Last Tuesday, I stood in our kitchen at 6:45 AM, staring into the abyss of the fridge. My brain was still asleep, my husband was hunting for his keys, and my seven-year-old was already complaining that he was “hangry.” The goal? A lunch that was healthy enough to keep him focused in math class, tasty enough to actually get eaten, and fast enough that I wouldn’t be late for my morning meeting.
Previously, I was the queen of the sad sandwich. You know the type: slightly stale bread, limp lettuce, and a mystery meat slice that looked like it had been sitting in the deli case since the Clinton administration. My kids would come home with half-eaten lunches, and I’d feel that familiar pang of guilt mixed with exhaustion. I didn’t have time to craft gourmet bento boxes, and I definitely didn’t have time for the twenty-minute prep that “healthy” meal prep blogs always promised.
Then, I made a decision. I was done with the compromise. I wanted something that tasted like a Saturday brunch but worked like a Tuesday rush hour. That’s when I stopped trying to reinvent the wheel and started making these Back-to-School Chicken Caesar Wraps. They became the secret weapon in our morning routine. Not only did my kids actually eat them (a miracle in itself), but I realized that if this simple wrap could save our mornings, it could probably save your weeknights, too.
Here’s the thing: these wraps aren’t just about convenience. They are about reclaiming five minutes of your morning. I’ve tested this recipe about fifty times over the last two school years, tweaking the sauce ratios and the wrap sizes, and I’ve finally landed on the perfect version. It’s crisp, it’s creamy, it’s packed with protein, and best of all? It comes together in about five minutes. No cooking required if you use leftovers or rotisserie chicken. Let me show you how to make these Back-to-School Chicken Caesar Wraps you’ll make on repeat.
Why You’ll Love This Recipe
I’m not exaggerating when I say these wraps have single-handedly lowered our household stress levels. There’s something magical about a lunch that doesn’t require a microwave to be good, and these Back-to-School Chicken Caesar Wraps hit every single note.
- Zero Cooking Required — Seriously. If you have a rotisserie chicken from Costco or a couple of leftover grilled chicken breasts from dinner, you’re already halfway done. No chopping lettuce, no making dressing from scratch, no standing over a hot stove. Just assemble and go.
- The “Crunch” Factor — Most lunch wraps get soggy by 1 PM. I’ve solved this. By wrapping the lettuce tight around the chicken and cheese, you create a barrier that keeps the tortilla crisp until lunchtime. My kids come home with wraps that still have that satisfying snap.
- Customizable for Picky Eaters — My daughter loves extra cheese. My son prefers it plain. My husband wants it spicy. With this formula, you can assemble them individually. The base is always the same, but the add-ins are up to them. It’s a buffet in a tortilla.
- Protein-Packed — These aren’t just carbs and mayo. With the chicken and cheese, you’re getting a solid protein punch that keeps kids (and adults) full until dinner. No 2 PM sugar crash here.
- Meal Prep Friendly — I make a batch of these on Sunday evening. They keep in the fridge for up to three days. I just wrap them tightly in parchment paper or foil, and they’re ready to grab and go. It’s the ultimate “set it and forget it” lunch.
Real talk? I used to dread the lunchbox routine. Now, it’s one of my favorite quick wins of the day. These Back-to-School Chicken Caesar Wraps you’ll make on repeat because they work. They’re reliable, they’re delicious, and they don’t require a degree in culinary arts.
Ingredients You’ll Need
I’m going to keep this list short because that’s the beauty of this recipe. You don’t need a special trip to the grocery store. Most of this is pantry staples or things you already have. Here’s exactly what you need to make these Back-to-School Chicken Caesar Wraps you’ll make on repeat.
The Tortillas
Large flour tortillas (8-inch or 10-inch) — I prefer 8-inch wraps. They’re easier for kids to handle and don’t require a giant amount of filling. 10-inch works if you have big eaters, but be careful not to overstuff them, or they’ll burst. I always keep a pack of Mission or La Tortilla Factory in the pantry.
The Protein
Chicken breast (2 cups, shredded or diced) — This is your star. Cooked chicken works best. I use rotisserie chicken for speed, or I’ll grill a couple of breasts on Sunday and shred them. If you’re using canned chicken, drain it well—it can be watery. I’ve also made this with leftover turkey, and it’s just as good.
The Dressing
Caesar dressing (½ cup) — I’m not going to lie to you: good store-bought dressing is fine here. I like Kraft or Hidden Valley because they have a consistent creamy texture. If you want to go homemade, mix ½ cup mayo, 1 tablespoon lemon juice, 1 teaspoon Worcestershire sauce, a clove of minced garlic, and a sprinkle of parmesan. But for back-to-school speed? Store-bought is your friend.
The Crunch
Romaine lettuce (1 head, chopped) — Romaine is non-negotiable for this. It’s sturdy and stays crisp. Iceberg works in a pinch, but it lacks that fresh snap. I chop it into bite-sized pieces before packing so it fits easily in the wrap. Avoid leaf lettuce—it wilts too fast and makes the wrap soggy.
The Cheese
Shredded Parmesan or Pecorino (½ cup) — Pre-shredded cheese has anti-caking agents that can make it grainy, so if you have time, buy a block and shred it yourself. It melts better and tastes infinitely sharper. Parmesan is classic, but Pecorino adds a nice salty kick.
The Optional Boost
Croutons (¼ cup) — This is the secret weapon. Adding a handful of croutons inside the wrap gives you that classic Caesar salad crunch. I use store-bought or homemade garlic croutons. If you’re avoiding gluten, skip this or use gluten-free croutons.
Seasoning
Black pepper — Freshly cracked pepper adds brightness. I use a pepper grinder because pre-ground pepper just tastes dusty. A little goes a long way.
Equipment Needed
You don’t need fancy gadgets for this. Here’s what I actually use in my kitchen every morning.
Mixing Bowl — Any medium-sized bowl works. I use a glass one because I can see what’s going on. You’ll use this to toss the chicken, dressing, and cheese together.
Knife and Cutting Board — For chopping the romaine lettuce. A serrated knife is nice for the lettuce, but a regular chef’s knife works fine. Just make sure it’s sharp so you don’t crush the leaves.
Measuring Cups and Spoons — For the dressing and cheese. I don’t measure every time I make this, but if you’re meal-prepping, it helps to be consistent.
Parchment Paper or Foil — For wrapping the finished wraps. This keeps them fresh and makes them easier to eat without making a mess. Plastic wrap works too, but parchment breathes better and keeps the tortilla from getting soggy.
Ziploc Bags or Airtight Container — For storing the wraps in the fridge. I prefer the bags because they lay flat and save space in the lunchbox.
How to Make It: Step-by-Step

Alright, let’s get these Back-to-School Chicken Caesar Wraps you’ll make on repeat assembled. It’s easier than you think, and I promise you’ll be doing this on autopilot in no time.
Step 1: Prep the Chicken
If you’re using rotisserie chicken, just shred it with two forks. If you’re using cooked breasts, dice them into bite-sized pieces. I like them slightly chunky so you get a good bite of meat in every wrap. Set them aside in a large mixing bowl.
Step 2: Make the Filling
Add ½ cup of Caesar dressing to the bowl with the chicken. Toss gently until the chicken is evenly coated. Don’t overmix—you don’t want to break up the chicken pieces. Then, add the shredded Parmesan cheese and a generous crack of black pepper. Toss one more time. Taste it. If it needs more salt or pepper, add it now. This is the moment to fix any seasoning issues.
Step 3: Chop the Lettuce
Wash and dry your romaine lettuce. I use a salad spinner because wet lettuce makes soggy wraps. Once it’s dry, chop it into 1-inch pieces. You want enough to fill the wrap, so aim for about 2 cups of chopped lettuce. Set it aside.
Step 4: Assemble the Wraps
Lay a tortilla flat on a clean surface. Spoon about ½ cup of the chicken mixture onto the center of the tortilla. Top with a handful of the chopped romaine lettuce. If you’re adding croutons, sprinkle them on top now. Don’t overfill—the key to a good wrap is balance.
Step 5: Roll It Up
Fold the sides of the tortilla inward, then roll it up tightly from the bottom. Use parchment paper or foil to wrap it tightly. This step is crucial for keeping the wrap intact. If you’re packing it for school, wrap it in foil first, then put it in a Ziploc bag. It stays fresh and easy to handle.
Step 6: Store or Serve
If you’re eating them now, slice them in half diagonally and serve immediately. If you’re prepping for the week, store them in the fridge in an airtight container or Ziploc bag. They’ll keep for up to three days.
Expert Tips & Tricks
After making these Back-to-School Chicken Caesar Wraps you’ll make on repeat dozens of times, I’ve learned a few tricks that make a huge difference. These aren’t just tips—they’re survival strategies.
Don’t Skimp on the Dressing
The dressing is what ties everything together. If you use too little, the wrap will be dry and the chicken will taste bland. If you use too much, the tortilla will get soggy. The ½ cup ratio for 2 cups of chicken is the sweet spot. Adjust slightly based on how dry your chicken is.
Use Parchment Paper, Not Plastic
Plastic wrap can trap moisture and make the tortilla sticky. Parchment paper allows the wrap to breathe while keeping it fresh. I’ve tried both, and parchment is the winner every time. Plus, it’s easier to unwrap at lunchtime.
Keep the Lettuce Dry
This is the #1 mistake people make. Wet lettuce = soggy wrap. I always dry my lettuce thoroughly, either with a salad spinner or paper towels. If you’re in a rush, just pat it dry with a paper towel. It takes 30 seconds and saves your lunch.
Add a Cheese Barrier
If you’re worried about the dressing soaking into the tortilla, sprinkle a thin layer of Parmesan cheese directly on the tortilla before adding the chicken. The cheese acts as a barrier, keeping the tortilla crisp. It’s a small trick, but it works wonders.
Make It Spicy
If your kids (or you) like a kick, add a pinch of red pepper flakes to the chicken mixture, or use a spicy Caesar dressing. It adds a nice depth of flavor without overpowering the classic taste.
Variations & Substitutions
Once you’ve mastered the basic version, here’s how you can mix it up. I’ve tried all of these, and they’re all winners.
Turkey Caesar Wraps
Swap the chicken for shredded turkey. It’s a great way to use up leftover turkey from Thanksgiving or a holiday meal. The flavor profile is almost identical, and it’s just as delicious.
Grilled Chicken Caesar Wraps
If you have time to grill, marinate chicken breasts in olive oil, lemon juice, and garlic before grilling. Let them cool, then shred. This adds a smoky flavor that’s incredible.
Veggie-Loaded Caesar Wraps
Add some sliced cucumbers or cherry tomatoes for extra crunch and freshness. I do this when I want to sneak in more vegetables. The tomatoes add a nice juiciness, but make sure to pat them dry first.
Gluten-Free Caesar Wraps
Use gluten-free tortillas. I like the Mission Gluten-Free wraps—they’re flexible and don’t crack. Everything else in the recipe is naturally gluten-free, so it’s an easy swap.
Dairy-Free Caesar Wraps
Use a dairy-free Caesar dressing and skip the Parmesan, or use a dairy-free Parmesan alternative. It’s not quite the same, but it’s still tasty. I’ve made this for friends with dairy allergies, and they loved it.
Low-Carb Caesar Wraps
Use a low-carb tortilla or wrap the filling in lettuce leaves instead. The lettuce wrap version is lighter and fresher, perfect for a warm day.
Serving & Storage
These Back-to-School Chicken Caesar Wraps you’ll make on repeat are perfect for lunch, but they’re also great for a quick dinner or a picnic. Here’s how to serve and store them for best results.
How to Serve
Slice the wraps in half diagonally for easy eating. Serve with a side of fruit or veggies. I like apple slices or carrot sticks. If you’re having them for dinner, pair them with a simple green salad or roasted potatoes.
Storing in the Fridge
Store the wraps in an airtight container or Ziploc bag in the fridge. They’ll keep for up to three days. I usually make a batch on Sunday and eat them throughout the week. They stay fresh and tasty.
Reheating
These wraps are best eaten cold or at room temperature. If you need to warm them up, you can microwave them for 30 seconds, but the tortilla might get a little soft. I prefer them cold.
Freezing
I don’t recommend freezing these wraps. The lettuce and dressing don’t freeze well—they become watery and mushy when thawed. It’s best to make them fresh or store them in the fridge.
Nutrition Information
I’m not a nutritionist, but here’s the breakdown if you’re tracking. This is per wrap, based on 4 servings.
- Calories: 350
- Protein: 25g
- Carbs: 30g
- Fiber: 2g
- Sugar: 2g
- Fat: 15g
- Saturated Fat: 3g
- Cholesterol: 60mg
- Sodium: 600mg
Look, this is a comfort food with dressing and cheese. It’s not a diet recipe. But it’s way better than takeout, costs less, and I know exactly what’s in it. When I want to make it lighter, I use less dressing and add more lettuce. But usually? I just enjoy it.
Final Thoughts
So that’s my go-to Back-to-School Chicken Caesar Wraps you’ll make on repeat. I’ve probably talked your ear off at this point, but when you make a recipe this often, you have a lot to say about it. These wraps have saved our mornings, our lunches, and my sanity. They’re my answer to “what’s for lunch?” when I’m tired, don’t want to cook, and still want something that tastes really good.
Make it yours! Try different add-ins, swap in your favorite veggies, or adjust the dressing. The best recipes are the ones you adapt to your family’s tastes. If you make these Back-to-School Chicken Caesar Wraps you’ll make on repeat, drop a comment and let me know what you think! I love hearing how recipes turn out in your kitchen. And if something doesn’t work, tell me that too—I’m here to help troubleshoot.
Happy cooking! And I hope your kitchen smells half as good as mine does right now.
Frequently Asked Questions
Q: Can I use canned chicken?
A: Yes, but drain it well. Canned chicken can be watery, which might make the wrap soggy. I pat it dry with paper towels before adding it to the mix. It’s not as juicy as rotisserie, but it works in a pinch.
Q: Why did my wrap get soggy?
A: Usually, this means the lettuce was wet or the dressing was too heavy. Make sure to dry your lettuce thoroughly and don’t over-dress the chicken. Also, using parchment paper helps keep moisture out.
Q: Can I make these ahead for the week?
A: Absolutely. I make a batch on Sunday and store them in the fridge. They keep for up to three days. Just make sure to wrap them tightly in parchment or foil to keep them fresh.
Q: Can I use a different type of cheese?
A: Sure! Mozzarella or cheddar work well if you prefer. Parmesan is classic for Caesar, but any cheese you like will work. Just make sure it’s shredded so it distributes evenly.
Q: Can I add other vegetables?
A: Yes! Cucumbers, tomatoes, or even roasted red peppers add great flavor. Just make sure to dry them well to avoid sogginess. I love adding a few cherry tomatoes for a pop of color.
Q: How do I reheat these wraps?
A: I recommend eating them cold or at room temperature. If you need to warm them up, microwave for 30 seconds, but the tortilla might get soft. They’re best fresh.
Q: Can I double this recipe?
A: Yes! Just double all the ingredients and use a larger bowl. I do this when I’m meal-prepping for the whole week. Just make sure you have enough tortillas and storage containers.
Pin This Recipe!


Back-to-School Chicken Caesar Wraps
- Total Time: 5 minutes
- Yield: 4 servings 1x
Description
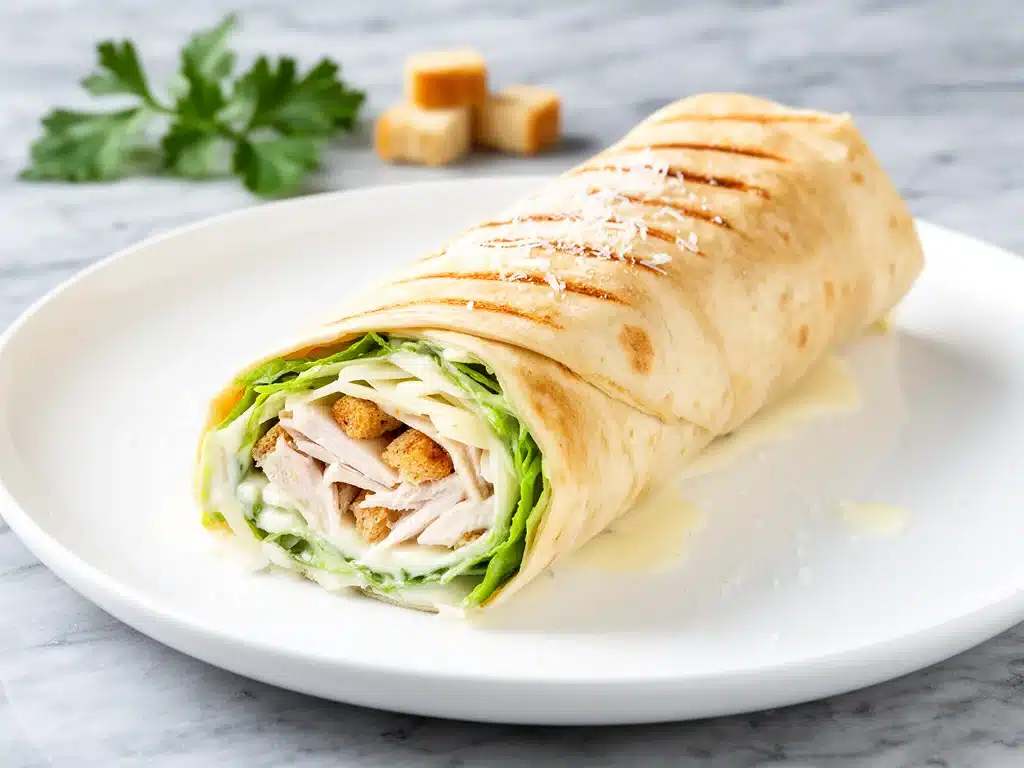
A quick, no-cook lunch idea that comes together in about five minutes using rotisserie or leftover chicken, romaine lettuce, and Caesar dressing for a protein-packed, customizable wrap.
Ingredients
- 4 large flour tortillas (8-inch or 10-inch)
- 2 cups cooked chicken breast, shredded or diced
- 1/2 cup Caesar dressing
- 1 head romaine lettuce, chopped into 1-inch pieces (approx. 2 cups)
- 1/2 cup shredded Parmesan or Pecorino cheese
- 1/4 cup croutons (optional)
- Black pepper, freshly cracked
Instructions
- Shred or dice the cooked chicken and place it in a large mixing bowl.
- Add the Caesar dressing to the chicken and toss gently until evenly coated.
- Add the shredded cheese and a generous crack of black pepper to the chicken mixture; toss once more and adjust seasoning if needed.
- Wash, dry thoroughly, and chop the romaine lettuce into 1-inch pieces.
- Lay a tortilla flat on a clean surface.
- Spoon about 1/2 cup of the chicken mixture onto the center of the tortilla.
- Top with a handful of chopped romaine lettuce and croutons (if using).
- Fold the sides of the tortilla inward and roll it up tightly from the bottom.
- Wrap the finished wrap tightly in parchment paper or foil to keep it fresh and intact.
- Serve immediately or store in an airtight container in the fridge for up to three days.
Notes
Ensure lettuce is completely dry to prevent soggy wraps. Use parchment paper instead of plastic wrap to allow the tortilla to breathe. For a cheese barrier to keep the tortilla crisp, sprinkle a thin layer of Parmesan directly on the tortilla before adding the chicken. These are best eaten cold or at room temperature.
- Prep Time: 5 minutes
- Cook Time: 0 minutes
- Category: Lunch
- Cuisine: American
Nutrition
- Serving Size: 1 wrap
- Calories: 350
- Sugar: 2
- Sodium: 600
- Fat: 15
- Saturated Fat: 3
- Carbohydrates: 30
- Fiber: 2
- Protein: 25
Keywords: chicken caesar wraps, back to school lunch, quick lunch ideas, rotisserie chicken recipes, meal prep lunch, healthy lunch for kids, no cook lunch