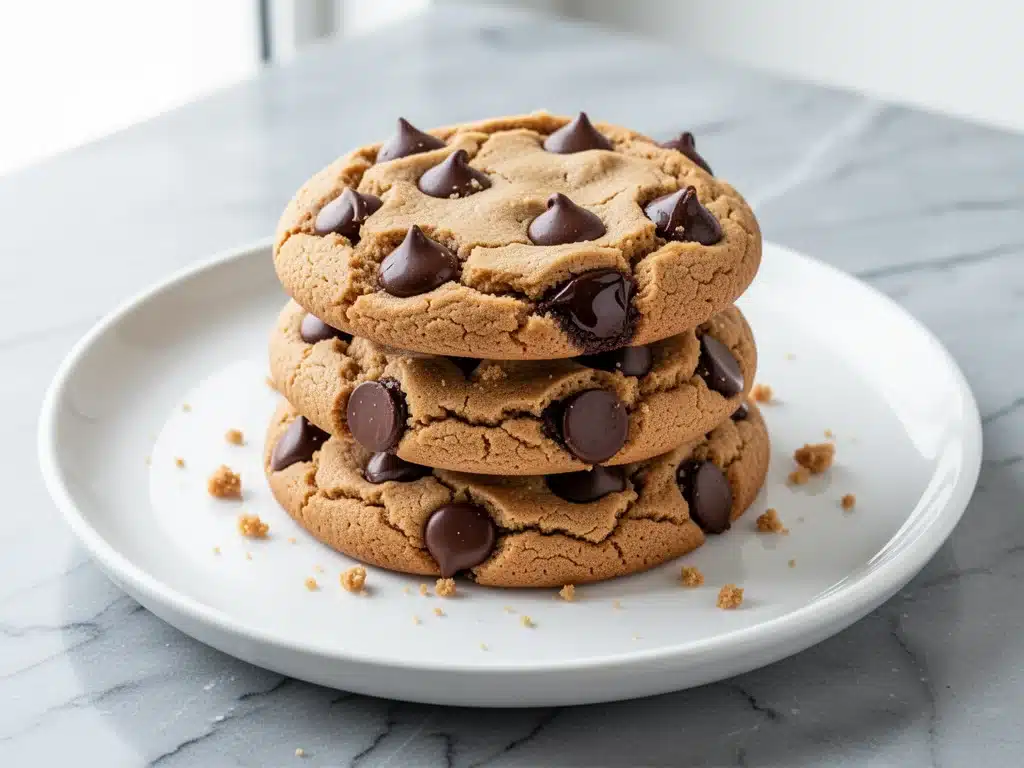
Last Thursday, I was staring into the back of my pantry like it owed me money. I had exactly two ingredients that weren’t expired: a jar of natural peanut butter that had separated into a solid brick and a bag of chocolate chips that were starting to look a little sad. I didn’t have eggs. I didn’t have butter. I didn’t even have milk.
Normally, this is the moment where I order takeout and accept my life choices. But my kids were home from school, the house was quiet for exactly twenty minutes, and I really didn’t want to explain why dinner was going to be pizza rolls again.
So I threw together what I thought would be a mediocre, dry crumble. I mixed the peanut butter with some maple syrup, a splash of plant milk, and flour. I folded in the chocolate chips because, well, they were there. I popped them in the oven, expecting a disaster. Instead, thirty minutes later, I pulled out a batch of cookies that were crispy on the edges, soft in the middle, and smelled like the best bakery in town.
My son took one bite, paused, and asked, “Did you use real butter in these?”
I had to tell him no. He looked genuinely confused. That was the moment I knew I had struck gold. These vegan peanut butter chocolate chip cookies with chewy centers aren’t just a “sad substitute” for regular cookies. They are better. They’re richer, nuttier, and honestly? Easier to make than most standard cookie recipes because you don’t have to wait for butter to soften.
I’ve made these at least fifteen times in the last three months. I’ve tweaked the ratios, tested different flours, and even tried swapping the peanut butter for almond butter (which works, but let’s be real—peanut butter is the star here). And every single time, they come out perfect. If you’re looking for a dessert that feels indulgent but fits a plant-based lifestyle, or if you just want cookies that don’t require a dozen ingredients and twenty minutes of creaming butter, this is the one. Trust me. You’ll make them on repeat.
Why You’ll Love These Chewy Vegan Cookies
Look, I’m not going to sit here and tell you that vegan baking is always easy. Sometimes it’s science experiments that end in sad, flat discs. But this recipe? This one just works. It’s reliable. It’s forgiving. And it tastes like heaven.
Here’s why these vegan peanut butter chocolate chip cookies have completely taken over our house:
No Softening Butter Required — Seriously, this is my favorite part. With regular cookies, you have to take butter out of the fridge an hour ahead of time. If you forget, you’re stuck waiting. With these, you just scoop the peanut butter straight from the jar. It’s room temperature by default. This cuts down prep time significantly and saves you from that frustrating “waiting game.”
Actually Chewy (Not Dry) — I’ve tried so many vegan cookie recipes that come out tasting like dry sand. These don’t. The combination of peanut butter and maple syrup creates this incredible moist, chewy center that stays soft for days. If you leave them on the counter, they stay edible. If you leave regular cookies, they’re rock hard by noon. I’ve tested this scientifically (okay, maybe not scientifically, but I did eat them on day four and they were still good).
Pantry-Friendly Ingredients — You probably have most of this already. Peanut butter, flour, sugar, baking soda, chocolate chips. That’s it. No weird aquafaba measurements or obscure vegan egg replacers that cost $8 at the health food store. This is simple, honest cooking.
Gluten-Free Potential — If you have friends or family who can’t have gluten, this recipe is a lifesaver. I swap the all-purpose flour for a 1-to-1 gluten-free blend, and nobody notices the difference. The texture stays the same. The flavor stays the same. It’s just… gluten-free. My celiac friend begged me for the recipe after one bite.
Quick Mix-Up — You can mix these by hand in five minutes. No stand mixer needed. No electric mixer needed. Just a big bowl and a wooden spoon. I make these while helping my kid with homework. It’s that low-stress.
This is my go-to when I need a dessert that feels special but doesn’t require a trip to the store. It’s the kind of cookie that makes people ask for the recipe before they even finish the second one.
Ingredients You’ll Need
Here’s the best part: this ingredient list is short. Like, shockingly short. But each one plays a specific role in getting that perfect chewy texture. I’m not going to skimp on quality here, especially with the peanut butter.
Natural Peanut Butter (1 cup / 250g) — This is the foundation. I use unsweetened natural peanut butter (just peanuts and salt, usually). The separated oil is actually good here—it adds richness. If your peanut butter is super runny, you might need a touch less plant milk. If it’s stiff, you might need a touch more. Just look at the dough consistency. Do NOT use the kind with hydrogenated oils and sugar added. We want the real deal.
Maple Syrup (½ cup / 120ml) — I use pure maple syrup, not the pancake syrup stuff. It adds moisture and that deep, caramel-like flavor that pairs perfectly with peanut butter. It also helps with the chewiness. Honey works too, but it’s not vegan, so stick to maple if you’re keeping it plant-based.
Granulated Sugar (½ cup / 100g) — This gives the cookies structure and helps them spread. I use white sugar, but brown sugar works too if you want a deeper molasses flavor. Just know that brown sugar makes them cakier, while white sugar makes them chewier. For this recipe, I prefer white for that crisp edge.
All-Purpose Flour (1 ½ cups / 190g) — Standard flour works best here. If you’re using gluten-free flour, make sure it’s a blend that includes xanthan gum, or add ½ teaspoon of xanthan gum yourself. This prevents the cookies from falling apart.
Baking Soda (1 teaspoon) — This helps the cookies rise and brown. Make sure yours isn’t expired! I keep a new box every few months because old baking soda makes cookies flat and dense.
Salt (½ teaspoon) — Essential. It balances the sweetness and makes the peanut butter flavor pop. Don’t skip this. I use sea salt.
Plant Milk (2-3 tablespoons) — I use unsweetened almond milk or oat milk. Oat milk makes them slightly richer, but almond is lighter. You only need a little bit to bind the dough. Don’t add too much, or they’ll be cakey.
Vanilla Extract (1 teaspoon) — Pure vanilla, please. It adds that warm, home-baked smell. I have a bottle of Nielsen-Massey that I’ve had for years. It’s worth the price.
Vegan Chocolate Chips (1 cup / 170g) — This is crucial. Regular chocolate chips often contain milk solids. Look for brands like Enjoy Life, Dairy-Free Ghirardelli, or Lily’s Sweets. I love semi-sweet chunks because they melt into gooey pockets. If you can’t find vegan chips, you can chop up a dark chocolate bar (check the label to ensure no milk cross-contamination if you’re strict).
Optional: Flaky Sea Salt — For sprinkling on top after baking. This is the restaurant-quality touch that makes people think you went to culinary school.
Equipment Needed
You don’t need anything fancy. Here’s what I actually use in my kitchen:
Large Mixing Bowl — I use a 4-quart stainless steel bowl. It’s big enough to fold in the chocolate chips without making a mess. Any bowl works, just make sure it’s big enough.
Wooden Spoon or Spatula — For mixing. I prefer a wooden spoon because it’s sturdy and doesn’t scratch the bowl. A silicone spatula works too. You’re not whipping cream here, so no need for a whisk.
Baking Sheets — I use two half-sheet pans. If you only have one, that’s fine—you’ll just bake in batches. Line them with parchment paper. I’m obsessed with parchment paper. It prevents sticking and makes cleanup a breeze. I tried silicone mats once, but I prefer the ease of parchment.
Parchment Paper — Seriously, just use it. It’s cheap insurance against burnt cookies.
Cooling Rack — Optional but recommended. It lets air circulate so the bottoms don’t get soggy. I sometimes skip this when I’m impatient and just let them cool on the pan for 5 minutes, but the rack is better.
Measuring Cups and Spoons — Standard stuff. I have a set from IKEA that’s been with me for a decade. They work fine. Just make sure you’re measuring flour correctly (spoon and level, don’t scoop and pack, or you’ll end up with dry cookies).
Ice Cream Scoop — Optional but life-changing. It ensures all your cookies are the same size so they bake evenly. I use a small cookie scoop. If you don’t have one, just use two spoons to drop dollops of dough.
How to Make It: Step-by-Step
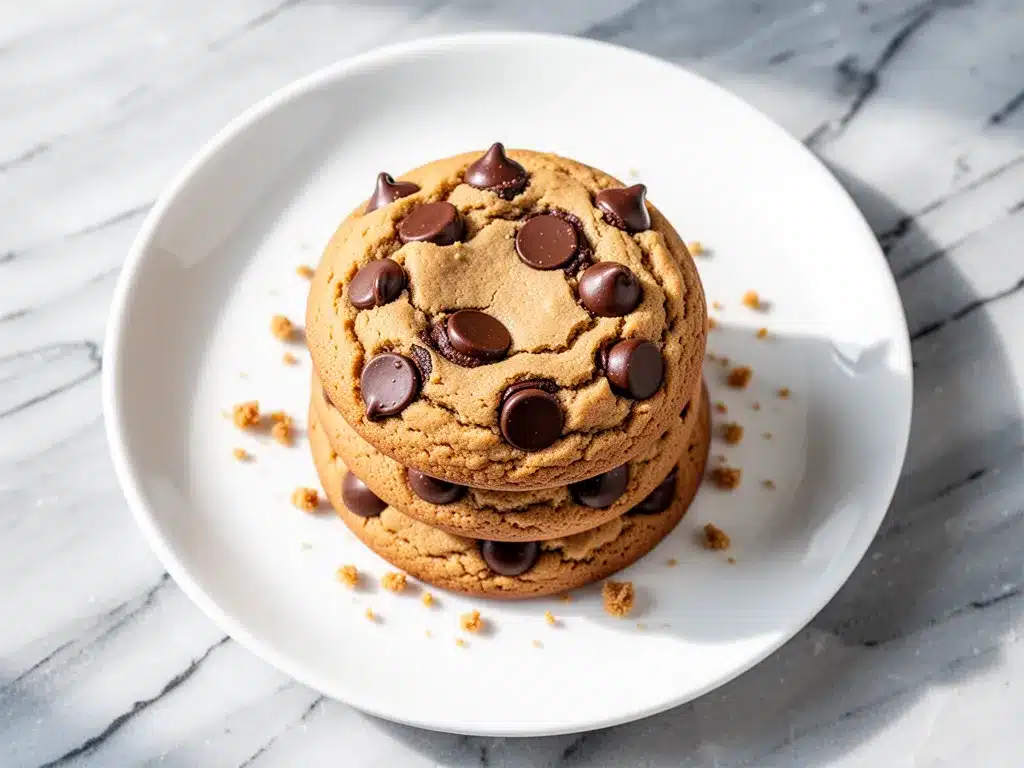
Alright, let’s make these! I’m walking you through exactly how I do it, including the little tricks I’ve picked up so you don’t end up with a flat, dry mess.
Step 1: Prep Your Peanut Butter (2 minutes)
If your natural peanut butter has separated (oil on top, solids on bottom), give it a good stir. You want it mixed but not necessarily smooth—little chunks are fine. If it’s super stiff, microwave it for 15-20 seconds to soften it up. You want it scoopable, like soft butter. This makes mixing way easier.
Step 2: Mix the Wet Ingredients (3 minutes)
In your large bowl, combine the peanut butter, maple syrup, granulated sugar, and plant milk. Whisk or stir vigorously. It will look a bit curdled at first—that’s normal. Keep stirring until it’s mostly combined and looks like a thick paste. Add the vanilla extract and mix again. This step creates the base flavor and moisture.
Step 3: Add the Dry Ingredients (2 minutes)
Add the flour, baking soda, and salt to the wet mixture. Stir until just combined. Do not overmix! Once you see no more streaks of flour, stop. Overmixing develops gluten, which makes cookies tough. We want tender and chewy, not bread-like. The dough will be thick and sticky. This is good.
Step 4: Fold in the Chocolate Chips (1 minute)
Throw in your vegan chocolate chips. Fold them in gently. If you want extra peanut butter flavor, you can save a few tablespoons of chocolate chips to press into the tops of the cookies before baking. I do this because it looks pretty and ensures every bite has chocolate.
Step 5: Scoop and Chill (10 minutes – Optional but Recommended)
Use your scoop or spoon to drop balls of dough onto the parchment-lined baking sheets. Leave about 2 inches between them because they will spread. Here’s a pro tip: If you have time, put the tray in the fridge for 10-15 minutes. Chilling the dough prevents them from spreading too thin and helps them stay chewy. If you’re in a rush, skip this, but the chill makes a difference. I chill them if I’m planning ahead; I skip it if I’m craving cookies right now.
Step 6: Bake (10-12 minutes)
Preheat your oven to 350°F (175°C). Place the trays in the oven and bake for 10-12 minutes. You want the edges to be golden brown and set, but the centers to still look slightly soft and underdone. They will continue to cook on the hot pan after you take them out. If you bake them until they look firm in the oven, they’ll be hard when they cool. Trust me on this. Pull them when they look just shy of done.
Step 7: Cool and Serve (10 minutes)
Let the cookies cool on the baking sheet for 5 minutes. This is the hardest part—waiting. But it lets them set. After 5 minutes, transfer them to a cooling rack (or eat them straight off the pan if you’re me). Sprinkle with flaky sea salt if you’re feeling fancy. They’re best warm, right out of the oven.
Total Time: About 30 minutes (10 minutes active, 20 minutes mostly hands-off)
Expert Tips & Tricks
Here’s everything I’ve learned from making these dozens of times. These tips will save you from my mistakes.
Don’t Overbake
This is the #1 mistake. Vegan cookies continue to cook on the hot pan. If they look done in the oven, they’ll be rock hard when cool. Pull them when the edges are just starting to brown and the centers look soft. They will firm up as they cool. I’ve ruined so many cookies by being too cautious. Underbake slightly.
Stir Your Peanut Butter Well
If your natural peanut butter isn’t fully mixed, you’ll get pockets of oil in your dough. This can make the cookies greasy. Stir it until it’s uniform before measuring. If it’s too oily, add a tiny bit more flour. If it’s too dry, add a splash more plant milk.
Measure Flour Correctly
Flour is tricky. If you scoop it directly from the bag, you pack it down and end up with too much. This leads to dry, crumbly cookies. Instead, fluff the flour with a spoon, then gently spoon it into your measuring cup and level it off with a knife. This method gives you the right amount. It’s the difference between a perfect cookie and a sad one.
Use Room Temperature Ingredients
While you don’t need to soften butter, cold plant milk can make the peanut butter seize up a bit. Let your milk sit out for 15 minutes before using. It mixes in smoother and creates a more consistent dough.
Chill for Chewiness
I mentioned this earlier, but it’s worth repeating. Chilling the dough for at least 30 minutes (or up to 24 hours) deepens the flavor and prevents excessive spreading. If you want a thicker, chewier cookie, chill it. If you want a thinner, crispier cookie, bake immediately. I usually chill because I prefer the chew.
Check Your Chocolate Chips
Not all dark chocolate is vegan. Some contain milk fat or milk solids. Look for the vegan label or check the ingredient list. Enjoy Life chips are my go-to because they melt beautifully and are widely available.
Variations & Substitutions
Once you’ve nailed the basic version, here’s how you can mix it up. I’ve tried all of these.
Nut-Free Version
Swap the peanut butter for sunflower seed butter (SunButter). It works almost identically! The flavor is slightly different—less intense than peanut butter—but the texture is the same. Great for schools or friends with nut allergies.
Almond Butter Cookies
You can use almond butter instead of peanut butter. It’s more expensive but tastes amazing. Just note that almond butter is often drier, so you might need an extra tablespoon of plant milk.
White Chocolate Chip
Swap the semi-sweet chips for vegan white chocolate chips. It’s sweet, creamy, and pairs surprisingly well with the salty peanut butter. It’s like a Reese’s Cup in cookie form.
Pretzel Crunch
Add ½ cup of crushed pretzels to the dough. The salt and crunch are incredible. It’s like a sweet and salty snack attack. I make this version for game day.
Double Chocolate
Add 2 tablespoons of cocoa powder to the dry ingredients and use chocolate chips. It’s a rich, fudgy cookie. Very decadent.
Gluten-Free
Use a 1-to-1 gluten-free flour blend. I recommend Bob’s Red Mill or King Arthur. Make sure it has xanthan gum. If it doesn’t, add ½ teaspoon. The cookies will be slightly more delicate but still delicious.
Serving & Storage
How to Serve:
I usually serve these warm, right out of the oven. They’re best with a cold glass of plant milk (soy milk is great for dunking). They’re also perfect for potlucks because they travel well and don’t melt as easily as dairy cookies.
Storage:
Store in an airtight container at room temperature for up to 5 days. They actually stay chewy for days! If you want to keep them fresh longer, freeze them. Place them in a single layer on a baking sheet, freeze until hard, then transfer to a freezer bag. They last up to 3 months. Thaw at room temperature for 15 minutes.
Reheating:
If you have leftovers (unlikely), warm them in the microwave for 10-15 seconds. They’ll be soft and gooey again. Never refrigerate cookies—they’ll go stale faster. Room temp is best.
Pro Tip:
If your cookies seem a bit dry after a few days, add a slice of bread to the container. The cookies will absorb the moisture from the bread and stay soft. It’s an old baker’s trick that actually works.
Nutrition Information
I’m not a nutritionist, but here’s the breakdown if you’re tracking. Keep in mind that these are rich cookies, so portion control is key.
Per Serving (based on 12 cookies):
- Calories: 220
- Protein: 6g
- Carbs: 28g
- Fiber: 2g
- Sugar: 14g
- Fat: 11g
- Saturated Fat: 2g
- Sodium: 180mg
What’s Good:
Decent protein from the peanut butter. No refined sugars if you use natural sweeteners (though we do use some sugar here). Plant-based fats are generally healthier than saturated animal fats.
What to Know:
Higher in calories due to peanut butter and oil. Contains nuts. Can be made gluten-free.
My Take:
Look, these are cookies. They’re meant to be enjoyed. They’re not a health food, but they’re better than store-bought vegan cookies which often have weird additives. When I make these, I enjoy two and feel satisfied. That’s the balance.
Final Thoughts
So that’s my go-to vegan peanut butter chocolate chip cookie! I’ve probably talked your ear off at this point, but when you make a recipe this often, you have a lot to say about it.
This has saved dessert nights more times than I can count. It’s my answer to “what’s for dessert” when I want something sweet but don’t want to order delivery. My kids are happy, my friends are happy, and I’m happy because I’m not stressed about complicated techniques.
Make it yours! Try different chocolate chips, add nuts, or skip the salt. The best recipes are the ones you adapt to your tastes. If you make this, drop a comment and let me know what you think! I love hearing how recipes turn out in your kitchen. And if something doesn’t work, tell me that too—I’m here to help troubleshoot.
Happy baking! And I hope your kitchen smells half as good as mine does right now.
Frequently Asked Questions
Can I use crunchy peanut butter?
Yes! Crunchy peanut butter works perfectly and adds nice texture. Just make sure it’s natural (no added sugar/oil) so the ratios stay correct. If your crunchy PB has added sugar, you might want to reduce the granulated sugar slightly.
Why did my cookies spread too much?
This usually happens if the dough was too warm or if you didn’t chill it. Peanut butter can be oily, and if it’s melted, the cookies spread fast. Chill the dough for 30 minutes before baking. Also, make sure your oven is actually at 350°F. An oven that’s too hot can cause spreading before the structure sets.
Why did my cookies come out dry and crumbly?
You likely used too much flour or overbaked them. Remember to spoon and level your flour, don’t scoop. Also, pull the cookies out when they look slightly underdone. They will firm up as they cool. If they’re still crumbly, add a little more plant milk or maple syrup next time.
Can I freeze the dough?
Absolutely! Scoop the dough into balls, freeze them on a tray, then transfer to a bag. Bake straight from frozen, adding 1-2 minutes to the bake time. This is great for having cookie dough ready to go.
What if I don’t have maple syrup?
You can use agave nectar or brown rice syrup. They have similar consistencies and sweetness levels. Avoid honey if you’re keeping it vegan. Liquid sweeteners work best here because they add moisture.
Can I make these nut-free?
Yes, use sunflower seed butter (SunButter) or soy nut butter. The texture will be slightly different but still delicious. SunButter is the closest match.
Do I need a mixer?
No! These are mixed by hand. A wooden spoon or spatula is all you need. It’s one of the best parts—minimal cleanup.
Pin This Recipe!
Vegan Peanut Butter Chocolate Chip Cookies: Chewy & Easy
- Total Time: 30 minutes
- Yield: 12 servings 1x
Description
These vegan peanut butter chocolate chip cookies are chewy, rich, and incredibly easy to make with pantry-friendly ingredients. No butter softening or stand mixer required.
Ingredients
- 1 cup (250g) natural peanut butter (unsweetened, stirred well)
- ½ cup (120ml) pure maple syrup
- ½ cup (100g) granulated sugar
- 1 ½ cups (190g) all-purpose flour (or gluten-free 1-to-1 blend)
- 1 teaspoon baking soda
- ½ teaspoon salt
- 2–3 tablespoons plant milk (almond or oat)
- 1 teaspoon vanilla extract
- 1 cup (170g) vegan chocolate chips
- Flaky sea salt (optional, for topping)
Instructions
- Preheat oven to 350°F (175°C) and line baking sheets with parchment paper.
- Stir natural peanut butter well to combine oil and solids. If stiff, microwave for 15-20 seconds to soften.
- In a large bowl, combine peanut butter, maple syrup, granulated sugar, and plant milk. Whisk vigorously until combined into a thick paste.
- Add vanilla extract and mix again.
- Add flour, baking soda, and salt to the wet mixture. Stir until just combined; do not overmix.
- Fold in vegan chocolate chips gently.
- Scoop dough onto prepared baking sheets, leaving 2 inches between cookies. For chewier cookies, chill dough for 10-15 minutes.
- Bake for 10-12 minutes until edges are golden brown but centers still look slightly soft.
- Let cookies cool on the baking sheet for 5 minutes to set, then transfer to a cooling rack.
- Sprinkle with flaky sea salt if desired and serve warm.
Notes
Do not overbake as vegan cookies continue to cook on the hot pan. Measure flour by spooning it into the cup and leveling off, rather than scooping directly from the bag, to avoid dry cookies. Chilling the dough helps prevent excessive spreading and enhances chewiness.
- Prep Time: 10 minutes
- Cook Time: 10-12 minutes
- Category: Dessert
- Cuisine: American
Nutrition
- Serving Size: 1 cookie
- Calories: 220
- Sugar: 14
- Sodium: 180
- Fat: 11
- Saturated Fat: 2
- Carbohydrates: 28
- Fiber: 2
- Protein: 6
Keywords: vegan cookies, peanut butter cookies, chocolate chip cookies, chewy cookies, gluten-free option, easy baking, plant-based dessert



