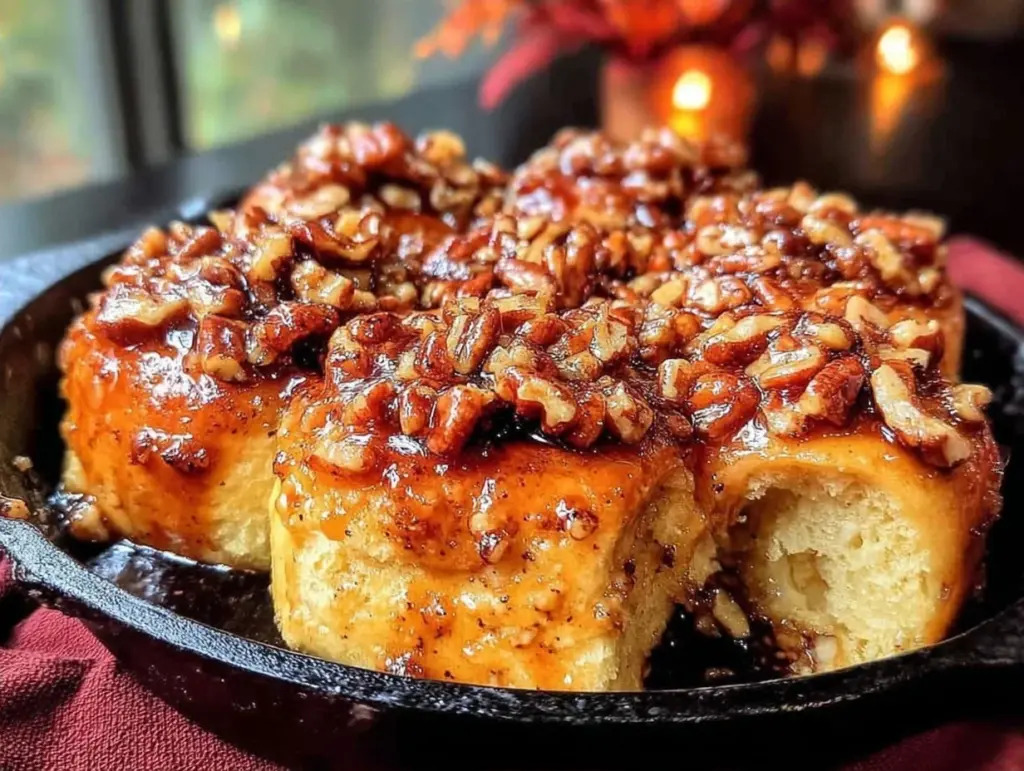
There is a specific kind of magic that happens in October when the air turns crisp and the smell of baking cinnamon rolls starts drifting from every coffee shop window. For years, I was that person standing outside the bakery window, tapping my fingers, wondering why I couldn’t have that warm, gooey, sticky sweetness without ruining my week. I tried the gluten-free doughs. They were crumbly. I tried the dairy-free versions. They tasted like cardboard soaked in sugar.
Then, about three years ago, I decided to stop apologizing for my dietary needs and start experimenting with what actually works. I wanted a fall maple pecan sticky bun that didn’t taste like a “diet” version. I wanted it to be the kind of treat that makes your guests ask for the recipe, not the kind you apologize for serving. What I discovered was that you don’t need a dozen ingredients or fancy techniques to get that bakery-quality texture. You just need the right simple swaps and a lot of maple syrup.
These fall maple pecan sticky buns are my answer to every October craving. They are soft, pillowy, and drenched in a caramelized pecan glaze that sticks to your fingers in the best possible way. The best part? They are naturally gluten-free and use only five core ingredients for the dough and topping combined. No xanthan gum panic, no weird flours you have to order online, no compromise on flavor. This is proof that eating differently doesn’t mean eating less deliciously. I’ve made these for brunches, holiday mornings, and just Tuesday nights when I needed a hug in food form. Every single time, they disappear before the coffee is even finished.
Why You’ll Love This Recipe
I’ve tested more gluten-free baked goods than I care to admit, and most of them fall flat—literally and figuratively. But this recipe? It’s the one I keep coming back to. It’s become my secret weapon for impressing people who don’t even know they’re eating gluten-free.
Stupid Simple — Seriously, if you can mix batter and let it rise, you can make these. There’s no kneading, no complex folding, and no fancy equipment. I make these on Sunday mornings while my partner is still sleeping, and they turn out perfect every time.
Only 5 Core Ingredients — I’m not exaggerating. The dough and the sticky topping rely on a handful of pantry staples. You likely have most of them already. This isn’t a recipe where you need to run to three different specialty stores.
Actually Soft Texture — This is the big one. Gluten-free baking often results in dry or dense products. These buns are pillowy soft, almost like a cinnamon roll from a high-end bakery. The maple syrup and eggs create a structure that holds together beautifully without being gummy.
Fall Flavor Bomb — The combination of toasted pecans, rich maple syrup, and warm spices is peak autumn. It smells like a cozy cabin. It tastes like comfort. It’s the ultimate seasonal treat.
Make-Ahead Friendly — You can mix the dough the night before, let it rise in the fridge, and bake them fresh in the morning. This is a game-changer for busy mornings when you want something homemade but don’t want to stand over the stove.
This recipe has completely changed how I approach fall baking. It’s reliable, it’s delicious, and it makes everyone happy—whether they have dietary restrictions or not.
Ingredients You’ll Need
Here’s the best part: you probably have most of these already. I’m particular about a few things here, but mostly, this is about simplicity. You don’t need a pantry full of specialty flours to make this work.
For the Dough
Gluten-Free All-Purpose Flour Blend (2 cups / 240g) — I use a blend that contains xanthan gum (like Bob’s Red Mill or King Arthur). If your blend doesn’t have xanthan gum, you’ll need to add 1 teaspoon separately. This is the foundation, so don’t cheap out on the flour.
Eggs (2 large) — Room temperature works best. These provide structure and help the dough rise. Don’t skip them; they’re essential for that soft texture.
Maple Syrup (¼ cup / 60ml) — Use real maple syrup, not pancake syrup. The flavor difference is huge. I keep a bottle of Grade B in the fridge for baking—it has a deeper, richer taste.
Melted Butter or Coconut Oil (3 tablespoons / 45ml) — I usually use butter for flavor, but if you’re keeping it dairy-free, solid coconut oil works perfectly. It adds richness and helps tenderize the dough.
Instant Yeast (2 teaspoons / 7g) — Quick-rise yeast is key here. It means you don’t have to wait hours for the dough to proof. Active dry yeast works too, but you’ll need to let it sit in warm water first.
For the Sticky Topping
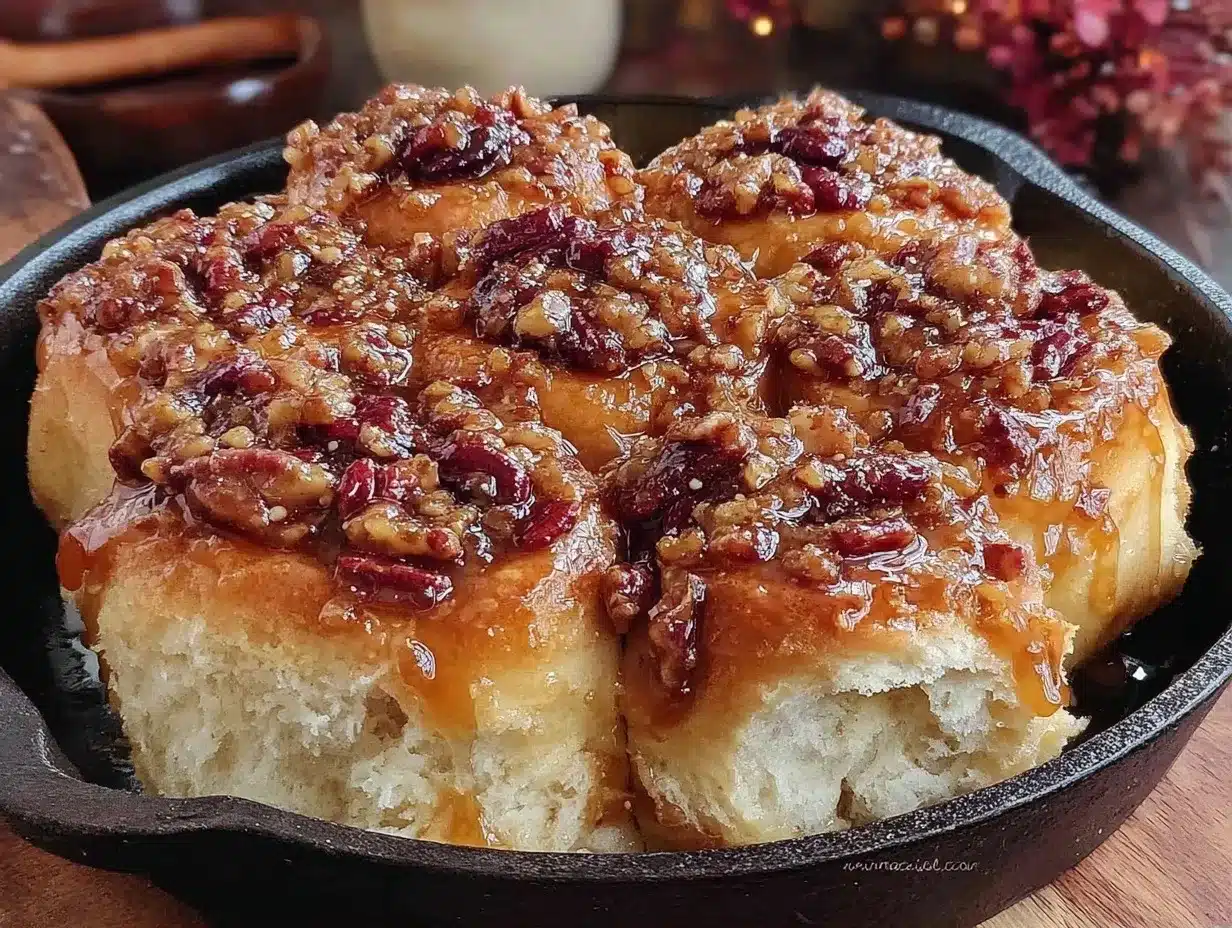
Maple Syrup (½ cup / 120ml) — More syrup, more flavor. This creates the caramel base. Use the same real maple syrup from the dough.
Butter or Coconut Oil (4 tablespoons / 60g) — This melts into the syrup to create a glossy, sticky glaze. Again, butter for dairy-inclusive, coconut oil for dairy-free.
Pecan Halves (1 cup / 100g) — Toasted pecans add crunch and depth. I always toast them in a dry pan for 2 minutes before adding them. It releases their oils and makes them taste incredible.
Cinnamon (1 teaspoon) — Warm, sweet, and essential for that fall vibe. Don’t use old cinnamon; if it doesn’t smell strong, it won’t taste strong.
Nutmeg (¼ teaspoon) — Just a pinch. It adds complexity without overpowering the maple.
Optional Add-ins
Vanilla Extract (1 teaspoon) — I add this to the dough for extra aroma. It’s not strictly necessary, but it makes the buns smell like heaven.
Salt (½ teaspoon) — A pinch of salt balances the sweetness. Don’t skip it, even in sweet baked goods.
Equipment Needed
You don’t need fancy equipment for this. Here’s what I actually use.
9×9 Inch Baking Pan — A square pan works best for sticky buns because it creates more edges (the best part). I use a glass pan because it heats evenly, but metal works fine too.
Mixing Bowl — A large bowl is all you need. I prefer glass or ceramic so I can see the consistency of the dough.
Whisk — For mixing the wet ingredients and the dry ingredients separately before combining.
Pastry Brush — Optional, but nice for brushing the top of the buns with extra syrup after baking.
Cooling Rack — Essential. You need to let the buns cool slightly before flipping them, or they’ll fall apart.
Small Saucepan — For heating the maple syrup and butter mixture for the topping. It makes it easier to pour evenly.
How to Make It: Step-by-Step
Alright, let’s make these sticky buns! I’m walking you through exactly how I do it, including the little tricks I’ve picked up over the years.
Step 1: Prep Your Pan and Toast the Pecans (5 minutes)
Preheat your oven to 350°F (175°C). Line the bottom of your 9×9 inch baking pan with parchment paper for easy removal later. In a small dry skillet, toast the pecan halves over medium heat for 2-3 minutes until fragrant. Watch them closely—they burn fast. Pour them into a small bowl and set aside.
Step 2: Make the Sticky Topping (5 minutes)
In a small saucepan, combine the ½ cup maple syrup and 4 tablespoons butter (or coconut oil). Heat over medium heat, stirring constantly, until the butter is melted and the mixture is smooth and bubbling. Pour this mixture into your prepared baking pan. Sprinkle the toasted pecans evenly over the syrup, followed by the cinnamon and nutmeg. Set aside.
Step 3: Mix the Wet Ingredients (3 minutes)
In a large mixing bowl, whisk together the 2 eggs, ¼ cup maple syrup, 3 tablespoons melted butter (or coconut oil), and vanilla extract (if using). Whisk until well combined and slightly frothy. This helps incorporate air into the dough.
Step 4: Combine with Dry Ingredients (3 minutes)
Add the gluten-free flour blend and instant yeast to the wet mixture. If your flour blend doesn’t contain xanthan gum, add it now. Mix with a sturdy spoon or your hands until a soft, sticky dough forms. Don’t overmix; just bring it together. The dough will be softer than traditional bread dough, which is normal.
Step 5: Spread and Rise (30-45 minutes)
Turn the dough out onto the sticky syrup in the pan. Use your hands or a spatula to spread it evenly into the corners. It will be sticky, so wet your hands slightly to handle it. Cover the pan with plastic wrap or a damp towel. Let it rise in a warm spot for 30-45 minutes, or until it puffs up and looks jiggly. It doesn’t need to double in size, just get noticeably puffier.
Step 6: Bake (25-30 minutes)
Place the pan in the preheated oven. Bake for 25-30 minutes, or until the tops are golden brown and a toothpick inserted into the center comes out clean. The edges should look slightly caramelized.
Step 7: Cool and Flip (10 minutes)
Remove from the oven and let the buns cool in the pan for 10 minutes. This is crucial—if you flip them too soon, they’ll fall apart. After 10 minutes, run a knife around the edges to loosen them. Place a large serving plate upside down over the pan, then carefully flip it over. The buns should release with a beautiful, gooey pecan topping. Let them cool for another 5 minutes before serving.
Expert Tips & Tricks
Here’s everything I’ve learned from making these dozens of times. These tips will save you from my mistakes.
Don’t Skip the Toasting — Toasting the pecans beforehand is non-negotiable. Raw pecans in the topping taste bland and soft. Toasted pecans add a nutty crunch that contrasts with the soft bun.
Use Real Maple Syrup — I know it’s more expensive, but pancake syrup is just corn syrup with flavoring. It won’t give you that deep, complex maple taste. It’s worth the extra few dollars.
Check Your Yeast — If your yeast is old, it won’t rise. If you’ve had the yeast open for more than 6 months, buy a new packet. A failed rise is heartbreaking.
Wet Hands Help — Gluten-free dough is stickier than wheat dough. Keep a small bowl of water nearby to wet your hands when spreading the dough. It prevents sticking and makes cleanup easier.
Patience with the Flip — I know you want to eat them immediately, but wait the full 10 minutes. The syrup is molten hot and needs to set slightly. If you flip too early, you’ll get a gooey mess on the counter.
Common Mistake: Dough Too Dry — Gluten-free flours absorb moisture differently. If your dough feels too dry to spread, add 1 tablespoon of milk or water. If it’s too wet, add 1 tablespoon of flour.
Pro Trick: Extra Glaze — If you love extra goo, save 2 tablespoons of the topping mixture before pouring it into the pan. Drizzle it over the top of the buns after you flip them.
Variations & Substitutions
Once you’ve nailed the basic version, here’s how you can mix it up. I’ve tried all of these.
Dairy-Free Version — Simply swap the butter in the topping and the dough for solid coconut oil. It works perfectly and adds a subtle tropical note that pairs well with maple.
Pumpkin Spice Twist — Add 1 teaspoon pumpkin pie spice to the dry ingredients and 2 tablespoons pumpkin puree to the wet. It’s like a pumpkin cinnamon roll in bun form.
Maple Bourbon — Add 1 tablespoon of bourbon to the topping mixture. It adds a warm, adult flavor that’s perfect for holiday brunches.
Walnut Swap — Pecans are classic, but toasted walnuts work just as well. They have a slightly more bitter edge that balances the sweet syrup.
Gluten-Free Flour Note — If you’re using a 1-to-1 flour blend, stick with it. Don’t try to substitute with almond flour or coconut flour alone, as the texture will be completely different. If you want to try almond flour, look for a dedicated almond flour sticky bun recipe.
Serving & Storage
How to Serve — I usually serve these warm, right after flipping. They’re best enjoyed with a cup of black coffee or tea. They pair beautifully with a simple fruit salad or some crispy bacon for a complete fall brunch.
Refrigerator — Store leftovers in an airtight container for up to 3 days. They will firm up in the fridge, so reheating is essential.
Reheating — The best method is to microwave individual buns for 20-30 seconds. This restores the gooey texture. You can also warm them in a 300°F oven for 10 minutes. Avoid the microwave for too long, or they’ll become tough.
Freezing — These freeze well! Bake them, let them cool completely, then wrap individual buns in plastic wrap and foil. Freeze for up to 2 months. Thaw at room temperature and reheat in the microwave.
Make-Ahead — You can prepare the topping and spread the dough the night before. Cover the pan tightly with plastic wrap and refrigerate overnight. In the morning, let it sit on the counter for 30 minutes to take the chill off, then bake as directed. Add 5 minutes to the baking time if the dough is cold.
Nutrition Information
I’m not a nutritionist, but here’s the breakdown if you’re tracking. These are estimates based on 9 buns.
Per Bun:
- Calories: 280
- Carbs: 42g
- Fiber: 2g
- Sugar: 24g
- Protein: 4g
- Fat: 12g
- Sodium: 120mg
These are naturally gluten-free and can be made dairy-free. They’re rich in healthy fats from the pecans and maple syrup. While they are a treat, they’re not loaded with refined sugar—just natural sweetness. Enjoy them as part of a balanced meal.
Final Thoughts
So that’s my go-to fall maple pecan sticky bun! I’ve probably talked your ear off at this point, but when you make a recipe this often, you have a lot to say about it.
This has saved my holiday mornings more times than I can count. It’s my answer to “what’s for brunch” when I want to impress but don’t want to spend all day in the kitchen. My family is happy, my guests are happy, and I’m happy because I’m not stressed about dietary restrictions.
Make it yours! Try different nuts, add a dash of bourbon, or swap the maple for honey. The best recipes are the ones you adapt to your tastes. If you make these, drop a comment and let me know what you think! I love hearing how recipes turn out in your kitchen.
Happy baking! And I hope your kitchen smells half as good as mine does right now.
Frequently Asked Questions
Can I use active dry yeast instead of instant yeast?
Yes, but you’ll need to activate it first. Dissolve the yeast in ¼ cup of warm water (about 110°F) with a pinch of sugar and let it sit for 5-10 minutes until foamy. Then add it to the wet ingredients. The rising time may take a bit longer, up to an hour.
Why did my sticky buns fall apart when I flipped them?
This usually happens if you flip them too soon. The syrup needs time to cool and thicken slightly. Wait at least 10 minutes after baking. Also, make sure you loosened the edges with a knife before flipping.
Can I make these ahead of time?
Absolutely. Prepare the topping and dough the night before. Cover the pan tightly and refrigerate overnight. In the morning, let them sit at room temperature for 30 minutes before baking. You may need to add 5-10 minutes to the baking time.
Do I need xanthan gum?
If your gluten-free flour blend already contains xanthan gum (most do), you don’t need to add more. If your blend doesn’t have it, add 1 teaspoon to the dry ingredients. It helps bind the dough and gives it that chewy texture.
Can I freeze the unbaked dough?
It’s better to freeze the baked buns. The yeast can lose its potency in the freezer, leading to a denser product. If you must freeze unbaked, do so immediately after mixing, then thaw and let rise in the fridge before baking.
What if I don’t have a 9×9 pan?
You can use an 8×8 pan, but the buns will be thicker and may take longer to bake. Check them at 25 minutes. Alternatively, you can make mini sticky buns in a muffin tin—they bake in 15-18 minutes and are great for portion control.
Can I use honey instead of maple syrup?
You can, but the flavor will be different. Honey has a stronger, floral taste. If you use honey, reduce the amount slightly as it’s sweeter. Maple syrup is traditional for sticky buns, so stick with it for the authentic fall flavor.
Pin This Recipe!
Fall Maple Pecan Sticky Buns: Perfect 5-Ingredient GF Treat
- Total Time: 45 minutes
- Yield: 9 servings 1x
Description
Soft, pillowy gluten-free sticky buns with a caramelized pecan glaze, made with only five core ingredients for a simple yet decadent fall treat.
Ingredients
- 2 cups (240g) Gluten-Free All-Purpose Flour Blend (with xanthan gum)
- 2 large Eggs (room temperature)
- 1/4 cup (60ml) Real Maple Syrup
- 3 tablespoons (45ml) Melted Butter or Coconut Oil
- 2 teaspoons (7g) Instant Yeast
- 1/2 cup (120ml) Real Maple Syrup (for topping)
- 4 tablespoons (60g) Butter or Coconut Oil (for topping)
- 1 cup (100g) Pecan Halves (toasted)
- 1 teaspoon Cinnamon
- 1/4 teaspoon Nutmeg
- 1 teaspoon Vanilla Extract (optional)
- 1/2 teaspoon Salt (optional)
Instructions
- Preheat oven to 350°F (175°C). Line a 9×9 inch baking pan with parchment paper.
- Toast pecan halves in a dry skillet over medium heat for 2-3 minutes until fragrant. Set aside.
- In a small saucepan, combine 1/2 cup maple syrup and 4 tablespoons butter (or coconut oil). Heat over medium until melted and smooth. Pour into the prepared pan.
- Sprinkle toasted pecans, cinnamon, and nutmeg evenly over the syrup in the pan.
- In a large bowl, whisk together 2 eggs, 1/4 cup maple syrup, 3 tablespoons melted butter (or coconut oil), and vanilla extract until frothy.
- Add the gluten-free flour blend and instant yeast to the wet mixture. Mix until a soft, sticky dough forms. If using a flour blend without xanthan gum, add 1 teaspoon now.
- Spread the dough evenly into the pan over the syrup mixture. Cover with plastic wrap or a damp towel.
- Let rise in a warm spot for 30-45 minutes until puffy.
- Bake for 25-30 minutes until golden brown and a toothpick comes out clean.
- Cool in the pan for 10 minutes. Run a knife around the edges, then flip onto a serving plate. Cool for 5 minutes before serving.
Notes
Toast pecans for better flavor. Use real maple syrup, not pancake syrup. If flipping buns too early, they may fall apart; wait the full 10 minutes. Gluten-free dough is stickier than traditional dough; wet hands help spread it. Can be made ahead by refrigerating dough overnight.
- Prep Time: 15 minutes
- Cook Time: 30 minutes
- Category: Breakfast
- Cuisine: American
Nutrition
- Serving Size: 1 bun
- Calories: 280
- Sugar: 24
- Sodium: 120
- Fat: 12
- Saturated Fat: 4
- Carbohydrates: 42
- Fiber: 2
- Protein: 4
Keywords: gluten-free, sticky buns, maple pecan, fall baking, dairy-free option, easy recipe, brunch



