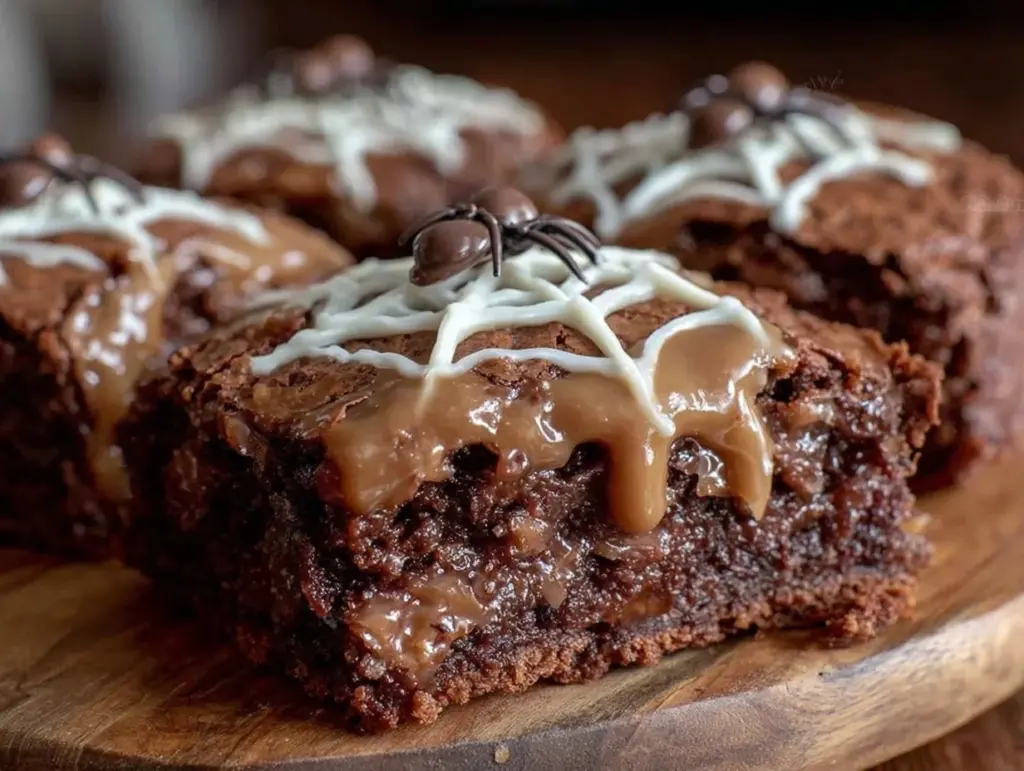
Let me tell you about the year I tried to make a spiderweb cookie cake and ended up with what I can only describe as a “chocolate pancake with a sad smear on top.” It was 2015, my niece was turning seven, and I had promised her a “spooky but delicious” centerpiece for her Halloween party. I watched in horror as my white chocolate drizzle merged into the dark chocolate base, creating a gray, muddy mess that looked less like a spiderweb and more like a smudge on a windowpane. The kids stared. The other parents nodded politely. I wanted to dissolve into the floor.
That failure haunts me still. But it also taught me everything I needed to know. Because after that disaster, I didn’t give up. I experimented. I tried different consistencies, different piping techniques, and different types of chocolate. I made about forty versions of this treat over the next two Halloweens, tweaking the ratio of white to dark chocolate until I finally nailed it. Now, this Halloween chocolate spiderweb cookie cake is the one thing I make every single October. It’s the dessert that gets the gasps, the “wow,” and the second helpings. And the best part? It’s actually incredibly simple once you know the trick.
This isn’t your average chocolate chip cookie. It’s a giant, shareable cookie cake—thick, chewy, and rich with dark chocolate, topped with an intricate web of white chocolate that looks like it came from a professional bakery. But here’s the secret: you don’t need a piping bag or fancy tools. You just need a little patience and the right technique. If you’ve ever been intimidated by the idea of making a “fancy” dessert, this is your gateway. It’s approachable, it’s fun to decorate (seriously, my kids love this part), and it tastes absolutely incredible.
I’ve tested this recipe with both butter and oil, with cake flour and all-purpose, and even tried using store-bought cookie dough as a shortcut (don’t do it—trust me on this one). The homemade base makes all the difference in texture. It’s crisp on the edges, soft in the middle, and holds up perfectly under the weight of the chocolate web. Whether you’re hosting a trick-or-treat gathering, a classroom party, or just a cozy night in, this spooky treat is guaranteed to be the highlight of the evening. So grab your spatulas, and let’s get spooky.
Why You’ll Love This Spooky Treat
There are about ten reasons I keep coming back to this Halloween chocolate spiderweb cookie cake, but let’s be real—you don’t need a list of ten reasons to love a giant, shareable chocolate dessert. But here are the big ones that keep me making it year after year:
- It Looks Impossible, But It’s Not — The spiderweb design looks like it requires steady hands and years of practice. But once you see the “pull” technique, you’ll realize it’s almost foolproof. I’ve made this for my clumsy dad, and he got better results than I did.
- Perfect for Crowds — One cake feeds 12-15 people easily. No need to cut individual cookies or worry about portioning. It’s the ultimate party dessert because everyone gets a slice, and no one fights over the last piece.
- Make-Ahead Friendly — You can bake the cookie base up to three days in advance. Store it in an airtight container, and just pipe the web the night before or morning of the party. The chocolate sets quickly, so it’s ready to serve whenever you are.
- Texture Heaven — This isn’t a thin, cracker-like cookie. It’s thick, chewy, and rich. Think of it as the bridge between a brownie and a cookie. The contrast between the dark chocolate base and the white chocolate web is visually stunning and deliciously balanced.
- Kid-Approved (and Adult-Approved) — My kids love the spooky factor, but the real test is the taste. The dark chocolate is rich but not bitter, and the white chocolate adds a creamy sweetness that keeps everyone coming back. It’s a crowd-pleaser that works for all ages.
This is my go-to when I need a dessert that looks impressive but doesn’t require a degree in pastry arts. It’s reliable, it’s festive, and it tastes better than anything you’ll buy at the store. Plus, it’s a great way to get kids involved in the kitchen—let them drizzle the white chocolate and watch the magic happen.
Ingredients You’ll Need
Here’s the best part: you probably have most of these ingredients already. This recipe uses pantry staples, but the quality of your chocolate makes a huge difference. Don’t skimp on the chocolate—it’s the star of the show.
For the Cookie Base
Unsalted butter (1 cup / 226g, softened) — This gives the cookie its rich flavor and chewy texture. Make sure it’s softened to room temperature so it creams properly with the sugar. If you’re in a rush, microwave it in 5-second bursts, but don’t melt it.
Granulated sugar (1 cup / 200g) — For that crisp edge. I use regular white sugar, but you can substitute half with brown sugar if you want a chewier, more molasses-like flavor. However, the granulated sugar helps create that nice crust.
Light brown sugar (1 cup / 200g, packed) — This adds moisture and chew. Don’t skip this. It’s what makes the cookie soft in the middle. If you don’t have brown sugar, you can use all granulated, but the texture will be slightly different.
Eggs (2 large) — Room temperature eggs incorporate better into the batter. If you’re short on time, just run them under warm water for a minute.
Vanilla extract (2 teaspoons) — Use real vanilla, not imitation. It makes a noticeable difference in flavor. I use pure vanilla extract because it adds that warm, comforting note that balances the chocolate.
All-purpose flour (2 ½ cups / 315g) — The base of the cookie. Don’t use cake flour or bread flour unless you’re adjusting the recipe. All-purpose gives the right balance of structure and tenderness.
Baking soda (1 teaspoon) — Helps the cookie spread and brown. Make sure it’s fresh—old baking soda won’t work as well.
Salt (1 teaspoon) — Essential for balancing the sweetness. Don’t skip it, even if you’re watching sodium. It enhances the chocolate flavor.
Dark chocolate chips (1 ½ cups / 255g) — I use semi-sweet chocolate chips (around 60% cocoa). They hold their shape well and add a rich, not-too-sweet chocolate flavor. You can use chunks for a more rustic look.
For the Spiderweb Top
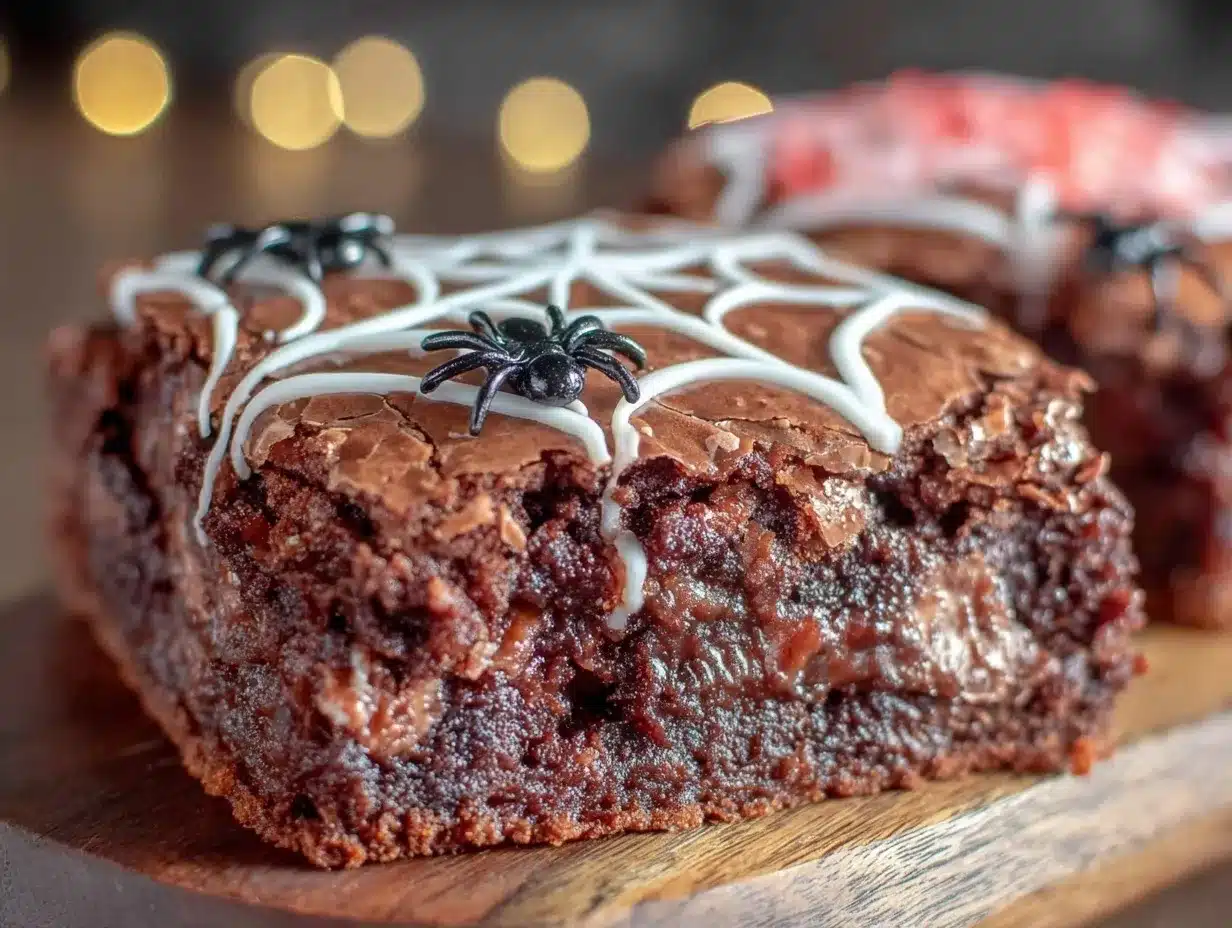
White chocolate chips (1 cup / 170g) — For the web. I use regular white chocolate chips, not melting wafers, because they’re easier to find and work with. If you want a more professional look, you can use white chocolate bars and chop them finely.
Shortening or coconut oil (1 tablespoon) — This is the secret weapon. Mixing a little shortening with the white chocolate makes it thinner and easier to drizzle. It also helps the web set with a nice shine. Coconut oil works too, but it can add a slight flavor. I prefer shortening for a neutral taste.
Equipment Needed
You don’t need fancy equipment for this. Here’s what I actually use:
12-inch round cake pan — This is crucial. The cookie cake needs to be thick and round. A 12-inch pan gives you the right surface area. You can use a 9-inch pan, but the cookie will be thicker and might need extra baking time. I also line the pan with parchment paper for easy removal.
Large mixing bowls — One for wet ingredients, one for dry. I use stainless steel bowls because they’re durable and easy to clean.
Electric mixer — A hand mixer or stand mixer makes creaming the butter and sugars much easier. You can do it by hand, but it takes about 5 minutes of arm work. Not that I’ve tried, but I imagine it’s tiring.
Spatula — For folding in the chocolate chips. A silicone spatula works best because it scrapes the bowl clean.
Piping bag or ziplock bag — For drizzling the white chocolate. I use a ziplock bag and snip off a tiny corner. It’s cheaper and less messy than a piping bag. If you have a piping bag with a small round tip, that works too.
Toothpick or fork — For creating the web pattern. I use a toothpick because it’s thin and precise. A fork works, but the lines will be thicker.
How to Make It: Step-by-Step
Alright, let’s make this! I’m walking you through exactly how I do it, including the little tricks I’ve picked up over the years.
Step 1: Prep Your Pan and Oven (5 minutes)
Preheat your oven to 350°F (175°C). Line your 12-inch round cake pan with parchment paper, leaving a little overhang on the sides. This makes it easy to lift the cookie cake out later. Grease the parchment lightly with butter or cooking spray to keep it in place.
Step 2: Cream the Butter and Sugars (3 minutes)
In a large bowl, beat the softened butter, granulated sugar, and brown sugar together until light and fluffy. This takes about 2-3 minutes with an electric mixer. The mixture should look pale and creamy. This step is crucial for getting the right texture. If you skip it, the cookie will be dense and flat.
Step 3: Add Eggs and Vanilla (2 minutes)
Add the eggs one at a time, beating well after each addition. Mix in the vanilla extract. The batter should look smooth and slightly glossy. Scrape down the sides of the bowl with a spatula to make sure everything is incorporated.
Step 4: Mix Dry Ingredients (1 minute)
In a separate bowl, whisk together the flour, baking soda, and salt. Gradually add the dry ingredients to the wet mixture, mixing on low speed until just combined. Don’t overmix! Once the flour disappears, stop. Overmixing leads to tough cookies.
Step 5: Fold in Chocolate Chips (2 minutes)
Using a spatula, gently fold in the dark chocolate chips. Make sure they’re distributed evenly. The batter should be thick and chunky.
Step 6: Press Into Pan and Bake (25-30 minutes)
Press the dough evenly into the prepared pan. Use your hands or the back of a spoon to smooth the top. Bake for 25-30 minutes, or until the edges are golden brown and the center is set but still slightly soft. The center will firm up as it cools. Don’t overbake—it should look underdone in the middle. That’s how you get that chewy texture.
Step 7: Cool Completely (1 hour)
Let the cookie cake cool in the pan for 10 minutes, then transfer it to a wire rack to cool completely. This step is non-negotiable. If you try to pipe the web while the cookie is warm, the white chocolate will melt and disappear into the base. Patience pays off here.
Step 8: Prepare the White Chocolate Web (5 minutes)
In a microwave-safe bowl, combine the white chocolate chips and shortening. Microwave in 15-second intervals, stirring between each, until smooth and fluid. The consistency should be like heavy cream. If it’s too thick, add another 5 seconds. If it’s too thin, let it cool for a minute.
Step 9: Drizzle and Create the Web (5 minutes)
Transfer the melted white chocolate to a ziplock bag and snip off a tiny corner. Drizzle concentric circles of white chocolate over the cooled cookie cake, starting from the center and working outward. Leave small gaps between the circles. Then, take a toothpick and drag it from the center outward, following the lines of the chocolate. Rotate the pan as you go, dragging the toothpick through multiple circles to create the web pattern. Work quickly before the chocolate sets.
Step 10: Set and Serve (10 minutes)
Let the web set for 10-15 minutes at room temperature, or pop it in the fridge for 5 minutes to speed things up. Once set, slice and serve. Enjoy your spooky masterpiece.
Expert Tips & Tricks
Here’s everything I’ve learned from making this dozens of times. These tips will save you from my mistakes.
Cool Completely Before Piping — I can’t stress this enough. If the cookie cake is even slightly warm, the white chocolate will melt. Let it cool for a full hour. If you’re in a hurry, put it in the fridge for 20 minutes, but make sure it’s cold to the touch.
Thin Out the White Chocolate — The shortening is key. It makes the white chocolate thinner and easier to drizzle. Without it, the white chocolate will be too thick and won’t flow smoothly. It also gives the web a nice shine.
Work Quickly — The white chocolate sets fast. Once you start drizzling, you have about 5 minutes to create the web before it hardens. If it starts to set, you can gently warm the pan over a low-heat source (like a hairdryer on low) to soften it slightly, but it’s easier to work fast.
Don’t Worry About Perfection — The web doesn’t need to be perfect. In fact, a slightly messy web looks more organic and spooky. Imperfections add character. My best webs are the ones where I let my hand guide the toothpick without overthinking it.
Use a Toothpick, Not a Fork — A toothpick creates thinner, more delicate lines. A fork makes thicker, bolder lines, which can look less like a web and more like a fence. I prefer the toothpick for a more realistic spiderweb look.
Variations & Substitutions
Once you’ve nailed the basic version, here’s how you can mix it up. I’ve tried all of these.
Milk Chocolate Web — Swap the white chocolate for milk chocolate. It creates a more subtle, caramel-like web. Great if you find white chocolate too sweet.
Dark Chocolate Web — Use dark chocolate chips for the web. This creates a monochromatic look, which is sleek and modern. The contrast is less dramatic, but the flavor is richer.
Colorful Webs — Add gel food coloring to the white chocolate. Orange for Halloween, purple for a spooky vibe, or green for a “monster” theme. Just make sure the coloring is oil-based, not water-based, or it will seize the chocolate.
Gluten-Free — Use a 1:1 gluten-free flour blend. The texture will be slightly more crumbly, but it still works well. I’ve used Bob’s Red Mill 1:1 blend with success.
Dairy-Free — Use dairy-free butter and dairy-free white chocolate chips. The shortening helps keep the web smooth. It’s not quite as creamy, but it’s still delicious.
Mini Version — You can make mini cookie cakes in 6-inch pans. Halve the recipe and bake for 15-20 minutes. Perfect for individual servings or small parties.
Serving & Storage
How to Serve: I usually serve this straight from the pan, sliced into wedges. It looks rustic and stays warm. But here are other ways I’ve enjoyed it:
- With Vanilla Ice Cream: A scoop of vanilla ice cream on top of a warm slice is pure heaven. The cold ice cream contrasts with the warm cookie.
- With Whipped Cream: For a lighter touch, add a dollop of whipped cream. It’s less heavy than ice cream but still adds creaminess.
- With Coffee or Milk: This is a dessert that pairs well with coffee or cold milk. It’s rich enough to stand on its own, but the drink helps cut through the sweetness.
Storage Instructions:
Room Temperature: Store in an airtight container for up to 3 days. The cookie cake stays fresh and chewy. If your kitchen is hot, the white chocolate might soften, so keep it in a cool place.
Refrigerator: If you need to store it longer, refrigerate it for up to 5 days. Let it come to room temperature before serving for the best texture. The cold can make the cookie slightly firmer, so let it sit out for 30 minutes.
Freezing: You can freeze the baked cookie cake (without the web) for up to 3 months. Wrap it tightly in plastic wrap and then in foil. Thaw at room temperature before piping the web. The web itself doesn’t freeze well—it can crack or lose its shine.
Pro Tip: If you’re making this for a party, bake the cookie cake a day ahead and store it at room temperature. Pipe the web the morning of the party. It’s fresh, crisp, and looks perfect.
Nutrition Information
I’m not a nutritionist, but here’s the breakdown if you’re tracking. Keep in mind that this is a rich, indulgent dessert, so portion control is key.
Per Serving (based on 12 slices):
- Calories: 380
- Protein: 5g
- Carbs: 48g
- Fiber: 2g
- Sugar: 32g
- Fat: 20g
- Saturated Fat: 12g
- Cholesterol: 45mg
- Sodium: 220mg
What’s Good: It’s a shareable dessert, so you can control portions. The dark chocolate adds some antioxidants. It’s a better option than store-bought cakes because you control the ingredients.
What to Know: It’s high in sugar and fat, as expected for a cookie cake. If you’re watching your intake, stick to one or two slices. Pair it with a light beverage like tea or coffee to balance the richness.
Final Thoughts
So that’s my go-to Halloween chocolate spiderweb cookie cake! I’ve probably talked your ear off at this point, but when you make a recipe this often, you have a lot to say about it. This has saved my Halloween parties more times than I can count. It’s my answer to “what’s for dessert” when I want something festive, impressive, and delicious. My kids are happy, my guests are impressed, and I’m happy because I’m not stressed about cooking.
Make it yours! Try different colors for the web, add sprinkles, or mix in nuts. The best recipes are the ones you adapt to your family’s tastes. If you make this, drop a comment and let me know what you think! I love hearing how recipes turn out in your kitchen. And if something doesn’t work, tell me that too—I’m here to help troubleshoot.
Happy baking! And I hope your kitchen smells half as good as mine does right now.
Frequently Asked Questions
Can I use store-bought cookie dough?
You can, but I don’t recommend it. Store-bought dough is often thinner and doesn’t hold up well under the weight of the chocolate web. It also lacks the rich, homemade flavor. If you’re short on time, you can use a high-quality store-bought dough, but be prepared for a slightly different texture. For the best results, make the dough from scratch. It’s worth the extra 20 minutes.
Why did my white chocolate seize up?
White chocolate seizes up if it gets wet or overheated. Make sure your bowl and utensils are completely dry. Also, microwave it in short intervals (15 seconds) and stir frequently. If it looks grainy, you’ve overheated it. Unfortunately, seized white chocolate is hard to fix. Start over, but this time, add the shortening before microwaving—it helps prevent seizing.
Can I make this ahead for a party?
Yes! Bake the cookie base up to 3 days in advance. Store it in an airtight container at room temperature. Pipe the web the night before or morning of the party. The web will set quickly and stay fresh. If you’re serving it later in the day, keep it in a cool place to prevent the chocolate from melting.
Why did my web crack?
The web can crack if the cookie cake is too cold or if the white chocolate is too thick. Let the cookie cake come to room temperature before piping. Also, make sure the white chocolate is thin and fluid. If it’s too thick, add a little more shortening. Work quickly and smoothly to avoid cracking.
Can I use milk chocolate instead of dark chocolate?
Absolutely! Milk chocolate chips will create a sweeter, milder cookie base. It’s a good option if you prefer less intense chocolate flavor. Just note that milk chocolate melts faster, so be careful when baking to avoid overbaking.
How do I store leftovers?
Store leftovers in an airtight container at room temperature for up to 3 days. If your kitchen is hot, refrigerate it. Let it come to room temperature before serving for the best texture. The cookie cake stays fresh and chewy, and the web holds up well if stored properly.
Pin This Recipe!


Halloween Chocolate Spiderweb Cookie Cake
- Total Time: 1 hour 45 minutes
- Yield: 12 servings 1x
Description
A thick, chewy giant cookie cake with a dark chocolate base and an intricate white chocolate spiderweb design. This spooky treat is easy to make, requires no fancy tools, and is perfect for Halloween parties.
Ingredients
- 1 cup (226g) unsalted butter, softened
- 1 cup (200g) granulated sugar
- 1 cup (200g) light brown sugar, packed
- 2 large eggs, room temperature
- 2 teaspoons vanilla extract
- 2 ½ cups (315g) all-purpose flour
- 1 teaspoon baking soda
- 1 teaspoon salt
- 1 ½ cups (255g) dark chocolate chips (semi-sweet)
- 1 cup (170g) white chocolate chips
- 1 tablespoon shortening or coconut oil
Instructions
- Preheat oven to 350°F (175°C). Line a 12-inch round cake pan with parchment paper and grease lightly.
- In a large bowl, beat softened butter, granulated sugar, and brown sugar until light and fluffy (2-3 minutes).
- Add eggs one at a time, beating well after each addition. Mix in vanilla extract.
- In a separate bowl, whisk together flour, baking soda, and salt.
- Gradually add dry ingredients to the wet mixture, mixing on low speed until just combined. Do not overmix.
- Gently fold in dark chocolate chips until evenly distributed.
- Press dough evenly into the prepared pan. Bake for 25-30 minutes until edges are golden brown and center is set but slightly soft.
- Let cookie cake cool in pan for 10 minutes, then transfer to a wire rack to cool completely (about 1 hour).
- In a microwave-safe bowl, combine white chocolate chips and shortening. Microwave in 15-second intervals, stirring between each, until smooth.
- Transfer melted white chocolate to a ziplock bag with a snipped corner. Drizzle concentric circles over the cooled cookie cake.
- Drag a toothpick from the center outward through the chocolate circles to create a web pattern.
- Let the web set for 10-15 minutes at room temperature or 5 minutes in the fridge before slicing and serving.
Notes
Ensure the cookie cake is completely cool before piping the white chocolate web, or the chocolate will melt. Use a toothpick for thinner, more delicate web lines. The cookie base can be baked up to 3 days in advance. Store leftovers in an airtight container at room temperature for up to 3 days.
- Prep Time: 15 minutes
- Cook Time: 30 minutes
- Category: Dessert
- Cuisine: American
Nutrition
- Serving Size: 1 slice (1/12 of cak
- Calories: 380
- Sugar: 32
- Sodium: 220
- Fat: 20
- Saturated Fat: 12
- Carbohydrates: 48
- Fiber: 2
- Protein: 5
Keywords: Halloween, cookie cake, spiderweb, chocolate, dessert, party treat, spooky, homemade



