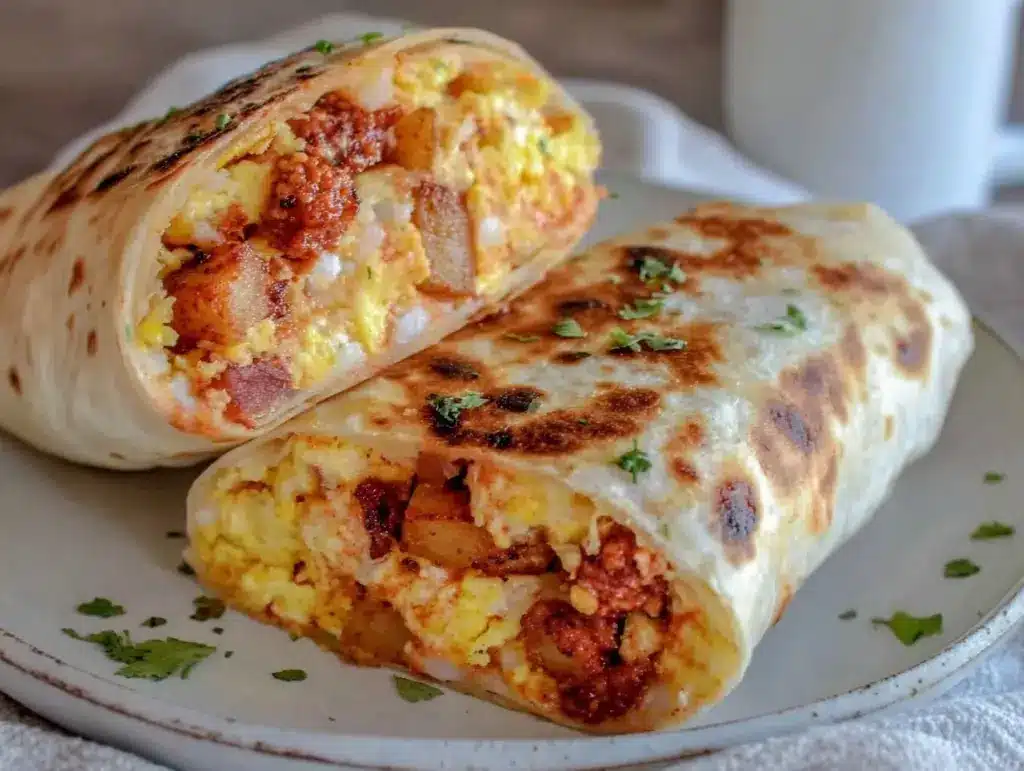
There was a Tuesday last November when I came home from work feeling completely hollowed out. You know that feeling? The kind where your brain feels like static and your body feels heavy, like you’ve been carrying invisible weights for twelve hours straight. I stood in my kitchen, staring at the fridge, and the thought of chopping onions or stirring a pot made me want to cry. I didn’t want dinner. I didn’t want a project. I just wanted something warm, something that felt like a hug, and something that wouldn’t ask anything of me for the rest of the night.
I opened the freezer and found a bag of these breakfast burritos I’d made three weeks prior, tucked away in the back behind some old ice packs. I didn’t even have to thaw them. I just wrapped one in a damp paper towel, popped it in the microwave, and waited. When I pulled it out, it was steaming, soft, and smelled like comfort itself. That single burrito didn’t just feed me; it reset my nervous system. It was the small act of kindness I needed to survive the week.
That’s why I’m sharing this recipe for Make-Ahead Freezer Breakfast Burritos for Self Care. This isn’t about meal prepping to be efficient or to save money (though it does that, too). It’s about building a pantry of warmth for those days when you have nothing left to give but the desire to be nourished. These burritos are the one to make when you need to take care of yourself. They’re gentle, they’re forgiving, and they’re always there waiting for you.
Why You’ll Love This Self-Care Recipe
I’ve made these burritos during flu seasons, during stressful work weeks, and during lazy Sunday mornings when I just want to stay in bed for another hour. They’ve become my anchor. Here’s why I keep coming back to this simple freezer staple:
Zero Morning Pressure — The hardest part of self-care is making a decision when you’re already tired. With these, the decision is made. You just grab one. No chopping, no mixing, no stress. It’s one less thing to worry about when your energy is low.
Gentle on the Stomach — When you’re feeling unwell or just emotionally drained, heavy meals can feel like a chore. These burritos are soft, warm, and easy to digest. The eggs are creamy, the cheese is melty, and the tortilla is soft. It’s food that feels safe to eat.
A Moment for You — Microwaving a burrito takes about two minutes. But that time? That’s your time. It’s the pause before you dive into the rest of your day (or your evening). It’s a quiet moment to breathe, to sip your coffee, to just be. It’s a ritual of care, not just fuel.
Flexible Comfort — Maybe you want extra cheese because you’re having a hard day. Maybe you want it plain because you’re feeling sensitive. Maybe you add a little hot sauce because you need a little kick. This recipe bends to your mood. It doesn’t judge. It just supports you.
Always Ready — There’s something deeply comforting about knowing you have food in the freezer that was made with love. It’s like having a friend who’s always ready to help. You don’t have to explain why you’re tired. You don’t have to apologize for needing help. You just unwrap the foil and let the warmth work its magic.
This is my go-to when I need dinner to just work. No complicated techniques, no weird ingredients, just reliable, delicious food that makes everyone happy. It’s the edible equivalent of a weighted blanket.
Ingredients You’ll Need
Here’s the best part: you probably have most of this already. This isn’t a recipe that requires a special trip to the store. It uses simple, whole ingredients that feel nourishing rather than processed. I’m particular about a few things here, and I’ll tell you exactly why, but feel free to swap based on what feels right for your body today.
For the Filling
Eggs (6 large) — I use cage-free or organic if I can afford it, because I like to think about where my food comes from. But honestly? Any eggs work. I scramble them softly—just until they’re set but still moist. Overcooked eggs make the burrito dry, and we want softness.
Butter (2 tablespoons) — Unsalted is best so you control the salt. I use real butter, not margarine. The richness adds that comforting mouthfeel that makes the meal feel special, even if it’s just you and the kitchen.
Yellow Onion (1 small, finely diced) — Sweet and mild. I dice it small so it melts into the eggs without being overwhelming. If you’re not a fan of onion texture, you can grate it instead. It dissolves completely.
Garlic (2 cloves, minced) — Just two. Enough to add depth without overpowering. Fresh garlic only. The jarred stuff has a sharpness that doesn’t belong in this gentle dish.
Sharp Cheddar Cheese (1 cup, shredded) — I shred my own from a block. Pre-shredded cheese has anti-caking agents that make it grainy, and we want smooth, creamy melt. Sharp cheddar has more flavor, so you need less of it, which is nice.
Salt and Black Pepper — To taste. I’m liberal with the pepper. It adds a little warmth that feels soothing.
For the Wrap
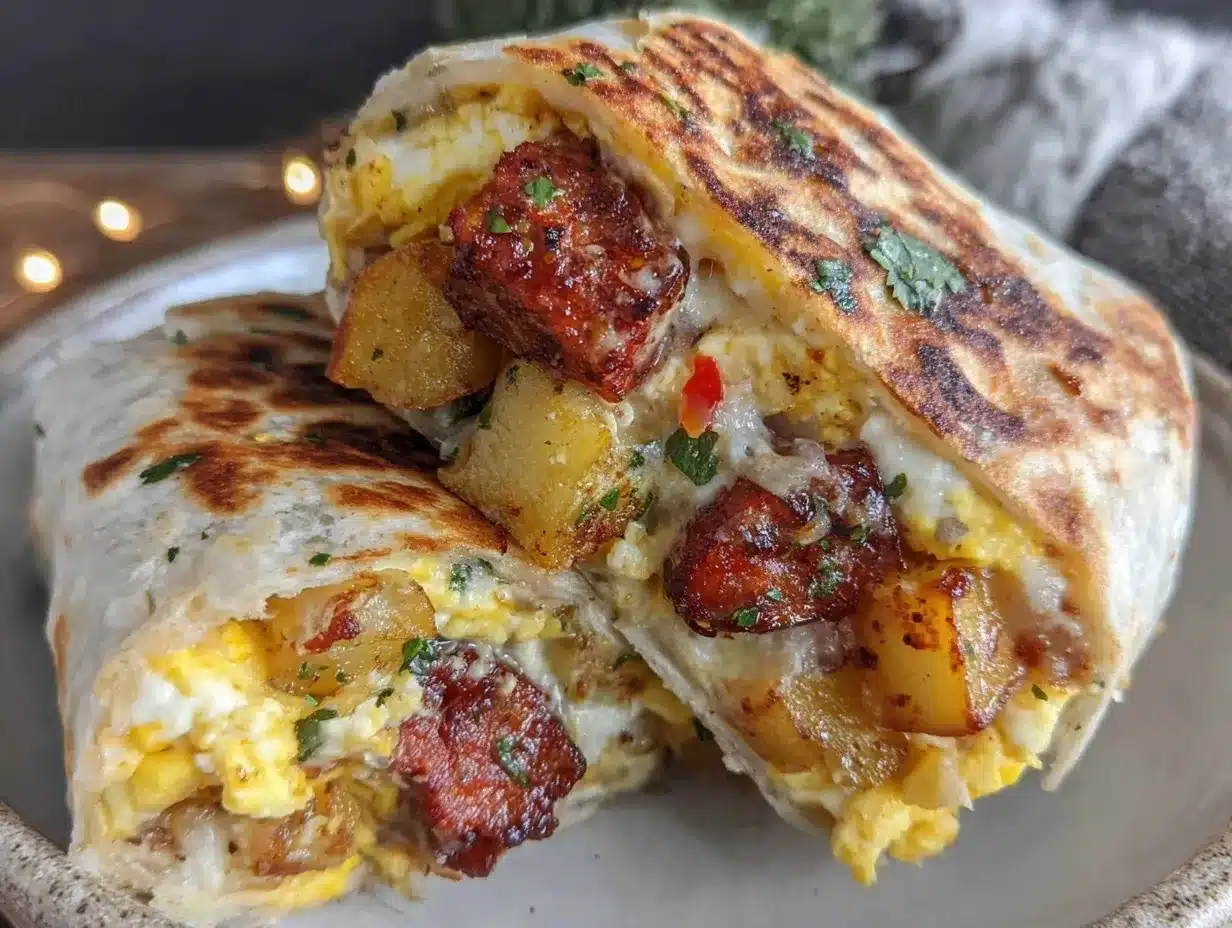
Flour Tortillas (8 large, 10-inch) — I use large burrito-sized tortillas. They’re soft and pliable. If you’re gluten-free, you can use GF tortillas, but be careful—they can be brittle. I recommend wrapping GF tortillas tightly in foil to steam them in the microwave, which keeps them soft.
Optional Add-ins — I sometimes add a handful of baby spinach. It wilts right into the eggs and adds a touch of green without changing the flavor much. Or a little cooked bacon for crunch. But honestly? Plain is often the most comforting. Sometimes less is more.
For the Freezer
Foil and Plastic Wrap — You’ll need these for wrapping. I use heavy-duty foil. It holds up better in the freezer and doesn’t tear as easily.
Ziploc Bags — For storing the wrapped burritos in the freezer. I like the gallon size. It keeps everything organized and protects the burritos from freezer burn.
Quick note: If you’re feeling particularly indulgent, you can add a layer of refried beans or black beans. It adds protein and fiber, which keeps you full longer. But I usually skip it when I just want pure comfort.
Equipment Needed
You don’t need fancy equipment for this. Here’s what I actually use.
Large Skillet — 10-inch or 12-inch. I prefer cast iron because it heats evenly, but stainless steel or non-stick works fine. Just make sure it’s big enough to scramble all the eggs at once.
Wooden Spoon — For stirring the eggs. Silicone works too. I like wood because it doesn’t scratch my pans.
Cutting Board and Knife — For dicing the onion. A sharp knife makes this easier and safer. Dull knives are frustrating, especially when you’re already tired.
Measuring Cups and Spoons — Standard stuff. I eyeball the salt and pepper, but I measure the cheese and butter.
Grater — Box grater or microplane. I use a box grater for the cheese. It’s faster for the amount I need.
Foil and Plastic Wrap — Essential for wrapping. I keep a roll of foil and a box of plastic wrap right next to the stove so I don’t have to hunt for them.
Ziploc Bags — For storage. I like the gallon size. It keeps everything organized and protects the burritos from freezer burn.
Optional but nice:
Microplane — For grating the garlic. It makes a paste that distributes evenly in the eggs.
Large Spatula — For flipping the eggs. A wide spatula makes it easier to fold the eggs into a neat pile for wrapping.
How to Make It: Step-by-Step
Alright, let’s make this! I’m walking you through exactly how I do it, including the little tricks I’ve picked up. Remember, there’s no rush. Take your time. This is your time.
Step 1: Prep Your Ingredients (5 minutes)
Before you start cooking, dice your onion and mince your garlic. Measure out your cheese. I know it seems fussy, but it makes the actual cooking way less stressful. Once you start cooking, things move fast, and you don’t want to be scrambling for ingredients while your butter burns. Set out your tortillas, too. I lay them out on the counter so they’re ready to go.
Step 2: Sauté the Aromatics (3 minutes)
Heat the butter in your skillet over medium-low heat. Add the diced onion. Cook for 2-3 minutes until it’s soft and translucent. It should smell sweet and gentle. Add the minced garlic and cook for 30 seconds more. Don’t let the garlic brown—it turns bitter. You just want it fragrant. This base is what gives the burrito its depth.
Step 3: Scramble the Eggs (5 minutes)
Whisk the eggs in a bowl with a pinch of salt and pepper. Pour them into the skillet with the onions and garlic. Stir gently with a wooden spoon. Don’t overwork them. You want soft, curdy eggs, not a solid omelet. When they’re about 80% cooked (still a little wet), take them off the heat. The residual heat will finish cooking them. This keeps them tender.
Step 4: Assemble the Burritos (10 minutes)
Warm your tortillas slightly. I do this by microwaving them for 10 seconds or wrapping them in foil and putting them in the oven for a minute. Cold tortillas crack when you roll them. Lay a tortilla flat. Spoon a portion of the egg mixture down the center. Sprinkle with cheese. If you’re adding spinach or beans, add them now. Fold the sides in, then roll from the bottom up. It should be a tight, neat package. Don’t overstuff it—leave room to roll.
Step 5: Wrap for the Freezer (10 minutes)
This is the crucial step. Wrap each burrito tightly in plastic wrap first. Press out as much air as you can. Then wrap it tightly in foil. The plastic wrap keeps it from drying out; the foil protects it from freezer burn and makes it easy to heat. Label each one with a date and your preferred heating time. I usually write “Microwave 2-3 mins” on the foil.
Step 6: Freeze (Ongoing)
Place the wrapped burritos in a gallon Ziploc bag. Squeeze out the air and seal. They’ll keep in the freezer for up to 3 months. I like to make a batch of 8 at a time. It takes about an hour from start to finish, but the payoff is weeks of easy, comforting meals.
Expert Tips & Tricks
Here’s everything I’ve learned from making these dozens of times. These tips will save you from my mistakes.
Don’t Overcook the Eggs — The eggs will continue to cook in the microwave. If they’re dry in the skillet, they’ll be dry in the burrito. Aim for soft, moist eggs. They should look slightly underdone when you take them off the heat.
Warm the Tortillas — Cold tortillas are the enemy. They crack and tear. Always warm them slightly before rolling. I just microwave them for 10 seconds. It’s a small step that makes a big difference.
Wrap Tightly — Air is the enemy of freezer food. Press out as much air as possible when wrapping in plastic. Then wrap tightly in foil. This prevents freezer burn and keeps the burritos soft.
Label Everything — You won’t remember which burrito is which in three months. Label them with the date and any specific ingredients (like “with bacon” or “plain”). I use a permanent marker on the foil.
Reheat with Care — Don’t microwave on high. High heat makes the tortilla tough and the eggs rubbery. Use medium power, or 50% power. It takes a minute longer, but the result is so much better. Soft, warm, and tender.
Add Moisture — If you’re worried about dryness, add a splash of milk to the eggs before scrambling. It makes them even softer. Or add a little cream cheese to the filling. It adds richness and moisture.
Make Small Batches — I usually make 8 at a time. That’s enough for a month or so, depending on how often I make them. If you make too many, they might take up too much space in your freezer.
Don’t Skip the Cheese — The cheese helps bind the filling and adds moisture. It also makes the burrito feel indulgent. Don’t skimp on it. Use good cheese. It makes a difference.
Freeze in Layers — If you’re short on space, you can freeze the burritos on a baking sheet first, then transfer them to bags. This prevents them from sticking together. But if you wrap them tightly, you can stack them directly.
Variations & Substitutions
Once you’ve nailed the basic version, here’s how you can mix it up. I’ve tried all of these, and they all work.
Spinach and Feta — Swap cheddar for feta. Add a handful of fresh spinach to the eggs. It’s lighter and tangier. Great for when you want something fresh.
Bacon and Cheddar — Add cooked, crumbled bacon to the filling. It adds crunch and salt. My husband loves this version. It feels more like a “real” breakfast.
Black Bean and Corn — Add a half cup of cooked black beans and corn to the filling. It adds fiber and protein. It’s heartier and more filling. Great for lunch.
Veggie Only — Skip the eggs entirely. Use sautéed peppers, onions, mushrooms, and zucchini. Add cheese and wrap. It’s a delicious vegetarian option. I make this when I want a break from eggs.
Gluten-Free — Use gluten-free tortillas. They can be brittle, so be gentle when rolling. Wrap tightly in foil to steam them in the microwave. It helps keep them soft.
Dairy-Free — Use a dairy-free butter and cheese. Or skip the cheese entirely. Add avocado slices for creaminess. It’s still comforting, just different.
Spicy — Add diced jalapeños or a dash of hot sauce to the eggs. It wakes up the palate. Great for when you need a little kick.
Herb-Infused — Add fresh chives or parsley to the eggs. It adds color and freshness. I like chives—they’re mild and complementary.
Breakfast Sausage — Add cooked breakfast sausage crumbles. It’s savory and rich. I use turkey sausage for a lighter version.
Serving & Storage
I usually serve these straight from the microwave, wrapped in a napkin. It’s rustic and cozy. But here are other ways I’ve enjoyed them:
How to Serve: — I like to eat them plain, with a side of fresh fruit or a small salad. Sometimes I add a dollop of sour cream or salsa. But often, I just eat it as is. It’s simple and satisfying.
Sides: — Fresh fruit (berries or orange slices), a small green salad, or a piece of toast. I don’t usually add more carbs. The tortilla is enough.
Drinks: — Coffee, tea, or a smoothie. I like a warm mug of tea with these. It feels like a complete breakfast.
Storage: — Store in the freezer for up to 3 months. Keep them in a Ziploc bag to save space. They’ll last longer if you wrap them tightly.
Reheating: — Remove the plastic wrap. Leave the foil on (or remove it and wrap in a damp paper towel). Microwave on medium power for 2-3 minutes, flipping halfway through. Let it sit for a minute before eating. It’s very hot inside!
Freezing: — Yes, they freeze well. That’s the whole point! They keep for 3 months. After that, they might get freezer burn.
Meal Prep: — Make a batch on Sunday. It takes about an hour. Then you have breakfast for weeks. It’s a small investment of time for a big return of peace of mind.
Pro tip: — If you’re reheating in the oven, wrap the burrito in foil and bake at 350°F for 20 minutes. It takes longer, but the tortilla stays softer. I prefer the microwave for speed, but the oven is nice for weekends.
Nutrition Information
I’m not a nutritionist, but here’s the breakdown if you’re tracking. This is per burrito, based on the basic recipe with eggs, cheddar, and onion.
Per Serving (1 burrito):
- Calories: 320
- Protein: 18g
- Carbs: 28g
- Fiber: 1g
- Sugar: 2g
- Fat: 16g
- Saturated Fat: 8g
- Cholesterol: 180mg
- Sodium: 450mg
What’s Good: — Decent protein from the eggs and cheese. It’s filling and satisfying. The eggs provide essential nutrients.
What to Know: — Higher in calories from the cheese and tortilla. Contains dairy and gluten. Moderate sodium (use low-sodium cheese to reduce).
My Take: — Look, this is comfort food. It’s not a diet recipe. But it’s better than cereal, and it’s nourishing. When I want to make it lighter, I use fewer eggs and more veggies. But usually? I just eat one and enjoy it. It’s about balance, not restriction.
Dietary Notes: — Contains: gluten, dairy, eggs. Can be made: vegetarian, gluten-free (with GF tortillas), dairy-free (with substitutions). Not suitable for: vegan (without modifications).
Final Thoughts
So that’s my Make-Ahead Freezer Breakfast Burritos for Self Care. I’ve probably talked your ear off at this point, but when you make a recipe this often, you have a lot to say about it.
This has saved me on more hard days than I can count. It’s my answer to “what’s for breakfast” when I’m tired, don’t want to cook, and still want something that feels good. My kids are happy, my husband’s happy, and I’m happy because I’m not stressed about cooking.
Make it yours! Try different add-ins, swap in your favorite vegetables, adjust the spices. The best recipes are the ones you adapt to your body’s needs. If you’re having a hard day, add extra cheese. If you’re feeling light, add spinach. Listen to what you need.
If you make this, drop a comment and let me know what you think! I love hearing how recipes turn out in your kitchen. And if something doesn’t work, tell me that too—I’m here to help troubleshoot.
Happy cooking! And I hope your kitchen smells half as good as mine does right now.
Frequently Asked Questions
Can I use egg whites instead of whole eggs?
You can, but the burritos will be less rich and creamy. Egg whites are leaner and can dry out faster. If you use egg whites, add a little extra butter or oil to the pan to keep them moist. I usually stick with whole eggs for that comforting richness.
Why did my tortillas crack when I rolled them?
They were probably too cold. Tortillas become brittle when they’re cold. Always warm them slightly before rolling. I microwave them for 10 seconds or wrap them in foil and put them in a warm oven. This makes them pliable and easy to roll.
Can I freeze these without wrapping them in foil?
I don’t recommend it. The plastic wrap alone isn’t enough to prevent freezer burn. The foil provides an extra layer of protection. It’s worth the extra step. Your burritos will stay soft and tasty for months.
How do I reheat these in the oven?
Wrap the burrito in foil (remove the plastic wrap first). Bake at 350°F for 20-25 minutes. Flip halfway through. This takes longer than the microwave, but the tortilla stays softer. I prefer the oven on weekends when I have more time.
Can I make these vegan?
Yes! Use a vegan egg substitute (like JUST eggs) or skip the eggs entirely and use a bean and veggie filling. Use vegan cheese and a vegan tortilla. It’s not exactly the same, but it’s still comforting and satisfying.
Do I need to thaw them before reheating?
No, you can cook them frozen. Just add a minute or two to the microwave time. I usually cook them straight from the freezer. It’s one less step to worry about.
Can I add salsa to the burritos before freezing?
I don’t recommend it. The salsa will make the tortillas soggy and watery. Add fresh salsa after reheating. It’s much better that way. The texture stays crisp and fresh.
Pin This Recipe!


Make-Ahead Freezer Breakfast Burritos: Self Care Comfort Food
- Total Time: 23 minutes
- Yield: 8 servings 1x
Description
Soft, comforting breakfast burritos designed for self-care, featuring scrambled eggs, cheddar cheese, and sautéed onions, wrapped in tortillas and frozen for easy, stress-free reheating.
Ingredients
- 6 large eggs
- 2 tablespoons unsalted butter
- 1 small yellow onion, finely diced
- 2 cloves garlic, minced
- 1 cup sharp cheddar cheese, shredded
- Salt and black pepper to taste
- 8 large flour tortillas (10-inch)
- Foil and plastic wrap for wrapping
- Gallon-sized Ziploc bags for storage
Instructions
- Dice the onion and mince the garlic. Measure out the cheese and lay out the tortillas.
- Heat butter in a large skillet over medium-low heat. Add diced onion and cook for 2-3 minutes until soft and translucent.
- Add minced garlic and cook for 30 seconds until fragrant, being careful not to brown it.
- Whisk eggs with a pinch of salt and pepper. Pour into the skillet with onions and garlic.
- Stir gently until eggs are about 80% cooked and still moist. Remove from heat to let residual heat finish cooking.
- Warm tortillas slightly (microwave for 10 seconds or wrap in foil) to prevent cracking.
- Spoon egg mixture down the center of each tortilla, sprinkle with cheese, and fold sides in, rolling from the bottom up.
- Wrap each burrito tightly in plastic wrap, pressing out air, then wrap tightly in foil.
- Label with date and heating instructions. Place in gallon Ziploc bags and freeze for up to 3 months.
- To reheat, remove plastic wrap, leave foil on (or wrap in damp paper towel), and microwave on medium power for 2-3 minutes, flipping halfway.
Notes
Do not overcook the eggs as they will continue to cook in the microwave. Always warm tortillas before rolling to prevent cracking. Wrap tightly to prevent freezer burn. Reheat on medium power to keep tortillas soft and eggs tender.
- Prep Time: 5 minutes
- Cook Time: 18 minutes
- Category: Breakfast
- Cuisine: American
Nutrition
- Serving Size: 1 burrito
- Calories: 320
- Sugar: 2
- Sodium: 450
- Fat: 16
- Saturated Fat: 8
- Carbohydrates: 28
- Fiber: 1
- Protein: 18
Keywords: breakfast burritos, freezer meals, self care, comfort food, meal prep, easy breakfast, make ahead



