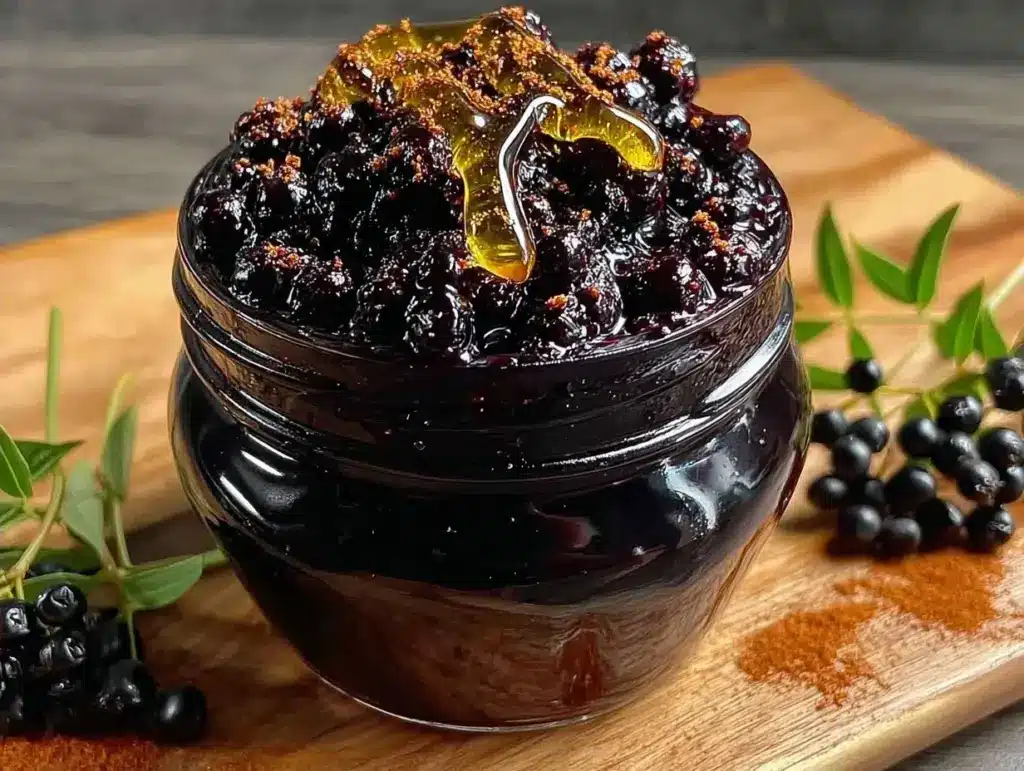
There’s a specific kind of silence that falls over my house when the first real chill hits October. It’s not just the temperature dropping; it’s the way the light changes, getting softer and shorter, and everyone instinctively gravitates toward the kitchen island. Last week, I came home from a long day of errands feeling that familiar, creeping tickle in my throat—the one that whispers, maybe you should just order takeout and go to bed early. But instead of reaching for the phone, I walked to the stove. I didn’t have a fancy remedy. I didn’t have a prescription. I had dried elderberries, a jar of raw honey, and some cinnamon sticks that had been sitting in my pantry for months.
Twenty minutes later, the entire house smelled like a warm hug. I stirred together this homemade elderberry syrup with raw honey, watching the deep purple liquid bubble and reduce until it was thick enough to coat the back of a spoon. I let it cool, poured it into a small glass bottle, and kept it by my bedside. By morning, the tickle was gone. More importantly, I felt like I’d done something intentional for my body, rather than just waiting for it to fix itself.
I’ve been making this syrup every autumn for the last five years. It started as a way to save money on store-bought immune boosters, which always tasted like medicine and cost an arm and a leg. But it quickly became my favorite way to signal the change of seasons. It’s not just about the health benefits (though those are real). It’s about the ritual. The smell of simmering berries. The rich, dark color. The sweetness of raw honey cutting through the tartness. It’s the ultimate cozy night remedy, and honestly, it’s easier than you think.
If you’ve never made syrup from scratch, don’t worry. You don’t need a chemistry degree or a kitchen full of gadgets. You just need patience and a pot. I’m going to walk you through exactly how I do it, including the little tweaks I’ve made over the years to get the perfect balance of tart and sweet. This isn’t just a health tonic; it’s a flavor experience that makes you feel cared for, whether you’re drinking it straight or drizzling it over your morning oatmeal.
Why You’ll Love This Recipe
There are a hundred things you can buy at the pharmacy that claim to boost your immune system, but few of them taste like comfort food. This homemade elderberry syrup with raw honey is different because it actually feels good to drink it. It’s not a bitter tea you have to chase with water. It’s a rich, syrupy delight that makes you want to curl up with a blanket and a good book. Here’s why this has become a staple in my kitchen, especially during those long, gray winter months:
- It Tastes Like Dessert, Acts Like Medicine — Seriously. The combination of tart elderberries and sweet raw honey is addictive. I’ve caught myself spooning it straight from the jar when I’m not feeling 100%. My kids think it’s a special treat, which means they’re getting immune support without any of the usual fight.
- Stupid Simple to Make — You don’t need to be a chef. If you can boil water and stir, you can make this. I spend about 10 minutes of active time—chopping a few things, dumping ingredients in a pot—and then I let the stove do the work. It’s perfect for those nights when you’re tired but want to do something nice for yourself.
- It Uses Whole, Real Ingredients — No artificial colors, no preservatives, no weird chemical names you can’t pronounce. Just berries, honey, spices, and water. I know exactly what’s going into my body, and I know it’s high-quality. Plus, raw honey has its own natural enzymes and antibacterial properties, which is a bonus.
- It Smells Amazing — I can’t stress this enough. The aroma that fills your kitchen while this simmers is incredible. It smells like autumn, like spice markets, like home. It’s sensory comfort in a way that a pill or a capsule just can’t replicate.
- Incredibly Versatile — Yes, I drink it straight when I’m sick. But I also drizzle it over vanilla ice cream, swirl it into my morning yogurt, or use it as a glaze for roasted vegetables. It’s not just a remedy; it’s a pantry staple that adds depth to a lot of different foods.
- Cost-Effective — A bottle of store-bought elderberry syrup runs about $15 to $20. I can make a batch of this for under $10, and it lasts for weeks. It’s a small investment that pays off in health and happiness.
This syrup has saved me from turning into a couch potato more times than I can count. It’s my go-to when I feel that first hint of a cold coming on, or just when I need a little extra warmth during a chilly evening. It’s simple, effective, and ridiculously good.
Ingredients You’ll Need
One of the best parts about this homemade elderberry syrup with raw honey is how few ingredients it requires. You probably have most of these already, or they’re easy to find at any grocery store. I’m particular about a few of them, so pay attention to the notes below.
Dried Elderberries (1 cup / 100g) — This is the star of the show. Make sure you use dried elderberries, not fresh. Fresh elderberries can be toxic if not cooked properly and don’t have the same concentrated flavor. I buy mine in bulk from online herbal suppliers, but you can find them at most health food stores or even larger grocery stores in the spice aisle. Look for deep purple, shriveled berries. Avoid any that look moldy or dusty.
Raw Honey (½ cup / 170g) — Do not skip the “raw” part. Processed honey has been heated and filtered, which strips away many of the beneficial enzymes and antioxidants. Raw honey retains those natural properties, making it a better immune booster. I love using local raw honey when I can get it—it supports local bees and often helps with seasonal allergies. If you can’t find raw honey, good quality organic honey is your next best bet.
Water (4 cups / 1 liter) — Just plain, filtered water is fine. If you have a good filter at home, use that. The quality of your water matters here since it’s the main liquid component.
Cinnamon Sticks (2 large sticks) — These add warmth and sweetness without sugar. I prefer Ceylon cinnamon if you can find it, as it has a more delicate, citrusy flavor, but regular Cassia cinnamon works fine too. Don’t use ground cinnamon—it will make the syrup gritty and hard to strain.
Whole Cloves (4-5 cloves) — These add a subtle, spicy depth. Don’t overdo it, or it will taste like Christmas pudding. Just a few will do the trick. I usually toss them in a tea ball or tie them in a piece of cheesecloth so they don’t float around everywhere.
Black Peppercorns (½ teaspoon) — This is my secret ingredient. A few cracked peppercorns add a tiny kick that wakes up the palate and helps with inflammation. You won’t taste the heat directly, but it adds complexity. Trust me on this.
Orange Peel (1 large strip) — I use a vegetable peeler to get a wide strip of peel from an organic orange. Make sure you get the zest (the orange part) but not the white pith, which is bitter. This adds a bright, citrusy note that cuts through the richness of the honey. If you don’t have an orange handy, a teaspoon of orange extract added at the end works too.
Optional: Ginger Root (1 inch piece, sliced) — If you’re feeling really under the weather, add a slice of fresh ginger. It adds a spicy warmth that’s great for nausea and colds. I usually just peel a tiny bit and slice it thin.
Quick Note on Substitutions: If you can’t find elderberries, you can try using dried hibiscus flowers for a similar tartness, though the health benefits will be different. And if you’re vegan, swap the honey for maple syrup, though the texture will be slightly thinner.
Equipment Needed
You don’t need fancy equipment for this. Here’s what I actually use, along with some alternatives if you don’t have exactly what I listed.
Medium Saucepan (2-3 quart) — I use a heavy-bottomed saucepan. It heats evenly and prevents the honey from scorching. If you only have a thin aluminum pot, just keep the heat on medium-low and stir more frequently.
Mesh Strainer or Cheesecloth — You need something to catch the berries and spices. A fine-mesh strainer works well, but if you want a super-smooth syrup, line it with cheesecloth. I have a reusable nut milk bag that’s perfect for this—it’s easier to squeeze and cleaner than cheesecloth.
Spatula — A silicone spatula is great for scraping the bottom of the pot to prevent sticking. It’s also useful for pressing the berries against the strainer to get every last drop of flavor.
Measuring Cups and Spoons — Standard stuff. I use a 1-cup measure for the berries and a ½-cup measure for the honey.
Glass Bottle or Jar for Storage — An airtight glass jar is best. I use old pasta sauce jars that I’ve washed and sterilized, or I buy small glass bottles with pour spouts. Avoid plastic if you can, as honey can sometimes interact with plastic over time.
Optional: Tea Ball or Infuser — If you don’t want to deal with straining out small spices like cloves and peppercorns, throw them in a tea ball. It makes cleanup a breeze.
How to Make It: Step-by-Step
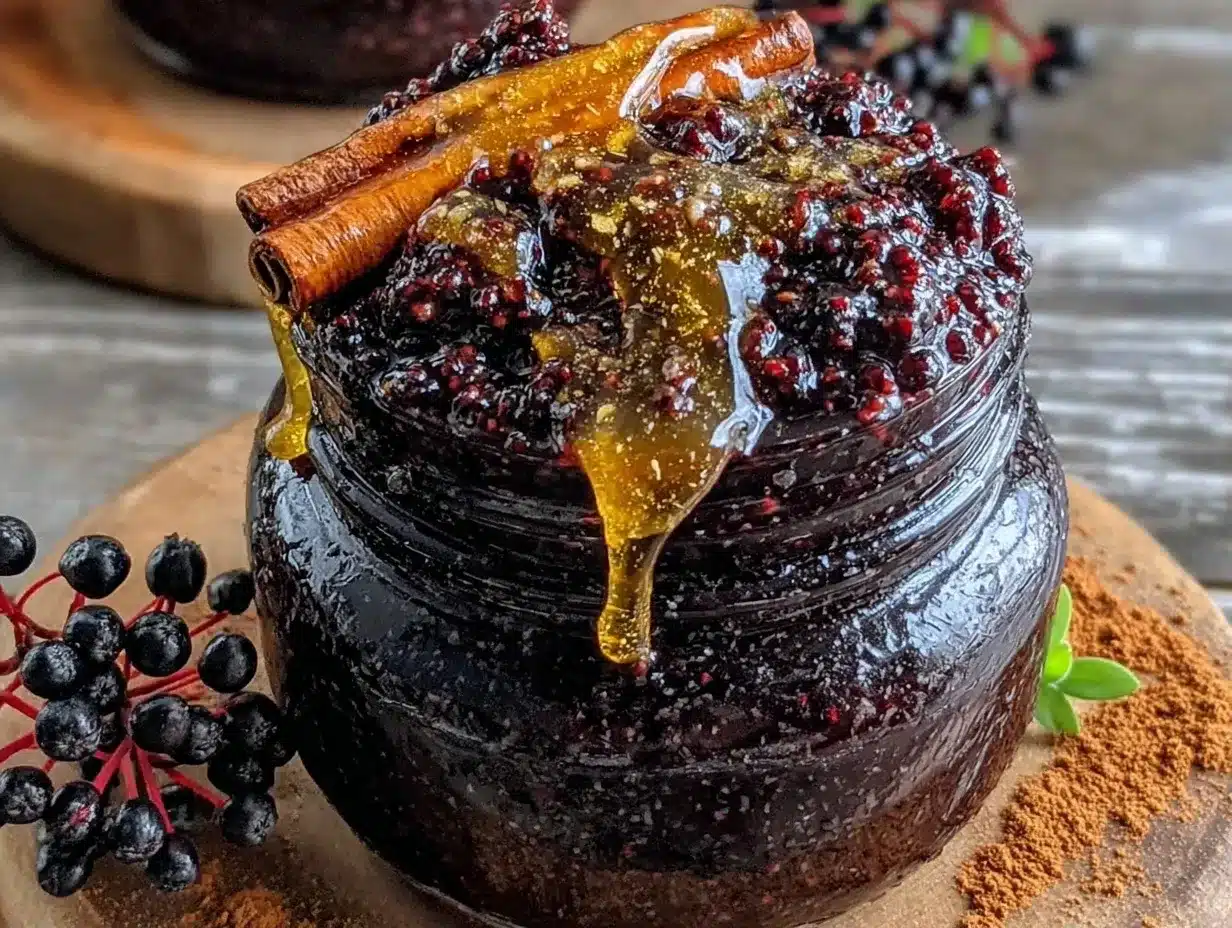
Alright, let’s make this! I’m walking you through exactly how I do it, including the little tricks I’ve picked up. This process takes about 30-40 minutes total, but most of that is just simmering, so you can go read a book or take a nap.
Step 1: Combine the Base Ingredients (5 minutes)
Start by adding the dried elderberries, water, cinnamon sticks, cloves, peppercorns, and orange peel to your saucepan. Give it a quick stir to make sure everything is submerged. If you’re adding fresh ginger, toss that in now too. There’s no need to measure precisely here; just get everything in the pot. I usually add the orange peel last so I don’t get juice on my hands.
Step 2: Bring to a Boil (5 minutes)
Place the pot on the stove over medium-high heat. Watch it closely. You want to bring it to a full boil, but once it starts bubbling, you’ll want to reduce the heat immediately. You’ll see the water turn a deep, dark purple as the berries release their color. This is satisfying to watch.
Step 3: Simmer and Reduce (20-25 minutes)
Once it boils, turn the heat down to low. Cover the pot with a lid, but leave it slightly ajar to let some steam escape. Let it simmer gently for 20-25 minutes. You’ll notice the liquid reducing and thickening slightly. The berries will swell up and start to split open. This is where the flavor develops. Don’t rush this step. If you boil it too hard, you can destroy some of the delicate compounds in the berries. Low and slow is the way to go.
Step 4: Cool Slightly (10 minutes)
Turn off the heat. Let the pot sit on the stove for about 10 minutes to cool down a bit. This is important because if you add the honey while the syrup is boiling hot, you’ll kill the beneficial enzymes in the raw honey. We want to keep those healthy properties intact. The syrup should be warm, not scalding.
Step 5: Strain the Syrup (5 minutes)
Set your mesh strainer (or cheesecloth-lined strainer) over a large bowl or jug. Pour the mixture through. Use your spatula or a spoon to press down on the berries and spices. You want to squeeze out every drop of that dark, flavorful liquid. It’s worth the effort. Discard the solid bits. If you used a tea ball, just remove it and rinse it off.
Step 6: Stir in the Honey (2 minutes)
Now that the liquid is warm but not hot, add the raw honey. Stir vigorously until it’s completely dissolved. You might need to whisk it a bit if the honey is very thick. The syrup will look glossy and deep purple. Taste it! It should be sweet but with a nice tart backbone. If it’s too tart, add a little more honey. If it’s too sweet, add a splash of lemon juice to brighten it up.
Step 7: Bottle and Store
Let the syrup cool completely to room temperature. Then, pour it into your clean glass bottle or jar. Seal it tightly and store it in the refrigerator. It will keep for up to 3-4 weeks. I usually make a fresh batch every few weeks because it’s just that good.
Total Time: About 45 minutes (5 minutes prep, 25 minutes simmering, 15 minutes cooling/straining)
Expert Tips & Tricks
Here’s everything I’ve learned from making this dozens of times. These tips will save you from my mistakes and help you get the best possible syrup.
- Don’t Skip the Straining — I know it’s tempting to just pour it in and go, but the berry skins and spice bits will make the syrup gritty and unpleasant. Take the time to strain it properly. If you want it super smooth, use a nut milk bag. It’s worth the extra step.
- Cool Before Adding Honey — I can’t say this enough. Hot honey loses its medicinal value. Wait until the syrup is just warm to the touch before stirring in the honey. If you’re impatient, you can put the pot in the fridge for 10 minutes to speed it up.
- Adjust the Sweetness — Elderberries can be quite tart. Some batches are more tart than others depending on the brand. Taste after straining and before bottling. Add honey gradually until it’s balanced. I like mine on the sweeter side, but you can make it less sweet if you prefer.
- Use a Heavy-Bottomed Pot — Honey and sugar can burn easily. A heavy-bottomed pot distributes heat evenly and prevents hot spots. If you’re using a thin pot, keep the heat very low and stir often.
- Label and Date Your Jar — It’s easy to forget when you made a batch. Write the date on the jar with a marker. This helps you keep track of freshness and ensures you use it while it’s at its best.
- Double or Triple the Batch — This recipe scales up easily. I often make two batches at once and fill more bottles. It’s great for gifting during the holidays or just having plenty on hand for the winter.
Common Mistakes (and how to avoid them):
- Mistake: Syrup is too thin. Fix: Simmer it longer. The goal is to reduce the water content so the syrup is thick and syrupy. If it’s still too thin after 30 minutes, simmer uncovered for another 10 minutes.
- Mistake: Syrup is too thick to pour. Fix: Add a little warm water when you’re ready to use it. You can also thin it out before bottling if you know you’ll be drizzling it over things.
- Mistake: Honey crystallizes. Fix: This is normal for raw honey! It doesn’t mean it’s bad. Just warm the jar in a bowl of hot water to liquify it again.
Variations & Substitutions
Once you’ve nailed the basic version, here’s how you can mix it up. I’ve tried all of these, and they’re all delicious.
- Spicy Ginger Version — Add 2 inches of fresh ginger, sliced, during the simmering step. This adds a warming kick that’s great for sore throats and colds.
- Lemon Zest Twist — Swap the orange peel for lemon zest. It makes the syrup brighter and more citrus-forward. Great for adding to tea.
- Vegan Version — Simply substitute the raw honey with pure maple syrup or agave nectar. The texture will be slightly thinner, but the flavor is still wonderful.
- Vanilla Bean — Split a vanilla bean and scrape the seeds into the pot, or just throw the whole pod in. It adds a luxurious, dessert-like aroma.
- Cherry Boost — Swap half the elderberries for dried tart cherries. This adds a different kind of antioxidant power and a slightly sweeter flavor.
Serving & Storage
So, how do you actually use this stuff? Here are my favorite ways to enjoy homemade elderberry syrup with raw honey.
How to Serve
The most common way is straight from the spoon. Take 1-2 teaspoons when you feel a cold coming on. It coats the throat and soothes the irritation. But it’s also amazing in drinks. Stir a tablespoon into hot water with lemon for a quick tea. Mix it into your morning smoothie for a flavor boost. Drizzle it over pancakes or waffles on the weekend. It’s also great in cocktails—try it in a hot toddy or a sparkling water with lime.
Storage Instructions
Store the syrup in an airtight glass jar in the refrigerator. It will keep for 3-4 weeks. If you notice any mold or off smells, toss it out. The high sugar content from the honey acts as a preservative, but it’s not indefinite. For longer storage, you can freeze it in ice cube trays and then transfer the cubes to a bag. That way, you can just pop a cube into your tea or smoothie whenever you need it.
Nutrition Information
I’m not a nutritionist, but here’s the breakdown if you’re tracking. This is based on a 1-tablespoon serving.
- Calories: 50
- Sugar: 12g (mostly natural from honey and berries)
- Carbs: 13g
- Fat: 0g
- Protein: 0g
What’s Good: The elderberries are packed with antioxidants, particularly anthocyanins, which help fight inflammation. The raw honey provides natural enzymes and has antibacterial properties. It’s a natural way to support your immune system without synthetic additives.
What to Know: It is high in sugar, but it’s natural sugar. If you’re diabetic or watching your sugar intake, use this sparingly or consult your doctor. It’s a remedy, not a daily candy.
Final Thoughts
That’s my go-to homemade elderberry syrup with raw honey! I’ve probably talked your ear off at this point, but when you make a recipe this often, you have a lot to say about it. This syrup has become a ritual for me, a way to slow down and care for myself during the busy, cold months. It’s simple, it’s effective, and it tastes incredible.
Make it yours! Try different spices, adjust the sweetness, or experiment with different fruit additions. The best remedies are the ones you enjoy taking. If you make this, drop a comment and let me know what you think! I love hearing how recipes turn out in your kitchen. And if something doesn’t work, tell me that too—I’m here to help troubleshoot.
Happy cooking! And I hope your kitchen smells half as good as mine does right now.
Frequently Asked Questions
Q: Can I use fresh elderberries instead of dried?
A: You can, but you need to be very careful. Fresh elderberries contain cyanogenic glycosides, which are toxic if not cooked properly. You must cook them thoroughly to break down these compounds. Dried elderberries are safer and more concentrated in flavor, which is why I recommend them. If you forage for fresh berries, make sure you know exactly what you’re picking and cook them well.
Q: How long does this syrup last?
A: In the refrigerator, it will last for about 3-4 weeks. The honey acts as a preservative, but the fresh fruit components can eventually spoil. If you want to keep it longer, freeze it in ice cube trays. It’ll keep for up to 6 months in the freezer.
Q: Can I give this to my kids?
A: Yes, but not for infants under 1 year old. Raw honey can contain spores that are dangerous for babies under 12 months. For older kids, this is a great natural immune booster. I give my kids 1 teaspoon a day during cold season. They love the taste!
Q: Why is my syrup so thick?
A: This is normal! Elderberry syrup is supposed to be thick and syrupy. If it’s too thick to pour easily, just add a little warm water when you’re ready to use it. You can also thin it out before bottling if you prefer a looser consistency.
Q: Can I make this in a slow cooker?
A: Yes! Combine all ingredients except honey in a slow cooker. Cook on low for 6-8 hours. Then strain, let cool, and stir in the honey. It’s a great hands-off method if you’re busy during the day.
Q: Does this actually work for colds?
A: Many studies suggest that elderberries can reduce the duration and severity of flu symptoms. While it’s not a cure-all, it’s a powerful supportive remedy. Combined with the antibacterial properties of honey, it’s a great natural tool for your health arsenal.
Pin This Recipe!
Homemade Elderberry Syrup: Best 10-Minute Cozy Night Remedy
- Total Time: 45 minutes
- Yield: Approximately 2 cups 1x
Description
A simple, immune-boosting homemade elderberry syrup made with raw honey, spices, and dried berries. This cozy remedy is easy to make, tastes like dessert, and helps soothe cold symptoms.
Ingredients
- 1 cup dried elderberries (100g)
- 4 cups water (1 liter)
- 2 large cinnamon sticks
- 4–5 whole cloves
- 1/2 teaspoon black peppercorns
- 1 large strip orange peel (zest only)
- 1/2 cup raw honey (170g)
- 1 inch fresh ginger root, sliced (optional)
Instructions
- Combine dried elderberries, water, cinnamon sticks, cloves, peppercorns, orange peel, and optional ginger in a medium saucepan.
- Place the pot on the stove over medium-high heat and bring the mixture to a full boil.
- Once boiling, reduce heat to low, cover with a lid slightly ajar, and simmer gently for 20-25 minutes until the liquid reduces and thickens slightly.
- Remove from heat and let the mixture cool for about 10 minutes until warm but not scalding.
- Strain the liquid through a fine-mesh strainer or cheesecloth into a bowl, pressing on the solids to extract all the flavor.
- Stir the raw honey into the warm strained syrup until completely dissolved.
- Taste and adjust sweetness if necessary, then let cool completely to room temperature.
- Pour into a clean glass bottle or jar, seal tightly, and store in the refrigerator.
Notes
Do not add honey while the syrup is boiling hot, as this destroys the beneficial enzymes in raw honey. Ensure you use dried elderberries, as fresh ones can be toxic if not cooked properly. The syrup keeps for 3-4 weeks in the refrigerator or can be frozen in ice cube trays for up to 6 months. Not for infants under 1 year old due to raw honey.
- Prep Time: 5 minutes
- Cook Time: 25 minutes
- Category: Beverages
- Cuisine: American
Nutrition
- Serving Size: 1 tablespoon
- Calories: 50
- Sugar: 12
- Carbohydrates: 13
Keywords: elderberry syrup, homemade remedy, immune booster, raw honey, cozy night, cold remedy, natural health, vegan option



