It was 6:15 AM on a Tuesday in August, and I was already behind schedule. You know that specific kind of panic? The kind where the alarm went off, the kids are still snoring, the dog is whining, and you’re standing in your pajamas staring at a loaf of bread like it owes you money. This was the reality of the first week of school. We had new schedules, new backpacks, and a collective lack of sleep that made every morning feel like a high-stakes negotiation.
I wanted to make them something special—something that felt like a weekend treat but could actually be assembled in the ten minutes it took to get dressed. I didn’t want syrup-drenched pancakes that got soggy in the lunchbox, and I definitely didn’t want cold cereal. I needed something portable, something that wouldn’t make a mess in the car seat, and something that smelled like cinnamon sugar before we even left the driveway.
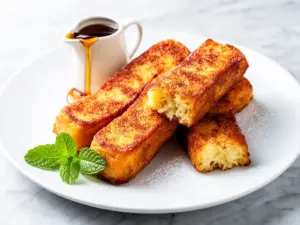
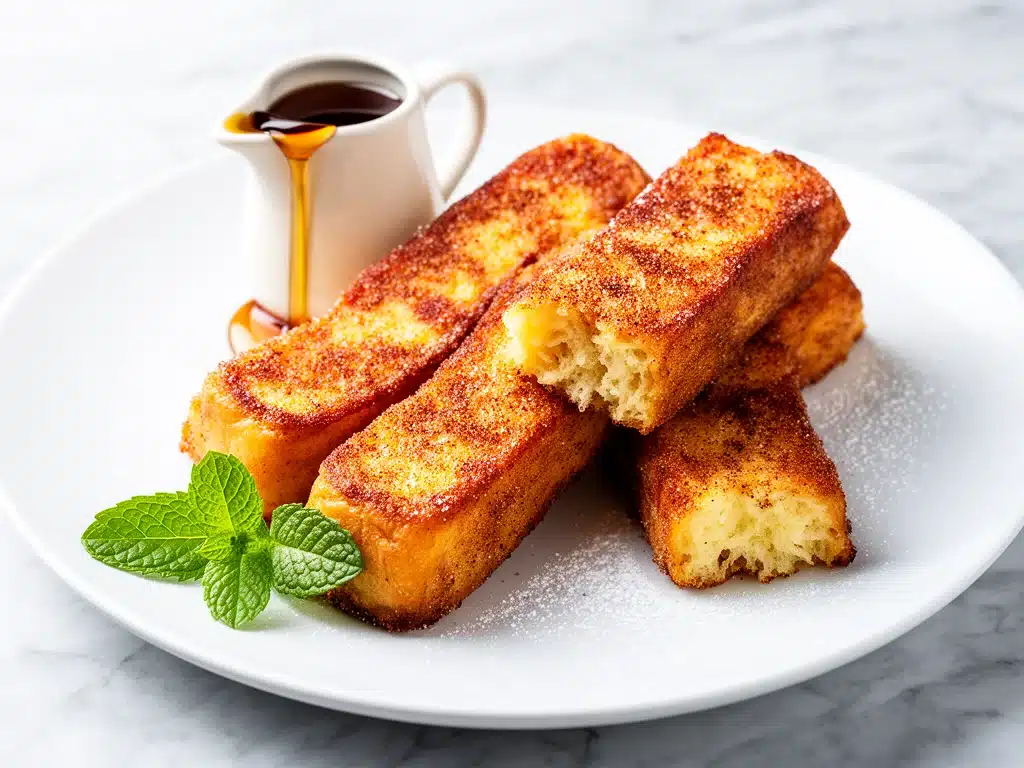
That’s when I remembered a trick from my college days: dipping thick slices of bread into a custard, frying them, and then cutting them into sticks. I tweaked it with extra cinnamon, added a bit of vanilla, and realized I had just stumbled onto the ultimate back-to-school hack. These Cinnamon French Toast Sticks are crispy on the outside, soft on the inside, and perfect for dipping into yogurt or just eating with your fingers while running out the door.
I’ve made these at least twenty times since that chaotic Tuesday. Some mornings, I make them for breakfast. Other mornings, I double the batch, let them cool, and pack them in airtight containers for school breakfasts or after-school snacks. They’re the kind of recipe that saves your sanity when the morning routine feels like a circus. If you’re looking for a way to start the school year with a little more joy (and a lot less stress), you’re going to want to make these on repeat.
Why You’ll Love This Back-to-School Recipe
Let’s be real: mornings during the school year are a grind. You’re trying to be a chauffeur, a lunch-packager, and a nutritionist all before 8 AM. This recipe works because it solves the biggest problem of back-to-school mornings: time. It’s also versatile enough to handle picky eaters and hungry teenagers alike. Here’s why these sticks have earned a permanent spot in our weekly rotation:
- Grab-and-Go Convenience — Unlike traditional french toast, these sticks don’t require a plate, a fork, or a table. You can wrap them in a napkin, toss them in a bag, and eat them in the car. I’ve had my kids eat these cold straight from the lunchbox, and they still taste amazing. It’s the perfect solution for those mornings when no one has time to sit down.
- Customizable for Any Diet — My oldest is gluten-sensitive, and my youngest is lactose intolerant. This recipe is easily adaptable. I use gluten-free bread for my son and oat milk for my daughter, and nobody notices the difference. The flavor profile is so strong that the substitutions don’t matter. It’s a win-win for the whole family.
- Make-Ahead Friendly — This is the game-changer. You can prep the batter and cut the bread the night before. In the morning, you just fry them up in five minutes. Or, you can make a huge batch, let them cool completely, and freeze them. I keep a bag of frozen sticks in the freezer for busy Tuesdays. Pop them in the toaster for two minutes, and they’re warm and ready to go.
- Kid-Approved Dipping** — The best part? The dipping. I serve them with warm maple syrup, but my kids also love dipping them into Greek yogurt with a drizzle of honey, or even apple butter. It turns breakfast into a little interactive experience, which means they actually eat without complaining.
- Smells Like Happiness** — There is nothing better than walking into the kitchen and smelling cinnamon and vanilla. It sets a positive tone for the day. Even on the worst mornings, that smell helps everyone calm down a little bit. It’s basically edible aromatherapy.
So basically, if you need a breakfast that is fast, flexible, and genuinely delicious, this is it. It’s not just a recipe; it’s a morning saver.
Ingredients You’ll Need
The beauty of these Cinnamon French Toast Sticks is how simple the ingredient list is. You probably have almost everything in your pantry right now. I’m particular about a few things here—not because they’re fancy, but because they make a huge difference in texture and flavor. Here’s exactly what you need and why.
For the Bread
Thick-cut white or brioche bread (1 loaf, sliced into 1-inch strips) — This is the foundation. You need bread that is sturdy enough to hold up to the batter but soft enough to be fluffy. Brioche is my absolute favorite because it’s rich and slightly sweet, but standard thick-cut white bread works perfectly too. Avoid thin sandwich bread—it’ll disintegrate. And definitely avoid sourdough or whole wheat if you want that classic, soft french toast texture. The crusts stay on for these; they add structure.
For the Custard Batter

Eggs (4 large) — I use large eggs. They provide the protein structure that helps the sticks hold their shape. If you’re making a big batch, you might need extra eggs, so have a backup ready.
Whole milk (1 cup / 240ml) — I use whole milk for richness. You can use 2% or even almond milk if you’re dairy-free, but whole milk gives that creamy, custard-like interior. If you’re using oat milk, choose an unflavored, creamy variety.
Heavy cream (¼ cup / 60ml) — This is the secret ingredient. It adds fat, which makes the inside tender and prevents the sticks from becoming dry. Don’t skip it if you can help it. It’s what makes them taste like a treat rather than a meal.
Vanilla extract (2 teaspoons) — Use real vanilla, not imitation. The flavor is much warmer and more complex. If you have vanilla bean paste, use that—it adds little specks and looks beautiful.
Cinnamon (2 teaspoons ground) — Yes, two full teaspoons. Cinnamon is the star here. Don’t be shy. If you want a spicier kick, you can add a pinch of nutmeg or allspice, but pure cinnamon is classic for a reason.
Sugar (2 tablespoons granulated) — Just a little bit in the batter helps caramelize the outside. It’s subtle, but it adds depth.
For Cooking
Butter (4 tablespoons unsalted) — I use butter for frying. It gives a nutty, rich flavor that oil can’t match. I mix butter with a little bit of oil (like canola or vegetable) to prevent burning, but pure butter works if you keep the heat low.
Extra cinnamon for dusting** — For the finishing touch, mix 1 tablespoon cinnamon with ½ cup sugar. This is what makes them taste like a cinnamon roll.
Equipment Needed
You don’t need fancy gadgets for this. Here’s what I actually use on my counter:
Large skillet or griddle — I use a 12-inch cast iron skillet. It holds heat evenly, which is crucial for consistent browning. A non-stick skillet works too, but you might need to use more butter to prevent sticking. If you have a large electric griddle, that’s even better because you can cook more sticks at once.
Shallow baking dish or pie plate — This is for the egg mixture. It needs to be wide enough to dip the bread strips without them overlapping too much. A 9×13 dish is perfect.
Whisk — For mixing the eggs and milk. A fork works, but a whisk incorporates the cream better and removes lumps.
Tongs or fork — For flipping the sticks. Tongs are easier because they grip the bread without crushing it.
Cooling rack — I place the cooked sticks on a wire rack set over a baking sheet. This keeps the bottoms from getting soggy. If you stack them on a plate immediately, they’ll steam and lose their crispness.
Freezer bags — For storing leftovers. Label them with the date so you know how fresh they are.
How to Make It: Step-by-Step
Alright, let’s get cooking! I’m walking you through exactly how I do it, including the little tricks I’ve picked up over the last few months of morning chaos.
Step 1: Prep Your Bread (5 minutes)
Before you turn on the stove, get your bread ready. Take your loaf of thick-cut bread and slice it into 1-inch strips. If the slices are already thick, you might just need to cut them in half lengthwise. Try to keep the strips uniform so they cook evenly. Place them on a plate or tray while you get the batter ready. I like to keep the crusts on—it adds a nice contrast to the soft interior.
Step 2: Whisk the Custard (2 minutes)
In your shallow baking dish, crack the eggs. Add the milk, heavy cream, vanilla extract, cinnamon, and sugar. Whisk everything together vigorously until the mixture is completely smooth and slightly frothy. You want to make sure there are no streaks of egg white left. Taste a tiny bit (if you’re brave) to check the cinnamon level. If you want it spicier, add a pinch more. Pour the mixture into the dish.
Step 3: Heat the Pan (3 minutes)
Place your skillet or griddle over medium heat. Add half the butter. Let it melt and foam slightly. You’ll know it’s ready when the butter stops sizzling loudly and just starts to shimmer. If the butter browns too quickly, your heat is too high. You want a gentle, steady heat.
Step 4: Dip the Sticks (10 minutes)
This is the most important step. Take a bread strip and dip it into the custard. Let it soak for about 10-15 seconds on each side. You want the bread to absorb the liquid, but not so much that it falls apart. If the bread is very thick, you might need to press it down gently with your fingers. Lift it out and let the excess drip off for a few seconds. Don’t rush this, or the inside will be dry. Place the dipped stick on a clean plate.
Step 5: Cook Until Golden (10-12 minutes)
Once you have a few sticks dipped, place them in the hot skillet. Don’t overcrowd the pan—cook in batches if you need to. The sticks should sizzle gently when they hit the butter. Cook for 2-3 minutes on the first side, until golden brown. Flip them over and cook for another 2-3 minutes on the other side. You want both sides to be a deep golden color. If they’re browning too fast, lower the heat. The inside needs time to cook through.
Step 6: Drain and Dust (5 minutes)
Transfer the cooked sticks to the cooling rack. While they’re still warm, toss them in the cinnamon-sugar mixture. I do this by putting the sugar mix in a small bowl and gently rolling the sticks around until they’re coated. The heat from the sticks helps the sugar stick. If you’re making a big batch, keep the cooked sticks warm in a 200°F oven while you finish the rest.
Step 7: Serve or Store
Serve immediately with maple syrup, yogurt, or fruit. If you’re packing them for school, let them cool completely first. Then, pack them in an airtight container with a sheet of parchment paper between layers. They’ll stay fresh for up to 3 days in the fridge.
Expert Tips & Tricks
Here’s everything I’ve learned from making these dozens of times. These tips will save you from my early mistakes.
Don’t Over-Soak the Bread — I used to soak the bread for 30 seconds, and the sticks fell apart in the pan. 10-15 seconds is the sweet spot. The bread should be saturated but still hold its shape.
Keep the Heat Medium — High heat burns the outside before the inside is cooked. Medium heat ensures a crispy exterior and a fluffy, custardy interior. Patience pays off.
Use a Cooling Rack — This is non-negotiable. If you stack hot sticks on a plate, the steam gets trapped and makes them soggy. The rack allows air to circulate, keeping them crisp.
Dust While Warm — The cinnamon-sugar mix sticks best when the sticks are warm. If they’re cold, the sugar will just slide off. Warm sticks = perfect coating.
Freeze for Later — These freeze beautifully. Once completely cooled, lay them on a baking sheet in the freezer for an hour to flash freeze. Then transfer them to a freezer bag. They’ll last for up to 2 months. Reheat in the toaster or oven for a fresh taste.
Variations & Substitutions
Once you’ve nailed the basic version, here’s how you can mix it up. I’ve tried all of these, and they all work.
Gluten-Free Version — Use gluten-free thick-cut bread. Brands like Schär or Udi’s work well. The batter might soak in slightly faster, so reduce the soaking time to 5-10 seconds. The flavor is the same, and my gluten-free son loves them.
Dairy-Free Version — Swap the milk and cream for oat milk or cashew milk. Use coconut oil or vegan butter for frying. The texture is slightly less rich, but still delicious. I use this version for my lactose-intolerant daughter.
Maple Cinnamon Sticks — Add 2 tablespoons of pure maple syrup to the egg mixture. It adds a deeper, more complex sweetness. Reduce the granulated sugar in the batter by half.
Orange Zest Twist — Add the zest of one orange to the egg mixture. It adds a bright, citrusy note that pairs beautifully with the cinnamon. Great for spring mornings.
Mini Muffin Tin Version — Instead of strips, dip small cubes of bread into the batter and bake them in a greased muffin tin at 375°F for 15 minutes. They turn out like little French toast bites. Great for toddlers.
Serving & Storage
These Cinnamon French Toast Sticks are versatile when it comes to serving. Here’s how I enjoy them:
How to Serve
I usually serve them straight from the pan, piled high on a platter. But for school breakfasts, I pack them in containers. Here are some dipping options:
- Warm Maple Syrup — The classic choice. Warm it up slightly for a better pour.
- Greek Yogurt — Thick, creamy yogurt with a drizzle of honey. Adds protein.
- Apple Butter — A seasonal favorite. It’s like eating a cinnamon roll.
- Peanut Butter — Melted peanut butter is a great protein boost for growing kids.
Storage Instructions
Refrigerator: Store in an airtight container for up to 3 days. They will firm up in the fridge, so reheat them to restore softness.
Reheating: The best way is in a toaster or toaster oven. It restores the crispness. If you’re using a microwave, heat in 30-second intervals, but they will get soft. For the best texture, always toast them.
Freezer: Freeze in a single layer, then transfer to a bag. They last for up to 2 months. No need to thaw—just pop them in the toaster from frozen.
Nutrition Information
I’m not a nutritionist, but here’s the breakdown if you’re tracking. This is per stick, based on a recipe that makes about 24 sticks.
- Calories: 110
- Protein: 3g
- Carbs: 15g
- Fat: 5g
- Sugar: 6g
- Fiber: 1g
It’s a treat, but not an indulgent one. The protein from the eggs and the fiber from the bread make it a balanced breakfast option. If you’re watching sugar, skip the cinnamon-sugar dusting or use a sugar substitute.
Final Thoughts
So that’s my go-to Cinnamon French Toast Sticks recipe! I’ve probably talked your ear off at this point, but when you make a recipe this often, you have a lot to say about it. This has saved our mornings more times than I can count. It’s my answer to “what’s for breakfast?” when I’m tired, don’t want to cook, and still want something that tastes really good.
Make it yours! Try different breads, swap in your favorite spices, or adjust the sweetness to your family’s taste. The best recipes are the ones you adapt to your life. If you make these, drop a comment and let me know what you think! I love hearing how recipes turn out in your kitchen. And if something doesn’t work, tell me that too—I’m here to help troubleshoot.
Happy cooking! And I hope your mornings feel a little less chaotic and a lot more delicious.
Frequently Asked Questions
Can I use stale bread?
Yes! Stale bread actually works better because it’s less moist and absorbs the custard without getting mushy. If your bread is fresh, you can leave the slices out on a counter for a few hours to dry them out slightly.
Why did my sticks fall apart in the pan?
This usually happens if you soak the bread too long or if the heat is too high. Make sure you’re dipping for only 10-15 seconds, and keep the heat at medium. Also, make sure your bread is thick enough—thin bread won’t hold up.
Can I make these ahead of time?
Absolutely. You can prep the batter and cut the bread the night before. Just keep the batter covered in the fridge and the bread on a plate. In the morning, you can dip and cook them quickly. Or, cook them fully, let them cool, and freeze them for later.
How do I reheat frozen sticks?
The best way is to pop them in the toaster or toaster oven from frozen. They’ll be warm and crispy in about 3-4 minutes. If you’re using a microwave, they’ll be soft, so I don’t recommend it if you want that crisp texture.
Can I use almond milk instead of regular milk?
Yes, you can. Almond milk works well, but it’s thinner than cow’s milk, so the custard might be slightly less rich. I recommend using an unsweetened, creamy variety. Oat milk is also a great substitute because it’s thicker and closer to whole milk.
What’s the best way to store leftovers?
Let them cool completely on a rack, then store them in an airtight container in the fridge for up to 3 days. For longer storage, freeze them in a freezer bag. They reheat beautifully in the toaster.
Pin This Recipe!


Cinnamon French Toast Sticks: Easy Back-to-School Recipe
- Total Time: 15-17 minutes
- Yield: 24 servings 1x
Description
Crispy on the outside and soft on the inside, these Cinnamon French Toast Sticks are a grab-and-go breakfast hack perfect for busy school mornings. They are customizable for various diets and can be made ahead and frozen for convenience.
Ingredients
- 1 loaf thick-cut white or brioche bread, sliced into 1-inch strips
- 4 large eggs
- 1 cup whole milk
- ¼ cup heavy cream
- 2 teaspoons vanilla extract
- 2 teaspoons ground cinnamon
- 2 tablespoons granulated sugar
- 4 tablespoons unsalted butter (for frying)
- 1 tablespoon cinnamon (for dusting)
- ½ cup sugar (for dusting)
Instructions
- Slice the thick-cut bread into 1-inch strips, keeping the crusts on for structure.
- In a shallow baking dish, whisk together eggs, milk, heavy cream, vanilla extract, 2 teaspoons cinnamon, and 2 tablespoons granulated sugar until smooth and frothy.
- Heat a large skillet or griddle over medium heat and add half the butter, letting it melt and shimmer.
- Dip each bread strip into the custard mixture for 10-15 seconds per side, allowing excess to drip off.
- Place dipped sticks in the hot skillet, cooking in batches to avoid overcrowding. Cook for 2-3 minutes per side until golden brown.
- Transfer cooked sticks to a cooling rack set over a baking sheet to prevent sogginess.
- While still warm, toss the sticks in a mixture of 1 tablespoon cinnamon and ½ cup sugar until coated.
- Serve immediately with maple syrup, yogurt, or fruit, or cool completely for storage.
Notes
Do not over-soak the bread (10-15 seconds is the sweet spot) to prevent falling apart. Keep heat at medium to ensure the inside cooks through without burning the outside. Use a cooling rack to maintain crispness. These can be frozen for up to 2 months and reheated in a toaster.
- Prep Time: 5 minutes
- Cook Time: 10-12 minutes
- Category: Breakfast
- Cuisine: American
Nutrition
- Serving Size: 1 stick
- Calories: 110
- Sugar: 6
- Sodium: 120
- Fat: 5
- Saturated Fat: 2.5
- Carbohydrates: 15
- Fiber: 1
- Protein: 3
Keywords: back-to-school, breakfast, french toast sticks, cinnamon sugar, grab-and-go, kid-friendly, make-ahead, freezer-friendly