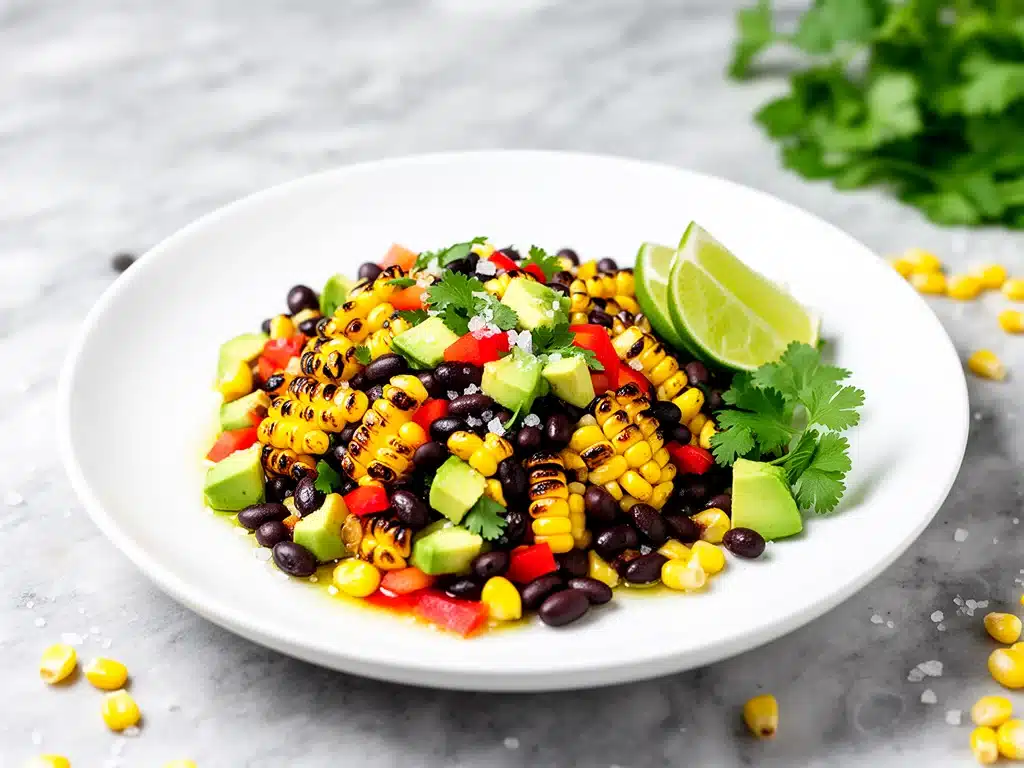
Last year, I walked into my neighbor’s Labor Day cookout feeling smug. I’d brought a “fancy” quinoa salad with roasted beets and candied walnuts. It was beautiful. It was healthy. It was sitting in a Tupperware container, untouched, while everyone else devoured the third platter of burgers.
Meanwhile, the bowl of grilled corn and black bean salad I’d thrown together in ten minutes? Gone in twelve minutes flat. People were scraping the bottom of the bowl with their tortilla chips. My friend Sarah literally asked me for the recipe while wiping salsa off her chin.
Here’s the thing about Labor Day cookouts: nobody wants another leafy green salad that wilts in the sun. They want something with texture. Something with a little kick. Something that tastes like summer but doesn’t require standing over a hot stove for an hour.
This grilled corn and black bean salad has become my non-negotiable Labor Day staple. I’ve made it for my family reunion, my office picnic, and three different backyard barbecues this summer. It’s the kind of side dish that disappears so fast you’ll need to make two batches. And the best part? It’s genuinely simple. You don’t need ten exotic ingredients or a degree in culinary arts. Just corn, beans, and a few pantry staples.
I’m not going to lie to you—I used to think canned black beans were a cheat. I thought I had to dry-soak them overnight. But after years of trial and error, I’ve learned that rinsed canned beans are perfect here. They hold their shape, they absorb the dressing, and they save you hours. This is the kind of honest, no-fuss cooking that actually works when you’re managing a grill, keeping drinks cold, and trying not to burn the hot dogs.
Why You’ll Love This Labor Day Side Dish
There are about a dozen reasons I keep making this grilled corn and black bean salad, but if I had to narrow it down to the big ones, here’s what keeps it in my regular rotation:
It Actually Gets Better — Most salads taste best the second they’re made. This one? It improves. I’ve found that letting it sit in the fridge for an hour (or overnight) lets the flavors marry. The corn gets sweeter, the beans get creamier, and the lime dressing penetrates everything. It’s the ultimate make-ahead dish.
Zero Cooking Stress — If you’re grilling burgers or ribs, you don’t need another dish requiring constant attention. This salad is either made with fresh corn off the cob (grilled quickly alongside your main protein) or frozen corn (which is basically pre-grilled). Either way, you’re tossing it in a bowl while you finish up the meat. It’s that easy.
Texture Heaven — I’m obsessed with contrasting textures. You’ve got the pop of juicy corn, the creamy bite of black beans, the crunch of red onion, and the crispness of cilantro. It’s not mushy. It’s not sad. Every spoonful has something different to offer.
Perfectly Portable — Cookout salads have a reputation for leaking or spilling in the car. This one is sturdy. It travels well in a lidded container. It doesn’t get watery. It doesn’t slide around. It just sits there, looking delicious and ready to be scooped.
Vegetarian-Friendly Crowd Pleaser — I’ve served this to meat-lovers who swear they “don’t eat salad.” They’ll eat this. I’ve also served it to my vegetarian cousin, who was thrilled to find a substantial side that didn’t rely on cheese or heavy dressings. It works for everyone.
Under $10 to Make — If you buy fresh corn and a can of beans, you’re looking at maybe $8 total. That feeds a crowd. That’s less than the cost of the burger buns. It’s budget-smart without feeling cheap.
This is my go-to when I need a side that feels festive but requires zero effort. No complicated techniques, no weird ingredients, just reliable, delicious food that makes everyone happy.
Ingredients You’ll Need
Here’s the best part: you probably have most of this already. I’m particular about three ingredients here, and I’ll tell you exactly why.
For the Base
Corn (4 cups / about 6 ears of fresh corn or 32oz frozen corn) — This is the star. If you’re using fresh corn, I recommend grilling it first (more on that below). It adds a smoky depth that canned corn just can’t match. Frozen corn works perfectly fine in a pinch—just thaw it. I’ve used both, and honestly, the flavor difference is noticeable but not deal-breaking.
Black beans (2 cans, 15oz each / about 450g drained weight) — Rinse and drain them well. This removes the starchy liquid that can make the salad slimy. I use the standard canned kind. I know some people swear by dry beans, but for a quick cookout side, canned is your friend. I like the brand Goya, but any brand works.
Red onion (1 medium, finely diced / about 150g) — Raw red onion adds a nice crunch and sharp bite that cuts through the richness of the dressing. If you’re sensitive to raw onion, soak the diced pieces in ice water for 10 minutes first. It tones down the bite significantly. I don’t do this, but my husband appreciates it.
For the Flavor
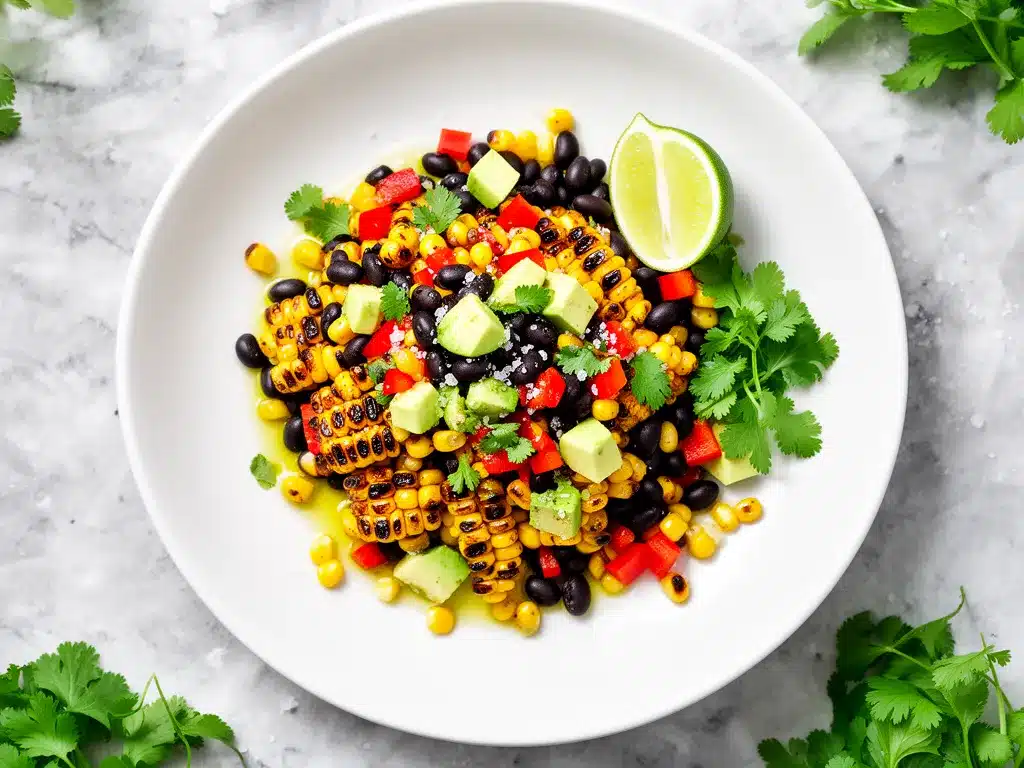
Jalapeño (1 medium, seeded and minced / about 1 tablespoon) — This is where the heat lives. I usually remove the seeds and ribs to keep it mild. If you like it spicy, leave some seeds in. Fresh is best here. Dried flakes don’t give you that same fresh, bright heat.
Fresh cilantro (½ cup, chopped / about 30g) — Don’t skip this. Cilantro makes the salad taste like summer. If you’re one of those people who thinks cilantro tastes like soap, you can substitute with fresh parsley or basil. It won’t be the same, but it’ll still be good. I’ve tried it. I still prefer cilantro.
Lime (2-3 limes / about 60ml juice) — Fresh squeezed only. Bottled lime juice tastes metallic and flat. Squeeze your own. It’s easier than you think, and the difference is huge. I usually get about 3 tablespoons from two medium limes.
Extra virgin olive oil (3 tablespoons / 45ml) — Use a decent quality here. You’re tasting it. I keep a bottle of Bertolli or Caloona on hand for everyday cooking. It’s not fancy, but it works.
Cumin (1 teaspoon / about 2g) — Ground cumin adds that warm, earthy note that ties the Mexican-inspired flavors together. Don’t use old cumin. If your jar has been sitting since 2019, toss it. Fresh cumin smells amazing. Old cumin smells like dust.
Garlic powder (½ teaspoon / about 1g) — I use garlic powder here, not fresh garlic. Fresh garlic can get overpowering in a cold salad, and the powder distributes more evenly. It’s a subtle flavor, but it adds depth.
Salt (to taste, usually 1-1½ teaspoons) — Taste as you go. The beans and cheese (if you add it) will add salt, so start with less and add more at the end.
Optional Add-ins
Avocado (1 large, diced) — Adds creaminess and healthy fats. I add this right before serving so it doesn’t brown. If you’re meal prepping, leave it out.
Feta or Cotija cheese (½ cup, crumbled) — Salty, crumbly cheese is amazing here. Feta is easier to find; Cotija is more traditional. Both work. I like the saltiness it adds.
Cherry tomatoes (1 cup, halved) — Adds sweetness and color. I throw these in whenever I have them. They make the salad look more vibrant.
Equipment Needed
You don’t need fancy equipment for this. Here’s what I actually use.
Large mixing bowl — I use a 6-quart stainless steel bowl. It needs to be big enough to toss everything without spilling. My ancient glass bowl from college still works fine, but steel is easier to clean.
Colander — For rinsing the black beans. Or just use the sink strainer—I do this when I’m lazy.
Knife and cutting board — For chopping corn, onion, and jalapeño. Sharp knives make this way faster. Dull knives make you cry more—learned this the hard way with onions.
Grill or skillet — If you’re using fresh corn, you’ll need a grill or a cast iron skillet to char it. I prefer the grill for that smoky flavor, but a skillet works in a pinch.
Measuring spoons — Pretty standard stuff. Dollar store versions work fine.
Wooden spoon or spatula — For tossing the salad. Silicone works too. Don’t use metal if you’re using a non-stick bowl (which you shouldn’t be).
Microplane or zester — Optional, but nice for getting lime zest. I love the burst of citrus flavor from the zest. If you don’t have one, just skip it. The juice is enough.
Tool Tips:
- Don’t have a grill? Any big skillet works—doesn’t need to be fancy. Or use frozen corn.
- I’m obsessed with my microplane from IKEA—it’s like $3 and makes life easier for zesting limes.
How to Make It: Step-by-Step
Alright, let’s make this! I’m walking you through exactly how I do it, including the little tricks I’ve picked up.
Step 1: Prep Your Corn (10-15 minutes)
If you’re using fresh corn, this is the most important step. Peel back the husks and remove the silk. I know, it’s tedious. But it’s worth it. You can grill the corn in the husk (soaked in water first) for easier peeling, but I prefer to peel it fully for even charring.
Heat your grill to medium-high heat (about 400°F / 200°C). Place the corn directly on the grates. Grill for 10-12 minutes, turning every 2-3 minutes, until the kernels are tender and charred in spots. You want those blackened bits—they add flavor. Let the corn cool for 5 minutes, then use a sharp knife to cut the kernels off the cob. You should get about 4 cups of kernels. If you’re using frozen corn, just thaw it under warm water and drain well.
Step 2: Prep the Vegetables (5 minutes)
While the corn cools, dice the red onion finely. If you’re sensitive to raw onion, soak it in ice water for 10 minutes and drain. Mince the jalapeño, removing seeds if you want less heat. Chop the cilantro. It’s okay if the pieces are uneven—this is a rustic salad, not a precision dish.
Step 3: Rinse and Drain the Beans (2 minutes)
Open the cans of black beans and pour them into a colander. Rinse them under cold water until the bubbles stop. Shake the colander vigorously to remove excess water. This step is crucial. Wet beans = watery salad. You want them dry so the dressing clings to them.
Step 4: Make the Dressing (2 minutes)
In a small bowl or jar, whisk together the olive oil, lime juice, lime zest (if using), cumin, garlic powder, and salt. Whisk until emulsified—the oil and lime juice should blend into a cloudy, creamy-looking liquid. Taste it. It should be bright and tangy. If it needs more acid, add more lime. If it needs more salt, add a pinch.
Step 5: Toss It All Together (3 minutes)
In your large mixing bowl, combine the corn kernels, black beans, red onion, jalapeño, and cilantro. Pour the dressing over the top. Toss gently but thoroughly until everything is coated. The goal is even distribution. Every bean and kernel should have a bit of dressing on it.
Step 6: Chill and Serve
Let the salad sit in the fridge for at least 30 minutes before serving. This allows the flavors to meld. If you’re making it ahead, you can let it chill for up to 24 hours. Stir it again before serving. Taste and adjust salt if needed. Top with avocado or cheese if using. Serve cold or at room temperature.
Total Time: About 30 minutes (10 minutes active, 20 minutes mostly hands-off, plus chilling time)
Built-in Troubleshooting:
- Salsa too watery? You didn’t drain the beans well enough, or you added too much lime juice. Let it sit uncovered in the fridge for 15 minutes to evaporate excess moisture.
- Not enough flavor? It probably needs more salt or lime. Cold food tastes less flavorful than warm food, so season a bit more than you think you need.
- Avocado is brown? You added it too early. Dice avocados right before serving, or toss them in a little lime juice to slow browning.
Expert Tips & Tricks
Here’s everything I’ve learned from making this dozens of times. These tips will save you from my mistakes.
Grill the Corn
This is the #1 tip. Charred corn tastes like a completely different vegetable than boiled corn. The smokiness pairs perfectly with the cumin and lime. I’ve made this with boiled corn, and it’s fine. But grilled? It’s magic. Now I always grill the corn, even if I have to fire up the grill in the middle of the kitchen for a quick pan-sear.
Don’t Skimp on Lime Zest
The juice gives you acid, but the zest gives you aroma. That essential oil in the peel is what makes the salad smell amazing. Use a microplane to get just the green part—avoid the white pith, which is bitter. It takes 30 seconds and makes a huge difference.
Rinse Until Bubbles Stop
I used to rinse beans for 10 seconds. Big mistake. The starchy liquid from canned beans can make the salad slimy. Rinse until the water runs clear and no bubbles form. It’s a small step that prevents a big problem.
Let It Rest
I know you want to eat it now. But let it sit for 30 minutes. The beans absorb the dressing, the corn gets a little more tender, and the flavors blend. It’s not just a suggestion—it’s necessary. I’ve rushed it, and the result was disjointed and bland.
Common Mistakes (and how to avoid them):
- Mistake: Salad is too dry Fix: Add more lime juice or olive oil, a tablespoon at a time. Toss well.
- Mistake: Too spicy Fix: Add more corn or beans to dilute the heat. Or stir in a dollop of sour cream or Greek yogurt.
- Mistake: Onion is too strong Fix: Soak diced onion in ice water for 10 minutes. Drain well before adding.
Pro Tricks I’ve Learned:
- For Extra Flavor Toast the cumin in a dry pan for 30 seconds before adding it to the dressing. It releases more oils and makes the spice taste nuttier.
- For Better Texture Add a handful of crushed tortilla chips right before serving. Adds crunch and makes it feel more like a dip spread.
- Make-Ahead Strategy Make the salad up to 24 hours ahead. Store in the fridge. Stir before serving. It tastes better the next day.
Variations & Substitutions
Once you’ve nailed the basic version, here’s how you can mix it up. I’ve tried all of these.
Southwest Chicken Version
Add 2 cups diced cooked chicken (rotisserie works great) when you toss the salad. My husband prefers this version—makes it more filling. I also add a can of drained corn for extra bulk.
Veggie-Loaded
Toss in 1 cup halved cherry tomatoes and 1 diced avocado in the last minute. The tomatoes add sweetness and the avocado adds creaminess. This is how I get my kids to eat vegetables. They don’t even notice.
Cilantro-Lime Rice Bowl Base
Mix in 2 cups of cooked cilantro-lime rice. This turns the salad into a grain bowl. I make this for meal prep lunches. It keeps well in the fridge for 3 days.
Spicy Salsa Version
Stir in ½ cup of your favorite salsa. This adds moisture and complexity. I use a mild tomato salsa, but a tomatillo salsa works too. Just reduce the lime juice slightly since the salsa has acid.
Dietary Modifications:
- Gluten-Free This is naturally gluten-free. Just check your cumin and garlic powder labels to be sure. I use McCormick, which is GF.
- Dairy-Free This is naturally dairy-free. Skip the cheese topping.
- Lower-Sodium Use no-salt-added beans and reduce the salt in the dressing. I use low-sodium broth if I’m adding liquid, but this recipe doesn’t need broth.
- Vegan This is naturally vegan. Skip the cheese or use a vegan cheese alternative.
Different Proteins:
- Shrimp (add 1lb cooked shrimp in step 5)
- Chorizo (crumble 4oz cooked chorizo on top for spice)
- Bacon (cook crispy, crumble on top for smokiness)
- White beans (substitute black beans with cannellini beans for a milder flavor)
Serving & Storage
How to Serve:
I usually serve this straight from the bowl at the dinner table—it looks rustic and stays cool. But here are other ways I’ve enjoyed it:
Side Dishes:
- Grilled burgers or sausages (obviously)
- Tacos or quesadillas (it’s the perfect topping)
- Grilled fish (the lime cuts through the fishiness)
- Crispy garlic chicken (I’ve paired this salad with my easy baked mozzarella pizza pockets for a fun, casual meal)
Toppings Bar:
When I have guests, I put out: extra lime wedges, red pepper flakes, crumbled queso fresco, and tortilla chips. Everyone customizes their bowl.
Wine Pairing:
Not a wine expert, but my wine-snob friend says a crisp Sauvignon Blanc or a light Pinot Grigio works great with this. It’s refreshing and complements the lime.
Storage Instructions:
Refrigerator:
Store in an airtight container for up to 4 days. The salad will hold up well. It might release a little liquid, which is normal. Just stir it before serving.
Reheating:
Don’t reheat this. It’s a cold salad. Heating it will make the corn mushy and the beans soggy. Eat it cold or at room temperature.
Freezing:
Honestly, this doesn’t freeze well because of the raw onion and avocado (if added). The texture changes. Make it fresh or store in the fridge for up to 4 days.
Meal Prep:
Make the salad on Sunday, store in the fridge. It’s perfect for lunch throughout the week. I pack it in a container with a fork. It’s better than any cafeteria salad. I’ve also paired this with my back-to-school chicken Caesar wraps for a balanced week of lunches.
Pro tip: If the salad looks dry after sitting in the fridge, stir in a teaspoon of lime juice and a splash of olive oil. Brings it back to life.
Nutrition Information
I’m not a nutritionist, but here’s the breakdown if you’re tracking.
Per Serving (based on 8 servings):
| Nutrient | Amount |
|---|---|
| Calories | 180 |
| Protein | 7g |
| Carbs | 28g |
| Fiber | 8g |
| Sugar | 6g |
| Fat | 6g |
| Sodium | 350mg |
What’s Good:
- High in fiber from beans and corn
- Good source of plant-based protein
- Rich in vitamins A and C from the vegetables
- Low in saturated fat
What to Know:
- Contains sodium from beans (use low-sodium to reduce)
- Contains corn (natural sugars, but balanced by fiber)
- Can add cheese for more calcium and protein
My Take:
Look, this is a vegetable-heavy salad with healthy fats. It’s not diet food, but it’s way better than chips and dip. It’s filling, nutritious, and tastes amazing. When I want to make it lighter, I skip the cheese and use less oil. But usually? I just eat a reasonable portion and enjoy it.
Dietary Notes:
- Contains: none (naturally gluten-free and dairy-free)
- Can be made: vegan, vegetarian, gluten-free
- Not suitable for: low-sodium (if using canned beans without rinsing)
Final Thoughts
So that’s my go-to grilled corn and black bean salad! I’ve probably talked your ear off at this point, but when you make a recipe this often, you have a lot to say about it.
This has saved Labor Day cookouts more times than I can count. It’s my answer to “what’s for dinner” when I’m tired, don’t want takeout, and still want something that tastes really good. My kids are happy, my husband’s happy, and I’m happy because I’m not stressed about cooking.
Make it yours! Try different add-ins, swap in your favorite vegetables, adjust the heat (though more jalapeño is always better in my opinion). The best recipes are the ones you adapt to your family’s tastes.
If you make this, drop a comment and let me know what you think! I love hearing how recipes turn out in your kitchen. And if something doesn’t work, tell me that too—I’m here to help troubleshoot.
Happy cooking! And I hope your kitchen smells half as good as mine does right now.
Frequently Asked Questions
Q: Can I use frozen corn instead of fresh?
A: Absolutely. In fact, I use frozen corn half the time. It’s already shucked and cleaned. Just thaw it under warm water and drain well. It won’t have the charred flavor, but it’s still delicious and saves time. I’ve made this with frozen corn and fresh corn, and both are great.
Q: Can I make this ahead of time?
A: Yes! This salad actually tastes better the next day. Make it up to 24 hours ahead and store in the fridge. Stir before serving. If you’re adding avocado, add it right before serving so it doesn’t brown.
Q: Why did my salad turn out watery?
A: Usually means you didn’t drain the beans well enough, or you added too much lime juice. Rinse the beans until no bubbles form. Let the salad sit uncovered in the fridge for 15 minutes to evaporate excess moisture. Also, fresh corn releases water as it sits. That’s normal.
Q: Can I substitute black beans with another bean?
A: Sure! Kidney beans, pinto beans, or cannellini beans all work. I’ve used pinto beans, and they’re creamier. Kidney beans are a bit firmer. Just rinse and drain them the same way. The flavor will be slightly different, but still good.
Q: How do I store leftovers?
A: Store in an airtight container in the fridge for up to 4 days. The salad will hold up well. It might release a little liquid, which is normal. Just stir it before serving. Don’t freeze it—the texture of the raw vegetables will suffer.
Q: Can I add cheese?
A: Yes! Crumbled queso fresco, feta, or cotija are all amazing. Add it right before serving so it doesn’t melt into the salad. I like the salty contrast it adds.
Q: Is this salad good for meal prep?
A: Yes, it’s perfect for meal prep. It keeps well in the fridge for 3-4 days. I pack it in containers for lunch. It’s better than any cafeteria salad. I’ve also paired this with my back-to-school fruit and cheese snack boxes for a balanced week of lunches.
Pin This Recipe!
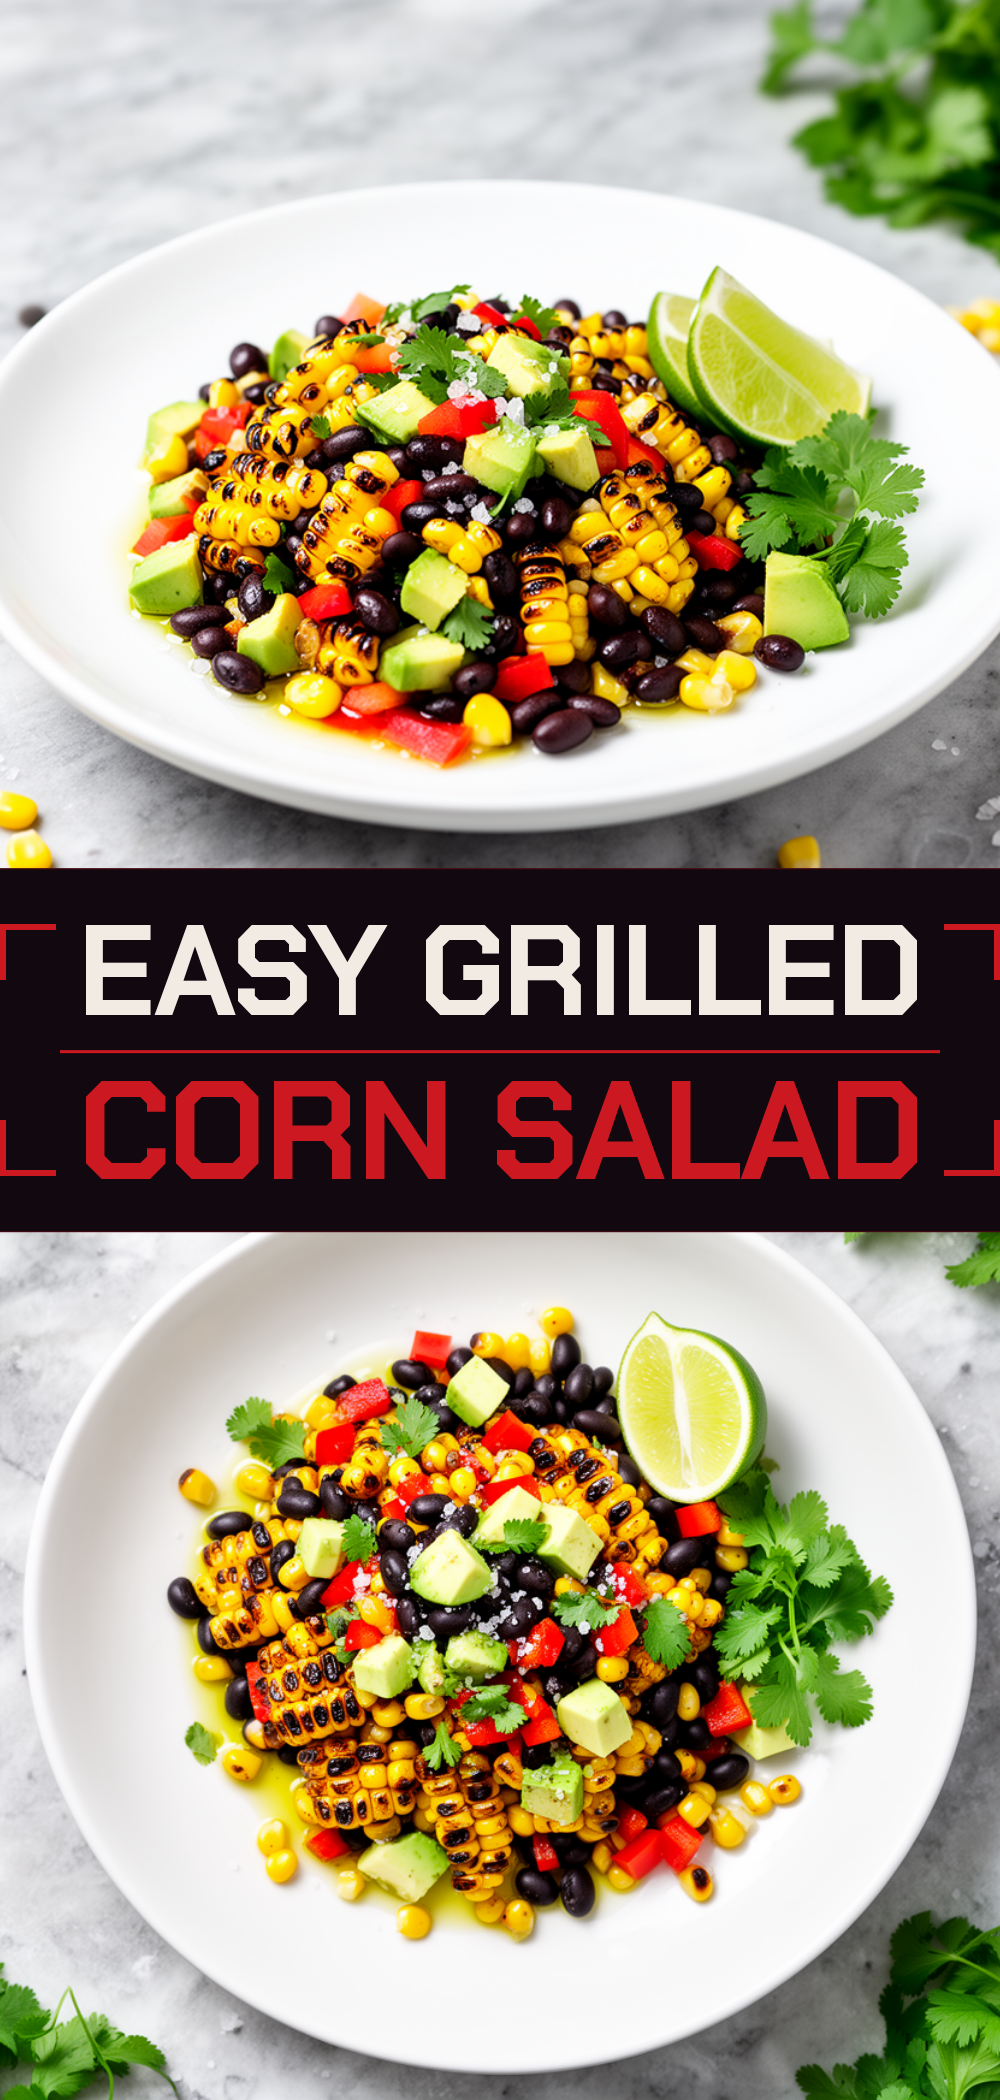
Grilled Corn and Black Bean Salad: Best 3-Ingredient Labor Day Side
- Total Time: 30 minutes
- Yield: 8 servings 1x
Description
A simple, vegetarian-friendly side dish featuring charred corn, black beans, and a zesty lime-cumin dressing. This make-ahead salad is perfect for cookouts and improves in flavor after chilling.
Ingredients
- 4 cups corn kernels (from about 6 ears of fresh grilled corn or 32oz frozen corn)
- 2 cans (15oz each) black beans, drained and rinsed well
- 1 medium red onion, finely diced
- 1 medium jalapeño, seeded and minced
- ½ cup fresh cilantro, chopped
- 2–3 limes, juiced (about 60ml)
- 3 tablespoons extra virgin olive oil
- 1 teaspoon ground cumin
- ½ teaspoon garlic powder
- 1–1½ teaspoons salt, to taste
- Optional: 1 large avocado, diced
- Optional: ½ cup feta or cotija cheese, crumbled
- Optional: 1 cup cherry tomatoes, halved
Instructions
- Prep the corn: If using fresh corn, peel husks and silk. Grill over medium-high heat (400°F/200°C) for 10-12 minutes, turning every 2-3 minutes until charred. Let cool for 5 minutes, then cut kernels off the cob. If using frozen corn, thaw under warm water and drain well.
- Prep the vegetables: While corn cools, dice the red onion. If sensitive to raw onion, soak in ice water for 10 minutes and drain. Mince the jalapeño and chop the cilantro.
- Rinse and drain the beans: Pour canned black beans into a colander and rinse under cold water until bubbles stop. Shake vigorously to remove excess water.
- Make the dressing: In a small bowl, whisk together olive oil, lime juice, lime zest (if using), cumin, garlic powder, and salt until emulsified. Taste and adjust seasoning.
- Toss together: In a large mixing bowl, combine corn, black beans, red onion, jalapeño, and cilantro. Pour dressing over the top and toss gently but thoroughly to coat evenly.
- Chill and serve: Let the salad sit in the fridge for at least 30 minutes to allow flavors to meld. Stir before serving. Add optional avocado or cheese just before serving. Serve cold or at room temperature.
Notes
[‘Rinsing beans until bubbles stop is crucial to prevent a slimy texture.’, ‘The salad tastes better after chilling for 30 minutes to 24 hours.’, ‘Add avocado right before serving to prevent browning.’, ‘Fresh lime juice and zest are preferred over bottled juice for better flavor.’, ‘Do not freeze this salad as the texture of raw vegetables will suffer.’]
- Prep Time: 15 minutes
- Cook Time: 15 minutes
- Category: Side Dish
- Cuisine: Mexican
Nutrition
- Serving Size: 1 cup
- Calories: 180
- Sugar: 6
- Sodium: 350
- Fat: 6
- Saturated Fat: 1
- Carbohydrates: 28
- Fiber: 8
- Protein: 7
Keywords: grilled corn salad, black bean salad, labor day side dish, vegetarian side, summer salad, make ahead salad, mexican inspired salad, healthy side dish



