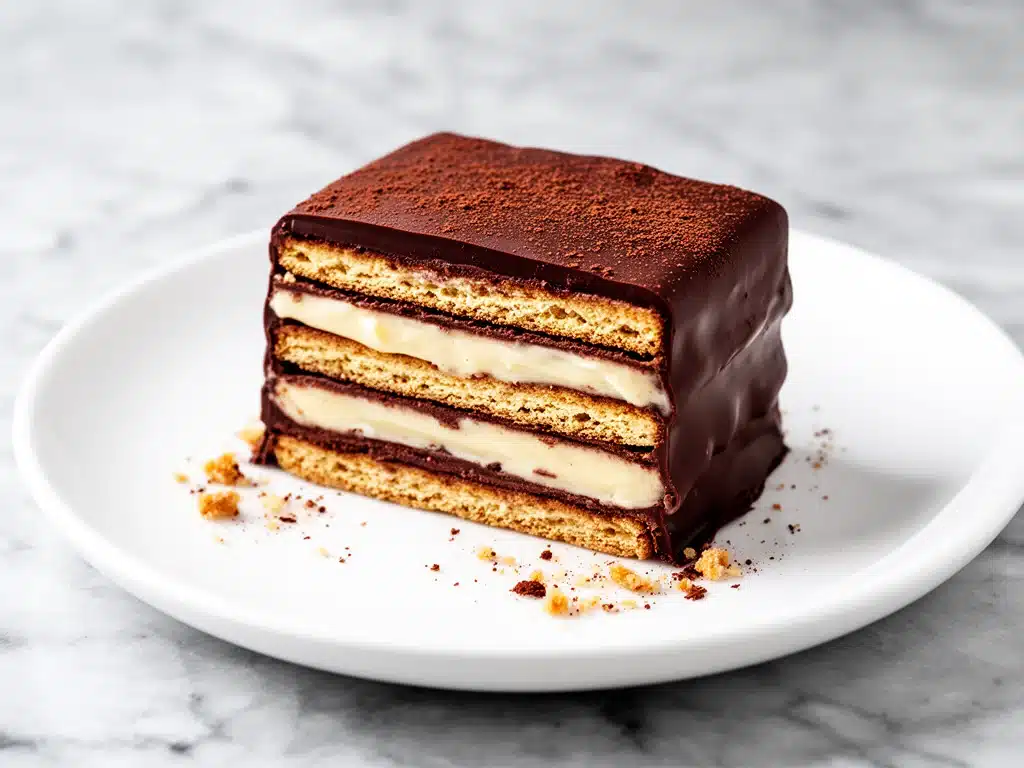
It was last July, and I was standing in my kitchen sweating through a cotton shirt, staring at a kitchen that felt more like an oven than a workspace. My family was coming over in two hours for a backyard barbecue, and I had promised—somewhat ambitiously—that I’d bring “that chocolate cake thing” everyone loves. The problem? I had zero oven space. The grill was smoking, the patio was full, and my small apartment kitchen was barely holding together as it was. I didn’t want to stand over a hot stove for an hour, and I definitely didn’t want to turn my tiny home into a sauna just to bake a dessert.
So I did what any desperate, heat-averse cook does: I looked in the pantry. I had boxes of chocolate wafers, a tub of cool whip, some instant pudding mix, and a gallon of milk. It sounded ridiculous. It sounded like a kid’s snack, not a show-stopping dessert for a summer gathering. But hunger and heatstroke are powerful motivators, so I threw it together. I layered the cookies, poured the pudding, and tossed it in the fridge. Two hours later, when my family arrived, I pulled it out. It was cool, creamy, and had that distinct, crisp-yet-soft texture that makes you close your eyes when you take a bite.
My husband took one bite and said, “This is better than the bakery ones.” My kids ate three pieces each. My sister asked for the recipe before she even sat down. That was the moment I realized that sometimes, the best recipes aren’t the ones that require five hours of labor and a degree in pastry arts. Sometimes, they’re the ones that let you enjoy the summer while the dessert makes itself. This homemade chocolate eclair cake has been my lifeline for every BBQ, potluck, and hot weekend since. It’s no-bake, it’s incredibly simple, and it tastes like pure comfort.
I’ve made this chocolate eclair cake for summer gatherings at least a dozen times since that sweaty afternoon. I’ve tweaked the layers, tested different cookies, and even tried making it with coffee instead of milk (more on that later). But the core simplicity remains. It’s five ingredients, zero oven, and maximum flavor. If you’re looking for a dessert that doesn’t require turning on the oven and still impresses everyone at the table, you need to try this.
Why You’ll Love This 5-Ingredient Summer Dessert
There are about ten reasons I keep making this chocolate eclair cake, but let’s be honest—you’re probably looking for the ones that matter most right now. Here’s why this recipe has earned a permanent spot in my summer rotation.
Zero Oven Required — Seriously. I mean it. If you are cooking in the summer and you turn on your oven, I’m going to judge you. This cake lives entirely in the fridge. It’s perfect for hot days when you don’t want to heat up the house. I’ve made this during heatwaves when the thermostat was stuck at 85 degrees, and it was a lifesaver.
Stupid Simple Ingredients — You probably have everything you need right now. Chocolate wafer cookies, instant chocolate pudding, cool whip (or whipped cream), and milk. That’s it. Five ingredients. No weird baking soda ratios, no tempering chocolate, no fancy equipment. If you can layer cookies and pour liquid, you can make this.
Make-Ahead Magic — This is the ultimate stress-buster for entertaining. You can assemble this cake the morning of your party, or even the night before. It needs time to set anyway, so the earlier you make it, the better it gets. I love that I can finish all the cooking and cleaning hours before my guests arrive, then just pull this out and look like a hero.
Texture Nirvana — People are always confused by the texture. Is it a cake? Is it a trifle? It’s both. The cookies soften into a cake-like layer, the pudding becomes a rich custard, and the whipped topping adds that airy lightness. It’s crunchy, creamy, soft, and rich all in one bite. It’s addictive.
Crowd-Pleasing Flavor — This tastes like a dessert from a high-end bakery but costs a fraction of the price. It’s sweet, chocolatey, and cool. It’s the kind of dessert that disappears fast. I’ve served this to picky eaters, chocolate lovers, and people who claim they “don’t like cake,” and everyone asks for seconds.
This is my go-to when I want to look like I put in effort but actually didn’t break a sweat. No complicated techniques, no weird ingredients, just reliable, delicious food that makes everyone happy.
Ingredients You’ll Need
Here’s the best part: you probably have most of this already. This recipe relies on pantry staples and fridge basics. I’m particular about three things here, but don’t worry, substitutions are easy.
Chocolate Wafer Cookies (1 box, usually 14.3 oz / 405g) — This is your base. Nilla Wafers are the classic choice, and they work perfectly. Some people use chocolate chip cookies (like Chips Ahoy!), but I find they get too soft and mushy. The Nilla Wafers hold their structure just enough to give you that nice texture contrast. Don’t use ginger snaps or anything too spiced; you want a neutral, sweet base.
Instant Chocolate Pudding Mix (2 boxes, 3.4 oz each / 96g total) — Yes, the dry mix. Do not use the “instant” cups with milk in them; we need the powder to thicken the milk. Look for the boxes that say “Instant” on the front. Brands like Jell-O or generic store brands work fine. I’ve tried both, and honestly, the difference is negligible for this recipe. Just make sure they are chocolate flavor.
Milk (3 cups / 720ml) — Whole milk is best for richness. 2% works okay, but skim milk will make the pudding a bit thinner. If you want a coffee kick (highly recommended), swap half the milk for strong brewed coffee or cold brew. This enhances the chocolate flavor without making it taste like coffee. I usually do a 50/50 split.
Whipped Topping (1 large tub, 8 oz / 227g, thawed) — Cool Whip is the traditional choice. It’s easy, stable, and keeps well in the fridge. However, if you want to feel fancy, you can whip up your own heavy cream with a tablespoon of sugar and a teaspoon of vanilla. Homemade whipped cream is lighter and tastier, but it doesn’t hold up quite as well overnight. For a summer gathering where it sits out for an hour, Cool Whip is the safer bet.
Chocolate Syrup or Hot Fudge (Optional, for drizzling) — I usually buy a bottle of Hershey’s syrup or make a quick homemade version. It’s not strictly necessary for the layers, but drizzling it on top adds that professional bakery finish. It also helps with the “wow” factor when you slice it.
Chopped Nuts (Optional, for garnish) — Walnuts or pecans add a nice crunch and break up the sweetness. I sprinkle these on top right before serving. If you’re serving kids, you can skip this, but adults usually love the texture contrast.
Personal Tips:
– Cookie Substitution: I’ve tried using chocolate chip cookies, but they disintegrate. Stick to Nilla Wafers or similar crisp vanilla wafers.
– Pudding Note: Make sure you use the dry mix, not the pre-made cups. The dry mix is what creates the custard-like consistency as it absorbs the milk.
– Whipped Cream Hack: If you use homemade whipped cream, stabilize it with a little bit of cream cheese. It helps it hold its shape better in the fridge.
Equipment Needed
You don’t need fancy equipment for this. Here’s what I actually use.
9×13 Inch Baking Dish — I use a glass Pyrex dish. It lets you see the layers and it’s easy to clean. A ceramic dish works too, but glass is easier to see through. Make sure it’s deep enough to hold all the layers without spilling.
Large Mixing Bowl — You need something big enough to whisk the pudding and milk together. A 4-quart bowl is ideal. If you don’t have one, a large pot works in a pinch.
Whisk — A simple balloon whisk is perfect for getting the lumps out of the pudding. Electric mixer is overkill for this.
Measuring Cups and Spoons — Standard stuff. Dollar store versions work fine. Just make sure your cups are accurate.
Spatula — A rubber spatula is great for spreading the pudding and whipped cream evenly. You want smooth layers.
Knife — For slicing the cake. A sharp chef’s knife works best. If you don’t have one, a serrated bread knife also works well for cutting through the layers without crushing them.
Optional but nice:
– Piping Bag: If you want to make the whipped cream layer look fancy, pipe it on. It’s not necessary, but it looks pretty.
– Offset Spatula: Makes spreading the pudding and cream so much easier. It’s like $5 and changes your life.
How to Make It: Step-by-Step
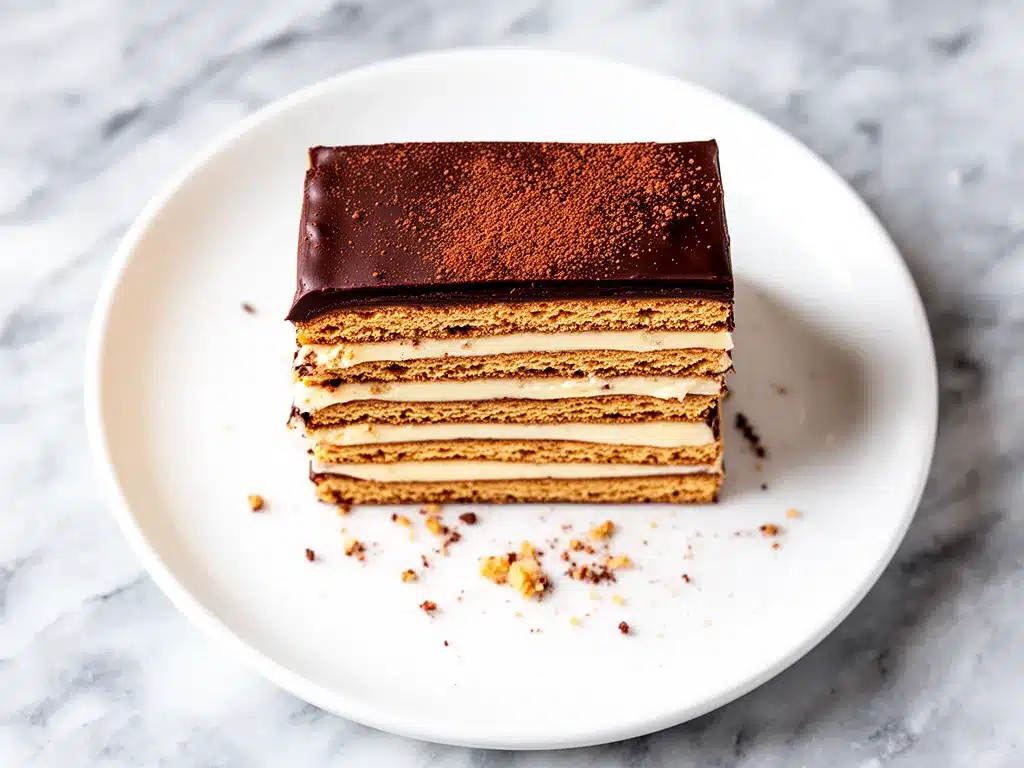
Alright, let’s make this! I’m walking you through exactly how I do it, including the little tricks I’ve picked up.
Step 1: Prepare the Pudding (5 minutes)
In your large mixing bowl, combine the two boxes of instant chocolate pudding mix with the 3 cups of milk. Whisk vigorously for about 2 minutes. You want it to be smooth and thick. It will look like chocolate milk at first, but it will thicken up quickly. If you’re using coffee, add it now. Whisk until there are no lumps. Set this aside while you assemble.
Step 2: First Layer of Cookies (2 minutes)
Take your 9×13 dish and start arranging the Nilla Wafers. You want a single, tight layer. If you need to break a cookie to fit a gap, do it. Don’t leave holes! The pudding needs to soak into every part of the cookie. You’ll probably use about 1/3 to 1/2 of the box for this first layer. Press them down gently so they sit flat.
Step 3: First Layer of Pudding (2 minutes)
Pour half of the pudding mixture over the first layer of cookies. Use your spatula to spread it evenly. Make sure it gets into the cracks between the cookies. You want every cookie to be coated. This layer creates the custard-like base.
Step 4: Second Layer of Cookies (2 minutes)
Add another layer of Nilla Wafers on top of the pudding. Again, make it tight. No gaps. Break cookies as needed. This layer absorbs the pudding from below and will be coated from above. It’s the heart of the cake.
Step 5: Second Layer of Pudding (2 minutes)
Pour the remaining pudding over the second cookie layer. Spread it evenly. You should have enough to cover the top completely. If you feel like you have extra pudding, don’t worry; it’ll soak in. If you feel like you’re running out, just make sure the top layer is covered.
Step 6: Top Layer of Cookies (2 minutes)
Add the final layer of Nilla Wafers. This is the visible top, so make it look nice. Arrange them neatly. You might have a few cookies left over; save those for crumbling on top later if you want extra crunch.
Step 7: Whipped Cream Layer (2 minutes)
Spread the thawed Cool Whip (or your homemade whipped cream) over the top layer of cookies. You want a thick, even layer. About 1/2 inch to 1 inch thick. Smooth it out with your spatula. If you’re feeling fancy, use a piping bag to make swirls. This layer protects the cookies and adds the creamy finish.
Step 8: The Chill (4 hours minimum)
Here’s the most important step: patience. Cover the dish with plastic wrap or a lid and refrigerate for at least 4 hours, but overnight is best. This is when the magic happens. The cookies soften into a cake-like texture, and the pudding sets into a custard. If you eat it too soon, it’ll just be soggy cookies and liquid pudding. Trust the process.
Step 9: Garnish and Serve (2 minutes)
Before serving, drizzle chocolate syrup over the top. Sprinkle with chopped nuts if you’re using them. Cut into squares and serve cold. The contrast between the cool, creamy top and the soft, cake-like interior is what makes this dessert so special.
Total Time: About 15 minutes active, plus 4+ hours chilling.
Expert Tips & Tricks
Here’s everything I’ve learned from making this dozens of times. These tips will save you from my mistakes.
Don’t Skimp on the Chill Time
This is the #1 mistake people make. They make it and eat it an hour later. It’s not ready. The cookies need time to absorb the liquid and soften. If you’re in a rush, you can chill it for 2 hours, but the texture won’t be quite right. Overnight is ideal. Plan ahead.
Use Cold Milk
Cold milk helps the pudding thicken faster and keeps the cake cooler. If your milk is warm, the pudding might take longer to set, and the cookies might get mushy too quickly. Keep it cold.
Press the Cookies Down
When you layer the cookies, press them down gently. This helps them absorb the pudding more evenly and prevents air pockets. It also makes the final cake more compact and easier to slice.
Drizzle the Syrup Before Slicing
Don’t wait until everyone is eating to add the syrup. Drizzle it on before you slice. It looks prettier and adds flavor to every bite. It also helps seal the top layer slightly.
Common Mistakes (and how to avoid them):
Mistake: Cake is too soggy
Fix: You didn’t chill it long enough, or you used too much pudding. Stick to the 4-hour minimum. If you’re using homemade whipped cream, it has more moisture, so reduce the pudding slightly or chill longer.
Mistake: Cake is too dry
Fix: You didn’t use enough pudding or milk. Make sure you’re using the full 3 cups of milk and both boxes of pudding. The cookies need that liquid to soften.
Mistake: Layers are sliding apart
Fix: You didn’t spread the pudding evenly, or you didn’t press the cookies down. Make sure each layer is coated and compact.
Variations & Substitutions
Once you’ve nailed the basic version, here’s how you can mix it up. I’ve tried all of these.
Coffee Eclair Cake
Swap half the milk for strong brewed coffee or cold brew. This enhances the chocolate flavor and adds a subtle coffee note. It’s my personal favorite. If you’re serving people who don’t like coffee, stick to milk.
Strawberry Shortcake Version
Use vanilla pudding instead of chocolate. Layer with strawberries and vanilla wafers. Top with whipped cream and fresh strawberries. It’s a summer classic.
Butterscotch Delight
Use butterscotch pudding mix. It’s sweet and rich, and goes great with Nilla Wafers. Top with chopped pecans. It’s a crowd-pleaser.
Gluten-Free Option
Use gluten-free vanilla wafers. Most brands work fine. Just make sure they’re crisp and don’t disintegrate too quickly. Check the label for gluten-free certification.
Dairy-Free Option
Use dairy-free milk (almond, oat, or soy) and dairy-free whipped topping. There are several good brands available now. The texture might be slightly different, but it’s still delicious.
Lighter Version
Use low-fat milk and light Cool Whip. It’s less rich, but still tasty. I make this when I’m trying to be “healthy,” but honestly, the full-fat version is worth the calories.
Different Cookies:
– Chocolate Chip Cookies: Use Chips Ahoy! for a chewier texture. Be careful, they get soft fast.
– Ginger Snaps: For a spicy twist. Good with butterscotch pudding.
– Sugar Cookies: For a vanilla flavor. Good with vanilla pudding.
Serving & Storage
How to Serve:
I usually serve this straight from the fridge at the dinner table. It looks rustic and stays cool. But here are other ways I’ve enjoyed it:
Side Dishes:
– Fresh fruit salad (strawberries, melon, grapes)
– Grilled corn on the cob
– Simple green salad with vinaigrette
Toppings Bar:
When I have guests, I put out: extra whipped cream, chocolate syrup, chopped nuts, and fresh berries. Everyone customizes their bowl.
Wine Pairing:
Not a wine expert, but my wine-snob friend says a sweet Riesling or a light red like Pinot Noir works great with this. Or just stick to ice-cold lemonade.
Storage Instructions:
Refrigerator:
Store in an airtight container or covered with plastic wrap for up to 5 days. It actually gets better after 2 days as the flavors meld.
Freezing:
Honestly, this doesn’t freeze well because of the whipped cream and pudding. The texture changes and it can get icy. Make it fresh or store in the fridge for up to 5 days.
Meal Prep:
Make the whole cake on Sunday. It keeps well all week. Just slice off a piece each night. It’s perfect for lunch or an after-school snack.
Pro tip: If the top looks dry after a few days, drizzle a little extra chocolate syrup or whipped cream on it before serving. It brings back the freshness.
Nutrition Information
I’m not a nutritionist, but here’s the breakdown if you’re tracking.
Per Serving (based on 12 servings):
– Calories: 280
– Protein: 4g
– Carbs: 42g
– Fiber: 2g
– Sugar: 28g
– Fat: 12g
– Saturated Fat: 6g
– Cholesterol: 15mg
– Sodium: 220mg
– Calcium: 80mg
What’s Good:
– Calcium from the milk and pudding
– Quick and easy
– Can add fruit for vitamins
What to Know:
– Higher in sugar from the cookies and pudding
– Contains dairy and gluten
– Moderate calories, but rich in flavor
My Take:
Look, this is a dessert. It’s sweet, creamy, and chocolatey. It’s not a diet recipe. But it’s way better than store-bought, costs less, and I know exactly what’s in it. When I want to make it lighter, I use the low-fat version and add fresh fruit. But usually? I just enjoy a reasonable portion and savor it.
Final Thoughts
So that’s my go-to homemade chocolate eclair cake! I’ve probably talked your ear off at this point, but when you make a recipe this often, you have a lot to say about it.
This has saved summer dinners more times than I can count. It’s my answer to “what’s for dessert” when I’m tired, don’t want to bake, and still want something that tastes really good. My kids are happy, my husband’s happy, and I’m happy because I’m not stressed about cooking.
Make it yours! Try different cookies, swap in your favorite pudding flavor, or add a coffee kick. The best recipes are the ones you adapt to your family’s tastes. If you make this, drop a comment and let me know what you think! I love hearing how recipes turn out in your kitchen. And if something doesn’t work, tell me that too—I’m here to help troubleshoot.
Happy cooking! And I hope your kitchen smells half as good as mine does right now.
Frequently Asked Questions
Can I use homemade whipped cream instead of Cool Whip?
Yes, you can! Just make sure to stabilize it with a little bit of cream cheese or a teaspoon of gelatin so it holds up in the fridge. Homemade whipped cream is lighter and tastier, but it doesn’t hold its shape quite as well as Cool Whip. If you’re serving the cake immediately, homemade is fine. If it’s sitting out for a while, Cool Whip is safer.
Why did my cake turn out soggy?
This usually happens if you don’t chill it long enough. The cookies need time to absorb the liquid and soften into a cake-like texture. If you eat it too soon, it’s just wet cookies. Chill it for at least 4 hours, but overnight is best. Also, make sure you’re using the right amount of milk and pudding. Too much liquid can make it soggy.
Can I make this ahead for a party?
Absolutely! This is actually better when made ahead. You can assemble it 1-2 days before the party. Just cover it tightly with plastic wrap and refrigerate. It’s perfect for meal prep or when you’re hosting a summer gathering. It saves you stress on the day of the event.
Can I use instant pudding cups instead of the dry mix?
No, you need the dry mix. The dry mix contains the thickeners that turn the milk into a custard-like pudding. The pre-made cups are already thick and don’t have the same setting power. You’ll end up with a liquid mess if you use the cups.
Can I freeze this cake?
Honestly, it doesn’t freeze well. The whipped cream and pudding separate when thawed, and the texture becomes icy and grainy. It’s best made fresh or stored in the fridge for up to 5 days. If you need to make it ahead, stick to the fridge.
What cookies can I use instead of Nilla Wafers?
You can use other crisp vanilla cookies, like sugar cookies or vanilla sandwich cookies. Avoid soft cookies like chocolate chip, as they disintegrate too quickly. Ginger snaps work well for a spicy twist. Just make sure the cookies are crisp enough to hold their structure when soaked.
How long does this cake last in the fridge?
It lasts up to 5 days in the fridge, covered tightly. It actually gets better after 2 days as the flavors meld. Just make sure it’s in an airtight container to prevent it from absorbing fridge odors. If it starts to look dry, drizzle a little extra syrup or whipped cream on it before serving.
Pin This Recipe!
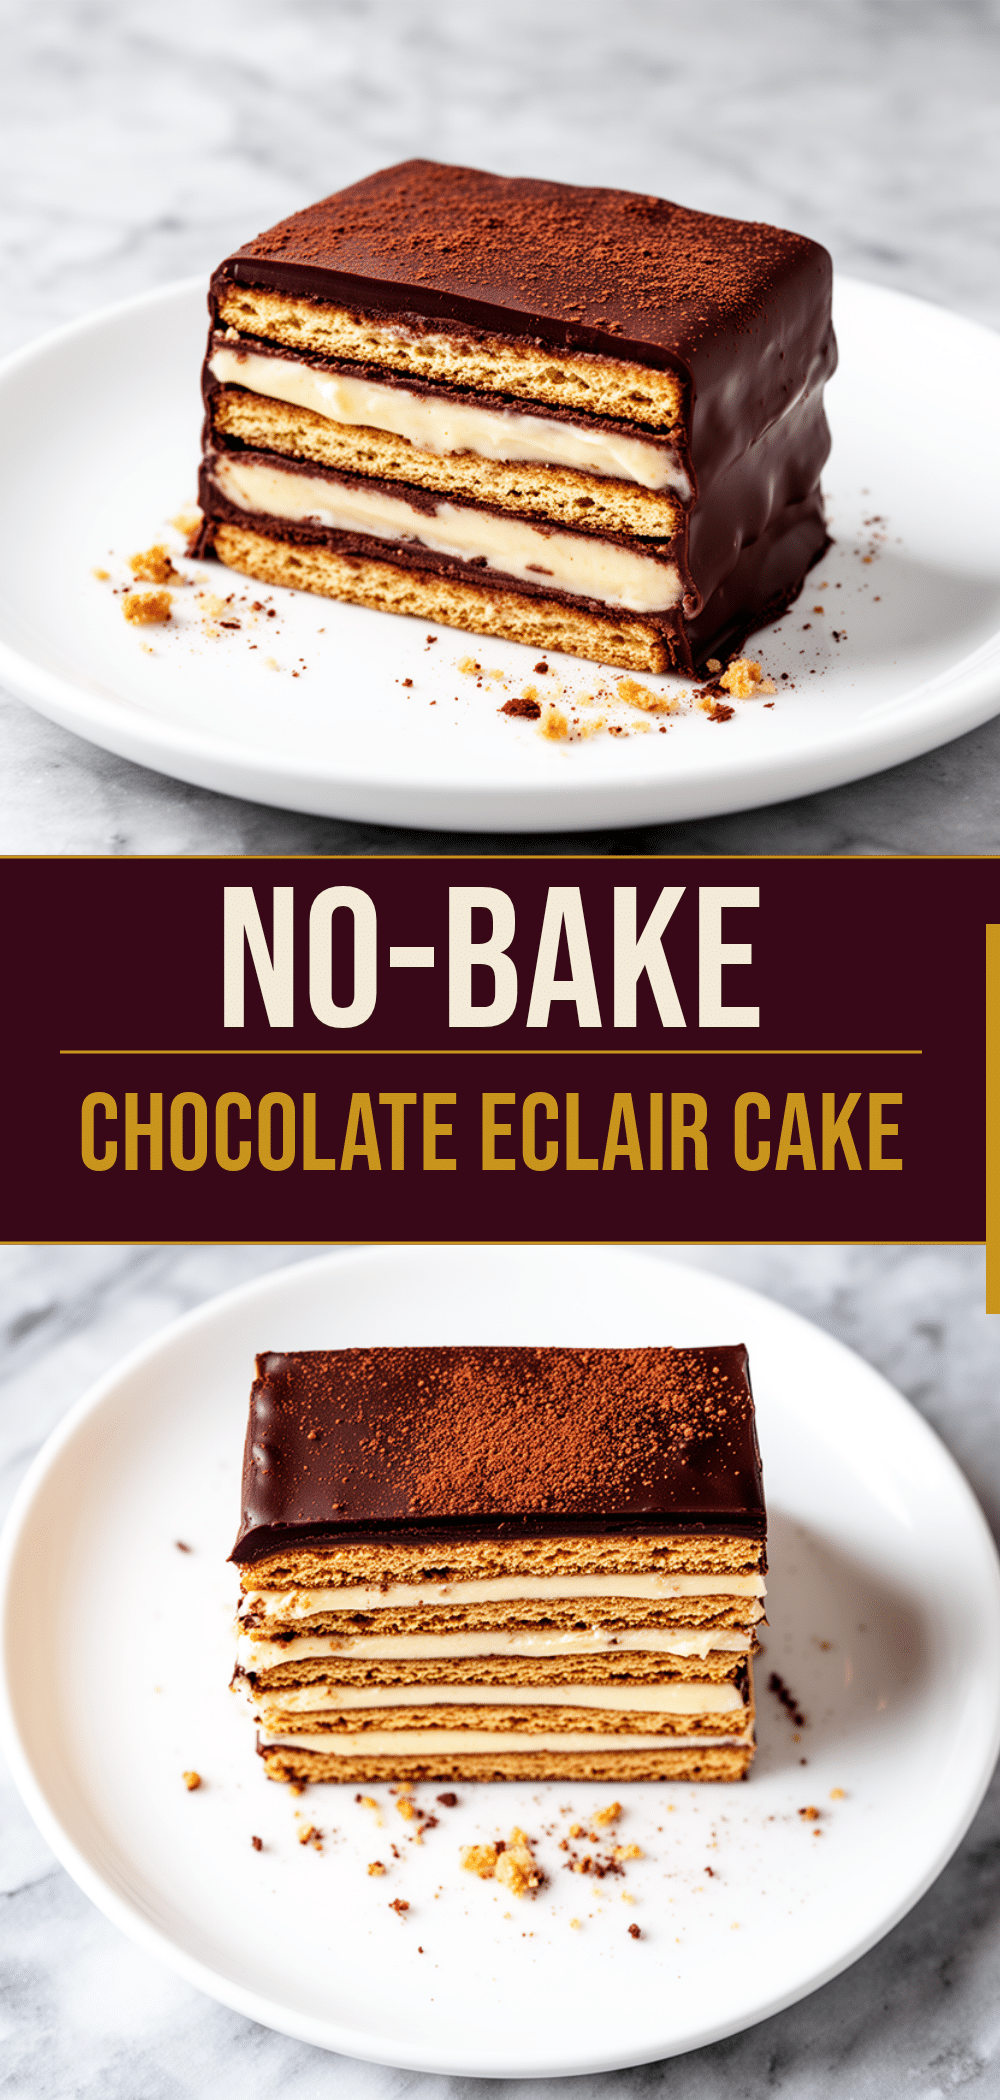
Homemade Chocolate Eclair Cake: Best 5-Ingredient Summer Dessert
- Total Time: 4 hours 15 minutes
- Yield: 12 servings 1x
Description
A no-bake, make-ahead summer dessert featuring layers of chocolate wafers, instant chocolate pudding, and whipped topping. This simple 5-ingredient cake requires zero oven time and sets in the fridge for a creamy, cake-like texture.
Ingredients
- 1 box (14.3 oz / 405g) chocolate wafer cookies (Nilla Wafers)
- 2 boxes (3.4 oz each) instant chocolate pudding mix
- 3 cups cold milk (whole milk recommended)
- 1 large tub (8 oz / 227g) whipped topping (Cool Whip), thawed
- Chocolate syrup or hot fudge (optional, for drizzling)
- Chopped nuts (optional, for garnish)
Instructions
- In a large mixing bowl, whisk the two boxes of instant chocolate pudding mix with the 3 cups of milk vigorously for about 2 minutes until smooth and thick. Set aside.
- Arrange a single, tight layer of chocolate wafer cookies in the bottom of a 9×13 inch baking dish. Break cookies as needed to fill gaps.
- Pour half of the pudding mixture over the first cookie layer and spread evenly with a spatula, ensuring it gets into the cracks.
- Add a second layer of chocolate wafer cookies on top of the pudding, pressing them down gently.
- Pour the remaining pudding mixture over the second cookie layer and spread evenly.
- Add a final top layer of chocolate wafer cookies, arranging them neatly.
- Spread the thawed whipped topping evenly over the top layer of cookies, creating a layer about 1/2 to 1 inch thick.
- Cover the dish with plastic wrap or a lid and refrigerate for at least 4 hours, or overnight, until the cookies have softened and the pudding has set.
- Before serving, drizzle with chocolate syrup and sprinkle with chopped nuts if desired. Cut into squares and serve cold.
Notes
For best results, chill the cake for at least 4 hours, though overnight is ideal to allow cookies to soften properly. Use cold milk to help the pudding thicken faster. If using homemade whipped cream, stabilize it with cream cheese or gelatin to help it hold its shape in the fridge. This cake does not freeze well due to the texture changes in the whipped cream and pudding.
- Prep Time: 15 minutes
- Cook Time: 0 minutes
- Category: Dessert
- Cuisine: American
Nutrition
- Serving Size: 1 square slice
- Calories: 280
- Sugar: 28
- Sodium: 220
- Fat: 12
- Saturated Fat: 6
- Carbohydrates: 42
- Fiber: 2
- Protein: 4
Keywords: no-bake dessert, summer dessert, chocolate eclair cake, easy dessert, make-ahead dessert, 5-ingredient recipe, party dessert



