I have a confession to make. For years, I treated green beans like the stepchild of the dinner table. You know the type: the slightly undercooked, slightly bitter vegetable that sat awkwardly between the mashed potatoes and the roast chicken, begging for mercy. I used to steam them until they turned a dull olive green, then drown them in canned soup. It was a crime against nature, and honestly, it’s probably why my kids wouldn’t touch them.
That changed last Tuesday. I was staring at a half-empty pantry, trying to figure out what to serve alongside a quick weeknight chicken stir-fry. I had a bag of fresh green beans, a package of thick-cut bacon, and absolutely zero energy to chop anything complicated. So, I did something reckless. I bundled ten green beans together, wrapped them in bacon, and threw them in the oven. I wasn’t expecting much. I expected soggy, salty disappointment.
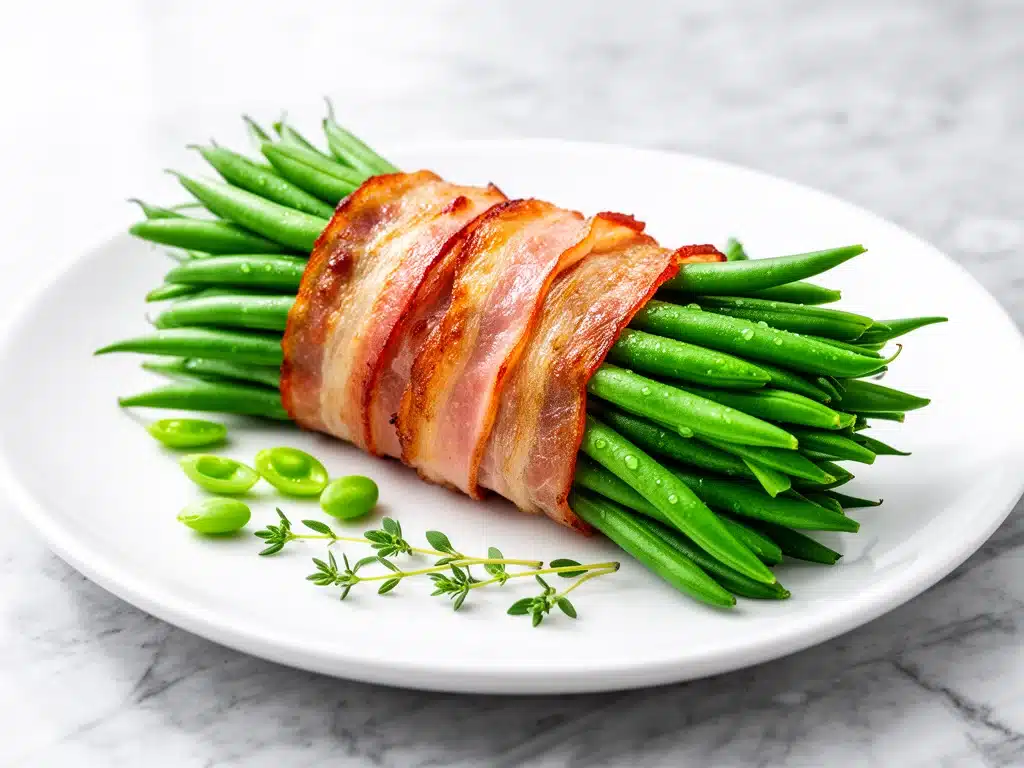
Instead, I got this. These bacon-wrapped green bean bundles are nothing short of magic. The bacon crisps up, rendering its fat into the beans, while the green beans stay tender-crisp and surprisingly sweet. My kids, who usually pick vegetables off their plates, devoured them. My husband asked me to add them to the rotation immediately. It’s one of those recipes that feels like a cheat code—looks fancy, takes almost no effort, and tastes like you spent hours in the kitchen.
I’ve made these at least a dozen times since that Tuesday. I’ve tweaked the wrapping style, played with different bacon thicknesses, and even tried them with different seasonings. Every single time, the result is the same: empty plates and requests for seconds. If you’re tired of boring side dishes that take too long to prep, this is your new best friend. It’s simple, it’s savory, and it’s perfect for those nights when you just need dinner to work.
Why You’ll Love This Recipe
There are about ten reasons I keep coming back to these bundles, but here are the big ones. This isn’t just another vegetable side; it’s a flavor bomb that solves the “what’s for sides?” problem instantly.
Seriously Stupid Simple — I mean this literally. If you can hold a handful of beans and wrap a strip of bacon around them, you can make this. I’ve walked my teenage daughter through it over FaceTime while she was at college. No complex techniques, no fancy knives, just assembly. It’s so easy that you’ll feel like a genius for doing it.
Lightning Fast — From start to finish, this takes about 25 minutes. That’s 5 minutes of prep and 20 minutes in the oven. I make this on weeknights when I get home at 6:30 pm, throw it in before I even change out of my work clothes, and by the time the chicken is done, the sides are ready too. It’s the ultimate low-effort, high-reward side.
Crowd-Pleaser Status — I’ve served these to picky eaters, keto dieters, and my meat-loving dad (who usually ignores veggies). Everyone loved them. The bacon masks any bitterness in the beans, and the salty-savory combo is universally liked. It’s the perfect bridge dish for families with different tastes.
Looks Fancy, Costs Pennies — These look like something you’d order at a nice appetizer bar. They’re elegant, bite-sized, and photogenic. But they cost less than $10 to make for a family of four. That’s a massive upgrade in presentation for a tiny fraction of the price of restaurant food.
Makes Amazing Leftovers — Okay, let’s be real. These are so good, leftovers are rare. But if you do have any, they reheat beautifully in the oven or air fryer. The bacon stays crispier than you’d expect, and the beans hold their texture. They’re perfect for a quick lunch or a snack before dinner.
This is my go-to when I need a side that feels special but doesn’t require special effort. No chopping salads, no boiling pots of water, just simple, delicious food that makes everyone happy.
Ingredients You’ll Need
Here’s the best part: you probably have most of this already in your fridge or pantry. I’m particular about three things here, and I’ll tell you exactly why. Quality matters, but not in a complicated way.
Green Beans (1.5 pounds / 680g) — Fresh is non-negotiable. Look for bright green, firm beans with no wrinkles. Frozen green beans work in a pinch, but they’re too watery for this method and the bacon won’t crisp up. I buy mine at the local market because they’re always fresher. Trim the ends off before you start.
Thick-Cut Bacon (12-16 slices) — This is crucial. Thin bacon burns before the beans cook through. Thick-cut bacon has enough fat to render slowly and crisp up without charring. I use applewood smoked bacon because it has a nice sweet smoke flavor. If you can’t find thick-cut, use regular but watch the oven time closely.
Black Pepper (1 teaspoon, freshly cracked) — Just pepper. No need for salt because the bacon is already salty. Freshly cracked adds a nice bite. I use a pepper grinder because pre-ground pepper tastes dusty and flat.
Optional: Brown Sugar (1 tablespoon) — If you like a little sweet and salty combo, sprinkle this lightly over the bundles before baking. It helps caramelize the bacon. I do this when I want them to taste like appetizers.
Optional: Garlic Powder (½ teaspoon) — A little extra savory kick. I add this when I’m serving them with roast chicken. It complements the smokiness of the bacon.
Personal Tips:
- Brand Recommendation: I always buy Kirkland Signature thick-cut bacon from Costco. It’s consistent, flavorful, and saves money if you make this often.
- Shopping Shortcut: If you’re in a rush, buy pre-trimmed green beans. They cost a little more but save you 5 minutes of prep. Worth it on busy weeknights.
- Substitution: Can’t find thick-cut bacon? Use regular bacon but cut each slice in half lengthwise. You’ll need more slices, but it works.
- Storage: Bacon keeps for weeks in the freezer if you separate slices with parchment paper. I always buy extra when it’s on sale.
Equipment Needed
You don’t need fancy equipment for this. Here’s what I actually use.
Baking Sheet — I use a standard 18×13 inch rimmed baking sheet. Make sure it’s big enough to hold all the bundles in a single layer. If you crowd them, they’ll steam instead of roast. I have a big sheet that holds about 20 bundles comfortably.
Parchment Paper or Silicone Mat — Parchment paper is my go-to for easy cleanup. The bacon fat can get messy, and parchment makes wiping the pan a breeze. A silicone mat works too, but I prefer parchment for the crispiness it encourages.
Cutting Board — Any size works. I use a medium plastic board because it’s easy to sanitize. Make sure it’s stable so you don’t slip when trimming beans.
Sharp Knife — For trimming the green bean ends. A dull knife will crush the beans. I use my chef’s knife for this. Learn to sharpen it—it makes a huge difference.
Pastry Brush (Optional) — If you’re using brown sugar or a glaze, a pastry brush helps distribute it evenly. I usually just sprinkle it by hand.
Tongs — For flipping the bundles halfway through. Metal tongs work best because they’re sturdy. Plastic might melt if they get too close to the heating element.
Tool Tips:
- Don’t have a baking sheet? Any oven-safe pan works, but make sure it has edges to catch the bacon grease.
- I’m obsessed with my silicone mats—they’re reusable and make cleanup instant. But parchment paper is fine if you don’t mind tossing it.
How to Make It: Step-by-Step
Alright, let’s make this! I’m walking you through exactly how I do it, including the little tricks I’ve picked up.
Step 1: Prep Your Green Beans (5 minutes)
Wash the green beans thoroughly and pat them dry. Moisture is the enemy of crisp bacon. Trim the ends off. I just snap off the tough bottom end of one bean, then line up the rest and cut them all at once. It’s faster than trimming one by one. Set them aside in a bowl.
Step 2: Prepare the Bacon
Take your thick-cut bacon slices and let them sit at room temperature for 5 minutes. Cold bacon is harder to wrap. If it’s too stiff, it might tear. Keep the slices intact—don’t cut them yet.
Step 3: Bundle and Wrap
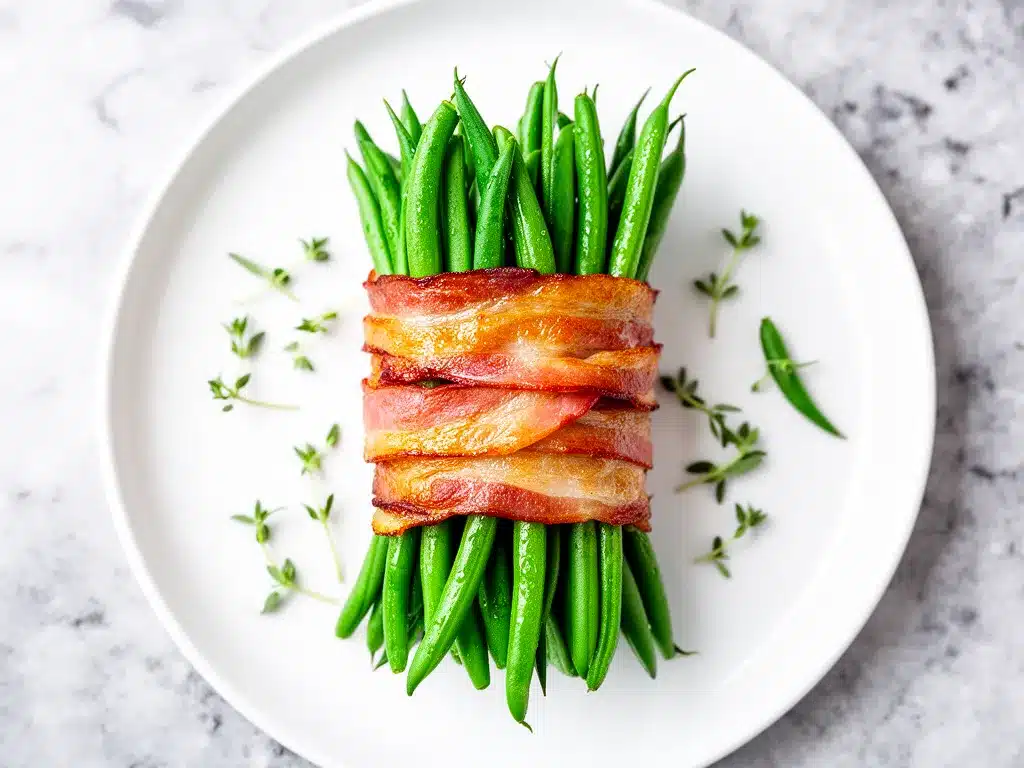
Take a small handful of green beans—about 10-12 beans per bundle. Lay them flat on your cutting board. Take one slice of bacon and wrap it around the middle of the bundle. Twist the ends of the bacon slightly to secure it. It doesn’t need to be perfect; just secure enough that it doesn’t unravel in the oven. Place them seam-side down on your parchment-lined baking sheet. Repeat until all beans are used. You should get about 12-15 bundles.
Step 4: Season
Crack fresh black pepper over the bundles. If you’re using brown sugar, sprinkle it lightly now. Don’t go overboard—you want a hint of sweetness, not a candy coating. If you’re using garlic powder, add it now too.
Step 5: Bake
Preheat your oven to 400°F (200°C). Place the baking sheet in the middle rack. Bake for 15 minutes. Then, carefully flip each bundle using tongs. Continue baking for another 5-10 minutes, or until the bacon is crispy and browned. Keep an eye on them in the last few minutes—bacon goes from perfect to burnt very quickly. The beans should be tender but still have a slight crunch.
Step 6: Cool and Serve
Remove from the oven and let them cool for 2-3 minutes. The bacon will crisp up more as it cools. Serve immediately while hot. They’re best eaten right out of the oven.
Total Time: About 25 minutes (5 minutes prep, 20 minutes cooking)
Built-in Troubleshooting:
- Bacon is too soft? Bake for another 2-3 minutes. Check it every minute.
- Burnt bacon? Your oven might run hot. Lower the temperature to 375°F next time, or check earlier.
- Bundles unraveling? Twist the bacon ends tighter or use a toothpick to hold them (remove before eating).
Expert Tips & Tricks
Here’s everything I’ve learned from making this dozens of times. These tips will save you from my mistakes.
Pat the Beans Dry
This is the #1 tip. Wet beans = steamy bacon = soggy disaster. I always pat them dry with paper towels. It takes an extra minute, but it makes all the difference. I forgot this once, and the bacon came out limp and greasy. Never again.
Use Thick-Cut Bacon
I can’t stress this enough. Thin bacon burns before the beans cook. Thick-cut bacon has the fat content and thickness to render properly. It’s worth the extra dollar.
Don’t Crowd the Pan
If the bundles are touching, they’ll steam each other. Give them space. If you have too many, use two baking sheets. Cook one sheet at a time if your oven is small.
Flip for Even Cooking
Flipping halfway through ensures both sides of the bacon crisp up. It also prevents one side from burning. I use tongs to flip them gently.
Common Mistakes (and how to avoid them):
- Mistake: Beans are raw — Fix: Bake longer. Check with a fork. If they’re still hard, give them 5 more minutes.
- Mistake: Bacon is too salty — Fix: Use less pepper and no added salt. The bacon is salty enough.
- Mistake: Bundles are too big — Fix: Use fewer beans per bundle. Smaller bundles cook more evenly.
Pro Tricks I’ve Learned:
- For Extra Crispiness: Broil for 1 minute at the end. Watch it like a hawk—it burns fast!
- For Better Flavor: Add a dash of smoked paprika before baking. It enhances the smoky bacon flavor.
- For Meal Prep: Make a double batch. They reheat well in the air fryer for 3 minutes at 350°F.
Variations & Substitutions
Once you’ve nailed the basic version, here’s how you can mix it up. I’ve tried all of these.
Spicy Version
Add a pinch of cayenne pepper or red pepper flakes before baking. I do this when I want a kick. It pairs well with the sweet brown sugar.
Honey Glazed
Brush with honey mixed with a little Dijon mustard after flipping. Sweet and tangy. Great for holiday dinners.
Garlic Parmesan
Sprinkle with grated Parmesan cheese in the last 2 minutes of baking. Salty, cheesy, and delicious.
Asparagus Bundles
Same method, but use asparagus spears. Cook for 10-12 minutes total. Asparagus cooks faster, so watch closely.
Vegetarian Option
Use vegetarian bacon strips. They don’t crisp up the same way, but they work in a pinch. I prefer the real thing, but it’s an option.
Dietary Modifications:
- Low-Carb: This is naturally low-carb. Just skip the brown sugar.
- Gluten-Free: Bacon and green beans are naturally gluten-free. Check your bacon package to be sure.
- Dairy-Free: Naturally dairy-free. Perfect for dairy-free diets.
Serving & Storage
How to Serve:
I usually serve these straight from the baking sheet at the dinner table. They look rustic and stay warm. But here are other ways I’ve enjoyed them:
- With Roast Chicken: The classic combo. The bacon complements the chicken perfectly.
- With Grilled Steak: A hearty side for a weekend dinner.
- As an Appetizer: Serve them on a platter with a dipping sauce like ranch or BBQ sauce. They disappear fast.
Storage Instructions:
Refrigerator: Store in an airtight container for up to 3 days. The bacon might soften a bit, but it’s still good.
Reheating: Best method: Oven or air fryer at 350°F for 5-7 minutes. This restores the crispiness. Microwave works but makes the bacon chewy. Avoid the microwave if you care about texture.
Freezing: I don’t recommend freezing these. The texture changes, and the bacon gets weird. Make them fresh whenever you can.
Pro Tip: If leftovers are drying out, reheat with a splash of water in the oven to keep them moist.
Nutrition Information
I’m not a nutritionist, but here’s the breakdown if you’re tracking.
Per Serving (based on 6 servings, 2-3 bundles each):
- Calories: 150
- Protein: 8g
- Carbs: 4g
- Fiber: 2g
- Fat: 12g
- Sodium: 350mg
What’s Good:
- Low in carbs (great for keto)
- Good source of protein from bacon
- Contains vitamins from green beans
What to Know:
- High in sodium due to bacon
- Higher in fat, but it’s mostly saturated fat from the bacon
- Use low-sodium bacon if you’re watching salt
My Take:
Look, these are bacon-wrapped vegetables. They’re indulgent. They’re not a diet food. But they’re way better than chips or fried sides, and you’re getting vegetables in. When I want to make them lighter, I use turkey bacon (though it’s less crispy) and skip the sugar. But usually? I just enjoy them in moderation.
Final Thoughts
So that’s my go-to bacon-wrapped green bean bundles! I’ve probably talked your ear off at this point, but when you make a recipe this often, you have a lot to say about it.
This has saved weeknight dinners more times than I can count. It’s my answer to “what’s for sides” when I’m tired, don’t want takeout, and still want something that tastes really good. My kids are happy, my husband’s happy, and I’m happy because I’m not stressed about cooking.
Make it yours! Try different seasonings, swap in asparagus, or add a glaze. The best recipes are the ones you adapt to your family’s tastes.
If you make this, drop a comment and let me know what you think! I love hearing how recipes turn out in your kitchen. And if something doesn’t work, tell me that too—I’m here to help troubleshoot.
Happy cooking! And I hope your kitchen smells half as good as mine does right now.
Frequently Asked Questions
Can I use thin-cut bacon?
You can, but it’s risky. Thin bacon burns quickly and might not cook the beans through. If you must use it, reduce the baking time to 10-12 minutes total and watch closely. I strongly recommend thick-cut for best results.
Can I make these ahead of time?
Yes! You can assemble the bundles up to 24 hours ahead. Store them covered in the fridge. Take them out 15 minutes before baking to come to room temperature. This helps the bacon cook evenly.
Why did my bacon get burnt?
Your oven might run hot, or you baked them too long. Bacon goes from perfect to burnt in seconds. Check them at the 15-minute mark and flip. If your oven runs hot, lower the temperature to 375°F.
Can I freeze leftovers?
I don’t recommend it. The bacon loses its crispiness and becomes chewy. The beans also get mushy. It’s best to eat them fresh or reheat in the oven/air fryer.
What dipping sauces go well with these?
Ranch dressing, BBQ sauce, honey mustard, or even a spicy aioli. I like ranch for a classic combo, but BBQ is great for a sweet and smoky flavor.
Can I use frozen green beans?
I don’t recommend it. Frozen beans are too watery and won’t crisp up well with the bacon. Fresh beans are much better for this recipe. If you must use frozen, thaw them completely and pat them very dry.
How do I keep the bundles from unraveling?
Twist the bacon ends tightly when wrapping. If they’re still loose, use a toothpick to hold them in place. Remove the toothpick before eating. I’ve found that thick-cut bacon holds better than thin-cut.
Pin This Recipe!
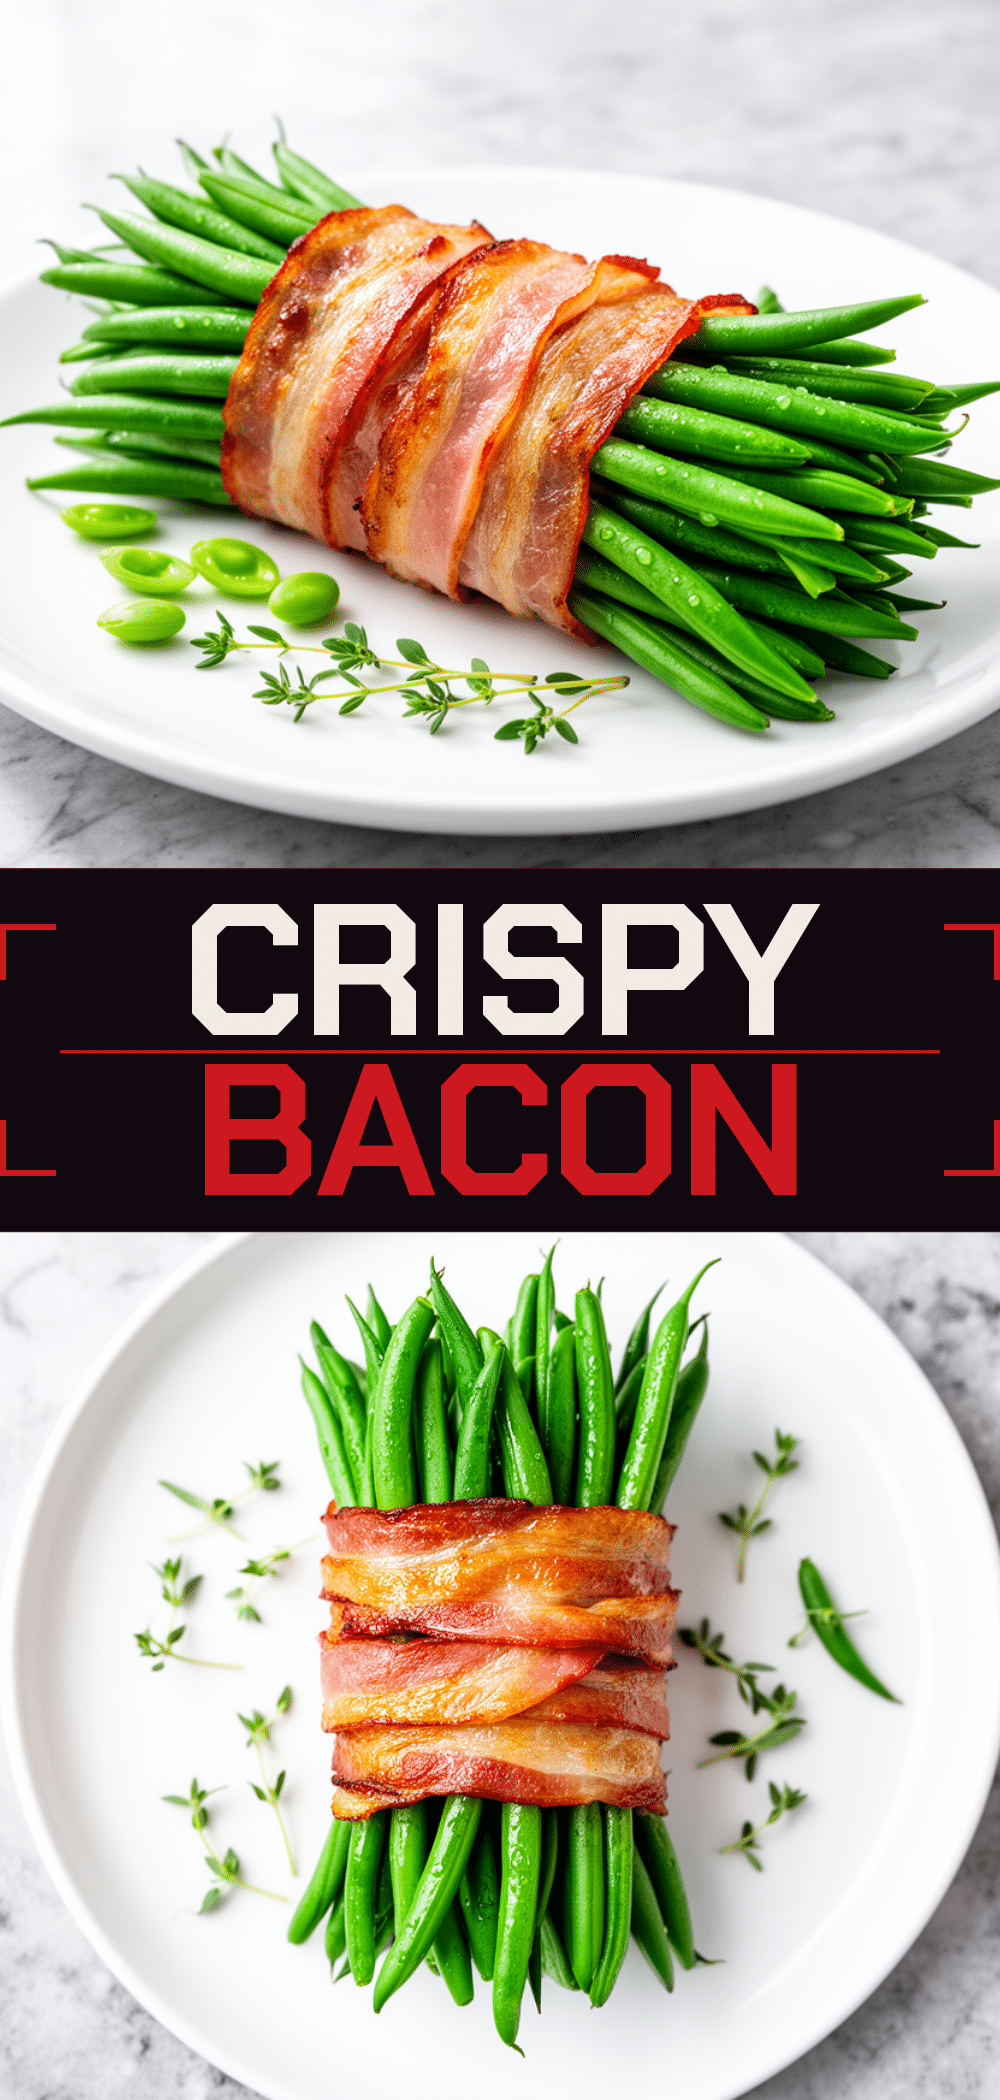
Bacon-Wrapped Green Bean Bundles: Easy Weeknight Sides
- Total Time: 25 minutes
- Yield: 6 servings 1x
Description
Crispy thick-cut bacon wraps around tender-crisp green beans in this simple, savory side dish that looks fancy but takes only 25 minutes to make.
Ingredients
- 1.5 pounds fresh green beans, trimmed
- 12–16 slices thick-cut bacon
- 1 teaspoon freshly cracked black pepper
- 1 tablespoon brown sugar (optional)
- 1/2 teaspoon garlic powder (optional)
Instructions
- Preheat oven to 400°F (200°C).
- Wash green beans thoroughly and pat them completely dry with paper towels to ensure crispy bacon.
- Trim the ends off the green beans.
- Let bacon slices sit at room temperature for 5 minutes to make them more pliable.
- Take a small handful of green beans (about 10-12 beans) and wrap one slice of bacon around the middle of the bundle.
- Twist the ends of the bacon slightly to secure it and place the bundle seam-side down on a parchment-lined baking sheet.
- Repeat until all beans are used, aiming for 12-15 bundles.
- Season the bundles with black pepper and optional brown sugar or garlic powder.
- Bake for 15 minutes.
- Flip each bundle using tongs and continue baking for another 5-10 minutes until bacon is crispy and browned.
- Remove from oven and let cool for 2-3 minutes before serving.
Notes
Patting the beans dry is crucial for crispy bacon. Use thick-cut bacon to prevent burning. Do not crowd the pan to avoid steaming. If using thin bacon, reduce baking time and watch closely. Leftovers reheat best in an oven or air fryer.
- Prep Time: 5 minutes
- Cook Time: 20 minutes
- Category: Side Dish
- Cuisine: American
Nutrition
- Serving Size: 2-3 bundles per serv
- Calories: 150
- Sugar: 2
- Sodium: 350
- Fat: 12
- Saturated Fat: 4
- Carbohydrates: 4
- Fiber: 2
- Protein: 8
Keywords: bacon wrapped green beans, weeknight dinner, easy side dish, keto friendly, low carb, gluten free, party appetizer