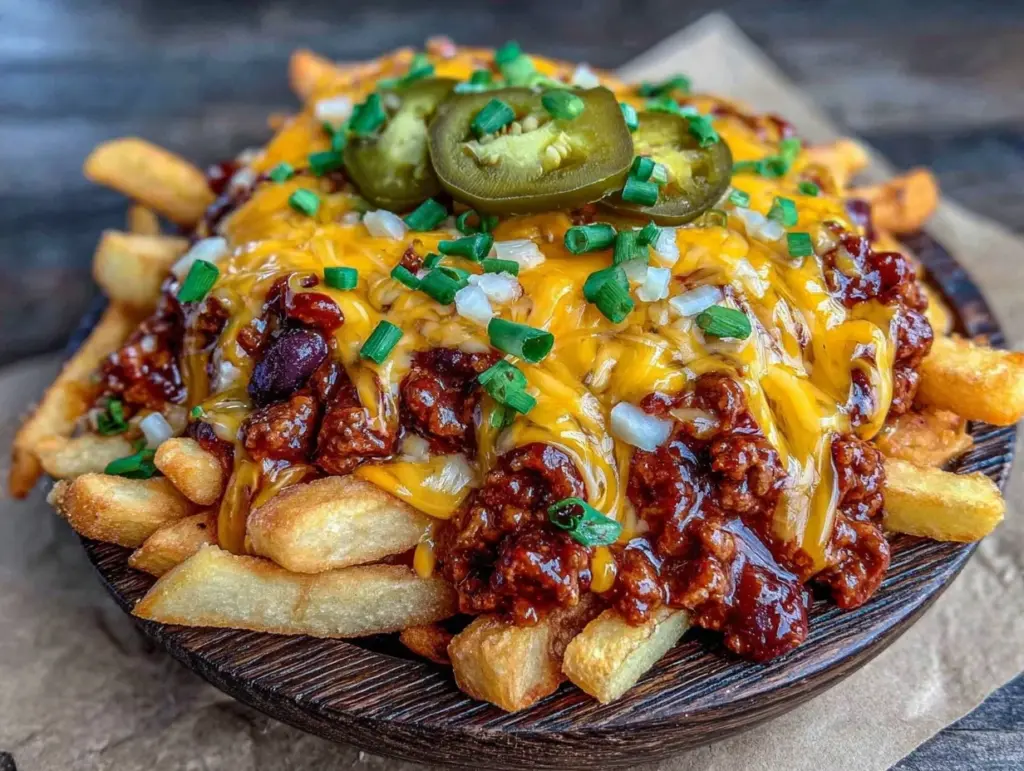
Last September, I showed up to my cousin’s tailgate party with a plastic container of store-bought potato chips. Yeah. I know. It was embarrassing. Everyone else had brought elaborate spreads—smoked brisket, loaded nachos, actual hot food. I was holding a bag of Ruffles like it was going to win me any kind of favor. That’s when I realized I needed a game-day dish that looked as good as it tasted, something that screamed “I put in effort” without actually requiring me to stand over a grill for six hours.
That afternoon, I went home and whipped up a batch of football tailgate chili cheese fries in my cast-iron skillet. I brought them in a slow cooker to keep them warm (which, by the way, was a genius move), and suddenly, I was the hero of the parking lot. People were lining up. My cousin’s husband asked for the recipe three times. It wasn’t just tasty; it was the kind of food that makes you feel like a pro cook, even if you’re just boiling potatoes and heating up jarred sauce.
I’ve made this football tailgate chili cheese fries recipe at least a dozen times since that day—both for tailgates and for watching games on the couch. It’s become my go-to because it’s incredibly forgiving. You really can’t mess this up. It’s minimal ingredients, minimal steps, and maximum flavor. If you’re looking for a dish that brings everyone together and gets eaten before the first quarter ends, this is it. Let me show you how to make it.
Why You’ll Love This Recipe
There are a lot of snacks out there, but few hit that specific sweet spot of salty, spicy, creamy, and savory all at once. This football tailgate chili cheese fries recipe is special because it’s built for sharing. Here’s why it keeps coming back to my kitchen:
- It’s a Crowd-Pleaser — Seriously, I’ve served this to people who hate chili, people who hate cheese, and people who are “just here for the beer.” Everyone loves it. It’s comfort food in its purest form.
- Minimal Cleanup — You’re basically boiling fries and heating sauce. If you use frozen fries and good-quality jarred chili, you’re looking at one pot and one bowl to wash. That’s it. I love recipes that don’t require me to do dishes while the game is on.
- Make-Ahead Friendly — You can prep the chili and cut the veggies days in advance. On game day, you just heat it up and assemble. It’s the ultimate low-stress entertaining.
- Customizable — Love jalapeños? Add them. Hate onions? Skip them. This recipe bends to your taste. I’ve made it mild for the kids and spicy for the adults, all in the same batch.
- It Stays Warm — Unlike pizza that gets soggy or wings that get cold, chili cheese fries hold up beautifully in a slow cooker or chafing dish. They’re still hot and gooey when the fourth quarter rolls around.
This is the kind of dish that takes the pressure off. You don’t need to be a chef to make it work. You just need some fries, some sauce, and some cheese. Simple, right? That’s the beauty of it.
Ingredients You’ll Need
Here’s the best part: you probably have most of this already. I’m not asking you to run to three different stores for obscure spices. This is pantry-friendly, beginner-proof cooking.
For the Base:
French fries (2 pounds / 900g) — I use thick-cut frozen fries. They hold up better under the heavy toppings than thin shoestrings. Brands like Ore-Ida or Trader Joe’s work great. If you’re feeling fancy, you can bake fresh cut potatoes, but let’s be real—frozen is easier and still delicious.
Cheddar cheese (2 cups / 200g, shredded) — Use sharp cheddar for that punchy flavor. I buy the block and shred it myself because pre-shredded cheese has anti-caking agents that make it clumpy. You want smooth, melty cheese here, not grainy bits.
Monterey Jack cheese (1 cup / 100g, shredded) — This is the secret weapon. It melts like a dream. Mixing it with cheddar gives you both flavor and perfect texture. If you can’t find Monterey Jack, just use more cheddar or mozzarella.
For the Chili:
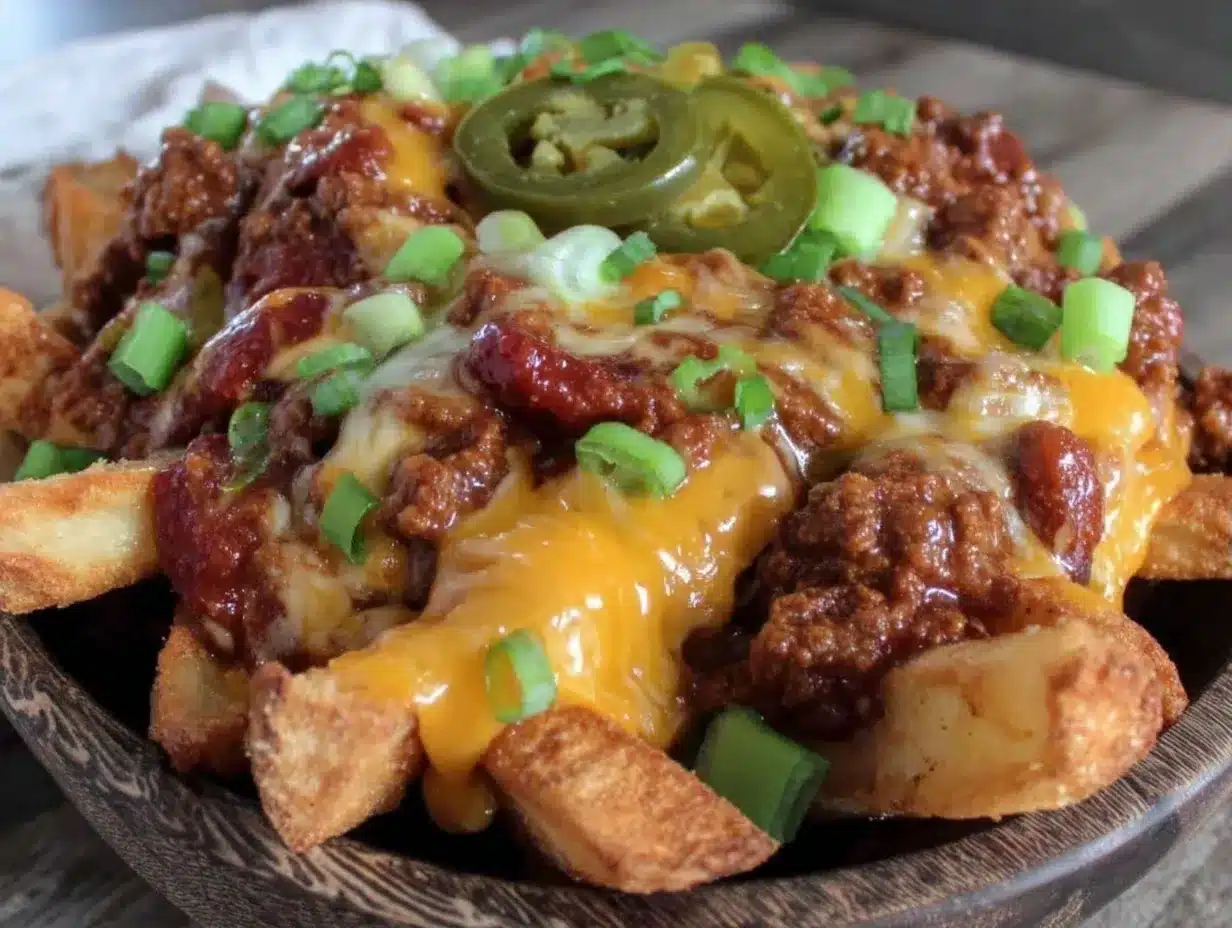
Ground beef (1 pound / 450g) — I use 80/20 ground beef for flavor. Lean beef gets dry in chili. Brown it with some basic seasoning—salt, pepper, and maybe a little cumin if you want to get fancy. Or, if you’re being lazy, just buy a good jar of chunky chili and heat it up. I do this sometimes, and no one can tell the difference.
Onion (1 medium, diced / about 150g) — Yellow or white onions work. I sauté them with the beef to add sweetness and depth. Don’t skip this step—it makes the chili taste homemade.
Garlic (2 cloves, minced / about 1 tablespoon) — Fresh garlic is key. Jarred garlic has a weird metallic taste that doesn’t work well here. Just mince it finely and throw it in with the onions.
Tomato sauce (1 can / 15oz / 425g) — Use a plain tomato sauce or crushed tomatoes. If you’re using jarred chili, you might not need this, but if you’re making the chili from scratch, this is your base.
Chili powder (1 tablespoon) — This gives it that classic chili flavor. If you have a homemade blend, use that. Otherwise, standard McCormick chili powder works fine.
For the Toppings:
Green onions (4 stalks, sliced) — Adds a fresh, crunchy contrast to the soft fries and hot cheese. I chop them up and keep them in a small bowl on the side.
Jalapeños (optional, sliced) — For heat. I usually keep these on the side so people can add as much as they want. Pickled jalapeños add a nice tangy crunch.
Sour cream (½ cup) — A dollop on top cools things down and adds creaminess. Not everyone likes it, so I always serve it on the side.
Chili beans (optional, 1 can / 15oz / 425g) — If you want more texture, add a can of kidney beans or pinto beans to the chili. I usually skip them for a smoother sauce, but it’s your call.
Equipment Needed
You don’t need fancy equipment for this. Here’s what I actually use.
Large skillet or Dutch oven — I use a 12-inch skillet to brown the beef. It gives me plenty of room to spread it out so it sears instead of steams. If you’re making a big batch, a Dutch oven works too.
Baking sheet or large platter — For serving the fries. I usually bake the fries on a sheet pan, then transfer them to a large serving platter. A big slate board looks great for tailgates, too.
Slow cooker — This is my favorite part. I keep the chili warm in a small slow cooker at the tailgate. It keeps everything hot and ready to serve without getting soggy or cold.
Sharp knife and cutting board — For dicing onions and slicing jalapeños. Just a basic kitchen setup.
Wooden spoon — For stirring the chili. Silicone works too, but I like wood because it doesn’t scratch my pans.
Spatula — For flipping the fries if you’re baking them from scratch.
How to Make It: Step-by-Step
Alright, let’s make this! I’m walking you through exactly how I do it, including the little tricks I’ve picked up over the years.
Step 1: Prep Your Ingredients (5 minutes)
Before you start cooking, dice your onion, mince your garlic, and slice your jalapeños if you’re using them. Have your cheeses shredded and ready to go. Once you start cooking, things move fast, and you don’t want to be chopping while your beef is burning.
Step 2: Cook the Beef and Make the Chili (15 minutes)
Heat a large skillet over medium-high heat. Add the ground beef and cook, breaking it up with a wooden spoon, until browned and no longer pink. Drain any excess fat if there’s a lot of it (but leave a little for flavor). Add the diced onion and cook for 2-3 minutes until softened. Add the minced garlic and cook for 1 minute until fragrant.
Stir in the chili powder, salt, and pepper. Pour in the tomato sauce (or your jarred chili if you’re using that). Bring it to a simmer, then reduce the heat to low. Let it simmer for 10-15 minutes to let the flavors meld. Taste and adjust seasoning. If it’s too thin, let it simmer longer. If it’s too thick, add a splash of water or broth. Set aside or transfer to a slow cooker to keep warm.
Step 3: Cook the Fries (20-25 minutes)
Preheat your oven to 425°F (220°C). If you’re using frozen fries, spread them out in a single layer on a baking sheet. Don’t crowd them! If you pile them up, they’ll steam instead of crisp. I usually use two sheets if I’m making a large batch. Bake according to package directions, usually 20-25 minutes, flipping halfway through, until golden and crispy.
If you’re making fresh fries, cut potatoes into sticks, soak them in cold water for 30 minutes (this removes starch and makes them crispier), pat them dry, toss with oil and salt, and bake at 400°F (200°C) for 30-40 minutes, flipping halfway.
Step 4: Assemble the Fries (5 minutes)
Transfer the hot fries to a large serving platter or keep them on the baking sheet. Immediately sprinkle the shredded cheddar and Monterey Jack cheese over the hot fries. The heat from the fries will start to melt the cheese. If it doesn’t melt enough, you can put the platter back in the oven for 1-2 minutes.
Generously ladle the warm chili over the cheese-covered fries. You want every bite to have a little bit of everything. Don’t be shy with the chili—this is not a dish for light portions.
Step 5: Add Toppings and Serve
Top with sliced green onions and jalapeños if you like. Add dollops of sour cream on the side or on top. Serve immediately while the fries are still crispy and the cheese is melty.
Total Time: About 45 minutes (mostly hands-off while fries bake and chili simmers)
Expert Tips & Tricks
Here’s everything I’ve learned from making this dozens of times. These tips will save you from my mistakes.
Don’t Overcrowd the Fries
This is the #1 mistake people make. If you pile fries on top of each other, they get soggy. Spread them out in a single layer. If you’re making a big batch, do two pans. Crispy fries are non-negotiable for good chili cheese fries.
Shred Your Own Cheese
Pre-shredded cheese is coated in cellulose to prevent clumping. That’s great for storage, but terrible for melting. It makes your cheese sauce grainy and uneven. Buy a block of cheddar and shred it yourself. It takes 3 minutes and makes a huge difference.
Keep the Chili Warm
If you’re serving at a tailgate, transfer the chili to a slow cooker set to “warm” right after you make it. This keeps it hot and ready to ladle without overcooking it. I’ve learned this the hard way with cold, congealed chili that no one wanted.
Use Thick-Cut Fries
Thin shoestring fries disappear under the weight of the chili. Thick-cut steak fries or crinkle-cut fries hold up better. They’re sturdier and provide a better texture contrast.
Season Your Beef
Don’t just brown the beef and add sauce. Season it well with salt, pepper, and cumin while it’s cooking. The beef is the main protein, and if it’s bland, the whole dish suffers.
Common Mistakes
Mistake: Soggy fries
Fix: Make sure you’re not piling the chili on too early. Assemble right before serving. If you have to prep ahead, keep the fries, chili, and cheese separate and assemble when ready to eat.
Mistake: Cheese didn’t melt
Fix: The cheese needs heat. Sprinkle it on immediately after the fries come out of the oven. If it’s not melting, put it back in the oven for a minute or two.
Mistake: Chili is too spicy
Fix: If you used hot chili powder or added too many jalapeños, add a dollop of sour cream or a splash of cream to balance it out. Or just serve it with plenty of bread to soak it up.
Variations & Substitutions
Once you’ve nailed the basic version, here’s how you can mix it up. I’ve tried all of these.
Vegan Version
Use vegan fries, vegan cheese shreds (like Daiyo or Violife), and a vegan chili (like Amy’s or make your own with lentils and beans). It’s surprisingly good, though the cheese melt is different.
Turkey Chili
Swap ground beef for ground turkey. It’s leaner and lighter. I like this version when I want something a bit less heavy. Just make sure to add a little extra oil when browning the turkey so it doesn’t dry out.
BBQ Beef Fries
Skip the chili and use pulled pork or shredded beef tossed in BBQ sauce. Top with cheddar and green onions. It’s a different vibe but equally delicious. If you love smoky honey garlic BBQ ribs, you’ll love this twist.
Loaded Nacho Style
Add jalapeños, black olives, and diced tomatoes to the toppings. It’s basically a giant plate of nachos. Great for parties with lots of people.
Spicy Kick
Add diced jalapeños to the chili while it simmers. Or use a spicy chili powder. If you like heat, this is the way to go.
Gluten-Free
Most fries are naturally gluten-free, but check the label. Use gluten-free chili or make your own with cornstarch instead of flour for thickening. Everything else is naturally gluten-free.
Serving & Storage
How to Serve:
I usually serve this straight from the platter at the dinner table or tailgate. It looks rustic and stays warm. But here are other ways I’ve enjoyed it:
- Side Dishes: This is a meal on its own, so you don’t need much else. But a simple green salad or some coleslaw cuts through the richness nicely.
- Toppings Bar: When I have guests, I put out extra cheese, jalapeños, sour cream, and green onions. Everyone customizes their portion.
- Drinks: Cold beer, lemonade, or a simple iced tea works great. If you’re serving cocktails, fresh raspberry mint lemonade is a refreshing contrast to the heavy fries.
Storage Instructions:
Refrigerator:
Store leftovers in an airtight container for up to 3 days. The fries will get soft, which is normal. The chili will keep well.
Reheating:
Best method: Spread fries on a baking sheet and reheat in the oven at 400°F (200°C) for 10 minutes to crisp them up. Heat the chili separately in a saucepan. Then reassemble.
Microwave method: It works, but the fries will be soft. Heat in 30-second intervals, stirring the chili. Not ideal, but it’s faster.
Freezing:
Honestly, this doesn’t freeze well. The fries get mushy when thawed, and the cheese can separate. Make it fresh or store in the fridge for up to 3 days.
Nutrition Information
I’m not a nutritionist, but here’s the breakdown if you’re tracking. Keep in mind, this is comfort food, so it’s not exactly a diet meal.
Per Serving (based on 6 servings):
– Calories: 650
– Protein: 22g
– Carbs: 55g
– Fiber: 4g
– Sugar: 6g
– Fat: 38g
– Saturated Fat: 15g
– Cholesterol: 65mg
– Sodium: 900mg
What’s Good:
– Decent protein from the beef and cheese
– Calcium from the cheese
– Can add vegetables to boost nutrition
What to Know:
– Higher in calories and fat from the cheese and beef
– Contains dairy and gluten
– High sodium (use low-sodium chili or reduce salt in the beef)
My Take:
Look, this is indulgent food. It’s meant to be enjoyed, not judged. When I want to make it lighter, I use lean turkey and less cheese. But usually? I just eat a reasonable portion and enjoy it. It’s worth it.
Final Thoughts
So that’s my go-to football tailgate chili cheese fries! I’ve probably talked your ear off at this point, but when you make a recipe this often, you have a lot to say about it. This has saved game days more times than I can count. It’s my answer to “what’s for the tailgate?” when I want to bring something impressive but don’t want to stress.
Make it yours! Try different add-ins, swap in your favorite vegetables, adjust the spice level. The best recipes are the ones you adapt to your family’s tastes. If you make this, drop a comment and let me know what you think! I love hearing how recipes turn out in your kitchen.
Happy cooking! And I hope your kitchen smells half as good as mine does right now.
Frequently Asked Questions
Can I use fresh fries instead of frozen?
Yes! Just make sure to cut them evenly and soak them in cold water for 30 minutes to remove starch. Pat them dry thoroughly before tossing with oil. Bake at 400°F (200°C) for 30-40 minutes, flipping halfway. They take longer than frozen fries but taste amazing.
Why did my cheese turn out grainy?
This usually happens if you use pre-shredded cheese or if the heat was too high. Pre-shredded cheese has anti-caking agents that prevent smooth melting. Also, always add cheese to hot fries, not cold ones. If it’s already grainy, you can try stirring in a splash of milk to help emulsify it, but prevention is better.
Can I make the chili ahead of time?
Absolutely! In fact, chili tastes better the next day because the flavors have time to meld. Make it 1-2 days ahead, store in the fridge, and reheat gently before serving. This saves you a lot of time on game day.
What kind of cheese is best?
I recommend a mix of sharp cheddar for flavor and Monterey Jack for meltability. Cheddar alone can be clumpy, and Monterey Jack alone can be bland. Together, they’re perfect. If you can’t find Monterey Jack, use mozzarella for melt or more cheddar for flavor.
Can I freeze leftover chili cheese fries?
I don’t recommend it. The fries will lose their crispiness and become soggy when thawed. The cheese can also separate. It’s best to freeze the chili separately (without the fries) and make fresh fries when you’re ready to eat.
Is there a vegetarian option?
Yes! Skip the beef and use a hearty bean chili or a lentil chili. Use vegan cheese if you want, or regular cheese if you’re vegetarian. The rest of the recipe stays the same. It’s just as filling and delicious.
Pin This Recipe!
Football Tailgate Chili Cheese Fries: The Easy Game Day Snack
- Total Time: 45 minutes
- Yield: 6 servings 1x
Description
A crowd-pleasing, easy-to-make game day dish featuring crispy fries topped with savory beef chili and melted cheese. Perfect for tailgating or casual entertaining with minimal cleanup.
Ingredients
- 2 pounds thick-cut frozen french fries
- 1 pound 80/20 ground beef
- 1 medium onion, diced
- 2 cloves garlic, minced
- 1 tablespoon chili powder
- 1 can (15oz) tomato sauce
- Salt and pepper to taste
- 2 cups sharp cheddar cheese, shredded
- 1 cup Monterey Jack cheese, shredded
- 4 stalks green onions, sliced
- Jalapeños, sliced (optional)
- ½ cup sour cream
- 1 can (15oz) chili beans (optional)
Instructions
- Preheat oven to 425°F (220°C). Dice onion, mince garlic, and slice jalapeños.
- Heat a large skillet over medium-high heat. Add ground beef and cook until browned, breaking it up with a spoon. Drain excess fat if desired.
- Add diced onion to the beef and cook for 2-3 minutes until softened. Add garlic and cook for 1 minute until fragrant.
- Stir in chili powder, salt, and pepper. Pour in tomato sauce (or jarred chili). Bring to a simmer, then reduce heat to low and simmer for 10-15 minutes. Adjust seasoning and set aside or keep warm in a slow cooker.
- Spread frozen fries in a single layer on a baking sheet. Bake for 20-25 minutes, flipping halfway, until golden and crispy.
- Transfer hot fries to a large serving platter. Immediately sprinkle shredded cheddar and Monterey Jack cheese over the fries to melt.
- Ladle warm chili over the cheese-covered fries.
- Top with green onions and jalapeños. Serve immediately with sour cream on the side.
Notes
For best results, shred your own cheese to avoid anti-caking agents that prevent smooth melting. Do not overcrowd the fries on the baking sheet to ensure they stay crispy. If serving at a tailgate, keep the chili warm in a slow cooker.
- Prep Time: 5 minutes
- Cook Time: 40 minutes
- Category: Appetizer
- Cuisine: American
Nutrition
- Serving Size: 1 serving
- Calories: 650
- Sugar: 6
- Sodium: 900
- Fat: 38
- Saturated Fat: 15
- Carbohydrates: 55
- Fiber: 4
- Protein: 22
Keywords: chili cheese fries, tailgate recipes, game day snacks, easy appetizer, comfort food, football food, slow cooker chili



