
I still remember the first time I used my Instant Pot. I was standing in my kitchen, staring at this big, shiny metal pot that looked like it belonged in a spaceship, and I was genuinely terrified. I’d heard stories about pressure cookers exploding (okay, maybe not exploding, but definitely hissing loudly and making a mess). I had a whole chicken, some beans, and a bag of frozen corn, and I just wanted dinner to be done without me standing over the stove for two hours.
So I threw everything in. I hit a button. I went to read a book. And when the timer went off, I opened it to find something creamy, comforting, and absolutely delicious. It wasn’t fancy. It wasn’t complicated. It was just… good. And that was the moment I realized that cooking doesn’t have to be a chore or a performance. It can just be simple.
This Instant Pot white chicken chili is exactly that. It’s my go-to for when I want something hearty but don’t want to spend my evening chopping vegetables or stirring a pot. It’s basically a hug in a bowl. And the best part? You really can’t mess this up. If you can pour ingredients into a pot and press a button, you can make this. Seriously.
I’ve made this for my family, for friends who were stressed about dinner, and for myself when I just wanted comfort food without the guilt of ordering takeout. It’s become a staple in our house, especially during the colder months. The fire-roasted corn adds this smoky sweetness that makes the whole dish feel elevated, even though it’s made with five simple ingredients. If you’re new to pressure cooking or just looking for a foolproof dinner, this is the one. Trust me.
Why You’ll Love This Recipe
There are a few reasons this white chicken chili has taken over my kitchen, but the main one is how easy it is to love. Here’s why it’s worth making:
Minimal Cleanup — Seriously, you’re only using one pot. The Instant Pot. You throw everything in, you press a button, you wait. When it’s done, you wash one pot. That’s it. No chopping boards, no extra pans, no mess. I love that. It makes me want to cook more because there’s no punishment at the end.
Beginner-Proof — I know pressure cookers can feel intimidating, but this recipe is designed for people who have never used one before. There’s no complex timing, no fancy techniques, no worrying about burning things. You just dump and go. I’ve taught my teenage nephew to make this, and he did it perfectly the first time. If he can do it, you can too.
Flavor That Feels Fancy — Even though it’s simple, it tastes like you spent hours on it. The fire-roasted corn and the cream cheese create this rich, creamy base that’s incredibly satisfying. It’s comforting in a way that feels like a restaurant meal, but it’s made in your own kitchen. My friends always ask for the recipe when I serve it, and they’re surprised when I tell them it’s that easy.
Perfect for Leftovers — This chili actually tastes better the next day. The flavors meld together overnight, and it’s even creamier. I make extra on purpose so I have lunch sorted for the next few days. It reheats beautifully in the microwave or on the stove.
Customizable — Once you get the hang of it, you can tweak it to your liking. Add more beans, less corn, some jalapeños for heat. But honestly, the base recipe is so good that I rarely feel the need to change it. It’s just right.
This is my answer to “what’s for dinner” when I want something warm and filling but don’t want to stress. It’s reliable, it’s delicious, and it’s so easy that you’ll wonder why you haven’t been making it all along.
Ingredients You’ll Need
Here’s the best part: you probably have most of this already. I’m particular about a few things, but mostly, this is about using what you like. Let’s break it down.
Chicken Breasts (1.5 lbs / 680g) — I use boneless, skinless chicken breasts because they cook quickly and shred easily. You can use thighs if you prefer, but breasts are leaner and fit the “white” chili vibe. I buy them fresh when I can, but frozen works too—just make sure they’re thawed before cooking.
White Beans (1 can, 15 oz / 425g) — Cannellini or Great Northern beans are classic here. I love cannellini for their creamy texture. Rinse and drain them well. This step is important to remove that canned bean taste. If you’re short on time, you can skip rinsing, but I recommend it.
Fire-Roasted Corn (1 can, 15 oz / 425g) — This is the star of the show. The fire-roasting adds this smoky depth that regular corn just doesn’t have. Look for canned corn labeled “fire-roasted.” If you can’t find it, you can use regular corn plus a little smoked paprika, but the fire-roasted kind is worth seeking out. I keep cans of it in my pantry just for this recipe.
Chicken Broth (2 cups / 480ml) — I use low-sodium broth so I can control the saltiness. If you only have regular broth, just reduce the added salt in the recipe. Chicken broth gives the base its savory flavor. Vegetable broth works if you want it vegetarian, but chicken is traditional for white chicken chili.
Cream Cheese (8 oz / 225g) — This is what makes the chili creamy and rich. Use full-fat, softened cream cheese. I take it out of the fridge 15 minutes before cooking so it melts easier. Don’t use the low-fat version—it doesn’t melt the same way and can make the sauce grainy. Trust me on this.
Seasonings — I keep it simple: 1 teaspoon cumin, 1 teaspoon garlic powder, and salt and pepper to taste. I don’t add much salt upfront because the broth and cheese are already salty. Adjust at the end.
Optional Add-ins — Some people like to add diced jalapeños for heat, or a little lime juice for brightness. I sometimes stir in a handful of shredded cheese at the end for extra richness. But the base five ingredients are enough. You can always add more later.
For Topping — I like to serve this with sour cream, fresh cilantro, and maybe some crushed tortilla chips. It adds texture and makes it feel more like a meal. But honestly, it’s great on its own too.
That’s it. Five ingredients, plus a few pantry staples. No fancy stuff, no hard-to-find items. Just good, simple food.
Equipment Needed
You don’t need fancy equipment for this. Here’s what I actually use.
Instant Pot or Pressure Cooker — I use a 6-quart Instant Pot. It’s the perfect size for this recipe. If you have a different brand of pressure cooker, it works too. Just make sure it has a “Manual” or “Pressure Cook” setting. I’ve used the Instant Pot for years, and it’s been reliable. If you’re new to it, don’t worry—I’ll walk you through it.
Wooden Spoon — For stirring. I like wooden because it doesn’t scratch the pot. Silicone works too. Just avoid metal if your pot has a non-stick coating.
Measuring Cups and Spoons — Standard stuff. I have a set from the dollar store that works fine. You don’t need anything fancy.
Colander — For rinsing the beans. Or you can just drain them in the sink if you’re lazy. I use a colander because it’s easier to hold.
Knife and Cutting Board — You’ll need to chop the chicken if it’s large, but most breasts are fine as is. I just cut them in half if they’re really big so they fit in the pot.
Optional but nice: Slotted Spoon — For removing the chicken after cooking. Or you can just use tongs. I have a slotted spoon because it’s easier to drain the liquid when I take the chicken out.
You don’t need anything else. If you have a pressure cooker and a spoon, you’re good to go.
How to Make It: Step-by-Step
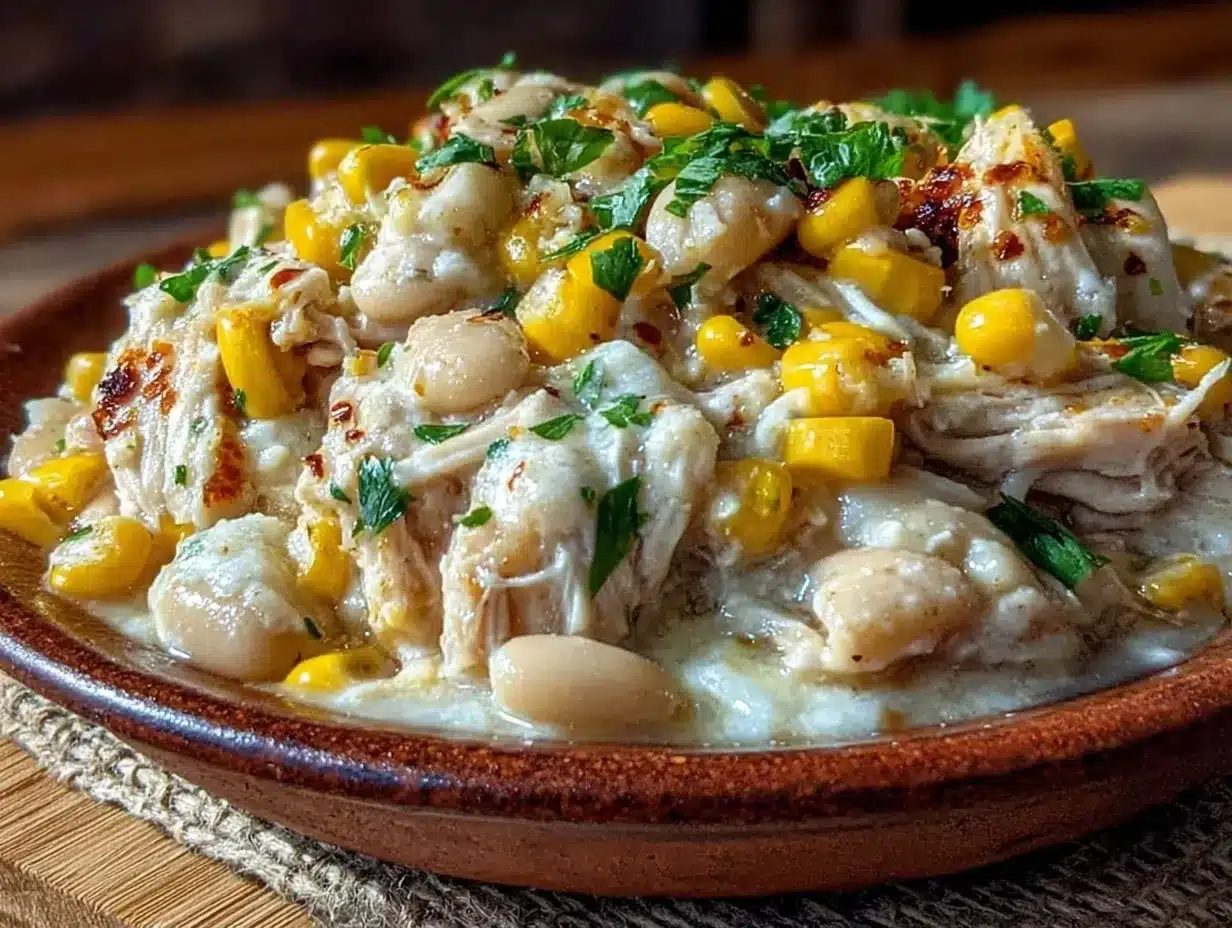
Alright, let’s make this! I’m walking you through exactly how I do it, including the little tricks I’ve picked up. It’s really simple, so don’t overthink it.
Step 1: Prep Your Ingredients (5 minutes)
Before you start, rinse and drain the white beans. Chop the chicken breasts into large chunks if they’re big—I want them bite-sized so they cook evenly. Measure out your spices. It helps to have everything ready so you don’t miss a step later. I know it seems fussy, but it makes the cooking part way less stressful.
Step 2: Add Ingredients to the Pot (5 minutes)
Add the chicken chunks to the Instant Pot. Then add the rinsed beans, the fire-roasted corn (don’t drain it—the juice adds flavor), and the chicken broth. Sprinkle in the cumin, garlic powder, salt, and pepper. Stir everything together gently. You don’t need to mix it perfectly—just get it all in there.
Step 3: Pressure Cook (15 minutes)
Lock the lid on the Instant Pot. Make sure the valve is set to “Sealing” so the steam doesn’t escape. Press the “Manual” or “Pressure Cook” button and set it to 15 minutes on high pressure. The pot will take a few minutes to come to pressure, so be patient. While it’s cooking, you can go do something else. Read a book, watch a show, whatever. This is the hands-off part.
Step 4: Quick Release (2 minutes)
Once the timer goes off, do a quick pressure release. Carefully turn the valve to “Venting” to let the steam out. Be careful—the steam is hot! I use a wooden spoon to turn the valve so my hands stay safe. Once the float valve drops, open the lid.
Step 5: Shred the Chicken
Use two forks to shred the chicken right in the pot. It should be tender and fall apart easily. If some pieces are still large, just keep shredding. You want little chunks, not huge pieces. This takes about 2 minutes.
Step 6: Add Cream Cheese (2 minutes)
Add the softened cream cheese to the pot. Stir it in until it’s fully melted and incorporated. The sauce will become thick and creamy. If it’s too thick, add a splash more broth. If it’s too thin, let it sit for a minute—it’ll thicken up. Taste and adjust salt if needed. The cream cheese adds salt, so you might not need much extra.
Step 7: Serve
Ladle the chili into bowls. Top with sour cream, fresh cilantro, and tortilla chips if you like. Serve immediately while it’s hot. It’s amazing on its own, but the toppings make it feel special.
Total Time: About 45 minutes (10 minutes prep, 15 minutes cook, 20 minutes coming to pressure and releasing)
Expert Tips & Tricks
Here’s everything I’ve learned from making this dozens of times. These tips will save you from my mistakes.
Shred the Chicken in the Pot — I used to take the chicken out to shred it, but it’s easier to just shred it in the pot. The liquid helps keep it moist, and you don’t have to wash another bowl. Plus, it saves time.
Softened Cream Cheese — If your cream cheese is cold, it won’t melt well. I take it out of the fridge 15 minutes before cooking. If I forget, I microwave it for 15 seconds. It should be soft enough to stir in easily.
Don’t Skip the Rinsing — Rinsing the beans removes that canned taste. It’s a small step, but it makes a big difference in flavor. I used to skip it and wondered why my chili tasted weird. Never skip it.
Quick Release vs. Natural Release — For this recipe, I always do a quick release. Natural release can make the chicken tough because it keeps cooking in the residual heat. Quick release stops the cooking right when it’s done.
Adjust the Spice — If you like it spicy, add a diced jalapeño with the other ingredients. Or add some red pepper flakes at the end. If you prefer mild, skip the jalapeño and just use the cumin and garlic. It’s still delicious.
Thickening the Sauce — If you want a thicker chili, you can mash some of the beans against the side of the pot before adding the cream cheese. This releases their starch and thickens the sauce naturally. I do this sometimes for a heartier texture.
Leftovers — This chili thickens in the fridge. When you reheat it, add a splash of broth or milk to thin it out. It’ll be creamy again. I reheat it in the microwave in 30-second intervals, stirring in between.
Clean Up — If you want to make cleanup even easier, line the Instant Pot with a slow cooker liner before adding ingredients. I don’t always do it, but when I’m really lazy, it’s a game-changer.
Variations & Substitutions
Once you’ve nailed the basic version, here’s how you can mix it up. I’ve tried all of these.
Spicy Version — Add 1 diced jalapeño or 1 teaspoon of chipotle powder. I like this version when I want a kick. It’s great with some hot sauce on top.
Vegetarian Version — Skip the chicken and add an extra can of beans. Use vegetable broth instead of chicken broth. It’s just as satisfying. I make this for my vegetarian friend, and she loves it.
Green Chili Version — Swap the fire-roasted corn for canned green chiles. Add a can of diced green chiles with the other ingredients. It’s tangier and spicier. My husband prefers this version.
Loaded Version — Top with shredded cheddar cheese, bacon bits, and sour cream. It’s like a loaded baked potato in chili form. I make this for game days.
Dairy-Free Version — Use coconut cream instead of cream cheese. It’s not exactly the same, but it’s creamy and delicious. I’ve made this for my lactose-intolerant friend, and she didn’t miss the dairy.
Gluten-Free — This recipe is naturally gluten-free. Just make sure your broth and beans are certified gluten-free. I use gluten-free broth because some brands have additives.
Slow Cooker Version — If you don’t have an Instant Pot, you can make this in a slow cooker. Cook on low for 6-8 hours or high for 3-4 hours. Add the cream cheese in the last 30 minutes. It takes longer, but it’s just as good.
Serving & Storage
Here’s how to enjoy and store this chili.
How to Serve
I usually serve this straight from the pot at the dinner table—it looks rustic and stays warm. But here are other ways I’ve enjoyed it:
Side Dishes — I love it with garlic bread or cornbread. A simple green salad works too if you want something light. I also serve it with spicy chipotle corn on the cob for a complete meal. The corn adds a nice smoky flavor that complements the chili.
Toppings Bar — When I have guests, I put out: sour cream, shredded cheese, fresh cilantro, diced jalapeños, and crushed tortilla chips. Everyone customizes their bowl. It’s fun and interactive.
Wine Pairing — I’m not a wine expert, but a crisp white wine like Sauvignon Blanc works well with this. Or a light red like Pinot Noir if you prefer.
Storage Instructions
Refrigerator: Store in an airtight container for up to 4 days. The sauce will thicken in the fridge—totally normal. Add a splash of broth or milk when reheating.
Reheating: Best method: Add to a pot with a splash of milk or broth over low heat. Stir until heated through and creamy again. Microwave method: Heat in 30-second intervals, stirring between. Add a splash of liquid if it’s too thick.
Freezing: This doesn’t freeze well because of the cream cheese. The texture can get grainy when thawed. It’s best eaten fresh or stored in the fridge for up to 4 days.
Meal Prep: Make the chili on Sunday, store in the fridge. Reheat each night. It takes 2 minutes and tastes way better than takeout. I meal prep this all the time.
Nutrition Information
I’m not a nutritionist, but here’s the breakdown if you’re tracking.
Per Serving (based on 6 servings):
- Calories: 380
- Protein: 35g
- Carbs: 30g
- Fiber: 8g
- Sugar: 4g
- Fat: 12g
- Saturated Fat: 7g
- Cholesterol: 85mg
- Sodium: 650mg
- Calcium: 150mg
What’s Good: High protein from the chicken and beans. Good fiber content. Calcium from the cheese.
What to Know: Higher in calories from the cream cheese. Contains dairy. Moderate sodium (use low-sodium broth to reduce).
My Take: Look, this is comfort food. It’s not a diet recipe. But it’s way better than takeout, costs less, and I know exactly what’s in it. When I want to make it lighter, I use less cream cheese and more beans. But usually? I just eat a reasonable portion and enjoy it.
Final Thoughts
So that’s my go-to Instant Pot white chicken chili! I’ve probably talked your ear off at this point, but when you make a recipe this often, you have a lot to say about it.
This has saved weeknight dinners more times than I can count. It’s my answer to “what’s for dinner” when I’m tired, don’t want takeout, and still want something that tastes really good. My kids are happy, my husband’s happy, and I’m happy because I’m not stressed about cooking.
Make it yours! Try different add-ins, swap in your favorite vegetables, adjust the spice. The best recipes are the ones you adapt to your family’s tastes. And if you’re looking for other easy chicken dinners, check out my one-pan creamy mushroom chicken—it’s just as simple and delicious.
If you make this, drop a comment and let me know what you think! I love hearing how recipes turn out in your kitchen. And if something doesn’t work, tell me that too—I’m here to help troubleshoot.
Happy cooking! And I hope your kitchen smells half as good as mine does right now.
Frequently Asked Questions
Can I use frozen chicken?
You can, but it’s better to use thawed chicken. If you use frozen, add 5 minutes to the cook time. But thawed chicken cooks more evenly and shreds easier. I always try to thaw mine ahead of time.
My sauce is too thin—what happened?
Usually means you used too much broth. Let it simmer for a few minutes to reduce, or add a little more cream cheese. You can also mash some beans to thicken it. If it’s already done, just let it sit—it’ll thicken as it cools.
Can I make this ahead for a dinner party?
Sort of. Make the chili up to 2 days ahead and store in the fridge. Reheat gently and add the cream cheese right before serving. It won’t be quite as good as fresh, but it’s close and saves you stress during the party. I do this all the time.
Why did my sauce get grainy?
The heat was too high when you added the cream cheese, which made it separate. Always add cream cheese off the heat or on low heat. Stir it in gently until melted. If it’s already grainy, try whisking in a splash of warm broth—sometimes you can save it.
Can I use regular corn instead of fire-roasted?
You can, but the flavor won’t be the same. Fire-roasted corn adds a smoky depth that regular corn doesn’t have. If you must use regular corn, add a little smoked paprika to mimic the flavor. But I recommend seeking out the fire-roasted kind.
How do I reheat leftovers without it getting dry?
Add a splash of milk or broth to a pot, add your leftover chili, and heat gently over low heat, stirring frequently. The extra liquid brings back the creamy texture. Microwave sort of works but tends to dry it out. If you do microwave, definitely add a splash of liquid first and heat in short bursts, stirring between.
Can I double this recipe?
Absolutely! Double everything and use your biggest Instant Pot. The cooking times stay the same. I do this when I’m meal-prepping or feeding a crowd. Just make sure your pot isn’t too full—leave some room for steam.
Pin This Recipe!


Instant Pot White Chicken Chili: Easy 5-Ingredient Beginner Recipe
- Total Time: 45 minutes
- Yield: 6 servings 1x
Description
A creamy, comforting, and beginner-proof white chicken chili made in the Instant Pot with just five simple ingredients. This one-pot meal is perfect for busy weeknights and yields delicious leftovers.
Ingredients
- 1.5 lbs boneless, skinless chicken breasts
- 1 can (15 oz) white beans (cannellini or Great Northern), rinsed and drained
- 1 can (15 oz) fire-roasted corn (do not drain)
- 2 cups low-sodium chicken broth
- 8 oz full-fat cream cheese, softened
- 1 teaspoon cumin
- 1 teaspoon garlic powder
- Salt and pepper to taste
- Optional toppings: sour cream, fresh cilantro, crushed tortilla chips
Instructions
- Rinse and drain the white beans. Chop chicken breasts into large, bite-sized chunks if necessary.
- Add chicken chunks, rinsed beans, fire-roasted corn (with juice), and chicken broth to the Instant Pot.
- Sprinkle in cumin, garlic powder, salt, and pepper. Stir gently to combine.
- Lock the lid and ensure the valve is set to ‘Sealing’. Press ‘Manual’ or ‘Pressure Cook’ and set to 15 minutes on high pressure.
- Once the timer finishes, perform a quick pressure release by carefully turning the valve to ‘Venting’. Wait for the float valve to drop before opening.
- Shred the chicken directly in the pot using two forks until tender and broken into small pieces.
- Add the softened cream cheese and stir until fully melted and incorporated into the sauce. Adjust consistency with more broth if too thick.
- Taste and adjust seasoning if needed. Serve immediately with desired toppings.
Notes
For best results, use softened cream cheese to ensure it melts smoothly. Rinsing the beans removes the canned taste. This recipe is naturally gluten-free if using certified gluten-free broth. The chili thickens in the fridge; add a splash of broth or milk when reheating. Do not freeze this recipe as the cream cheese may become grainy upon thawing.
- Prep Time: 10 minutes
- Cook Time: 15 minutes
- Category: Main Course
- Cuisine: American
Nutrition
- Serving Size: 1 bowl
- Calories: 380
- Sugar: 4
- Sodium: 650
- Fat: 12
- Saturated Fat: 7
- Carbohydrates: 30
- Fiber: 8
- Protein: 35
Keywords: instant pot, white chicken chili, easy dinner, beginner recipe, one pot meal, comfort food, creamy chili, quick dinner



