I have a confession to make. For years, I was that person who bought the pre-sliced apples at the grocery store. You know the ones—the ones sitting in plastic tubs, looking slightly bruised and vaguely sad. I told myself it was for “convenience.” In reality, it was because I was terrified of peeling and slicing a dozen apples before dinner. I was scared the topping would burn, the filling would be watery, or that I’d just end up with a sad, undercooked mess.
Then last October, my neighbor handed me a bag of Honeycrisp apples she’d picked from her own tree. They were heavy, crisp, and smelled like pure autumn. I decided to finally tackle the ultimate comfort dessert: apple crisp. I made it with zero expectation of greatness. I just wanted something warm and sweet for a chilly Tuesday night.
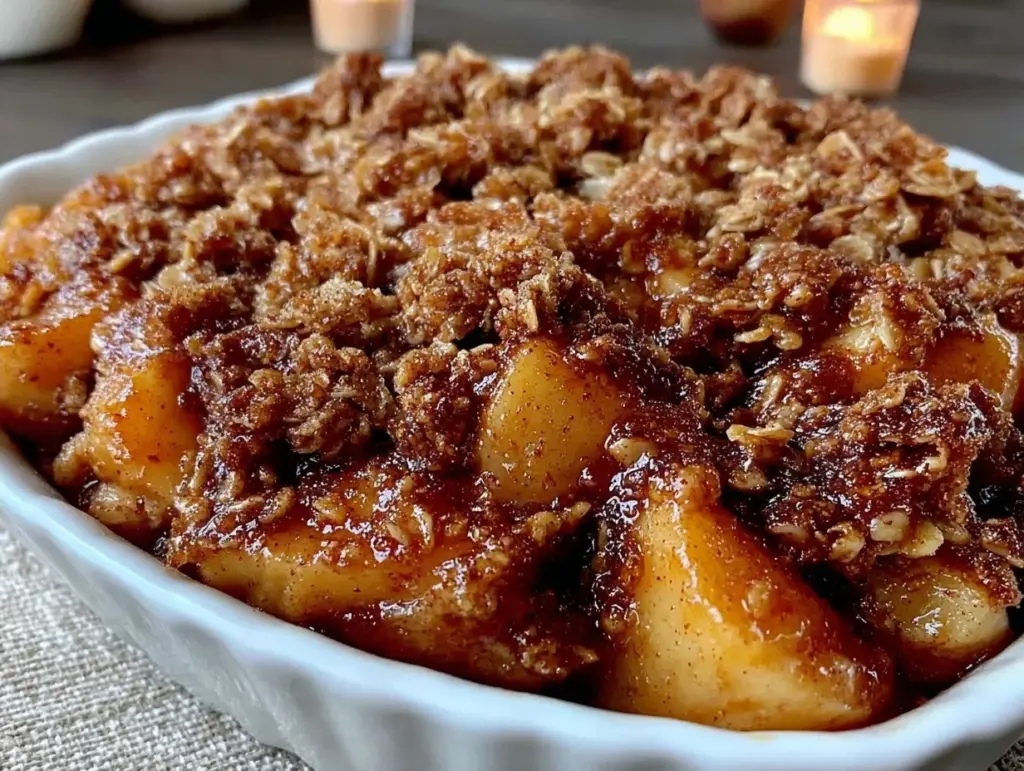
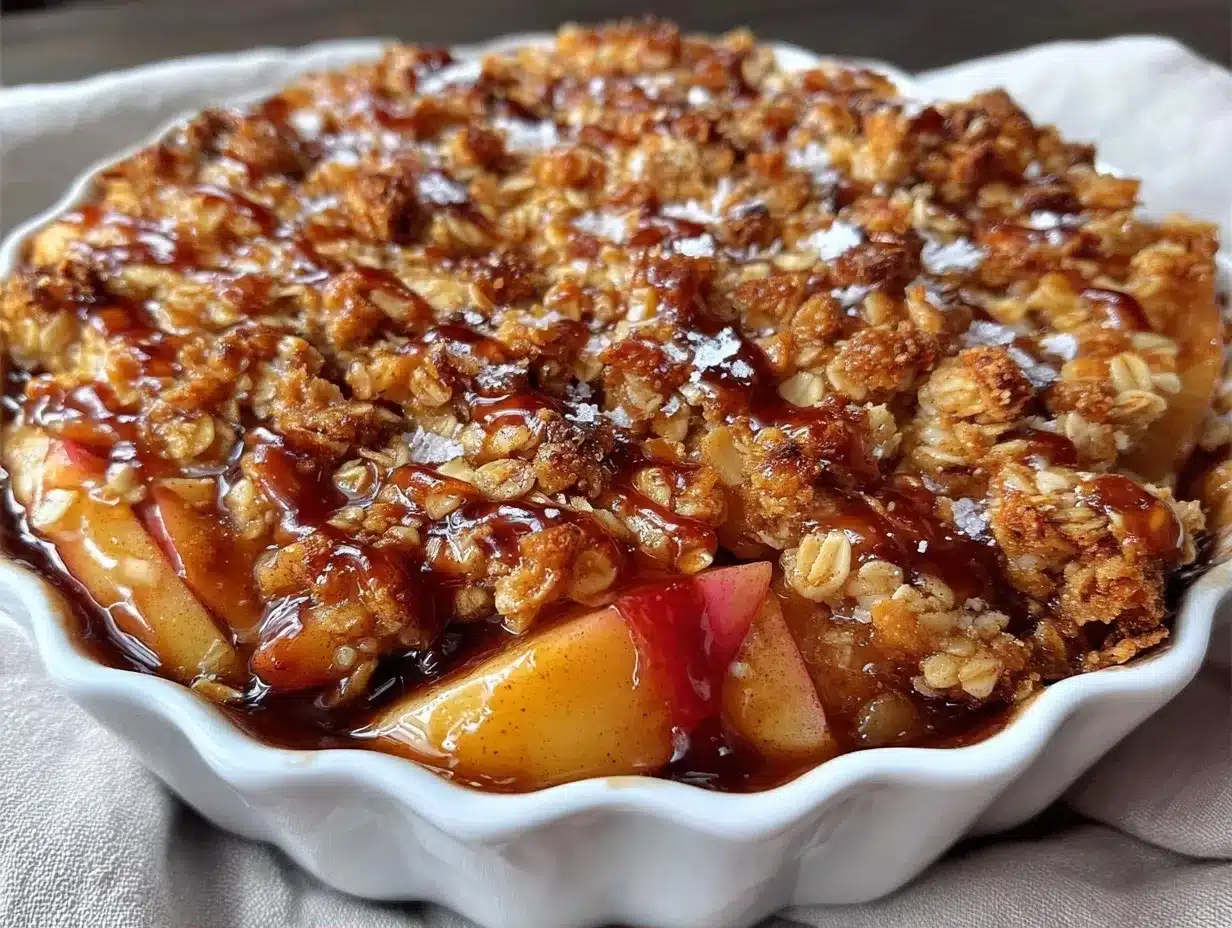
What came out of the oven wasn’t just good. It was life-changing. The apples stayed tender but didn’t turn into mush. The cinnamon-oat streusel had that perfect shatter-crisp texture that contrasts with the juicy filling. And the smell? It made my entire house feel like a cozy cabin in the woods. I’ve since made this fall Honeycrisp apple crisp with buttery oat streusel at least six times. It’s become my go-to for game days, dinner parties, and just because I need a hug in dessert form.
This isn’t your average, dry, cakey apple crisp. This is the real deal. The kind that leaves you scraping the last bit of cinnamon sugar from the bottom of the baking dish. If you’ve been hesitant to try baking from scratch, or if you’ve had bad experiences with apple desserts in the past, trust me on this one. It’s easier than you think, and the results are seriously impressive.
Why You’ll Love This Honeycrisp Apple Crisp Recipe
There are a million apple dessert recipes out there, but this one has earned a permanent spot in my rotation for a few specific reasons. It’s not just about the taste (though that’s huge). It’s about the experience of making it and the way it tastes the next day.
- It’s Actually Easy — Seriously. If you can chop apples and mix flour with butter, you can make this. I’ve made this while watching TV, with one hand on the counter. There’s no complex technique, no tempering chocolate, no fussy piping. Just toss, mix, and bake. It’s the perfect “I don’t want to spend hours in the kitchen” dessert.
- The Texture is Perfection — The secret here is the ratio of oats to flour in the streusel. It gives you that crunchy, granola-like topping that contrasts beautifully with the soft, spiced apples underneath. It’s not soggy. It’s not too hard. It’s just right.
- It Uses Seasonal Ingredients — When fall hits, apple prices drop, and the quality skyrockets. Using Honeycrisp apples isn’t just trendy; it’s practical. They’re sweet, tart, and hold their shape. Plus, making this dessert feels like celebrating the season. It’s cozy and nostalgic without being cliché.
- Leftovers Taste Better — I know, I know. Usually, leftovers are a letdown. Not this. The next day, the flavors have melded together even more. I often eat a cold slice for breakfast with a cup of coffee. It’s surprisingly good and feels like a treat rather than a compromise.
- It’s Crowd-Pleasing — I’ve served this to picky eaters, health-conscious friends (with a lighter topping), and grandparents who are critical of desserts. Everyone asks for the recipe. It’s a safe bet for any gathering, from casual weeknights to holiday dinners.
Once you make this fall Honeycrisp apple crisp with buttery oat streusel, you’ll wonder why you ever bought the frozen kind. It’s warm, it’s comforting, and it’s genuinely delicious. Let’s get into the details.
Ingredients You’ll Need for the Best Apple Crisp
Here’s the beauty of this recipe: you probably have most of these ingredients already. It’s a pantry-friendly dessert that relies on simple, high-quality components. I’m particular about a few things here, and I’ll tell you exactly why.
For the Apple Filling
Honeycrisp apples (6-7 medium, about 3 lbs / 1.4 kg) — This is the star. Honeycrisp apples are known for their crisp texture and balanced sweet-tart flavor. They don’t disintegrate when baked. If you can’t find Honeycrisp, use a mix of Granny Smith and Gala. Granny Smith gives the tartness and structure, while Gala adds sweetness and softness. Avoid Red Delicious—they turn to mush and lack flavor.
Granulated sugar (½ cup / 100g) — Just enough to bring out the natural sweetness of the apples without making it cloying. You can reduce this to ⅓ cup if you prefer less sweetness, but I recommend sticking with the full amount for balance.
Apple cider (2 tablespoons / 30ml) — This is my secret weapon. A splash of apple cider adds a deep, concentrated apple flavor that fresh juice can’t match. It also helps create a light syrup with the sugar. If you don’t have cider, apple juice works, but cider is better.
Lemon juice (1 tablespoon / 15ml) — Freshly squeezed. This prevents the apples from browning and adds a bright acidity that cuts through the richness of the topping. Don’t skip it—it makes the flavor pop.
Cinnamon (1 teaspoon / 2g) — Ground cinnamon is essential. If you have a high-quality, fresh jar, use it. Old cinnamon tastes dusty and flat.
Nutmeg (¼ teaspoon / 0.5g) — Just a pinch. Nutmeg adds warmth and complexity. Too much can make it taste medicinal, so be sparing.
Cornstarch (1 tablespoon / 8g) — This thickens the juices that release from the apples as they bake. Without it, you’ll end up with a soupy bottom. Mix it with a tablespoon of cold water first to make a slurry, then add it to the apples. It prevents clumping.
For the Buttery Oat Streusel
Old-fashioned rolled oats (1 cup / 80g) — Not quick oats. Old-fashioned oats give you that chewy, substantial texture. Quick oats turn to mush. If you only have quick oats, pulse them in a food processor for a few seconds to break them up a bit.
All-purpose flour (1 cup / 125g) — The base of the crumble. It binds the oats and butter together. For a gluten-free version, use a 1:1 gluten-free flour blend, though the texture will be slightly different.
Packed brown sugar (½ cup / 100g) — This adds moisture and a caramel-like depth. Light or dark brown sugar both work, but dark has a stronger molasses flavor. I prefer dark for that rich, toffee taste.
Unsalted butter (½ cup / 113g, cold and cubed) — This is crucial. Cold butter creates those distinct, buttery crumbs. If the butter is too soft, you’ll get a pasty topping instead of a crumbly one. Cut it into small cubes so it incorporates evenly.
Flaky sea salt (½ teaspoon / 3g) — Salt enhances the sweetness and balances the flavors. Flaky sea salt adds a nice crunch and visual appeal. Regular table salt works too, just use less.
Optional Add-ins — I love adding ½ cup of chopped pecans or walnuts to the topping. They add extra crunch and nuttiness. If you have leftover toasted pecan praline hot chocolate flavors in mind, these nuts will echo that cozy vibe perfectly.
Equipment Needed
You don’t need fancy equipment for this. Here’s what I actually use:
- 9×13 inch baking dish — I use a ceramic one because it heats evenly. Glass works too, but keep an eye on it as it can brown the bottom faster. Avoid metal if you’re worried about burning.
- Large mixing bowl — For tossing the apples with sugar, spices, and cornstarch. A bowl with a wide rim makes it easier to mix.
- Medium mixing bowl — For the streusel topping.
- Peeler and knife — For prepping the apples. A Y-peeler is easier to control than a straight peeler.
- Fork or pastry cutter — To cut the butter into the flour and oats. I use a fork because it’s faster and less messy than a pastry cutter.
- Spatula — For stirring the apples and spreading the topping.
That’s it. No stand mixer, no food processor, no fancy gadgets. Just basic kitchen tools you probably already have.
How to Make It: Step-by-Step
Alright, let’s make this! I’m walking you through exactly how I do it, including the little tricks I’ve picked up over the years.
Step 1: Prep Your Oven and Dish (5 minutes)
Preheat your oven to 375°F (190°C). This is the perfect temperature—hot enough to cook the apples through but not so hot that the topping burns before the fruit is tender. Grease your 9×13 inch baking dish with a little butter or non-stick spray. It helps prevent sticking and adds flavor.
Step 2: Peel, Core, and Slice the Apples (10 minutes)
Wash your Honeycrisp apples thoroughly. Peel them (I prefer peeled for a smoother texture, but leaving the skin on adds fiber and color—your choice). Core them and slice them into ¼-inch thick wedges. Try to keep them uniform so they cook evenly. If some slices are thick and some are thin, the thin ones will turn to mush before the thick ones are done.
Place the sliced apples in your large mixing bowl.
Step 3: Season the Apples (5 minutes)
Sprinkle the granulated sugar, cinnamon, nutmeg, and lemon juice over the apples. Toss them gently until they’re evenly coated. The lemon juice will keep them from browning, and the spices will infuse into the fruit as they bake.
Make a slurry by mixing the cornstarch with 1 tablespoon of cold water until smooth. Pour this over the apples and toss again. This ensures the cornstarch is distributed evenly, which is key for a thick, glossy sauce.
Step 4: Make the Buttery Oat Streusel (5 minutes)
In your medium bowl, combine the old-fashioned oats, all-purpose flour, and brown sugar. Use a fork to mix them together. Then, add the cold, cubed butter. Use your fork (or a pastry cutter) to cut the butter into the dry ingredients. You’re looking for coarse crumbs with some larger, pea-sized chunks. Don’t overmix—it should look like wet sand. Those larger butter chunks are what create the crunchy clusters.
If you’re adding nuts, stir them in now.
Step 5: Assemble and Bake (45-50 minutes)
Pour the seasoned apples into your prepared baking dish. Spread them out evenly. Spoon the streusel topping over the apples. You don’t need to spread it perfectly—just cover as much of the surface as possible. Some apples will peek through, and that’s fine. It looks rustic and inviting.
Place the dish in the preheated oven. Bake for 45-50 minutes. You’ll know it’s done when the topping is golden brown and the filling is bubbling vigorously around the edges. If the topping starts to brown too quickly, cover the dish loosely with foil for the last 10 minutes.
Step 6: Cool and Serve (15-20 minutes)
Remove the crisp from the oven and let it cool for at least 15 minutes. This is the hardest part, I know. But cooling allows the filling to thicken slightly. If you serve it immediately, the filling will be runny. Let it sit, grab a spoon, and wait. The smell will drive you crazy, but patience pays off.
Serve warm, topped with a scoop of vanilla ice cream or a dollop of whipped cream. The contrast of hot crisp and cold cream is pure heaven.
Expert Tips & Tricks for Success
Here’s everything I’ve learned from making this dozens of times. These tips will save you from my mistakes.
- Use Cold Butter — I cannot stress this enough. Room temperature butter makes a pasty topping. Cold butter creates flakes and crunch. Keep your butter in the fridge until the last minute.
- Don’t Skimp on Spices — Cinnamon and nutmeg are the soul of this dessert. If you’re using old spices, replace them. Fresh spices make a huge difference in flavor intensity.
- Let It Cool — I know it’s tempting to dig in right away, but cooling is essential for the texture. The filling needs time to set. If you’re impatient, let it cool for at least 10 minutes.
- Check for Bubbles — The apples release juice as they bake. You want to see vigorous bubbling around the edges. If it’s not bubbling, the filling isn’t thickened yet. Keep baking.
- Add a Splash of Cider — The apple cider adds depth that sugar alone can’t achieve. It’s a small step that makes a big difference in flavor complexity.
Common Mistakes:
- Soggy Bottom — This happens if the cornstarch isn’t distributed evenly or if the apples are too wet. Make sure you toss the apples well with the cornstarch slurry.
- Burnt Topping — If your oven runs hot, cover the dish with foil after 30 minutes. Also, make sure your topping is spread evenly so there are no thin spots that burn quickly.
- Dry Filling — This usually means the apples didn’t release enough juice. Honeycrisp apples are juicy, but if you use a dry variety, you might need to add a little extra liquid (like the cider or apple juice).
Variations & Substitutions
Once you’ve nailed the basic version, here’s how you can mix it up. I’ve tried all of these.
- Gluten-Free — Use a 1:1 gluten-free flour blend and certified gluten-free oats. The texture will be slightly softer, but still delicious.
- Dairy-Free — Replace the butter with cold coconut oil or a dairy-free butter alternative. The flavor will be slightly different, but the texture will hold up.
- Lower Sugar — Reduce the granulated sugar to ¼ cup and use a sugar substitute in the topping. The apples will still provide plenty of sweetness.
- Spiced Tea Twist — Add a teaspoon of chai spice blend to the topping for a warming, aromatic kick. It’s surprisingly good.
- Add Chocolate — Sprinkle ½ cup of dark chocolate chips over the apples before adding the topping. It’s like a dessert pizza. My kids love this version.
If you’re looking for other dessert ideas, you might enjoy these ultra-fluffy angel food cake for a lighter option, or these chocolate croissant bread pudding if you’re in the mood for something rich and indulgent.
Serving & Storage
How to Serve: I usually serve this straight from the baking dish at the dinner table—it looks rustic and stays warm. But here are other ways I’ve enjoyed it:
- With a scoop of vanilla bean ice cream (the classic choice)
- With a dollop of whipped cream and a drizzle of caramel sauce
- With a slice of sharp cheddar cheese on the side (a traditional pairing in the UK)
Storage Instructions:
- Refrigerator: Store leftovers in an airtight container for up to 4 days. The topping will soften in the fridge, but it’s still good.
- Reheating: Reheat individual portions in the microwave for 1-2 minutes. For a crispier topping, reheat in the oven at 350°F for 10-15 minutes. This restores the crunch.
- Freezing: This doesn’t freeze well because the apples can become mushy upon thawing. It’s best enjoyed fresh or refrigerated.
Pro Tip: If you’re meal-prepping, make the topping and filling separately. Store them in the fridge, then assemble and bake just before serving. It tastes almost as good as fresh and saves time during the week.
Nutrition Information
I’m not a nutritionist, but here’s the breakdown if you’re tracking. This is a rich dessert, so portion control is key.
Per Serving (based on 8 servings):
- Calories: 320
- Protein: 3g
- Carbs: 52g
- Fiber: 4g
- Sugar: 30g
- Fat: 12g
- Saturated Fat: 7g
- Cholesterol: 30mg
- Sodium: 150mg
What’s Good: The apples provide fiber and vitamin C. The oats add some protein and fiber. It’s a decent balance of carbs and fat.
What to Know: It’s higher in sugar from the brown sugar and granulated sugar. If you’re watching your intake, consider reducing the sugar or using a substitute. But honestly? It’s a treat. Enjoy it guilt-free.
Final Thoughts
So that’s my go-to fall Honeycrisp apple crisp with buttery oat streusel! I’ve probably talked your ear off at this point, but when you make a recipe this often, you have a lot to say about it.
This dessert has saved me more times than I can count. It’s my answer to “what’s for dessert” when I want something homemade but don’t have hours to spend in the kitchen. It’s warm, it’s comforting, and it’s genuinely delicious. My family loves it, my friends ask for it, and I love making it.
Make it yours! Try different apple varieties, add nuts, or swap the spices. The best recipes are the ones you adapt to your tastes. And if you make this, drop a comment and let me know what you think! I love hearing how recipes turn out in your kitchen.
Happy baking! And I hope your kitchen smells half as good as mine does right now.
Frequently Asked Questions
Can I use Granny Smith apples instead of Honeycrisp?
Yes, but they’re more tart and firmer. I recommend using a mix of Granny Smith and Gala or Fuji for a balanced flavor and texture. If you use only Granny Smith, you might need to add a bit more sugar to the filling.
Why did my topping turn out soggy?
This usually happens if the butter was too soft or if the topping wasn’t spread evenly. Make sure your butter is cold and cut into small cubes. Also, ensure your oven is fully preheated before baking.
Can I make this ahead of time?
You can prepare the filling and topping separately and store them in the fridge for up to 2 days. Assemble and bake when ready to serve. This is great for dinner parties.
How do I reheat leftovers without drying them out?
Reheat in the oven at 350°F for 10-15 minutes. This restores the crispiness of the topping. Microwaving works for speed but can make the topping chewy. If you must microwave, add a splash of water to the dish to create steam.
Can I freeze this apple crisp?
I don’t recommend freezing the baked crisp, as the apples can become mushy. However, you can freeze the unbaked assembled crisp for up to 3 months. Thaw in the fridge overnight before baking.
What’s the best way to store leftovers?
Store in an airtight container in the refrigerator for up to 4 days. The topping will soften, but the flavor remains delicious. Reheat in the oven for best results.
Can I add nuts to the topping?
Absolutely! Chopped pecans, walnuts, or almonds add a wonderful crunch and nutty flavor. I usually add ½ cup to the topping mixture. They pair beautifully with the cinnamon and brown sugar.
Pin This Recipe!

Fall Honeycrisp Apple Crisp: Easy Best Homemade Recipe
- Total Time: 1 hour 5 minutes
- Yield: 8 servings 1x
Description
A cozy, easy-to-make apple crisp featuring tender Honeycrisp apples and a crunchy, buttery oat streusel topping. This recipe delivers perfect texture and flavor, making it an ideal comfort dessert for fall gatherings.
Ingredients
- 6–7 medium Honeycrisp apples (about 3 lbs / 1.4 kg), peeled, cored, and sliced into ¼-inch wedges
- ½ cup granulated sugar (100g)
- 2 tablespoons apple cider (30ml)
- 1 tablespoon fresh lemon juice (15ml)
- 1 teaspoon ground cinnamon (2g)
- ¼ teaspoon ground nutmeg (0.5g)
- 1 tablespoon cornstarch (8g) mixed with 1 tablespoon cold water
- 1 cup old-fashioned rolled oats (80g)
- 1 cup all-purpose flour (125g)
- ½ cup packed brown sugar (100g)
- ½ cup unsalted butter (113g), cold and cubed
- ½ teaspoon flaky sea salt (3g)
- Optional: ½ cup chopped pecans or walnuts
Instructions
- Preheat oven to 375°F (190°C). Grease a 9×13 inch baking dish with butter or non-stick spray.
- In a large mixing bowl, combine sliced apples, granulated sugar, cinnamon, nutmeg, and lemon juice. Toss to coat evenly.
- Add the cornstarch slurry (cornstarch mixed with cold water) to the apples and toss again to distribute evenly.
- In a medium bowl, combine oats, flour, and brown sugar. Add cold cubed butter and use a fork or pastry cutter to mix until the mixture resembles coarse crumbs with some pea-sized butter chunks.
- If using nuts, stir them into the topping mixture.
- Pour the seasoned apples into the prepared baking dish and spread evenly.
- Spoon the streusel topping over the apples, covering as much surface area as possible.
- Bake for 45-50 minutes, or until the topping is golden brown and the filling is bubbling vigorously around the edges. If the topping browns too quickly, cover loosely with foil for the last 10 minutes.
- Remove from oven and let cool for at least 15-20 minutes to allow the filling to thicken.
- Serve warm with vanilla ice cream or whipped cream.
Notes
Use cold butter for the topping to ensure a crunchy texture rather than a pasty one. Let the crisp cool for at least 15 minutes before serving to allow the filling to set. For a gluten-free version, use a 1:1 gluten-free flour blend and certified gluten-free oats. For dairy-free, substitute butter with cold coconut oil or dairy-free butter alternative.
- Prep Time: 20 minutes
- Cook Time: 45-50 minutes
- Category: Dessert
- Cuisine: American
Nutrition
- Serving Size: 1 slice
- Calories: 320
- Sugar: 30
- Sodium: 150
- Fat: 12
- Saturated Fat: 7
- Carbohydrates: 52
- Fiber: 4
- Protein: 3
Keywords: apple crisp, honeycrisp apples, fall dessert, oat streusel, homemade apple dessert, comfort food, easy baking recipe



