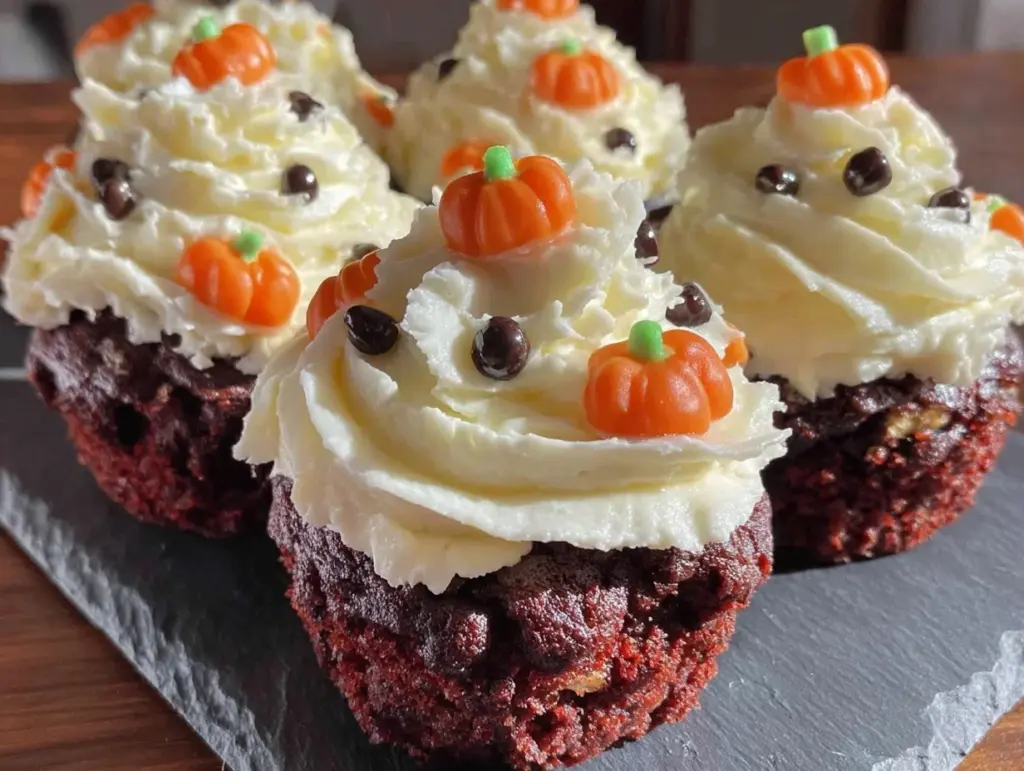
Last October, I stood in my kitchen at 11 PM, staring at a pantry that looked like a disaster zone. The party was in twelve hours. I had three kids who needed “something fun,” a neighbor who brought her entire book club (six people, all demanding dessert), and absolutely zero baked goods in sight. I opened the fridge, saw a bottle of red food coloring I’d bought for a failed Valentine’s project two years ago, and had one of those weird culinary epiphanies.
Why not make cupcakes? But not just any cupcakes. I wanted something that looked like it fell off a witch’s cauldron. Something purple. Something velvet. Something that would make my neighbors stop mid-conversation and ask, “Where did you get these?”
That night, I whipped up a batch of Halloween purple velvet cupcakes using a simple buttermilk base, a touch of cocoa for depth (because plain purple cake tastes like sugar water), and a cream cheese frosting that was rich enough to stand up to the vibrant color. I added a sprinkle of edible glitter and a single black licorice “spider” on top. The result? Absolute panic. People were taking photos. People were asking for the recipe. People were eating three apiece.
Since then, I’ve made these spooky purple velvet cupcakes for every Halloween party, family gathering, and “I just want chocolate and frosting” Tuesday. They’re moist, they’re vibrant, and they’re surprisingly easy to pull off even if you’re a nervous baker. I’ve tested this recipe at least ten times, tweaking the ratio of cocoa to flour and adjusting the frosting consistency until it was perfect. It’s my go-to for any occasion where you want dessert to look as good as it tastes.
Here’s the thing about Halloween baking: you don’t need to be a professional pastry chef to make something that looks magical. You just need the right color, the right texture, and a little bit of confidence. These cupcakes deliver on all three. They’re softer than a traditional red velvet, slightly more chocolate-forward, and absolutely stunning when frosted. Let’s get into why you’ll want to keep this recipe in your back pocket all year long.
Why You’ll Love This Halloween Purple Velvet Cupcake Recipe
There are about a dozen reasons I keep coming back to these cupcakes, but let’s be real—they’re not just for Halloween anymore. Once you taste them, you’ll want them in March, in July, and definitely on a random Thursday in November. Here’s why these easy purple velvet cupcakes have become a staple in my rotation:
- They’re Actually Moist — I’ve tried so many “velvet” recipes that turned out dry and crumbly. This one uses buttermilk and a bit of oil alongside butter, which keeps them tender for days. I made a batch last week and they were still soft on Sunday. No dryness. No regrets.
- The Color Is Unbeatable — Red velvet is great, but it’s everywhere. Purple? Purple is unexpected. It’s regal, it’s spooky, and it looks incredible on a plate. I use gel food coloring (not liquid) because it gives you that deep, electric purple without watering down the batter. Trust me, your guests will think you bought them from a fancy bakery.
- Cream Cheese Frosting Is Non-Negotiable — You cannot have velvet cake without tangy cream cheese frosting. It cuts through the sweetness and adds that classic velvety texture. I’ve tried buttercream versions, and they just don’t hit the same. This frosting is thick, stable, and pipes beautifully. If you’re worried about baking, check out my high protein Greek yogurt cheesecake bars for another easy, no-fuss dessert that relies on a similar tangy profile.
- They Freeze Like a Dream — I make the cupcakes a week ahead, freeze them, and frost them the day before. They thaw perfectly. This is a lifesaver when you’re hosting a party and don’t want to be stuck in the kitchen while everyone else is drinking wine and chatting.
- Kid-Approved (and Adult-Approved) — My kids think the purple color is “alien magic.” My husband thinks they’re “fancy.” My picky eater cousin, who usually only eats white cake, asked for seconds. That’s the highest praise I can give.
So basically, these cupcakes are the perfect blend of spooky aesthetics and serious comfort food. They’re not just a holiday gimmick; they’re a genuinely delicious treat that happens to look fantastic. And if you’re looking for other easy desserts that impress without the stress, you might also enjoy these ultra gooey chocolate chip cookie bars—they’re just as easy and equally crowd-pleasing.
Ingredients You’ll Need for Purple Velvet Cupcakes
Here’s the best part: you probably have most of these ingredients already. I’m particular about a few things here (like the type of flour and the quality of the cocoa), but for the most part, this is a standard pantry raid. You don’t need anything weird or hard to find.
For the Cupcakes
All-purpose flour (2 cups / 250g) — Don’t try to swap this for cake flour unless you want to change the whole ratio. All-purpose gives the right structure. Spoon it into the cup and level it off—don’t scoop, or you’ll pack it down and get dry cupcakes.
Baking powder (1 teaspoon) and baking soda (½ teaspoon) — These are your leavening agents. Make sure they’re not expired! Old baking powder is the silent killer of fluffy cupcakes. I check mine every six months.
Salt (½ teaspoon) — Essential for flavor balance. It makes the chocolate and vanilla pop.
Unsalted butter (½ cup / 115g, softened) — Room temperature is key. If it’s cold, it won’t cream properly with the sugar. I leave it on the counter for an hour before starting.
Granulated sugar (1 ½ cups / 300g) — This is the standard amount. You can reduce it to 1 ¼ cups if you’re super sweet-tooth sensitive, but I don’t recommend it. The sugar helps with moisture.
Eggs (2 large, room temperature) — Again, room temp. Cold eggs can cause the butter mixture to break. If you forget, just drop them in a bowl of warm water for 5 minutes.
Vanilla extract (2 teaspoons) — Use real vanilla. The fake stuff tastes like chemicals in a delicate cake like this.
Buttersilk (1 cup / 240ml) — This is the secret weapon. Buttermilk adds tang and tenderness. If you don’t have buttermilk, mix 1 cup of milk with 1 tablespoon of lemon juice or vinegar. Let it sit for 10 minutes. It works almost as well.
Cocoa powder (2 tablespoons / 10g) — Unsweetened cocoa. This gives the “velvet” depth without making it a full chocolate cake. It also helps the purple color show up better than plain white batter.
Purple food coloring (1-2 teaspoons gel paste) — Gel paste is crucial. Liquid coloring will make the batter too wet and dilute the flavor. I use a deep violet gel. A little goes a long way. Start with 1 teaspoon, mix, and add more if you want it darker.
For the Cream Cheese Frosting
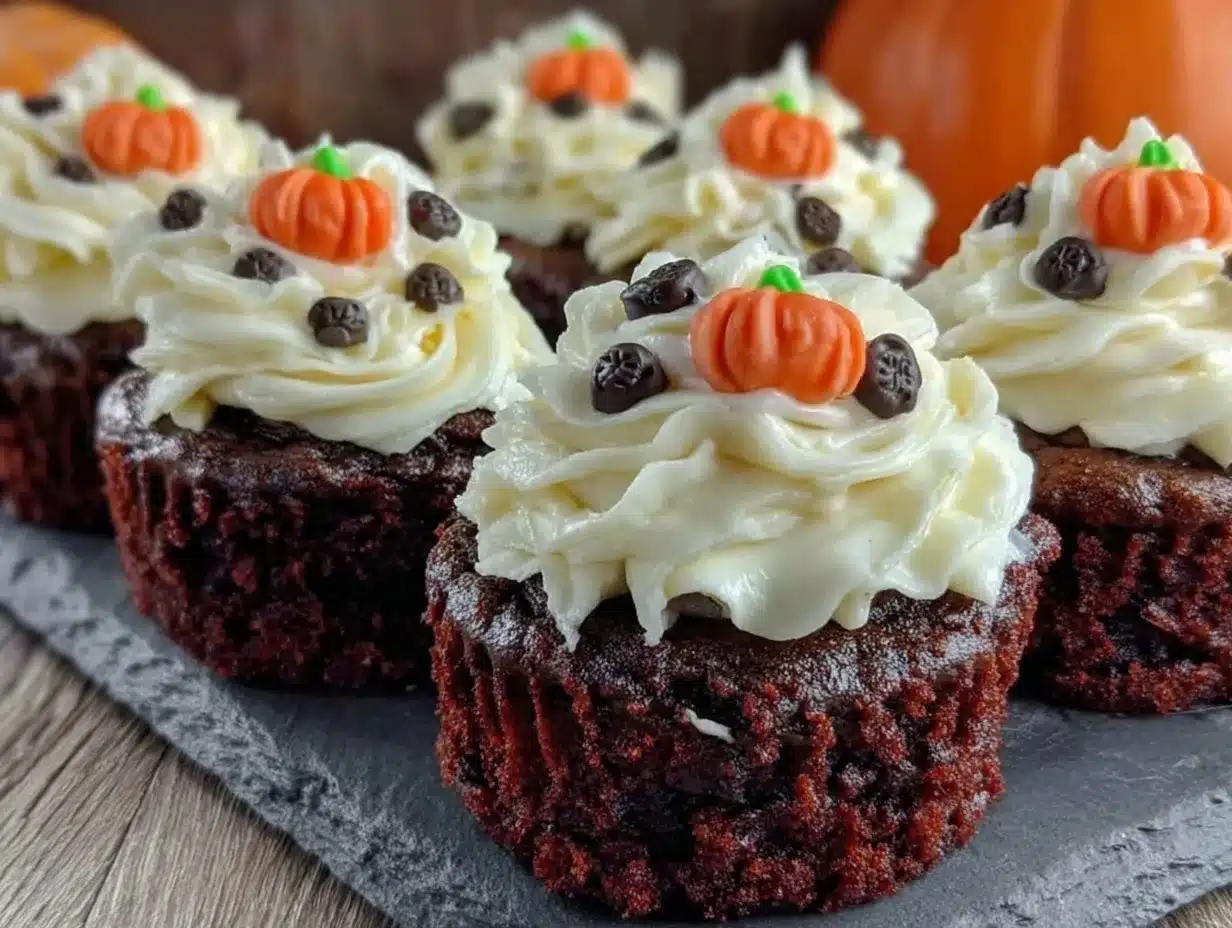
Cream cheese (8 oz / 225g, block style, softened) — Do not use the spreadable kind in the tub. It has too much water and air. Use the block cream cheese from the dairy section. It’s denser and makes a stable frosting.
Unsalted butter (½ cup / 115g, softened) — Make sure it’s soft but not melted. Melted butter makes the frosting greasy.
Powdered sugar (3-4 cups / 360-480g) — Sift this! I know it’s annoying, but powdered sugar has lumps. Sifting ensures your frosting is silky smooth. If you skip this, you’ll have little white chunks in your frosting, and nobody wants that.
Vanilla extract (1 teaspoon) — For flavor.
Salt (¼ teaspoon) — Cuts the sweetness.
For the Garnish (Optional but Fun)
Edible glitter — Purple or silver. Adds that magical sparkle.
Black licorice or pretzel sticks — Cut into spider legs for a spooky touch.
Candy eyeballs — For a cute, non-scary option.
Real talk: I once made these with liquid food coloring because I was lazy. The batter was soupy, and the cupcakes sank in the middle. Don’t be me. Use gel. It’s worth the extra dollar.
Equipment Needed
You don’t need fancy equipment for this. Here’s what I actually use:
Muffin tin — Standard 12-cup tin. I use non-stick, but if yours isn’t, line it with paper liners. Paper liners are easier for cleanup and help the cupcakes release cleanly.
Mixing bowls — Two large bowls. One for wet ingredients, one for dry. I use glass bowls because I can see through them.
Electric mixer — Handheld or stand mixer. You can do this by hand, but it takes 10 minutes of arm workout. I’m not that brave on a weeknight.
Cooling rack — Essential. You cannot frost warm cupcakes. It’s a rookie mistake that leads to melted frosting and sad cakes.
Piping bag or ziplock bag — For frosting. If you’re not comfortable piping, just use a knife. It’ll still look great.
Sifter or fine-mesh strainer — For the powdered sugar. Do not skip this step.
Measuring cups and spoons — Standard stuff. I keep a set on my counter because I’m always reaching for them.
Small bowl — For mixing the food coloring with a spoonful of batter first. This helps distribute the color evenly so you don’t get purple streaks.
How to Make Halloween Purple Velvet Cupcakes
Alright, let’s make these! I’m walking you through exactly how I do it, including the little tricks I’ve picked up over the years. This recipe takes about 45 minutes total, with 15 minutes of active work.
Step 1: Prep Your Oven and Pan (5 minutes)
Preheat your oven to 350°F (175°C). Line a 12-cup muffin tin with paper liners. I like to put two liners in each cup for extra stability, just in case the batter leaks. It’s a small thing, but it saves cleanup.
Step 2: Mix the Dry Ingredients (3 minutes)
In a medium bowl, whisk together the flour, baking powder, baking soda, and salt. Set this aside. It’s that simple. No sifting needed here, just a good whisk to aerate the flour.
Step 3: Cream the Butter and Sugar (5 minutes)
In a large bowl, beat the softened butter and granulated sugar together on medium-high speed for about 3-4 minutes. You want it to look pale and fluffy. This step is crucial for texture. If you rush it, your cupcakes will be dense. I usually set a timer so I don’t get distracted by my dog.
Step 4: Add Eggs and Vanilla (2 minutes)
Add the eggs one at a time, beating well after each addition. Then add the vanilla extract. Mix until just combined. Don’t overmix here. The mixture should look creamy and smooth.
Step 5: Combine Wet and Dry (3 minutes)
Reduce the mixer speed to low. Add the dry ingredients in three parts, alternating with the buttermilk in two parts. Start and end with the dry ingredients. Mix until *just* combined. Stop as soon as you see no more flour streaks. Overmixing develops gluten, which makes cupcakes tough. I know it’s tempting to mix it “one more time,” but don’t. Trust me.
Step 6: Add the Purple Color (2 minutes)
Take about ½ cup of batter and put it in a small bowl. Add your gel food coloring and mix until it’s a deep, vibrant purple. Then, fold this purple batter back into the main bowl. Fold gently with a spatula until the color is evenly distributed. You want a uniform purple, not a marbled look (unless you’re going for that style, but for classic velvet, uniform is best).
Step 7: Fill the Liners (3 minutes)
Distribute the batter evenly among the 12 liners. Fill them about ⅔ full. If you overfill them, they’ll spill over and make a mess in your oven. I use an ice cream scoop for this—it ensures every cupcake is the same size, which means they bake evenly.
Step 8: Bake (18-20 minutes)
Place the tin in the center of the oven. Bake for 18-20 minutes. They’re done when a toothpick inserted into the center comes out clean or with just a few moist crumbs. Do not overbake! If they’re dry in the oven, they’ll be dry when they cool. My oven runs hot, so I check at 18 minutes. Yours might take 20.
Step 9: Cool Completely (30 minutes)
Let the cupcakes cool in the pan for 5 minutes, then transfer them to a wire rack to cool completely. This is the hardest part. I want to frost them so bad, but if you frost them warm, the frosting will melt and slide off. Patience pays off. While they cool, you can make the frosting.
Step 10: Make the Frosting (10 minutes)
In a large bowl, beat the softened cream cheese and butter together until smooth and creamy. Add the sifted powdered sugar, one cup at a time, beating on low speed to avoid a sugar cloud. Once all the sugar is in, beat on high for 2-3 minutes until the frosting is fluffy and spreadable. Add the vanilla and salt. Taste it—it should be tangy and sweet. If it’s too sweet, add a splash more vanilla or a pinch more salt.
Step 11: Frost and Decorate (5 minutes)
Once the cupcakes are completely cool, frost them. I use a piping bag with a large star tip for a classic swirl, but a knife works fine. Pipe or spread the frosting generously. Add your edible glitter or candy decorations. If you’re making spiders, just press a small piece of black licorice into the frosting for the body, and stick on candy eyes.
Total time: About 45 minutes. And honestly, it’s faster than ordering takeout and way cheaper.
Expert Tips & Tricks
Here’s everything I’ve learned from making these cupcakes dozens of times. These tips will save you from my mistakes.
Use Gel Food Coloring — I can’t stress this enough. Liquid food coloring adds too much water to the batter, which can throw off the chemistry. Gel paste gives you intense color without changing the texture. I buy mine at craft stores or online because it lasts forever.
Room Temperature Ingredients — This is the golden rule of baking. Cold butter doesn’t cream. Cold eggs don’t emulsify. Take everything out of the fridge an hour before you start. If you forget, microwave the butter for 10 seconds (don’t melt it!) and drop eggs in warm water.
Don’t Overmix the Batter — Once you add the flour, mix until just combined. Overmixing makes tough cupcakes. I use a spatula for the final fold to be gentle. The batter should look slightly lumpy. That’s okay.
Sift Your Powdered Sugar — I know it’s tedious, but lumpy frosting is the worst. Sifting ensures a silky smooth finish. If you’re in a huge rush, you can blend the powdered sugar in a food processor for 30 seconds, but sifting is easier.
Cool Completely — I’ve rushed this step before and ended up with a pool of melted frosting at the bottom of the plate. Let them cool on a rack until they’re room temperature. It takes 30 minutes, but it’s worth it.
Frosting Consistency — If your frosting is too stiff, add a teaspoon of milk. If it’s too runny, add more powdered sugar. You want it to hold its shape but still be spreadable.
Storage — Store unfrosted cupcakes in an airtight container at room temperature for 2 days. Frosted cupcakes should be stored in the fridge due to the cream cheese. Bring them to room temperature before serving for the best texture.
Variations & Substitutions
Once you’ve nailed the basic version, here’s how you can mix it up. I’ve tried all of these, and they all work.
Red Velvet Twist — Skip the purple food coloring and use red instead. Add a teaspoon of vinegar to the buttermilk for that classic tang. It’s the traditional route, but purple is more unique for Halloween.
Chocolate Velvet — Increase the cocoa powder to ¼ cup and reduce the flour by 2 tablespoons. This makes them more chocolate-forward. Great for people who love dark chocolate.
Gluten-Free Version — Use a 1-to-1 gluten-free flour blend. I’ve used Bob’s Red Mill and King Arthur, and both work well. Make sure the blend contains xanthan gum, or add ½ teaspoon yourself.
Dairy-Free Option — Use vegan butter and dairy-free cream cheese. There are great brands like Miyoko’s or Kite Hill. The texture might be slightly different, but it’s still delicious. I made these for a dairy-free friend, and she loved them.
Vegan Version — This is trickier because velvet cake relies on the chemical reaction between buttermilk and baking soda. You can use soy milk with vinegar as a buttermilk substitute, and vegan butter/cream cheese. It works, but it’s not as moist. I’d recommend checking out my vegan peanut butter chocolate chip cookies if you want a foolproof vegan dessert instead.
Mini Cupcakes — Fill mini liners ¾ full and bake for 10-12 minutes. Perfect for parties because people can eat two without feeling guilty.
Flavor Boost — Add ½ teaspoon of almond extract to the batter for a different flavor profile. It pairs beautifully with the purple color.
Serving & Storage
How to Serve: I usually serve these at room temperature. Cold cream cheese frosting can be a bit firm, and room temp brings out the flavors. I arrange them on a platter with a few fresh berries or blackberries for contrast. The red berries look great against the purple.
Side Dishes: These are standalone desserts, but they pair well with a cup of hot coffee or a glass of milk. If you’re serving them at a party, they fit right in with other sweet treats. If you’re looking for other party-friendly desserts, these homemade funfetti birthday cakes are also a crowd-pleaser, though they’re a whole cake rather than individual portions.
Toppings Bar: When I have guests, I put out a small bowl of edible glitter and some black sprinkles. Let everyone customize their cupcake. It’s fun for kids and adults alike.
Refrigerator: Store frosted cupcakes in an airtight container in the fridge for up to 4 days. They’ll last longer unfrosted, but once frosted, the cream cheese needs refrigeration.
Freezing: You can freeze unfrosted cupcakes for up to 3 months. Wrap them tightly in plastic wrap and then foil. Thaw overnight in the fridge, then frost. Do not freeze frosted cupcakes—the texture of the cream cheese changes when frozen and thawed. It can become grainy.
Reheating: Cupcakes are best at room temperature. If you need to warm them slightly, microwave for 10 seconds. Don’t overdo it, or the frosting will melt.
Meal Prep: I often bake the cupcakes on Sunday, freeze them, and frost them on Friday night. This takes the stress out of party day. You just pull them out of the freezer, let them thaw, and frost. It’s so easy.
Nutrition Information
I’m not a nutritionist, but here’s the breakdown if you’re tracking. Keep in mind that this is an estimate based on standard ingredients.
Per Cupcake (with frosting):
- Calories: 320
- Protein: 4g
- Carbs: 42g
- Fiber: 1g
- Sugar: 32g
- Fat: 16g
- Saturated Fat: 10g
- Cholesterol: 45mg
- Sodium: 220mg
What’s Good: They provide a nice energy boost. The cocoa has some antioxidants. They’re a treat, so enjoy them mindfully.
What to Know: Higher in sugar and fat due to the frosting. If you’re watching your intake, you can reduce the powdered sugar in the frosting by ½ cup, or use a lighter cream cheese frosting. But honestly? It’s a Halloween treat. Enjoy it.
Dietary Notes: Contains gluten, dairy, eggs. Can be made gluten-free or vegan with substitutions (see above).
Final Thoughts
So that’s my take on Halloween purple velvet cupcakes! I’ve probably talked your ear off at this point, but when you make a recipe this often, you have a lot to say about it. These cupcakes have saved me more than once. They’re my answer to “what do I bring to the party” when I want to look impressive but don’t have hours to spend in the kitchen.
They’re spooky, they’re sweet, and they’re surprisingly easy to make. I hope you try them and love them as much as I do. Make them your own! Try different decorations, swap in your favorite candy, or just enjoy them plain. The best recipes are the ones you adapt to your tastes.
If you make these, drop a comment and let me know how they turned out! I love hearing how recipes work in your kitchen. And if something doesn’t work, tell me that too—I’m here to help troubleshoot.
Happy baking! And I hope your kitchen smells as amazing as mine does right now.
Frequently Asked Questions
Q: Can I use liquid food coloring instead of gel?
A: You can, but I don’t recommend it. Liquid food coloring adds a lot of water to the batter, which can make it runny and affect the rise. You’ll need to use a lot more liquid to get the same color, which throws off the recipe. Gel paste is worth the investment. It’s concentrated and doesn’t change the batter consistency.
Q: Why did my cupcakes sink in the middle?
A: This usually happens for one of three reasons: underbaking, overmixing, or opening the oven door too early. Make sure you bake them for the full 18-20 minutes. Don’t overmix the batter once you add the flour. And keep the oven door closed until the last 5 minutes of baking.
Q: Can I make these ahead of time?
A: Yes! Bake the cupcakes a day or two ahead. Let them cool completely, then store them in an airtight container at room temperature. Frost them the day before or the day of the party. This actually helps the flavors meld.
Q: Can I freeze the frosting?
A: I don’t recommend freezing cream cheese frosting. The texture can become grainy or separate when thawed. It’s best to make the frosting fresh. If you must, freeze it for no more than a month, but the texture won’t be as good.
Q: How do I get the purple color to be vibrant?
A: Start with a white batter. The cocoa powder adds a slight brown tint, but it’s minimal. Use a deep violet gel food coloring. Add it gradually. Mix well. If it’s still too pale, add more gel. It’s better to add slowly than to overdo it at once.
Q: Can I use self-rising flour?
A: No. Self-rising flour already has baking powder and salt. This recipe relies on specific amounts of baking powder and baking soda for the right rise and texture. Using self-rising flour will throw off the balance and likely result in dense cupcakes.
Q: What if I don’t have buttermilk?
A: You can make a substitute. Add 1 tablespoon of lemon juice or white vinegar to 1 cup of milk. Let it sit for 5-10 minutes until it curdles slightly. It works almost as well as real buttermilk. You can also use plain yogurt thinned with a little milk.
Pin This Recipe!
Halloween Purple Velvet Cupcakes: Easy Spooky Treat
- Total Time: 45 minutes
- Yield: 12 servings 1x
Description
Moist, vibrant purple velvet cupcakes with a tangy cream cheese frosting. These easy-to-make treats are perfect for Halloween or any occasion, featuring a buttermilk base and gel food coloring for a stunning color.
Ingredients
- 2 cups (250g) all-purpose flour
- 1 teaspoon baking powder
- 1/2 teaspoon baking soda
- 1/2 teaspoon salt
- 1/2 cup (115g) unsalted butter, softened
- 1 1/2 cups (300g) granulated sugar
- 2 large eggs, room temperature
- 2 teaspoons vanilla extract
- 1 cup (240ml) buttermilk
- 2 tablespoons (10g) unsweetened cocoa powder
- 1–2 teaspoons purple gel food coloring
- 8 oz (225g) block-style cream cheese, softened
- 1/2 cup (115g) unsalted butter, softened
- 3–4 cups (360-480g) powdered sugar, sifted
- 1 teaspoon vanilla extract
- 1/4 teaspoon salt
- Edible glitter (optional)
- Black licorice or pretzel sticks (optional)
Instructions
- Preheat oven to 350°F (175°C). Line a 12-cup muffin tin with paper liners.
- In a medium bowl, whisk together flour, baking powder, baking soda, and salt. Set aside.
- In a large bowl, beat softened butter and granulated sugar on medium-high speed for 3-4 minutes until pale and fluffy.
- Add eggs one at a time, beating well after each addition. Mix in 2 teaspoons vanilla extract until combined.
- Reduce mixer speed to low. Add dry ingredients in three parts, alternating with buttermilk in two parts, starting and ending with dry ingredients. Mix until just combined.
- Mix 1/2 cup of batter in a small bowl with purple gel food coloring until vibrant. Fold this purple batter back into the main bowl until evenly distributed.
- Fill cupcake liners about 2/3 full with batter.
- Bake for 18-20 minutes or until a toothpick inserted into the center comes out clean.
- Cool in pan for 5 minutes, then transfer to a wire rack to cool completely.
- For frosting, beat cream cheese and softened butter until smooth. Gradually add sifted powdered sugar, beating on low then high until fluffy. Mix in 1 teaspoon vanilla and 1/4 teaspoon salt.
- Frost cooled cupcakes and decorate with edible glitter or candy as desired.
Notes
Use gel food coloring instead of liquid to prevent watery batter. Ensure all ingredients are at room temperature for best texture. Do not overmix the batter to avoid tough cupcakes. Sift powdered sugar for smooth frosting. Store frosted cupcakes in the refrigerator.
- Prep Time: 15 minutes
- Cook Time: 20 minutes
- Category: Dessert
- Cuisine: American
Nutrition
- Serving Size: 1 cupcake
- Calories: 320
- Sugar: 32
- Sodium: 220
- Fat: 16
- Saturated Fat: 10
- Carbohydrates: 42
- Fiber: 1
- Protein: 4
Keywords: Halloween cupcakes, purple velvet cake, cream cheese frosting, easy baking, spooky treats, buttermilk cupcakes



