Here’s the thing about sourdough starters: they’re high-maintenance roommates. You have to feed them, talk to them (okay, maybe not talk, but definitely acknowledge their existence), and if you forget them for even two days, they start getting angry and smell like old gym socks. But the real killer? The discard.
I’ve been baking sourdough bread for about three years now, and for the longest time, I treated my discard like a toxic waste product. I’d stare at that thick, bubbly jar of rejected starter, feel a pang of guilt for wasting all that flour and water, and then… well, I’d eventually throw it out. Or, in my more desperate moments, I’d try to bake sad, dense discard pancakes that tasted like regret.
Then, last Tuesday, I was staring at my bank account. It wasn’t looking great. I had exactly $12 left until payday, and my pantry was basically just spices and a half-empty bag of flour. I looked at the discard jar. I looked at the $5 bag of Everything Bagel seasoning sitting in the back of my spice cabinet that I’d bought on a whim months ago and never used. And I had an idea.
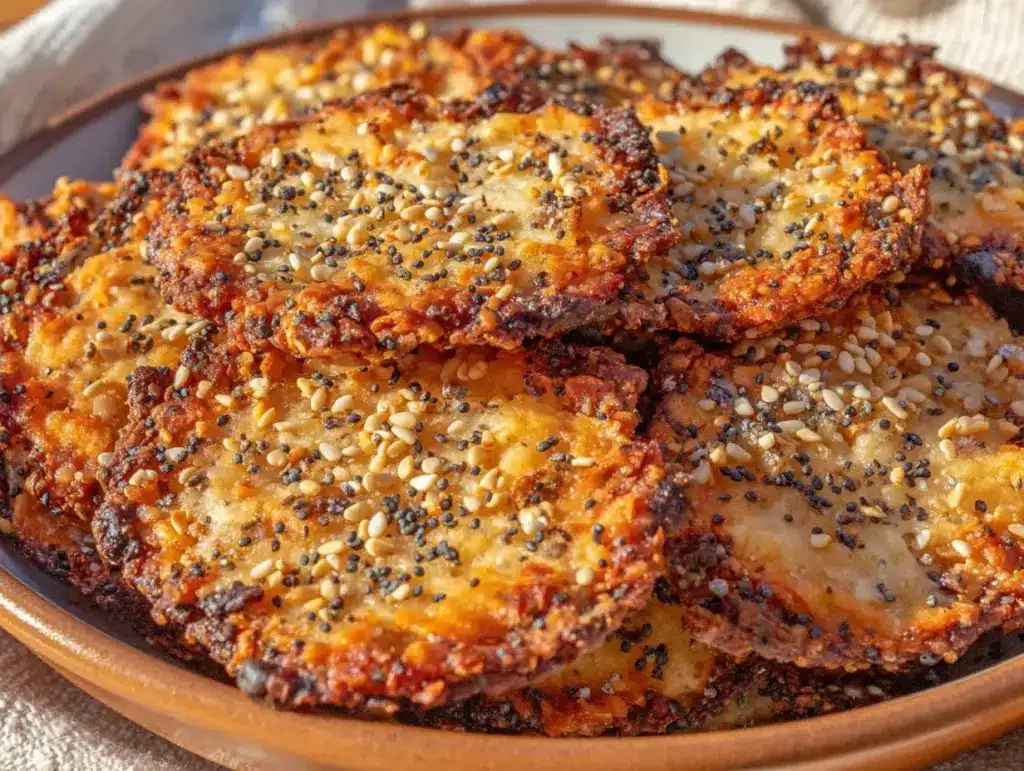
Why was I treating this “waste” like trash when it was basically free dough? I mixed the discard with a little olive oil, some grated parmesan, and that seasoning. I rolled it out thin. I baked it. And when I took that first bite—crisp, salty, garlicky, with that tangy sourdough kick—I realized I had just turned a $0.50 ingredient into a snack that tasted like it cost $8 at a boutique grocery store.
These Sourdough Discard Crackers with Everything Bagel Seasoning have completely changed how I view my starter. They’re crunchy, they’re savory, and best of all, they’re the ultimate budget hack. If you’re trying to stretch a dollar or just want a snack that doesn’t involve opening a new package of chips, this is your new best friend. I’ve made these at least a dozen times since that Tuesday, and they’re the only thing keeping me from buying expensive store-bought crackers when I’m craving something salty.
Why You’ll Love This Budget-Friendly Snack
I know what you’re thinking. “Crackers? Really?” But hear me out. These aren’t your average, boring soda crackers. These are complex, flavorful, and incredibly satisfying. Here’s why this recipe has earned a permanent spot in my rotation:
- Zero Food Waste — Seriously, this is the ultimate way to use up discard. Instead of tossing it, you’re turning it into a premium snack. It feels good to be thrifty and eco-friendly at the same time.
- Cheap as Chips (Literally) — You’re using flour, water, and oil you already have. The only cost is the seasoning, and a little goes a long way. This batch costs less than $1 to make. Compare that to a $4 bag of artisan crackers, and the math is obvious.
- Ready in 30 Minutes — From mixing to baking, you’re looking at about 30 minutes. That’s faster than waiting for a pizza delivery, and way healthier.
- Infinitely Customizable — While Everything Bagel seasoning is my go-to, this recipe is a blank canvas. Swap the seasoning for rosemary and sea salt, or everything but the bagel plus some chili flakes. I’ve even made a sweet version with cinnamon and sugar (though it’s not as good as my fall maple pecan sticky buns, it’s still tasty).
- Perfect for One — Since this is a small-batch recipe, you don’t have to worry about a giant container of crackers going stale because you made too much. Make exactly what you want to eat today.
- Shelf-Stable-ish — If they last that long in your house. They keep well in an airtight container for a week. Perfect for packing in a lunchbox or keeping at your desk.
This is my go-to when I’m bored, hungry, and trying to stick to a tight budget. No fancy equipment, no expensive ingredients, just smart cooking that makes everyone happy (especially my wallet).
Ingredients You’ll Need
Here’s the best part: you probably have most of this already. This recipe relies on pantry staples, which is exactly why I love it. Let’s break down what you need and why I’m particular about a few items.
The Base
Sourdough discard (1 cup / 240g) — This is the star. It needs to be unfed starter. If your starter is active and bubbly from being fed, let it sit out for a few hours until it flattens out and becomes “discard” again. I keep mine in the fridge, so I just take a cup out and let it come to room temp while I prep the rest.
All-purpose flour (1 cup / 125g) — Standard AP flour works perfectly. You want a little gluten structure to hold the crackers together without making them tough. Bread flour makes them too chewy; cake flour makes them too crumbly. Stick to AP.
Unsalted butter (2 tablespoons / 30g) — Melted. Yes, butter. Some recipes use oil, but butter adds that rich, flaky texture that makes crackers addictive. If you’re dairy-free, substitute with an equal amount of olive oil, but the texture will be slightly different.
Olive oil (1 tablespoon / 15ml) — Just a touch. It helps with browning and adds a nice savory note. Don’t skip it.
Water (1-2 tablespoons) — Depending on how thick your discard is, you might need a splash of water to get the dough to come together. Start with 1 tbsp and add more if it’s too crumbly.
The Flavor
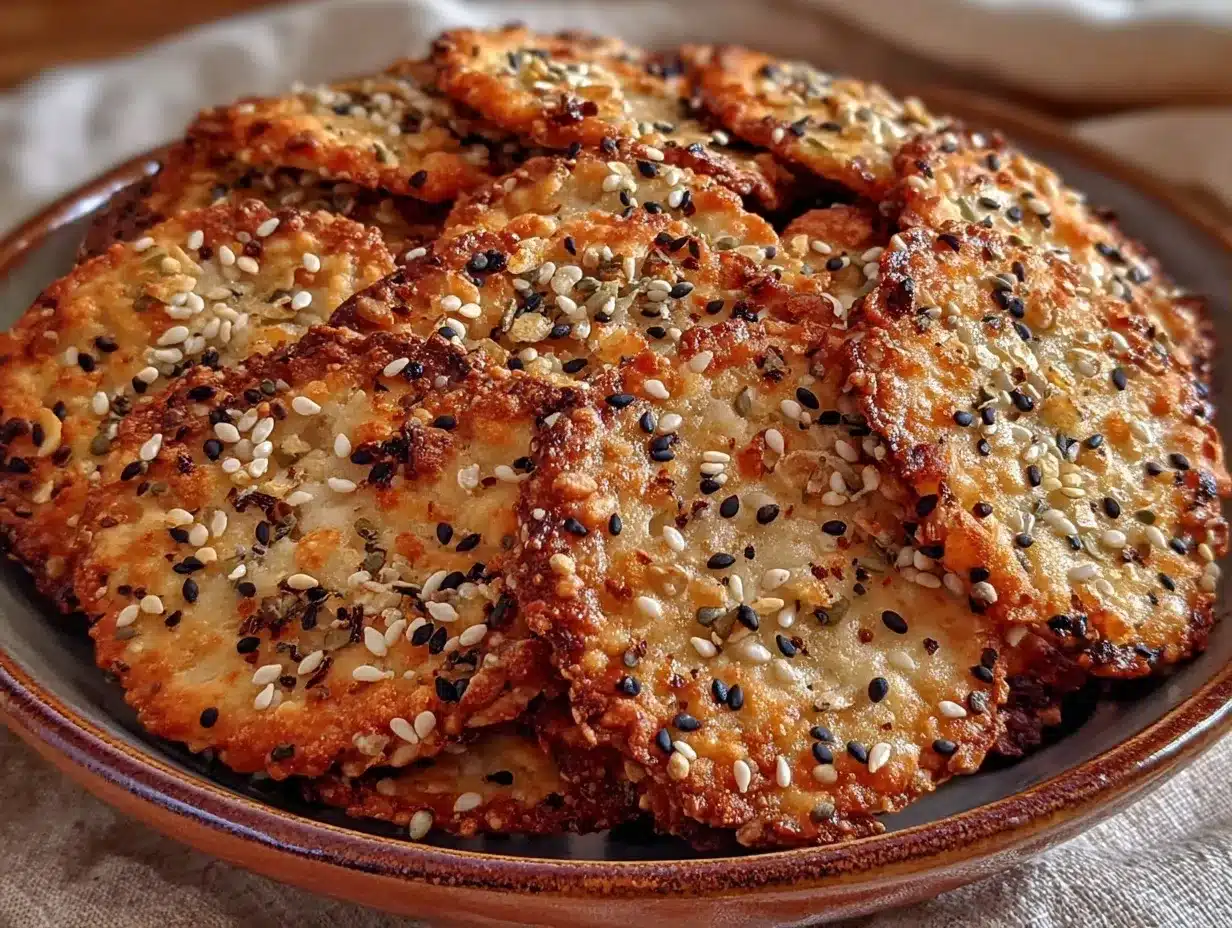
Everything Bagel Seasoning (2-3 tablespoons) — This is where the magic happens. I use a generous amount because I love that pop of flavor. If you can’t find store-bought blends, you can mix your own: sesame seeds, poppy seeds, dried garlic, dried onion, and salt. But honestly, the store-bought stuff is a lifesaver.
Sea salt (½ teaspoon) — Even with the seasoned salt, a little extra kosher salt helps bring out the sourdough tang. Taste your discard first—if it’s very sour, you might want less salt.
Garlic powder (½ teaspoon) — Optional, but I always add it. The Everything seasoning has garlic flakes, but the powder distributes the flavor more evenly throughout the cracker.
Grated Parmesan cheese (¼ cup / 25g) — This adds umami and helps the crackers crisp up. It’s not strictly necessary, but it elevates the flavor from “okay” to “wow.” I use pre-grated if I’m lazy, but freshly grated melts better. Just avoid the stuff in the green can if you can help it—it has cellulose that stops it from melting properly.
Equipment Needed
You don’t need fancy equipment for this. Here’s what I actually use in my tiny kitchen.
Mixing bowl — Any medium-sized bowl works. I use a ceramic one because I like the weight, but glass or plastic is fine.
Rolling pin — Essential. You need to roll this dough paper-thin. If you don’t have a rolling pin, you can use a clean wine bottle, but it’s harder to get even thickness.
Baking sheets — Two standard sheet pans. I bake them in batches because the dough is small, but if you have a large oven, you can do two sheets at once.
Parchment paper — Do not skip this. These crackers stick if you don’t line your pans. It also makes cleanup a breeze.
Cheese grater — For the Parmesan. A box grater works fine.
Pastry cutter or fork — To mix the melted butter into the dry ingredients initially.
Sharp knife or pizza cutter — To score the dough before baking. I use a pizza cutter because it’s faster and gives straight lines.
How to Make It: Step-by-Step
Alright, let’s make this! I’m walking you through exactly how I do it, including the little tricks I’ve picked up over time.
Step 1: Prep Your Oven and Pans (5 minutes)
Preheat your oven to 350°F (175°C). This is a low temperature because we want to dry out the crackers slowly so they get crispy all the way through, not just brown on the outside. Line your baking sheets with parchment paper. I’ve tried silicone mats before, but parchment gives me a crispier bottom. Trust me.
Step 2: Mix the Wet Ingredients (2 minutes)
In your mixing bowl, combine the melted butter, olive oil, and sourdough discard. Whisk them together until they’re fully emulsified. The mixture might look a little separated at first, but keep whisking. It’ll come together. If your discard is very cold, the butter might solidify into little chunks. That’s okay—it’ll melt into the flour soon enough.
Step 3: Combine Dry Ingredients (2 minutes)
Add the flour, grated Parmesan, garlic powder, and sea salt to the bowl. Stir with a spoon or your hands until a shaggy dough forms. At this point, check the consistency. If it’s too dry and crumbly, add that extra tablespoon of water, one teaspoon at a time. You want a dough that holds together when squeezed but isn’t sticky. It should feel like playdough.
Step 4: Knead Briefly (1 minute)
Turn the dough out onto a lightly floured surface. Knead it for about 30-60 seconds. Just enough to smooth it out. Don’t overwork it, or the crackers will get tough. We want tender, crisp crackers, not breadsticks. Divide the dough into two balls. You’ll roll them out one at a time.
Step 5: Roll Thin (3 minutes)
Place one ball of dough between two sheets of parchment paper. This is the pro tip: rolling it between parchment prevents sticking and makes transferring to the pan easier. Roll it out as thin as you possibly can. I’m talking paper-thin. If it’s too thick, the centers will stay doughy while the edges burn. Aim for about 1/8 inch thick or less.
Step 6: Season and Score (5 minutes)
Remove the top sheet of parchment. Brush the dough lightly with a little water (this helps the seasoning stick). Sprinkle the Everything Bagel seasoning generously over the top. Press it in gently with your hand so it adheres. Then, use a pizza cutter or sharp knife to score the dough into squares or rectangles. You don’t need to cut all the way through, just make indentations. This makes breaking them apart easier after baking.
Step 7: Bake (15-20 minutes)
Slide the parchment paper onto the baking sheet. Bake for 15-20 minutes. Watch them closely around the 12-minute mark. They’re done when the edges are golden brown and the surface looks dry. They will continue to crisp up as they cool, so don’t pull them out just because they look soft. Soft crackers are chewy crackers, and nobody wants that.
Step 8: Cool Completely
Let them cool on the pan for 5 minutes, then transfer to a wire rack. This step is crucial. If you stack them while they’re warm, steam gets trapped and they’ll get soggy. Let them cool completely before storing. This is the hardest part, I know.
Expert Tips & Tricks
Here’s everything I’ve learned from making these dozens of times. These tips will save you from my mistakes.
Roll Them Paper-Thin
I can’t stress this enough. The thickness is the difference between a cracker and a biscuit. If you’re worried about them breaking, just be patient. Use that rolling pin technique between parchment paper, and they’ll hold together.
Don’t Skip the Cooling
I used to eat them warm, thinking they were done. They weren’t. They were just warm and chewy. Letting them cool on a wire rack allows the moisture to escape. If you rush this, you’ll end up with a bag of chewy, soggy discs. Patience pays off.
Adjust for Humidity
If you live in a humid climate, your dough might feel stickier. Add a little extra flour, and maybe bake for an extra 2-3 minutes to ensure they’re dry. I live in a dry area, so my dough comes together quickly. Adjust based on your kitchen’s feel.
Season Generously
The flavor is in the seasoning. Don’t be shy. If you under-season, you’ll just taste bland flour and sourdough. The Everything Bagel seasoning needs to be visible on the surface to make an impact. I usually use about 3 tablespoons for this batch.
Double Batch? Go For It.
If you’re really hungry or want to have snacks for the week, you can easily double this recipe. Just make sure you have enough baking sheets. I usually bake one sheet, let it cool, then bake the second. It takes about 40 minutes total, but it’s worth it.
Variations & Substitutions
Once you’ve nailed the basic version, here’s how you can mix it up. I’ve tried all of these, and they’re all winners.
Rosemary & Sea Salt
Skip the Everything seasoning and use 1 tablespoon fresh chopped rosemary and 1 teaspoon flaky sea salt. This is my favorite for dipping in olive oil. It tastes like fancy restaurant breadsticks but crisp.
Chili Lime
Add 1 teaspoon chili powder and the zest of one lime to the dough. Skip the Parmesan. This is perfect for taco night or with a cold beer.
Garlic & Herb
Use 1 teaspoon dried dill, 1 teaspoon dried oregano, and 1 teaspoon garlic powder. Add 2 tablespoons of chopped fresh chives. This is great for soups. If you’re making a creamy roasted butternut squash soup, these garlic herb crackers are the perfect accompaniment.
Sweet Cinnamon Sugar
Omit the salt and Parmesan. Add 2 tablespoons sugar and 1 teaspoon cinnamon to the dough. Roll thin, bake, and toss with a little melted butter and extra cinnamon sugar while warm. They’re basically mini cinnamon crackers. Great with coffee.
Dairy-Free Option
Substitute the butter with olive oil or vegan butter. Use nutritional yeast instead of Parmesan for a cheesy flavor without the dairy. The texture will be slightly less flaky but still delicious.
Serving & Storage
So, how do you enjoy these bad boys?
How to Serve:
I usually serve these straight out of the jar as a snack. But if I’m having guests, I put them on a small plate with a bowl of good olive oil for dipping. You can also serve them with cheese and charcuterie. They pair well with sharp cheddar or brie. If you’re making a fall charcuterie board, these crackers add a nice homemade touch that looks impressive but costs pennies.
Storage:
Store in an airtight container at room temperature for up to 1 week. If your kitchen is humid, they might get soft after a few days. If that happens, pop them in the oven at 300°F for 5 minutes to re-crisp them. They freeze well too! Put them in a freezer bag for up to 3 months. Just thaw and crisp them up before eating.
Reheating:
Never microwave crackers unless you want a sad, chewy mess. If they lose their crunch, use the oven or an air fryer for 3-4 minutes at 350°F. They’ll be crisp again in no time.
Nutrition Information
I’m not a nutritionist, but here’s the breakdown if you’re tracking. Remember, these are small, so portion control is key.
Per Serving (approx. 10 crackers):
– Calories: 120
– Protein: 3g
– Carbs: 15g
– Fiber: 1g
– Sugar: 0g
– Fat: 5g
– Sodium: 180mg
What’s Good:
– No added sugar
– Decent fiber from the flour
– Low calorie compared to store-bought chips
What to Know:
– Contains gluten and dairy
– Sodium can vary depending on your seasoning blend
My Take:
Look, these are a snack, not a meal. They’re crunchy and satisfying, and because you control the ingredients, you know exactly what’s going in. They’re a much better choice than processed chips, especially when you’re on a budget.
Final Thoughts
So that’s my go-to sourdough discard cracker recipe! I’ve probably talked your ear off at this point, but when you find a recipe that saves money and stops waste, you have to share it.
This has saved me from buying overpriced snacks more times than I can count. It’s my answer to “what’s a good snack?” when I’m broke, bored, or just trying to use up my starter. It’s practical, it’s tasty, and it’s a win-win.
Make it yours! Try different seasonings, adjust the salt to your taste, and don’t be afraid to experiment. The best recipes are the ones you adapt to your own kitchen. If you make this, drop a comment and let me know what you think! I love hearing how recipes turn out in your kitchen. And if something doesn’t work, tell me that too—I’m here to help troubleshoot.
Happy baking! And I hope your kitchen smells as good as mine does right now (it smells like toasted garlic and happiness).
Frequently Asked Questions
Can I use active sourdough starter instead of discard?
You can, but the flavor will be different. Active starter has yeast in it, so the crackers might puff up a little or have a bread-like texture. For the crispiest, most cracker-like result, use unfed, flat discard. If you must use active starter, let it sit out for a few hours until it loses its volume and becomes “discard” again.
Why are my crackers soft instead of crispy?
Two reasons: they’re either not baked long enough, or they’re not cooled completely. Sourdough crackers continue to crisp up as they cool. If you pull them out when they look soft, they’ll stay soft. Also, check your rolling thickness—if they’re too thick, the center won’t dry out. Aim for paper-thin.
Can I freeze the dough?
Yes! Wrap the dough tightly in plastic wrap and freeze for up to 3 months. Thaw it in the fridge overnight before rolling and baking. This is great for meal prep. I often make a big batch of dough, freeze it in portions, and bake fresh crackers whenever I need a snack.
What if I don’t have Everything Bagel Seasoning?
No problem! You can make your own blend. Mix 1 tablespoon sesame seeds, 1 tablespoon poppy seeds, 1 teaspoon dried garlic flakes, 1 teaspoon dried onion flakes, and 1 teaspoon coarse salt. It takes 2 minutes and tastes just as good. Or just use sea salt and black pepper for a simple savory cracker.
Can I make these gluten-free?
Yes! Substitute the all-purpose flour with a 1-to-1 gluten-free flour blend. Note that gluten-free dough might be more fragile when rolling, so be gentle. You might need to add a little extra water if the blend absorbs more liquid. They’ll be slightly more crumbly but still delicious.
How do I store these if I live in a humid climate?
Airtight is key. Store them in a glass jar with a tight seal, and include a piece of bread in the jar. The bread will absorb excess moisture from the crackers, keeping them crisp. Just replace the bread every few days. It’s a classic trick that actually works.
Can I add cheese to the dough?
Absolutely! I usually add Parmesan, but you can use cheddar, gouda, or pecorino. Just grate it finely so it mixes evenly. This adds extra flavor and helps with browning. If you add more cheese, you might need a tiny bit more flour to balance the dough.
Pin This Recipe!
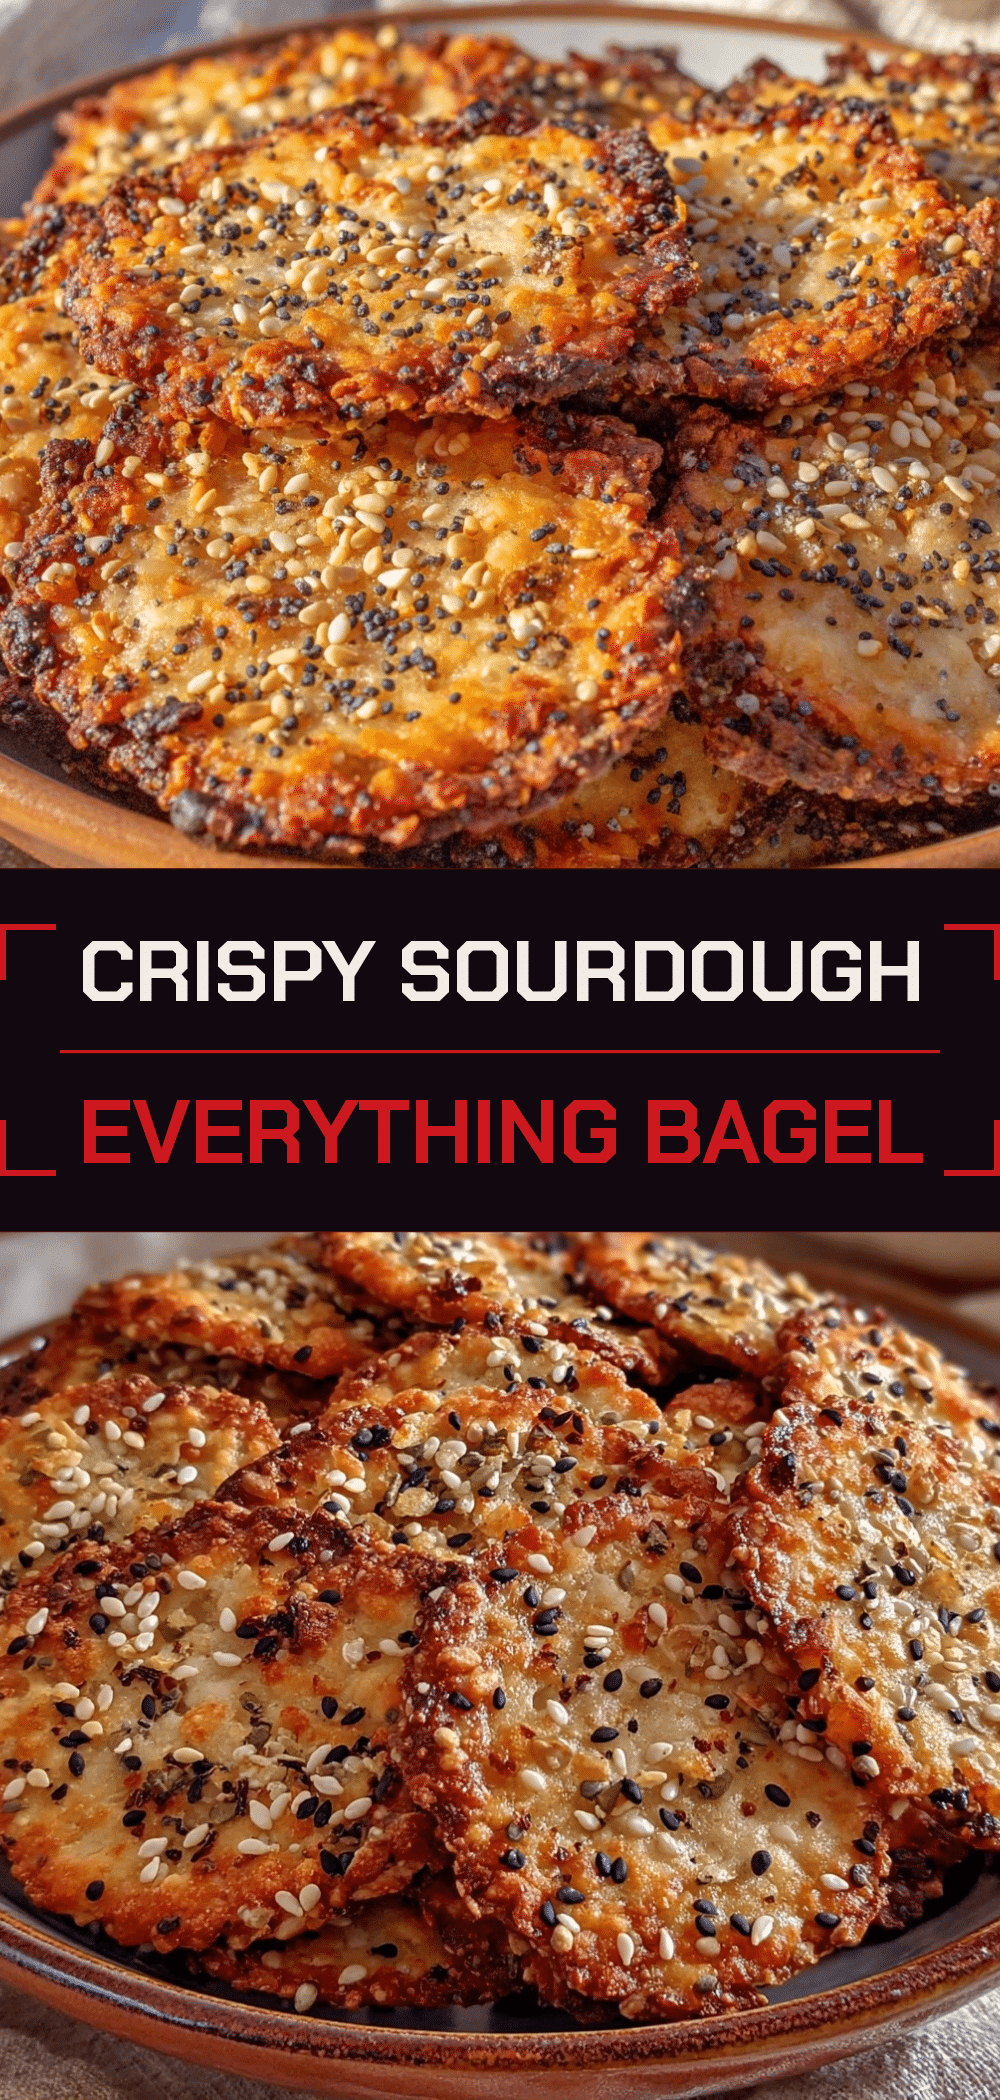
Sourdough Discard Crackers: Budget-Friendly Everything Bagel Snack
- Total Time: 35 minutes
- Yield: Approx. 10 servings (based on 10 crackers per serving)
Description
These budget-friendly sourdough discard crackers are crisp, savory, and made with pantry staples. Using Everything Bagel seasoning, they offer a delicious, zero-waste snack that costs less than $1 to make.
Ingredients
- 1 cup (240g) sourdough discard (unfed)
- 1 cup (125g) all-purpose flour
- 2 tablespoons (30g) unsalted butter, melted
- 1 tablespoon (15ml) olive oil
- 1–2 tablespoons water (as needed)
- 2–3 tablespoons Everything Bagel Seasoning
- ½ teaspoon sea salt
- ½ teaspoon garlic powder
- ¼ cup (25g) grated Parmesan cheese
Instructions
- Preheat oven to 350°F (175°C). Line two baking sheets with parchment paper.
- In a mixing bowl, whisk together the melted butter, olive oil, and sourdough discard until emulsified.
- Add the flour, grated Parmesan, garlic powder, and sea salt to the wet ingredients. Stir until a shaggy dough forms. If too crumbly, add water one teaspoon at a time until the dough holds together.
- Turn dough onto a lightly floured surface and knead briefly for 30-60 seconds until smooth. Divide into two balls.
- Place one ball of dough between two sheets of parchment paper. Roll out as thin as possible (approx. 1/8 inch or less).
- Remove the top sheet of parchment. Brush the dough lightly with water, then sprinkle generously with Everything Bagel Seasoning. Press seasoning in gently.
- Score the dough into squares or rectangles using a pizza cutter or sharp knife (do not cut all the way through).
- Transfer the parchment paper with dough to the baking sheet. Bake for 15-20 minutes until edges are golden brown and surface looks dry.
- Cool on the pan for 5 minutes, then transfer to a wire rack to cool completely before storing.
Notes
Roll the dough paper-thin to ensure crispiness. Do not skip the cooling step, as crackers continue to crisp as they cool. If your kitchen is humid, add a little extra flour or bake for an extra 2-3 minutes. Store in an airtight container for up to 1 week.
- Prep Time: 15 minutes
- Cook Time: 20 minutes
- Category: Snack
- Cuisine: American
Nutrition
- Serving Size: Approx. 10 crackers
- Calories: 120
- Sodium: 180
- Fat: 5
- Saturated Fat: 2
- Carbohydrates: 15
- Fiber: 1
- Protein: 3
Keywords: sourdough discard, crackers, everything bagel seasoning, budget recipes, zero waste, vegan options, gluten-free options, homemade snacks



