Last Tuesday, I was staring at a half-empty fridge, feeling that specific brand of Tuesday night despair. You know the one. It’s 6:30 PM, the kids are hungry, the dog is barking at a leaf, and I really, really don’t want to turn on the oven. My oven, by the way, is currently the size of a shoebox and takes forty-five minutes to preheat, which feels like an eternity when you’re trying to salvage dinner.
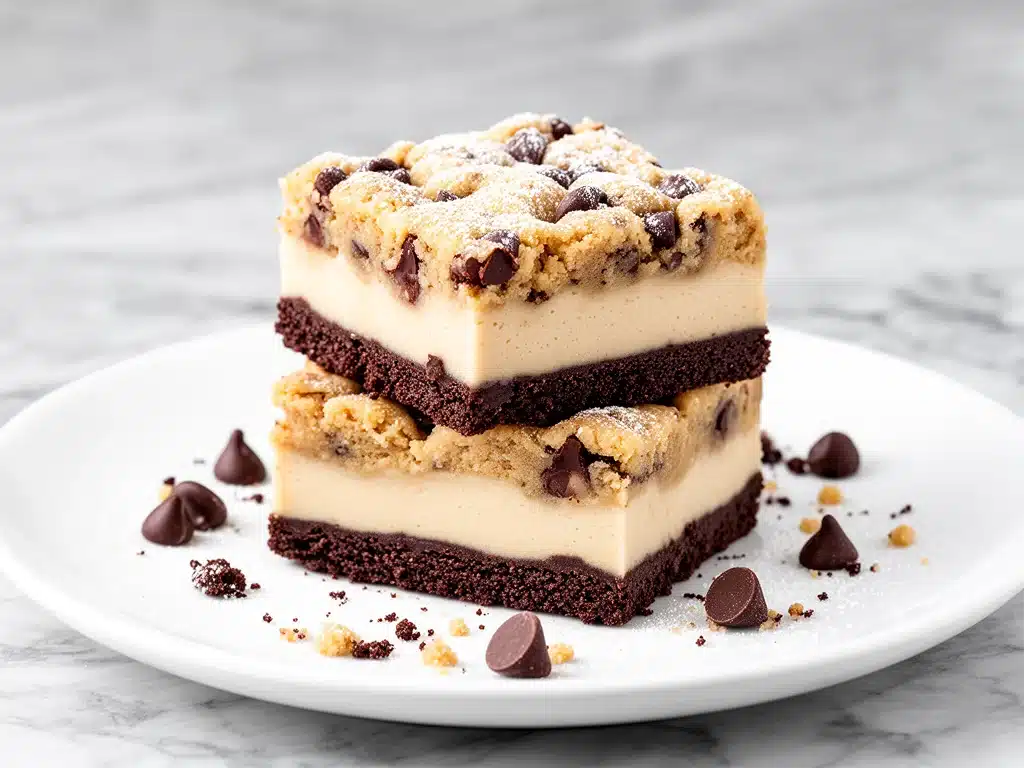
I had a block of cream cheese, a bag of Oreos, and a jar of cookie dough. Not a lot to work with, right? But I also had a secret weapon: a microwave. I threw these ingredients together on a whim, expecting a disaster. Maybe a weird texture. Maybe something that wouldn’t set. What I got instead was the best dessert I’ve made in years. It’s creamy, it’s chocolatey, it’s got that warm cookie dough vibe without the raw egg risk, and it took exactly twenty minutes of active work.
That was the birth of my No-Bake Cookie Dough Cheesecake Bars. I’ve made them about fifteen times since then, tweaking the ratios until they were perfect. They’ve become my go-to for busy weeknights, last-minute dinner guests, or when I just need a sugar fix that doesn’t require a 2-hour baking session. If you’re tired of complicated desserts that leave you with a mess and a burnt house, this is the recipe for you. It’s simple, it’s delicious, and it’s going to change your dessert game.
Why You’ll Love This Recipe
Look, I get it. Dessert recipes online often feel like they require a degree in pastry arts and a PhD in chemistry. This one? This one is stupid simple. Here’s why I keep coming back to these bars:
- Zero Oven Required — Seriously. No preheating, no waiting for it to cool, no hot kitchen in the summer. You just mix, press, and chill. This is perfect for quick weeknight snacks when you want something sweet without the fuss.
- Only Four Main Ingredients — I’m not exaggerating. Cream cheese, sugar, cookie dough, and Oreos. That’s it. You probably have three of these four items in your kitchen right now. It’s pantry-friendly in the best way possible.
- Ready in Under 30 Minutes — Well, technically you need to chill them for a few hours, but the active prep time is like 15 minutes. That’s faster than ordering takeout. I make these on Sunday nights so I have dessert ready for the rest of the week.
- Texture Heaven — The combination of the dense, creamy cheesecake layer and the soft, chewy cookie dough bits is addictive. It’s like eating a dessert cookie but in bar form. My kids fight over the last piece, which is usually a good sign.
- Make-Ahead Friendly — These bars actually get better the next day. The flavors meld together, and the texture firms up. I love making a batch on Friday so I don’t have to think about dessert during the chaotic workweek.
This is my answer to “what’s for dessert?” when I’m tired but still want to feel like a good parent. No stress, no mess, just pure, creamy, chocolatey joy.
Ingredients You’ll Need
Here’s the best part: you don’t need a trip to the specialty store for this. It’s a simple, accessible list. I’m particular about two things here, and I’ll tell you exactly why.
For the Cheesecake Layer
Cream Cheese (8 oz / 225g) — Full-fat, brick-style cream cheese is non-negotiable. The tub stuff is whipped with air and doesn’t set right. I buy the Philadelphia brand because it’s consistent. Let it sit out for 15 minutes before mixing so it’s soft and easy to blend.
Powdered Sugar (1 cup / 120g) — Also known as confectioners’ sugar. Don’t use granulated sugar here; it won’t dissolve in the cold mixture and will leave you with gritty bars. Sift it if it’s clumpy.
Vanilla Extract (1 teaspoon) — Pure vanilla, not imitation. It adds that classic cheesecake flavor. If you’re out, you can skip it, but it really ties the cream cheese together.
Heavy Cream (½ cup / 120ml) — Full-fat heavy whipping cream is what makes the cheesecake layer light and airy. If you don’t have heavy cream, you can use Greek yogurt, but the texture will be denser. I stick with cream for that rich, bakery-style feel.
For the Cookie Dough & Crust
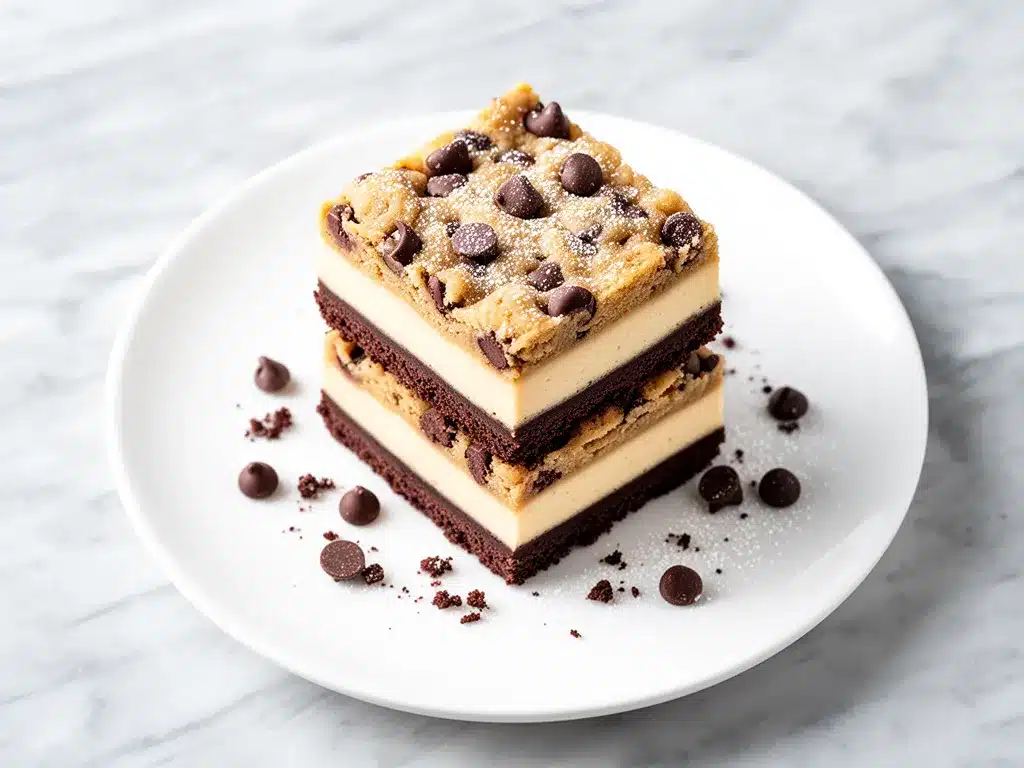
Oreo Cookies (1 package / about 20 cookies) — Yes, the whole package. We’re crushing these for the crust AND folding some into the top layer. Use regular Oreos, not Double Stuf or Minis, unless you want to adjust the sweetness. I crush them in a food processor, but a rolling pin and a ziplock bag works too.
Chocolate Chip Cookie Dough (1 cup / 150g) — This is the star. I use store-bought refrigerated cookie dough (like Pillsbury) because it’s safe to eat raw and has that perfect soft-baked texture. You can make your own edible cookie dough, but that takes more time. For busy weeknights, the tube is your friend.
Mini Chocolate Chips (½ cup / 85g) — Optional, but I recommend it. They add little bursts of chocolate that complement the cookie dough. If you’re out of mini chips, regular chips chopped up work fine.
Pinch of Salt — Just a tiny pinch to balance the sweetness. It makes the chocolate taste more like chocolate.
Common Questions
Can I use a different cookie? Yes! Nilla Wafers work for the crust, but Oreos give that classic cookie dough vibe. You could also use graham crackers for a graham cracker crust vibe.
Is the cookie dough safe to eat? If you buy the refrigerated tube, yes, it’s labeled as edible. If you make your own, make sure it doesn’t contain raw eggs (use heat-treated flour).
Equipment Needed
You don’t need fancy gadgets for this. Here’s what I actually use:
- 9×9 inch Baking Pan — I use a glass Pyrex pan because I can see the layers. Metal works fine too. Line it with parchment paper for easy removal.
- Mixer — A hand mixer or stand mixer makes the cream cheese smooth. You can do it by hand with a strong arm, but why suffer?
- Food Processor or Ziplock Bag — For crushing the Oreos. A food processor takes 10 seconds. A rolling pin takes 2 minutes and a little elbow grease.
- Spatula — A good silicone spatula helps you fold the cookie dough without breaking it up too much.
- Measuring Cups and Spoons — Standard stuff. Dollar store versions work fine.
Pro Tip: Line your pan with parchment paper, leaving an overhang on the sides. This acts as a sling to lift the bars out once they’re set. It makes cutting them so much easier and keeps your pan clean.
How to Make It: Step-by-Step
Alright, let’s make these! I’m walking you through exactly how I do it. It’s straightforward, but there are a few tricks to keep the texture perfect.
Step 1: Prep Your Pan (2 minutes)
Line your 9×9 inch baking pan with parchment paper. Grease it lightly with butter or cooking spray. This ensures the bars don’t stick and come out cleanly. Set it aside.
Step 2: Crush the Oreos (2 minutes)
Take 15 of your Oreos (save 5 for later) and crush them into fine crumbs. If you’re using a food processor, pulse until they’re like sand. If you’re using a ziplock bag, roll over them with a rolling pin until they’re fine. You want about 1 cup of crumbs.
Step 3: Make the Crust (3 minutes)
Mix the Oreo crumbs with a tablespoon of melted butter (optional, but helps them stick). Press the mixture firmly into the bottom of your prepared pan. Use the bottom of a glass to pack it down tightly. You want a solid base, not a loose crumble. Place the pan in the fridge while you make the filling.
Step 4: Whip the Cheesecake Filling (5 minutes)
In a large bowl, beat the softened cream cheese and powdered sugar until smooth and creamy. Add the vanilla extract and salt. Beat in the heavy cream until stiff peaks form. You want this to be thick and airy. If you overbeat it, it might get grainy. Stop when it’s smooth and holds its shape.
Step 5: Fold in the Cookie Dough (5 minutes)
Take the refrigerated cookie dough and break it into small, bite-sized pieces. You don’t want huge chunks, or the bars will be hard to cut. Gently fold the cookie dough pieces into the cheesecake mixture. Be gentle! You want to keep the dough chunks intact. If you overmix, you’ll lose the texture.
Step 6: Assemble the Bars (3 minutes)
Take the remaining 5 Oreos and crush them roughly (not fine crumbs, just big chunks). Sprinkle half of the cheesecake-cookie dough mixture into the pan over the crust. Sprinkle half of the crushed Oreos on top. Add the rest of the mixture and top with the remaining crushed Oreos. Press down gently to level the top.
Step 7: Chill and Set (2+ hours)
Cover the pan with plastic wrap or a lid. Refrigerate for at least 2 hours, but overnight is best. The longer it chills, the firmer it gets and the better the flavors meld. Don’t skip this step! If you cut it too soon, it’ll be a mess.
Step 8: Cut and Serve
Once set, lift the bars out of the pan using the parchment sling. Use a sharp knife to cut into squares. Wipe the knife between cuts for clean edges. Serve cold. They’re best eaten with a cold glass of milk.
Total Time: About 30 minutes active, plus 2+ hours chilling.
Expert Tips & Tricks
Here’s everything I’ve learned from making these dozens of times. These tips will save you from my mistakes.
Softened Cream Cheese is Key
If your cream cheese is cold and hard, you’ll get lumps in your cheesecake layer. Take it out of the fridge 15-20 minutes before you start. If you’re in a rush, microwave it in 5-second bursts, stirring in between. Don’t melt it, just soften it.
Don’t Overmix the Cookie Dough
I know it’s tempting to mix everything thoroughly, but you want distinct chunks of cookie dough. Overmixing will break them up and turn your bars into a uniform mush. Fold gently until just combined.
Use a Sharp Knife
Cutting no-bake bars can be tricky if your knife is dull. Use a sharp chef’s knife or a serrated knife. Dip it in hot water and wipe it dry between cuts for the cleanest slices. This is a game-changer for presentation.
Chill Longer for Better Texture
Two hours is the minimum, but 4 hours or overnight is better. The cheesecake layer needs time to set firmly. If you’re impatient, you can freeze them for 30 minutes to speed things up, but don’t leave them in the freezer too long or they’ll get icy.
Common Mistakes (and how to avoid them)
Mistake: Crust falls apart. Fix: Make sure you press it down firmly. If it’s too dry, add a bit more melted butter. If it’s too wet, add more crumbs.
Mistake: Filling is too runny. Fix: You didn’t whip the heavy cream enough. Make sure it forms stiff peaks before folding it into the cream cheese.
Mistake: Bars are too sweet. Fix: Oreos and cookie dough are both sweet. If you find it too sweet, use dark chocolate chips or reduce the powdered sugar to ¾ cup.
Variations & Substitutions
Once you’ve nailed the basic version, here’s how you can mix it up. I’ve tried all of these.
Strawberry Cheesecake
Swap the Oreos for vanilla wafers. Add ½ cup of chopped fresh strawberries to the cheesecake layer. It’s fresh and fruity, perfect for spring.
Chocolate Chip Cookie Dough
Use chocolate chip cookie dough and add mini chocolate chips to the crust. It’s extra chocolatey and rich. Great for chocolate lovers.
Mini Cupcakes
Press the crust into cupcake liners. Spoon the filling into the liners. Chill and top with a crumbled Oreo. Perfect for portion control and lunchboxes. These are great for back-to-school snack boxes when you need something sweet but easy.
Vegan Version
Use vegan cream cheese, vegan heavy cream (like coconut cream), and vegan cookie dough. It’s not exactly the same, but it’s still delicious and dairy-free.
Gluten-Free
Use gluten-free Oreos and gluten-free cookie dough. Everything else is naturally gluten-free. The texture might be slightly different, but it’s still great.
Low-Sugar Option
Use a sugar substitute for the powdered sugar and low-sugar cookie dough. It’s not as sweet, but it’s a healthier option if you’re watching your sugar intake.
Serving & Storage
These bars are best served cold, straight from the fridge. They’re dense and creamy, so a small square is usually enough to satisfy a sweet tooth. I like to serve them with a dollop of whipped cream and a sprinkle of crushed Oreos for extra flair.
Storage Instructions
Refrigerator: Store in an airtight container for up to 5 days. They’ll keep their texture and flavor. If you’re serving them at a party, keep them in the fridge until just before serving.
Freezer: Yes, you can freeze these! Wrap individual bars in plastic wrap and then foil. They’ll last up to 2 months in the freezer. Thaw in the fridge overnight before serving. They might lose a little bit of texture, but they’re still good.
Reheating: Don’t reheat these. They’re meant to be eaten cold. If you try to microwave them, the cookie dough will get hard and the cheesecake will get runny. Just eat them cold.
Serving Suggestions
Pair these with a hot cup of coffee or a cold glass of milk. They’re also great alongside cinnamon French toast sticks for a weekend brunch treat. Or serve them with a simple green salad for a balanced meal (okay, maybe not balanced, but delicious).
Nutrition Information
I’m not a nutritionist, but here’s the breakdown if you’re tracking. Keep in mind, this is a dessert, so it’s not exactly a health food.
Per Serving (based on 16 bars):
| Nutrient | Amount |
|---|---|
| Calories | 280 |
| Protein | 4g |
| Carbs | 32g |
| Fiber | 1g |
| Sugar | 22g |
| Fat | 16g |
| Saturated Fat | 9g |
| Sodium | 250mg |
What’s Good: It’s a decent source of calcium from the cream cheese. It’s also easy to portion control with bars.
What to Know: It’s high in sugar and saturated fat. Enjoy in moderation. If you’re watching your sugar, use the low-sugar variations I mentioned above.
Final Thoughts
So that’s my No-Bake Cookie Dough Cheesecake Bars! I’ve probably talked your ear off at this point, but when you make a recipe this often, you have a lot to say about it. These bars have saved my weeknights more times than I can count. They’re my answer to “what’s for dessert?” when I’m tired, don’t want to bake, and still want something that tastes really good.
Make it yours! Try different cookie dough flavors, add different candies, or swap the Oreos for different cookies. The best recipes are the ones you adapt to your family’s tastes. If you make this, drop a comment and let me know what you think! I love hearing how recipes turn out in your kitchen. And if something doesn’t work, tell me that too—I’m here to help troubleshoot.
Happy cooking! And I hope your kitchen smells half as good as mine does right now (it smells like chocolate and victory).
Frequently Asked Questions
Can I use a different type of cookie dough?
Yes! Any refrigerated cookie dough works. Peanut butter chip, snickerdoodle, or even double chocolate chip would be delicious. Just make sure it’s safe to eat raw or use heat-treated flour if making your own.
Why did my cheesecake layer get grainy?
This usually happens if the cream cheese wasn’t softened enough or if you overmixed the heavy cream. Make sure the cream cheese is smooth before adding the sugar. Also, don’t whip the cream too long; stop when you see stiff peaks.
Can I make these ahead of time?
Absolutely! These bars actually get better the next day. I recommend making them the night before you plan to serve them. They’ll keep in the fridge for up to 5 days.
Do I have to use Oreos?
No! You can use any cookie you like for the crust and topping. Nilla Wafers, graham crackers, or even shortbread cookies work well. Just adjust the sweetness if needed.
How do I cut clean bars?
Use a sharp knife and wipe it between cuts. You can also dip the knife in hot water and dry it off. This helps the knife glide through the cold cheesecake without sticking.
Can I freeze these bars?
Yes! Wrap individual bars in plastic wrap and then foil. They’ll last up to 2 months in the freezer. Thaw in the fridge overnight before serving. They might lose a little bit of texture, but they’re still good.
Pin This Recipe!
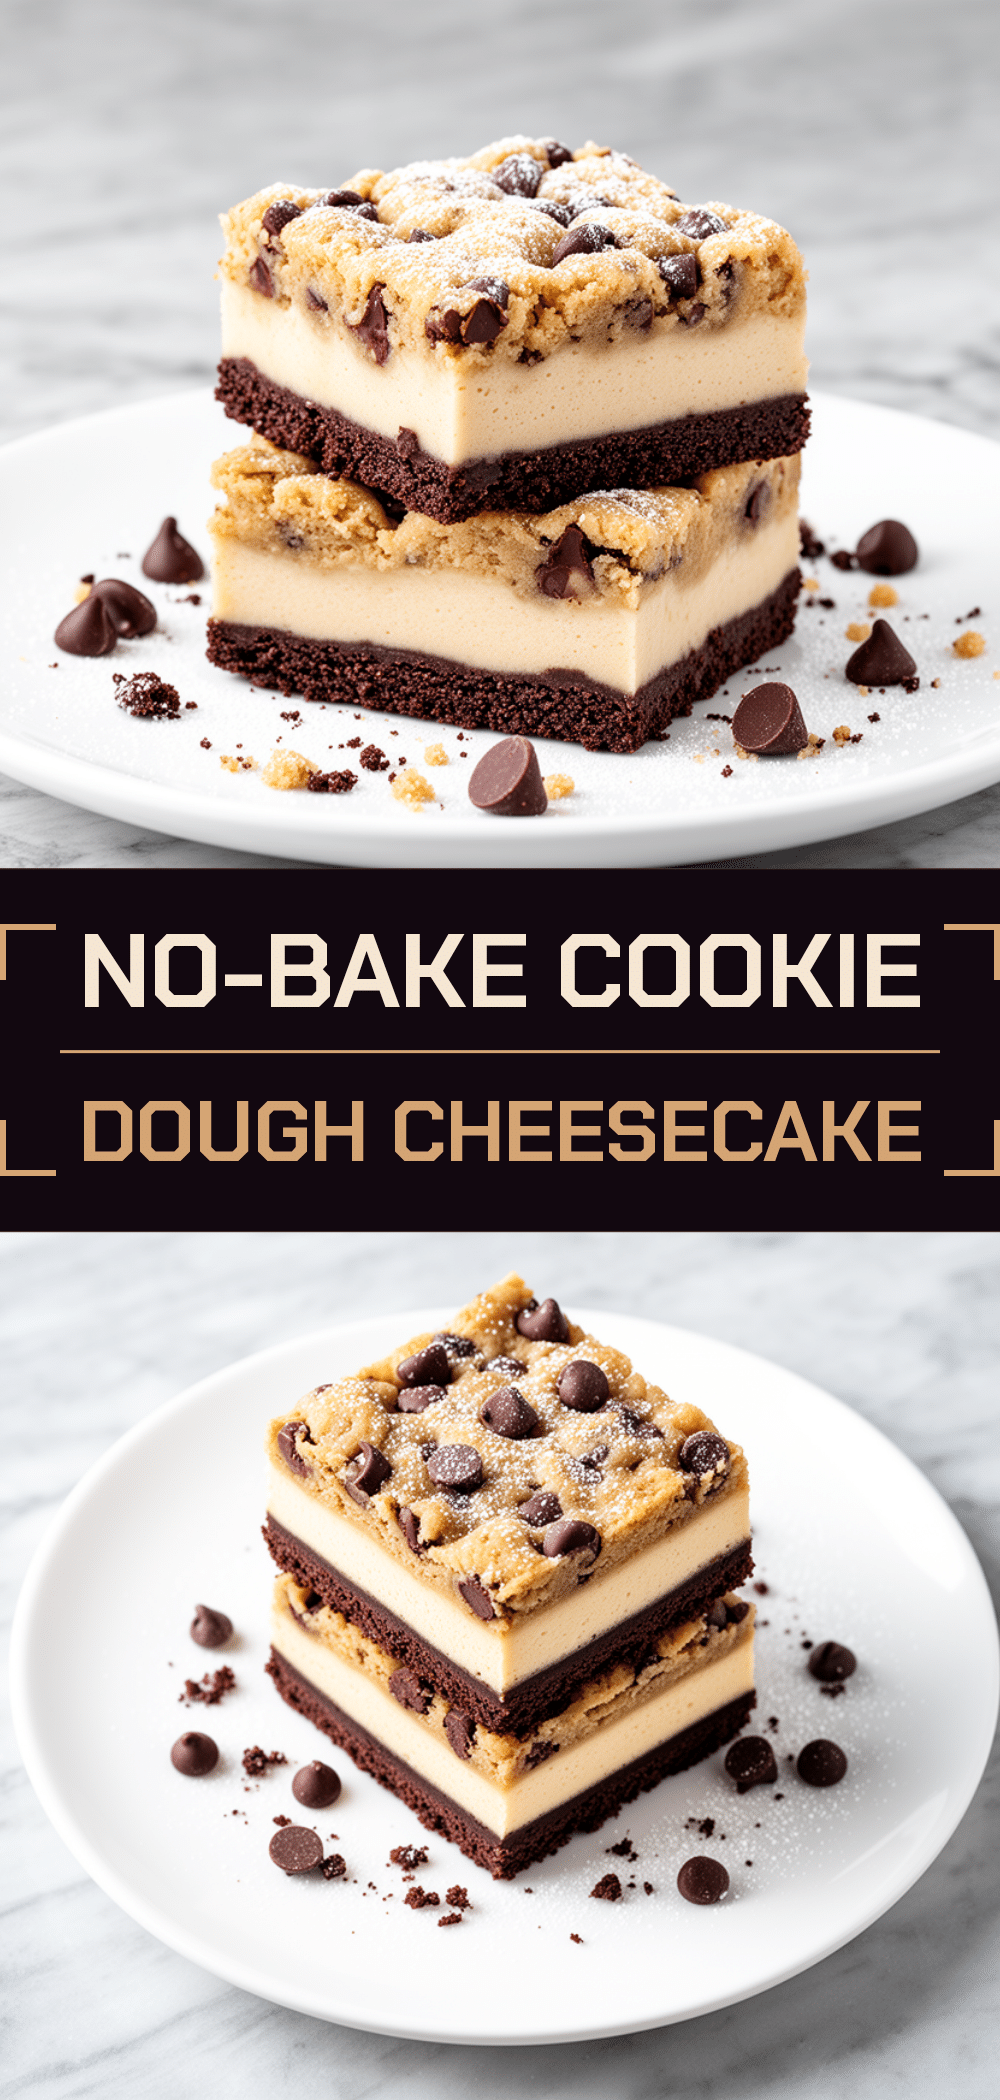
No-Bake Cookie Dough Cheesecake Bars
- Total Time: 2 hours 15 minutes
- Yield: 16 servings 1x
Description
A simple, creamy, and chocolatey dessert made with just four main ingredients. These no-bake bars require no oven, are ready in under 30 minutes of active time, and are perfect for busy weeknights or last-minute guests.
Ingredients
- 8 oz (225g) full-fat brick-style cream cheese, softened
- 1 cup (120g) powdered sugar
- 1 teaspoon pure vanilla extract
- 1/2 cup (120ml) heavy whipping cream
- 1 package (approx. 20 cookies) regular Oreos
- 1 cup (150g) refrigerated edible chocolate chip cookie dough
- 1 tablespoon melted butter (optional, for crust)
- 1/2 cup (85g) mini chocolate chips (optional)
- Pinch of salt
Instructions
- Line a 9×9 inch baking pan with parchment paper, leaving an overhang on the sides for easy removal. Lightly grease the pan.
- Crush 15 of the Oreos into fine crumbs using a food processor or a rolling pin in a ziplock bag. You should have about 1 cup of crumbs.
- Mix the Oreo crumbs with melted butter (if using) and press firmly into the bottom of the prepared pan to form a crust. Place in the fridge.
- In a large bowl, beat the softened cream cheese and powdered sugar until smooth. Add vanilla extract and salt.
- Beat in the heavy cream until stiff peaks form. Be careful not to overbeat.
- Break the refrigerated cookie dough into small, bite-sized pieces. Gently fold the cookie dough pieces into the cheesecake mixture.
- Roughly crush the remaining 5 Oreos into chunks.
- Spread half of the cheesecake-cookie dough mixture over the crust. Sprinkle half of the crushed Oreos on top. Add the rest of the mixture and top with the remaining crushed Oreos. Press down gently to level.
- Cover the pan and refrigerate for at least 2 hours, or overnight for best results.
- Lift the bars out of the pan using the parchment sling. Use a sharp knife to cut into squares and serve cold.
Notes
Ensure cream cheese is fully softened to avoid lumps. Do not overmix the cookie dough to maintain texture. For clean cuts, use a sharp knife and wipe it between slices. These bars are best eaten cold and do not require reheating.
- Prep Time: 15 minutes
- Cook Time: 0 minutes
- Category: Dessert
- Cuisine: American
Nutrition
- Serving Size: 1 bar
- Calories: 280
- Sugar: 22
- Sodium: 250
- Fat: 16
- Saturated Fat: 9
- Carbohydrates: 32
- Fiber: 1
- Protein: 4
Keywords: no-bake, cookie dough, cheesecake bars, easy dessert, 4-ingredient recipe, weeknight dessert, make-ahead dessert, chocolate dessert



