I remember the exact moment I realized I had finally stopped making a mess of cheesecake. It was three years ago, at a holiday party, and I had brought in a slice of what I thought was a disaster. I had rushed the cooling process because I wanted to see if it set, and I was convinced it would crack down the middle like my confidence always does in new baking projects.
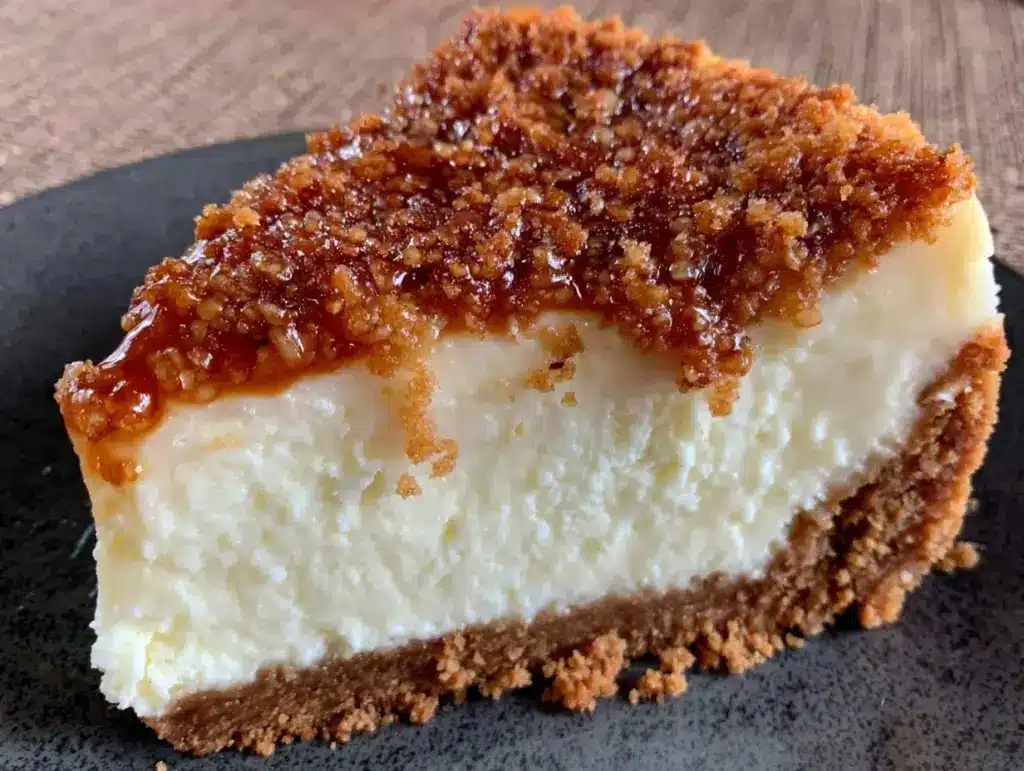
But it didn’t. It sat there, dense, creamy, and perfectly smooth. My uncle, who judges dessert with the severity of a health inspector, took a bite and said, “This is better than the place on 42nd Street.” That was the moment I knew I had it. I’ve tested this recipe at least a dozen times since then—sometimes failing, sometimes succeeding, but always learning. And now, I’m sharing the version that actually works. This classic New York cheesecake with graham crust is dense, rich, and honestly, you really can’t mess it up if you follow the basics.
There is something magical about a proper New York style cheesecake. It’s not that airy, soufflé-like cake you might find in some trendy bakeries. It’s the heavy, luxurious kind that feels like a hug from the inside. It’s the dessert that makes people stop talking at the dinner table and just stare at their forks. I’ve made this for birthdays, for potlucks, and just because I needed a win on a Tuesday. It’s become my go-to when I want to impress without stressing.
If you’ve been intimidated by cheesecake because you think it requires a water bath, a springform pan expert level, or a degree in pastry arts, let me stop you right there. You don’t need any of that. This method is forgiving. It’s simple. It uses ingredients you probably have in your fridge right now. I promise you, if you can mix a bowl and wait, you can make this. And trust me, once you taste it, you’ll be the one handing out slices to everyone.
Why You’ll Love This Recipe
Let’s be real—baking can be a lot of work. But this cheesecake is different. It’s the kind of recipe that builds your confidence. Here’s why this version keeps coming back to my menu, over and over again:
- Zero Cracking, Guaranteed — I’ve developed a cooling method that prevents those ugly cracks without needing a water bath. It just works. I’ve made this for friends with kids running around, and it stays smooth every time.
- Only 6 Main Ingredients — No fancy imports. No hard-to-find items. Just cream cheese, sugar, eggs, vanilla, sour cream, and graham crackers. Simple. Clean. Delicious.
- Make-Ahead Friendly — This is my secret weapon. You make it the night before. It tastes better after sitting in the fridge for 24 hours because the flavors meld together. It’s basically the perfect lazy baker’s dream.
- Rich Without Being Heavy — New York style is known for being dense, but this version strikes the perfect balance. It’s creamy and tangy, not cloying or too sweet. It cuts through the richness of the crust perfectly.
- Beginner Proof — I’ve walked my teenage niece through this entire process on FaceTime. She didn’t burn anything, didn’t crack the cake, and even cleaned up her station. If she can do it, you definitely can.
This isn’t just a dessert; it’s a confidence booster. It’s the “if you can only make one dessert this month, make this” kind of recipe. It’s reliable. It’s consistent. And it tastes like you spent hours in the kitchen, even though most of the time is just waiting.
Ingredients You’ll Need
Here’s the good news: you don’t need a trip to a specialty store for this. The beauty of this classic New York cheesecake with graham crust is how accessible it is. I’m particular about a few things, though, so pay attention to the details.
For the Graham Cracker Crust
Graham cracker crumbs (1 ½ cups / 150g) — You can buy pre-made crumbs, but I prefer crushing them myself. It gives a better texture. Just put whole sheets in a bag and crush them with a rolling pin. If you’re in a rush, the store-bought stuff works fine, just make sure it’s fine crumbs, not chunks.
Unsalted butter (6 tablespoons / 85g, melted) — Use real butter. Margarine changes the flavor and texture. Melt it completely before mixing. It needs to be liquid so it binds the crumbs together properly.
Granulated sugar (2 tablespoons / 25g) — Just a little bit to sweeten the crust. Don’t skip it; it helps with the browning.
Pinch of salt — Enhances the flavor of the butter and crackers. Don’t underestimate the power of a pinch.
For the Cheesecake Filling
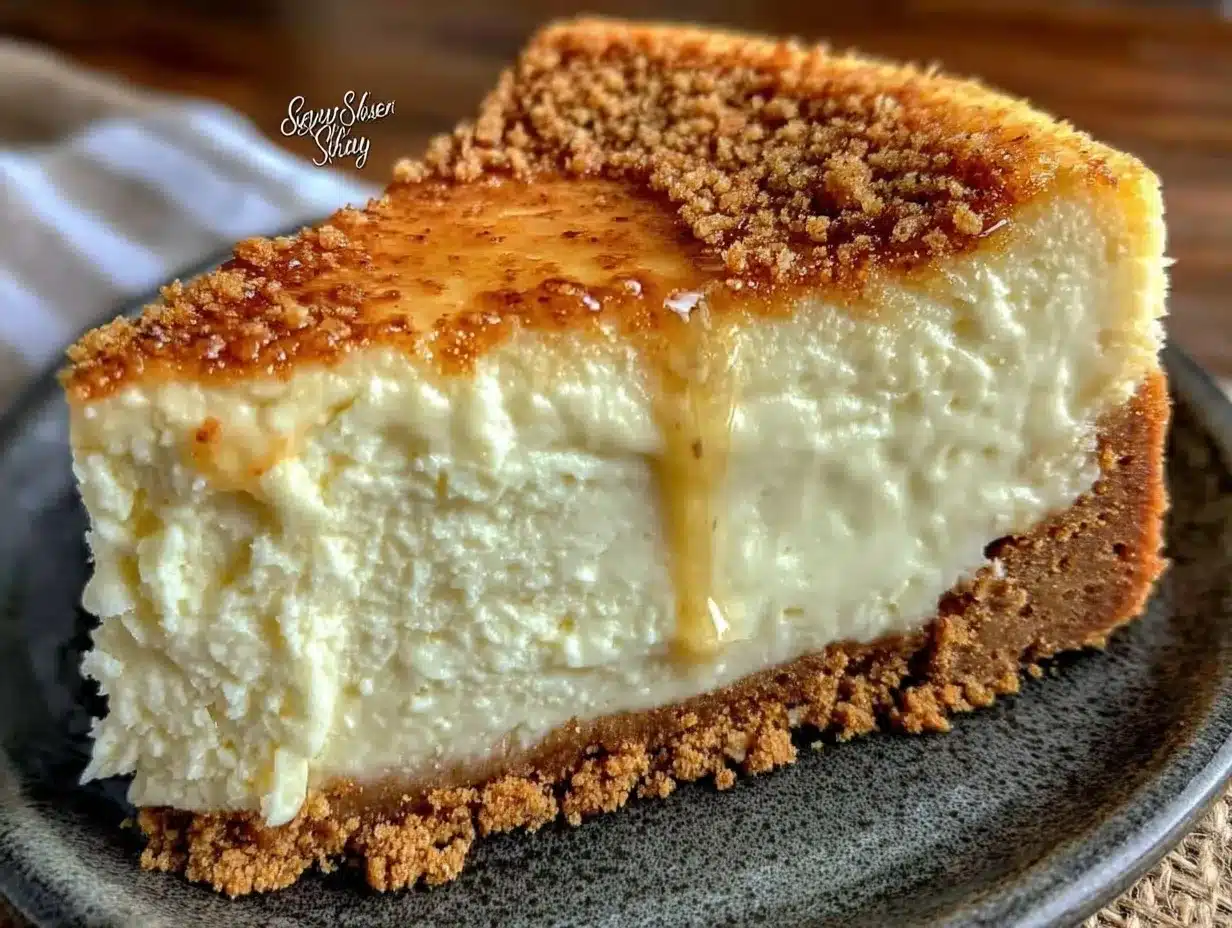
Full-fat cream cheese (32 ounces / 900g) — This is non-negotiable. Use the brick style, not the spreadable kind in the tub. The tub stuff has too much air and water. You need four 8-ounce blocks. Let them sit on the counter for at least an hour before you start. Cold cream cheese is the enemy of smooth batter.
Granulated sugar (1 cup / 200g) — Standard white sugar works best. It dissolves easily and doesn’t change the color. Brown sugar will make it too dense and dark.
Sour cream (1 cup / 240g) — This is the secret to that tangy New York flavor and the creamy texture. Full-fat sour cream is best. Low-fat versions can make the texture weirdly rubbery.
Vanilla extract (2 teaspoons) — Use real vanilla. I know it’s pricey, but artificial flavoring tastes harsh in a simple recipe like this. If you want to get fancy, scrape in half a vanilla bean, but extract is totally fine.
Eggs (4 large eggs) — Room temperature eggs mix better and don’t shock the cream cheese. Take them out of the fridge with your cream cheese.
Heavy cream (2 tablespoons / 30ml) — Just a splash to loosen up the batter so it pours easily. Don’t add too much or it won’t set.
Equipment Needed
You don’t need a fancy kitchen for this. Here’s what I actually use, and what you can swap if you don’t have it.
9-inch Springform pan — This is essential because of the tall sides. It’s the only way to get the cake out cleanly. If you don’t have one, you can use a regular 9-inch cake pan, but you’ll have to line it with foil and lift the cake out. It’s messier, but it works.
Electric mixer — A hand mixer or stand mixer is best. Mixing by hand is possible, but it takes forever and you’ll get tired. I use a hand mixer because it’s easier to clean. Just don’t overmix once you add the eggs (more on that later).
Large mixing bowl — Something big enough to hold all the ingredients without splattering. I like a bowl with a spout for pouring.
Aluminum foil — You’ll need a few large sheets to wrap the bottom of your springform pan. This prevents water from getting in if you decide to use a water bath (though this recipe doesn’t strictly require it, it’s good practice).
Offset spatula — For smoothing the top of the cheesecake. It makes it look professional. A regular knife works in a pinch, but the offset is nicer.
Wire cooling rack — For cooling the cake evenly after baking.
How to Make It: Step-by-Step
Alright, let’s get into the kitchen. I’m going to walk you through this exactly how I do it. It’s simple, but there are a few tricks to keep it smooth.
Step 1: Prep Your Pan and Oven (5 minutes)
Preheat your oven to 325°F (160°C). It’s important to get the oven ready early so it’s stable when the cake goes in. Take your springform pan and wrap the bottom and sides tightly with heavy-duty aluminum foil. You want to make sure no water can seep in. Set it aside.
Take your cream cheese and eggs out of the fridge. Let them sit on the counter while you prep the rest. This is crucial for a lump-free batter.
Step 2: Make the Crust (5 minutes)
In a medium bowl, mix the graham cracker crumbs, 2 tablespoons of sugar, and a pinch of salt. Pour in the melted butter and stir until it looks like wet sand. It should hold together when you pinch it.
Press this mixture firmly into the bottom of your prepared springform pan. Use the bottom of a measuring cup to pack it down tight. You want an even layer. Don’t worry about the sides unless you want a crust up the sides—I prefer just the bottom for this classic style.
Chill the crust in the fridge while you make the filling. This helps it set up.
Step 3: Mix the Filling (10 minutes)
In a large bowl, beat the softened cream cheese on medium-low speed until it’s completely smooth and creamy. This might take 2-3 minutes. Scrape down the sides of the bowl with a spatula. If there are lumps, your cheesecake will have lumps.
Add the 1 cup of sugar and beat until combined. It should look pale and fluffy. Add the sour cream and vanilla extract. Mix on low just until combined. Don’t overmix here.
Now, add the eggs one at a time, mixing on low speed just until the yellow disappears. This is the most important step: do not overmix once the eggs are in. Overmixing adds air, and air causes cracks. Mix gently and stop as soon as it’s smooth.
Stir in the heavy cream by hand with a spatula. This ensures you don’t accidentally whip too much air into the batter.
Step 4: Bake It (1 hour 15 minutes)
Pour the batter over the chilled crust. Smooth the top with your offset spatula. Tap the pan gently on the counter a few times to release any big air bubbles.
Place the pan in the oven. Bake at 325°F for 1 hour and 15 minutes. The edges should be set, but the center should still jiggle slightly like Jell-O when you shake the pan. It will look slightly puffed up. This is normal.
Do not open the oven door while it’s baking. The temperature change can cause cracking. Trust me.
Step 5: The Cool Down (Critical Step)
Turn off the oven. Crack the oven door open slightly (you can stick a wooden spoon in the door to keep it ajar). Let the cheesecake sit in the cooling oven for 1 hour. This gradual cooling is what prevents cracks.
After an hour, remove it from the oven and place it on a wire rack. Let it cool completely to room temperature. This takes about another hour.
Step 6: Chill (Overnight)
Once it’s at room temperature, cover the pan loosely with plastic wrap or foil. Refrigerate for at least 8 hours, or preferably overnight. This is when the magic happens. The texture firms up, and the flavor deepens. If you eat it warm, it’s just a custard. If you eat it cold, it’s a cheesecake.
Expert Tips & Tricks
Here’s everything I’ve learned from making this dozens of times. These tips will save you from my mistakes.
Room Temperature is King
If your cream cheese is cold, you will have lumps. If your eggs are cold, they won’t incorporate evenly. Take everything out at least an hour before you start. If you forget, you can warm the cream cheese blocks in the microwave for 10 seconds at a time, but don’t melt them. Just soften them.
Don’t Overbeat the Eggs
This is the #1 reason for cracks. Once you add the eggs, mix on the lowest speed possible. Just enough to blend them in. Air bubbles expand in the oven and then contract, causing cracks. Less air = smoother cake.
Use a Water Bath (Optional but Recommended)
While this recipe works without one, a water bath provides gentle, even heat. To do it, wrap the bottom of your springform pan in two layers of foil. Place the pan in a larger roasting pan. Pour hot water into the roasting pan until it comes halfway up the side of the springform pan. It’s a bit messy, but it guarantees a crack-free top. If you’re nervous, just do it.
Know When It’s Done
Many people bake cheesecake until it’s firm all the way through. Don’t do this. It will overcook and become dry. It’s done when the edges are set but the center 2 inches still jiggle slightly. It will firm up as it cools.
Use a Knife for Slicing
For clean slices, dip your knife in hot water and wipe it dry between every cut. This melts through the crust and filling smoothly. You’ll get perfect, professional-looking slices every time.
Variations & Substitutions
Once you’ve nailed the basic version, here’s how you can mix it up. I’ve tried all of these.
Berry Swirl
Before baking, dollop ½ cup of strawberry or raspberry jam on top of the batter. Use a knife to swirl it in gently. Don’t overmix or it will turn brown. It adds a beautiful color and flavor burst.
Chocolate Chip
Stir ½ cup of chocolate chips into the batter after adding the eggs. It’s like a cheesecake cookie. My kids love this version.
Gluten-Free
Use gluten-free graham crackers or even almond flour for the crust. The filling is naturally gluten-free, so just watch your crumbs. It tastes exactly the same.
Lemon Cheesecake
Add the zest of one lemon and 2 tablespoons of lemon juice to the batter. It cuts the richness and makes it brighter. Great for spring.
Dairy-Free
This is harder because cream cheese is the star, but you can use a high-quality vegan cream cheese block. The texture might be slightly different, but it’s still delicious. Use coconut milk instead of sour cream.
Serving & Storage
How to Serve
I usually serve this plain, maybe with a dollop of whipped cream and fresh berries. But it’s also amazing with a drizzle of caramel sauce or a scoop of vanilla ice cream. It pairs beautifully with a cup of black coffee or tea. The contrast between the rich cake and the bitter coffee is perfect.
Storage
Keep it covered in the refrigerator for up to 5 days. It actually tastes better on day 2 or 3. The flavors meld together. Do not leave it out at room temperature for more than 2 hours.
Freezing
You can freeze this! Wrap the whole pan (or individual slices) tightly in plastic wrap and then foil. It will keep for up to 2 months. Thaw it in the fridge overnight. The texture might be slightly softer, but it’s still good. I don’t recommend freezing it with fresh fruit toppings, as they get mushy.
Leftovers
If you have any left (unlikely, but possible), just keep it in the fridge. It’s great for breakfast if you’re into that kind of thing. I know, I know, it’s dessert. But hey, it’s our rules.
Nutrition Information
I’m not a nutritionist, but here’s the breakdown if you’re tracking. This is a rich dessert, so a little goes a long way.
Per Slice (1/12th of cake):
- Calories: 380
- Protein: 6g
- Carbs: 32g
- Fat: 24g
- Sugar: 22g
It’s high in fat and sugar, obviously, because it’s cheesecake. But it’s also high in protein from the cream cheese and eggs. If you’re watching calories, stick to a smaller slice and pair it with some fresh fruit. It’s a treat, not a snack. Enjoy it mindfully.
Final Thoughts
So there you have it. This classic New York cheesecake with graham crust. It’s dense, creamy, and incredibly satisfying. I’ve talked your ear off at this point, but when you make a recipe this often, you have a lot to say about it. This has saved me more times than I can count. It’s my answer to “what dessert should I bring?” when I want to look like a pro without the stress.
Make it yours! Try different extracts, add swirls, or just enjoy it plain. The best recipes are the ones you adapt to your family’s tastes. And remember, you really can’t mess this up. Just follow the steps, be patient, and let it chill.
If you make this, drop a comment and let me know how it turned out! I love hearing how recipes turn out in your kitchen. And if something doesn’t work, tell me that too—I’m here to help troubleshoot. Happy baking!
Frequently Asked Questions
Why did my cheesecake crack?
Cracks usually happen for three reasons: overmixing the batter (too much air), baking it too long (it dries out), or cooling it too quickly (temperature shock). To prevent this, mix gently after adding eggs, bake until the center jiggles, and let it cool slowly in the turned-off oven.
Can I use light cream cheese?
I don’t recommend it. Light cream cheese has more water and less fat, which can make the texture watery or rubbery. Full-fat brick-style cream cheese is the standard for a reason—it creates that rich, dense texture we love.
Do I need a water bath?
Not strictly for this recipe, but it helps. The gradual cooling method I described (cooling in the oven) does most of the work. If you’re a perfectionist or live at a high altitude, a water bath is a good safety net. Just make sure your pan is well-wrapped in foil so water doesn’t get in.
Can I make this in a different size pan?
Yes, but the baking time will change. If you use a 10-inch pan, the cake will be thinner and bake faster (check it at 50 minutes). If you use two 8-inch pans, you’ll need to split the batter and bake for less time. Keep an eye on it.
Why is my cheesecake runny in the middle?
If it’s still in the oven, it might just need more time. If it’s cooled completely and is still runny, you might have underbaked it or added too much liquid. Next time, let it cool in the oven longer and check for the jiggle earlier. A proper cheesecake should be firm, not soupy, once chilled.
Can I make this ahead of time?
Absolutely. This is actually better made ahead. Make it 1-2 days before you need it. It will keep in the fridge for up to 5 days. Just bring it to room temperature for 30 minutes before serving for the best texture.
Pin This Recipe!
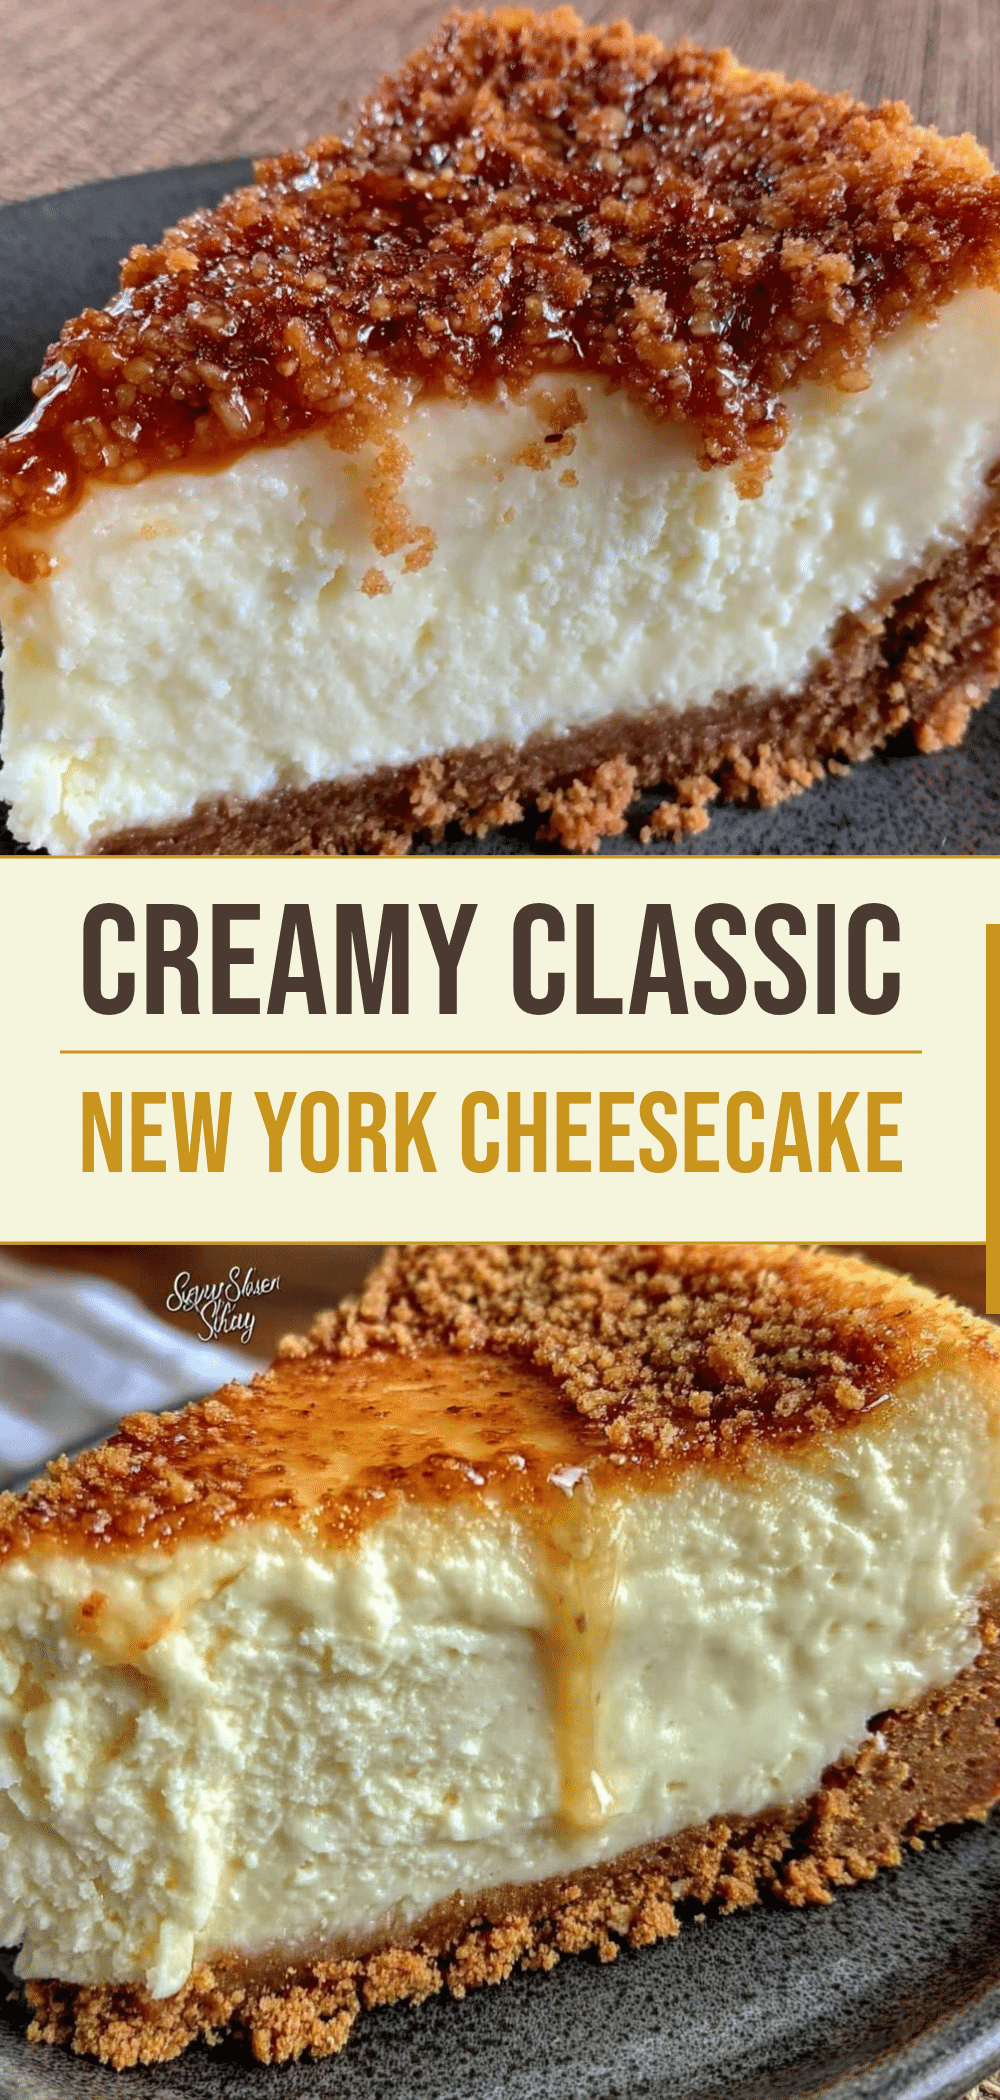
Classic New York Cheesecake: The Easy No-Fail Recipe You Cant Mess Up
- Total Time: 9 hours 35 minutes
- Yield: 12 servings 1x
Description
A dense, creamy, and rich New York-style cheesecake with a graham cracker crust that is beginner-proof, requires no water bath, and guarantees a crack-free top with a simple cooling method.
Ingredients
- 1 ½ cups (150g) graham cracker crumbs
- 6 tablespoons (85g) unsalted butter, melted
- 2 tablespoons (25g) granulated sugar
- Pinch of salt
- 32 ounces (900g) full-fat cream cheese, room temperature
- 1 cup (200g) granulated sugar
- 1 cup (240g) full-fat sour cream
- 2 teaspoons vanilla extract
- 4 large eggs, room temperature
- 2 tablespoons (30ml) heavy cream
Instructions
- Preheat oven to 325°F (160°C). Wrap the bottom and sides of a 9-inch springform pan tightly with heavy-duty aluminum foil.
- In a medium bowl, mix graham cracker crumbs, 2 tablespoons sugar, and a pinch of salt. Stir in melted butter until it resembles wet sand.
- Press the crust mixture firmly into the bottom of the prepared pan. Chill in the fridge while making the filling.
- In a large bowl, beat the softened cream cheese on medium-low speed until smooth (2-3 minutes). Scrape down the sides.
- Add 1 cup sugar and beat until combined and pale. Add sour cream and vanilla extract, mixing on low just until combined.
- Add eggs one at a time, mixing on low speed just until the yellow disappears. Do not overmix to avoid air bubbles.
- Stir in heavy cream by hand with a spatula.
- Pour batter over the chilled crust and smooth the top. Tap the pan gently to release air bubbles.
- Bake at 325°F for 1 hour and 15 minutes. The edges should be set, but the center should jiggle slightly like Jell-O.
- Turn off the oven and crack the door open slightly (use a wooden spoon to keep it ajar). Let the cheesecake sit in the oven for 1 hour.
- Remove from oven and place on a wire rack to cool completely to room temperature (about 1 hour).
- Cover loosely and refrigerate for at least 8 hours or overnight before serving.
Notes
Ensure all dairy ingredients (cream cheese, eggs) are at room temperature to prevent lumps. Do not overmix after adding eggs to avoid cracks. The cheesecake tastes better after sitting in the fridge for 24 hours. For clean slices, dip a knife in hot water and wipe dry between cuts.
- Prep Time: 20 minutes
- Cook Time: 1 hour 15 minutes
- Category: Dessert
- Cuisine: American
Nutrition
- Serving Size: 1 slice (1/12th of c
- Calories: 380
- Sugar: 22
- Sodium: 280
- Fat: 24
- Saturated Fat: 14
- Carbohydrates: 32
- Fiber: 1
- Protein: 6
Keywords: New York cheesecake, graham cracker crust, no-fail cheesecake, easy dessert, creamy cheesecake, baking