I have a confession to make. For years, I was the person who bought store-bought pecan pie filling from a can. I know, I know. Don’t judge me too hard. But between work, family obligations, and the sheer exhaustion of trying to keep a house that smells like cinnamon and pine needles, I needed a dessert that tasted indulgent but didn’t require three hours of my life.
Then, last November, I tried a recipe for maple bacon pecan pie bars. I expected it to be a gimmick—sweet meets salty, right? But what I got was something completely unexpected. It was rich, chewy, salty, smoky, and deeply comforting all at once. My husband took one bite, paused, and said, “This is better than the actual pie.” And he’s not a fan of bars. He likes structure. He likes a proper slice.
Since that first test batch (which I made because I had half a jar of maple syrup and a package of bacon that needed using), these fall maple bacon pecan pie bars have become the centerpiece of every holiday gathering. Thanksgiving? They’re there. Christmas cookies swap? They’re there. Just because it’s Tuesday and I need to feel fancy? They’re there.
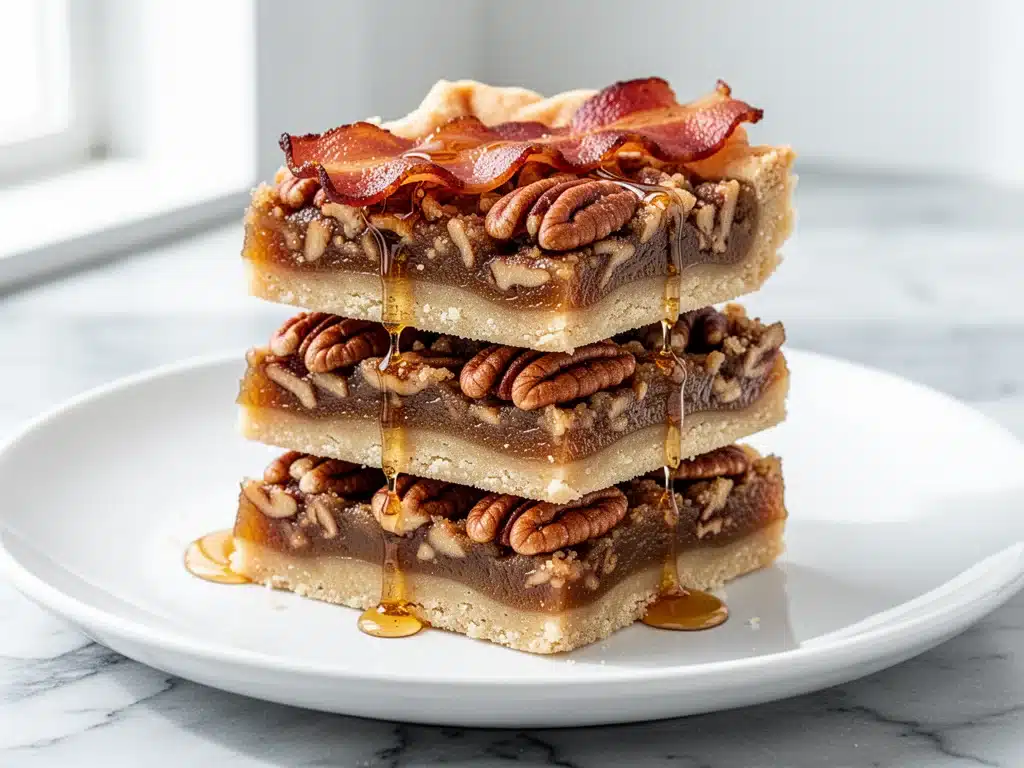
What makes these bars so special isn’t just the flavor combo—it’s the texture. You get that buttery, crumbly shortbread crust that melts in your mouth, topped with a gooey, maple-infused pecan filling that’s just set enough to hold its shape but still oozes when you cut it. And the bacon? It’s not just a garnish. It’s baked right into the top, adding little salty crunches that cut through the sweetness perfectly.
I’ve tested this recipe at least seven times. I’ve played with the butter-to-flour ratio for the crust. I’ve tried different types of maple syrup (real maple, obviously). I’ve even debated whether to put the bacon on before or after baking. (Spoiler: Before is better. Trust me.) Now, I’m sharing the version that works every single time. It’s easier than a whole pie, it feeds a crowd, and it’s the kind of dessert that disappears before you can even take a photo.
Why You’ll Love This Maple Bacon Pecan Pie Bar Recipe
If you’re on the fence about swapping your traditional pecan pie for bars this year, let me convince you. These bars have earned their spot in my rotation for reasons that go way beyond just being “easy.”
They Taste Like Dessert, But Feel Like a Hug — There’s something deeply comforting about the combination of warm maple, toasted pecans, and salty bacon. It hits all the right notes for fall. It reminds me of sitting by a fire with a mug of cider, but in bar form. My kids, who usually turn their noses up at “fancy” desserts, ask for these specifically. They call them “bacon candy bars.”
Shortbread Crust > Graham Cracker — Most pecan pie bars use a graham cracker crust. It’s fine. It’s standard. But a buttery shortbread crust? That’s game-changing. It’s tender, slightly crisp, and rich without being overwhelming. It provides the perfect structural base for the gooey filling. I’ve tried this with a graham base too, and it just doesn’t compare. The shortbread holds up better and adds a layer of sophistication that feels homemade.
Salty, Sweet, Crunchy, Chewy — This is the holy grail of texture. The crust is crumbly. The filling is chewy and sticky. The pecans add crunch. The bacon adds a crisp, savory snap. Every bite has a different texture profile. It keeps your palate interested. I’ve served these to people who claim they don’t like pecan pie, and they always go back for seconds.
Make-Ahead Friendly — This is huge for holiday hosting. You can make these bars up to two days in advance. They actually get better as they sit, allowing the flavors to meld and the bars to set firmly. You can bake them on Sunday, store them in the fridge, and bring them out on Thanksgiving Day. No last-minute panic. No oven space issues.
Uses Simple Ingredients — You probably have most of this already. Butter, flour, sugar, maple syrup, eggs, pecans, and bacon. Nothing weird or hard to find. It’s pantry-friendly in the best way. If you have a fall brown butter pear upside-down cake on your radar, you’ll appreciate how similar the flavor profiles are—warm spices, sweet fruits, and rich textures.
Ingredients You’ll Need
Here’s the thing about this recipe: it looks like a lot of ingredients, but it’s mostly basics. The magic happens in how you combine them. I’m particular about a few things here, so pay attention to the notes below.
For the Buttery Shortbread Crust
Unsalted Butter (½ cup / 113g, softened) — This is non-negotiable. I use unsalted so I can control the saltiness. If you only have salted, reduce the added salt in the recipe by half. Softened means it yields to pressure but isn’t melted. Room temperature is key for a tender crust.
All-Purpose Flour (1 cup / 120g) — Standard stuff. No need for fancy pastry flour. I use Gold Medal or King Arthur. Measure it correctly—spoon and level, don’t scoop. Scooping packs it down and makes the crust tough.
Granulated Sugar (¼ cup / 50g) — Just enough to sweeten the crust without making it crunchy. It helps with browning.
Salt (¼ teaspoon) — Enhances the butter flavor. Don’t skip it.
Vanilla Extract (½ teaspoon) — Adds depth. Use real vanilla, not imitation. It makes a difference in such a simple ingredient list.
For the Maple Pecan Filling
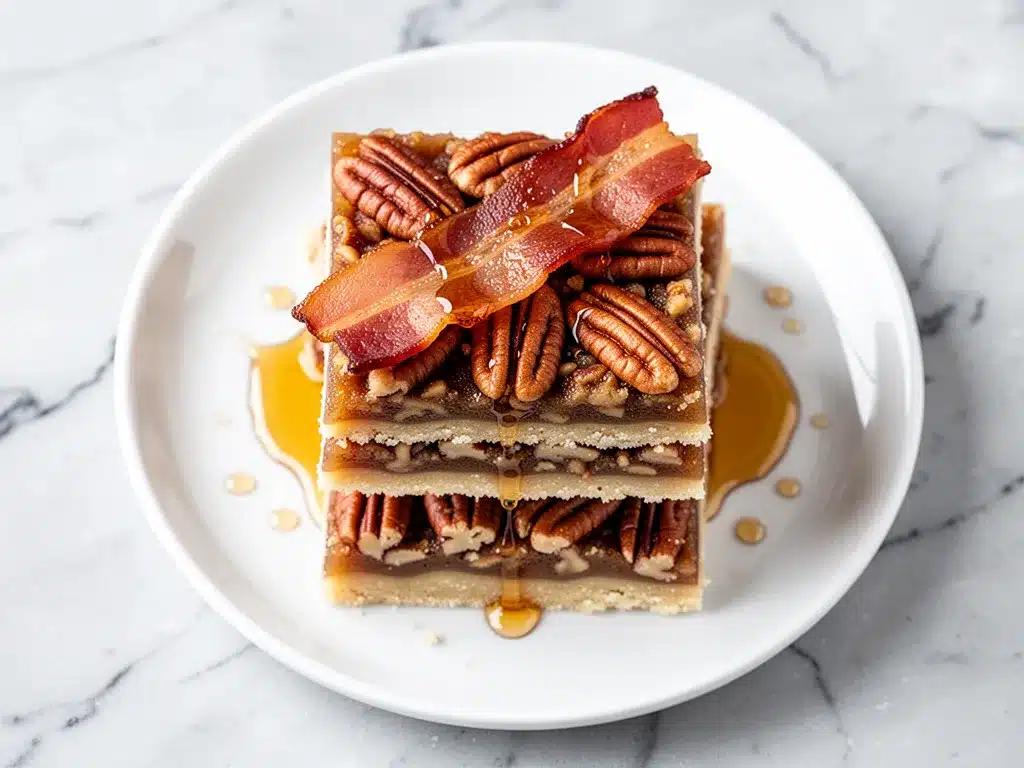
Maple Syrup (½ cup / 120ml) — This is the star. Use 100% pure maple syrup. The stuff in the pancake syrup bottle is sugar syrup and flavoring, and it will ruin this recipe. I love the robust flavor of Grade B syrup, but Grade A Dark Robust works too. Light syrup is too mild.
Packed Brown Sugar (½ cup / 100g) — Adds molasses notes and chewiness. Dark brown sugar is better for this. Light works but lacks depth.
Unsalted Butter (¼ cup / 57g, melted) — Adds richness and helps bind the filling. Melt it in the microwave or a small saucepan.
Eggs (2 large) — Room temperature eggs mix better. I take them out of the fridge 15 minutes before I start. Cold eggs can seize the filling.
Vanilla Extract (1 teaspoon) — Boosts the maple flavor.
Salt (½ teaspoon) — Balances the sweetness. Crucial.
Chopped Pecans (1 cup / 100g) — Toast them first! It brings out their natural oils and flavor. I toast them in a dry skillet for 3-4 minutes until fragrant. Don’t rush this step. Raw pecans taste flat in this recipe.
For the Bacon Topping
Thick-Cut Bacon (6-8 slices) — Thick-cut is essential. Thin bacon burns before it crisps. I use applewood smoked for a nice smoky flavor. Cook it until it’s just starting to crisp but still has some chew. It will crisp up more in the oven.
Equipment Needed
You don’t need a fancy kitchen for this. Here’s what I actually use:
8×8 Inch Baking Pan — I use a metal pan. Glass takes longer to bake and can result in a soggy bottom. If you only have glass, reduce the oven temp by 25°F.
Mixing Bowls — Two medium bowls. One for the crust, one for the filling.
Pastry Cutter or Fork — To mix the crust. I use a fork because it’s faster, but a pastry cutter gives a more uniform texture.
Whisk — For the filling. You need to incorporate the eggs thoroughly without overmixing.
Small Skillet — For toasting pecans and cooking bacon. Cast iron is best for even heating.
Cooling Rack — Essential. You need to cool the bars completely before cutting, or they’ll be a mess.
Parchment Paper — I line the pan with parchment, leaving an overhang on two sides. This makes lifting the bars out so much easier. No more digging them out with a knife.
How to Make It: Step-by-Step
Alright, let’s make these bars! I’m walking you through exactly how I do it, including the little tricks I’ve picked up over seven test batches.
Step 1: Prep Your Pan and Oven (5 minutes)
Preheat your oven to 350°F (175°C). Line your 8×8 inch baking pan with parchment paper. Grease the parchment lightly with butter or cooking spray. This ensures nothing sticks. Set your rack in the middle of the oven for even baking.
Step 2: Make the Shortbread Crust (5 minutes)
In a medium bowl, combine the softened butter, granulated sugar, salt, and vanilla. Mix with a wooden spoon or electric mixer on low until creamy and well combined. Add the flour and mix just until the dough comes together. It will look crumbly at first, but keep mixing. It should form a cohesive dough that holds together when squeezed.
Press the dough evenly into the bottom of your prepared pan. Use your fingers or the bottom of a measuring cup to press it down firmly. You want an even layer. Don’t worry if it’s not perfect; it’ll settle. Prick the crust all over with a fork to prevent puffing up.
Step 3: Blind Bake the Crust (15 minutes)
Bake the crust for 15 minutes. It should be lightly golden around the edges but still pale in the center. It won’t be fully cooked through yet—that’s okay. It will finish baking with the filling. Remove from the oven and leave the oven on.
Step 4: Toast the Pecans and Cook the Bacon (10 minutes)
While the crust bakes, toast your pecans in a dry skillet over medium heat for 3-4 minutes, shaking the pan frequently, until fragrant. Let them cool slightly, then chop them coarsely. You want chunks, not dust.
In the same skillet, cook your bacon until it’s just starting to crisp but still flexible. It will crisp up more in the oven. Transfer to a paper towel-lined plate to drain excess grease. Once cool enough to handle, chop the bacon into small pieces.
Step 5: Make the Filling (5 minutes)
In a large bowl, whisk together the maple syrup, brown sugar, melted butter, eggs, vanilla, and salt. Whisk vigorously for about 1-2 minutes. You want to dissolve the sugar and emulsify the eggs. This prevents the filling from being grainy or separated.
Stir in the chopped pecans and half of the chopped bacon. Reserve the other half for the topping.
Step 6: Assemble and Bake (35-40 minutes)
Pour the filling over the partially baked crust. Sprinkle the remaining bacon pieces evenly over the top. The bacon should be visible and distributed.
Return to the oven and bake for 35-40 minutes. The edges should be bubbly and slightly caramelized, and the center should be set but still have a slight jiggle. It will firm up as it cools. If the top is browning too quickly, tent it loosely with foil after 20 minutes.
Step 7: Cool Completely (2+ hours)
This is the hardest part. Let the bars cool in the pan on a wire rack for at least 2 hours. Ideally, let them cool completely and then refrigerate for an hour. This sets the filling and makes cutting clean squares possible. If you cut them warm, they’ll be a gooey mess.
Expert Tips & Tricks
Here’s everything I’ve learned from making this dozens of times. These tips will save you from my mistakes.
Toast Your Pecans — I cannot stress this enough. Raw pecans taste bland and waxy. Toasting them releases their oils and adds a nutty depth that complements the maple perfectly. It takes 3 minutes and makes a huge difference.
Use Real Maple Syrup — I’ve tried the cheap stuff. It tastes like artificial sugar. Real maple syrup has complexity and flavor that can’t be replicated. It’s worth the extra cost for this recipe.
Don’t Overmix the Crust — Once you add the flour, mix just until combined. Overmixing develops gluten, which makes the crust tough instead of tender and crumbly. It should look shaggy before you press it in.
Whisk the Filling Well — The eggs need to be fully incorporated. If you see white streaks of egg white, keep whisking. This ensures a smooth, uniform texture after baking.
Thick-Cut Bacon Only — Thin bacon burns and turns to ash in the oven. Thick-cut bacon stays chewy and adds substantial flavor. Look for “thick cut” or “center cut” at the store.
Cool Completely — I know you want to eat them now. Wait. The filling sets as it cools. Cutting warm bars results in messy, sticky squares that fall apart. Patience pays off.
Pro Trick: The Cold Knife — For clean cuts, dip your knife in hot water and wipe it dry between each cut. This prevents the filling from sticking to the blade.
Variations & Substitutions
Once you’ve nailed the basic version, here’s how you can mix it up. I’ve tried all of these.
Gluten-Free Version — Substitute the all-purpose flour with a 1:1 gluten-free baking flour blend (like Bob’s Red Mill or King Arthur). The texture is almost identical. Make sure your maple syrup and bacon are certified gluten-free if you have celiac disease.
Dairy-Free Version — Use dairy-free butter (like Miyoko’s or Earth Balance) for both the crust and filling. The flavor is slightly different but still delicious. I’ve made this for a friend with dairy allergies, and she loved it.
Honey Pecan Bars — Swap the maple syrup for honey. It’s lighter and less robust. Great for spring or summer. Add a teaspoon of cinnamon for warmth.
Maple Bourbon Pecan Bars — Add 1 tablespoon of bourbon to the filling. It adds a nice adult kick. Skip the bourbon if serving to kids. The alcohol cooks off mostly, leaving just the flavor.
Double Bacon — If you’re a bacon lover, double the bacon. I’ve done this, and it’s incredible. Just make sure you have enough bacon to cover the top and mix into the filling.
Mini Bars — Use a muffin tin for bite-sized versions. Reduce baking time to 15-18 minutes. Perfect for party platters.
Other Toppings — Swap bacon for crispy prosciutto for a more elegant twist. Or add a layer of caramel sauce under the filling for extra sweetness.
Serving & Storage
How to Serve — I serve these at room temperature. They’re best when they’ve had time to set. Garnish with a flake of sea salt on top for presentation. They look fancy but are totally casual.
Side Dishes — These are rich, so pair them with something light. A scoop of vanilla ice cream or whipped cream cuts the sweetness. A cup of black coffee or tea is perfect. I also like serving them with a fall spiced fig and honey ricotta tart for a varied dessert table.
Storage — Store in an airtight container at room temperature for up to 3 days. They keep well because the maple syrup acts as a preservative. For longer storage, refrigerate for up to 1 week. Bring to room temperature before serving for best texture.
Freezing — These freeze beautifully. Wrap individual bars in plastic wrap, then place in a freezer bag. Freeze for up to 3 months. Thaw at room temperature overnight. They taste just as good as fresh.
Reheating — Not really necessary, but if you want them warm, microwave for 10-15 seconds. Don’t overheat, or the bacon will get tough.
Nutrition Information
I’m not a nutritionist, but here’s the breakdown if you’re tracking. Keep in mind these are rich bars, so portion control is key.
Per Bar (makes 16 bars):
- Calories: 280
- Protein: 4g
- Carbs: 32g
- Fiber: 2g
- Sugar: 24g
- Fat: 16g
- Saturated Fat: 7g
- Cholesterol: 35mg
- Sodium: 220mg
What’s Good: — Pecans provide healthy fats and protein. Maple syrup has antioxidants. It’s a treat, but not empty calories.
What to Know: — High in sugar and saturated fat from butter and bacon. Enjoy in moderation. If you’re watching sugar, reduce the brown sugar to ¼ cup.
My Take: — This is a decadent dessert. It’s not a health food. But it’s made with real ingredients, and it’s far better than anything from a box. When I make these, I enjoy one square with my coffee and feel completely satisfied.
Final Thoughts
So that’s my take on fall maple bacon pecan pie bars. I’ve probably talked your ear off at this point, but when you make a recipe this often, you have a lot to say about it. These bars have saved my holiday dessert game more times than I can count. They’re my answer to “what’s for dessert?” when I’m tired, don’t want takeout, and still want something that tastes really good. My family is happy, my friends are happy, and I’m happy because I’m not stressed about cooking.
Make it yours! Try different types of bacon, swap the pecans for walnuts, or add a drizzle of caramel. The best recipes are the ones you adapt to your family’s tastes. If you make this, drop a comment and let me know what you think! I love hearing how recipes turn out in your kitchen. And if something doesn’t work, tell me that too—I’m here to help troubleshoot.
Happy baking! And I hope your kitchen smells half as good as mine does right now.
Frequently Asked Questions
Can I use light maple syrup?
You can, but the flavor will be much milder. Light maple syrup lacks the robust, caramel notes that Grade B or Dark Robust syrup provides. I strongly recommend using 100% pure maple syrup, regardless of grade, for the best taste. If you only have light syrup, consider adding a teaspoon of molasses to boost the flavor.
Why did my filling turn out runny?
This usually happens if the bars weren’t baked long enough or if the oven temperature was too low. The filling needs to set properly. Bake until the edges are bubbly and the center is just set. If you’re at a high altitude, you may need to increase the baking time by 5-10 minutes. Also, make sure you’re not under-measuring the eggs, which help bind the filling.
Can I make these ahead of time?
Absolutely. These bars actually taste better the next day as the flavors meld. You can bake them up to 2 days in advance and store them in an airtight container at room temperature. For longer storage, refrigerate for up to a week or freeze for up to 3 months. They’re perfect for meal-prepping your holiday desserts.
Why did my crust get soggy?
Blind baking the crust is crucial. If you skip this step, the crust will be soft and undercooked. Make sure you bake the crust for the full 15 minutes before adding the filling. Also, ensure your pan isn’t too small, which can cause the crust to be too thick and not cook through.
Can I use walnuts instead of pecans?
Yes! Walnuts work beautifully in this recipe. They have a slightly more bitter, earthy flavor that pairs well with the maple. Toast them just like you would pecans. I’ve made this with a mix of pecans and walnuts, and it’s delicious.
How do I cut clean squares?
Use a sharp knife and dip it in hot water between each cut. Wipe it dry before cutting the next square. This prevents the sticky filling from sticking to the blade. Also, make sure the bars are completely cool and set before cutting. Warm bars will crumble.
Can I double this recipe?
Yes, but you’ll need a 9×13 inch pan. Double all the ingredients and bake for 40-45 minutes. Keep an eye on the edges, as they may brown faster. The baking time may vary slightly depending on your oven, so check for doneness around the 40-minute mark.
Pin This Recipe!
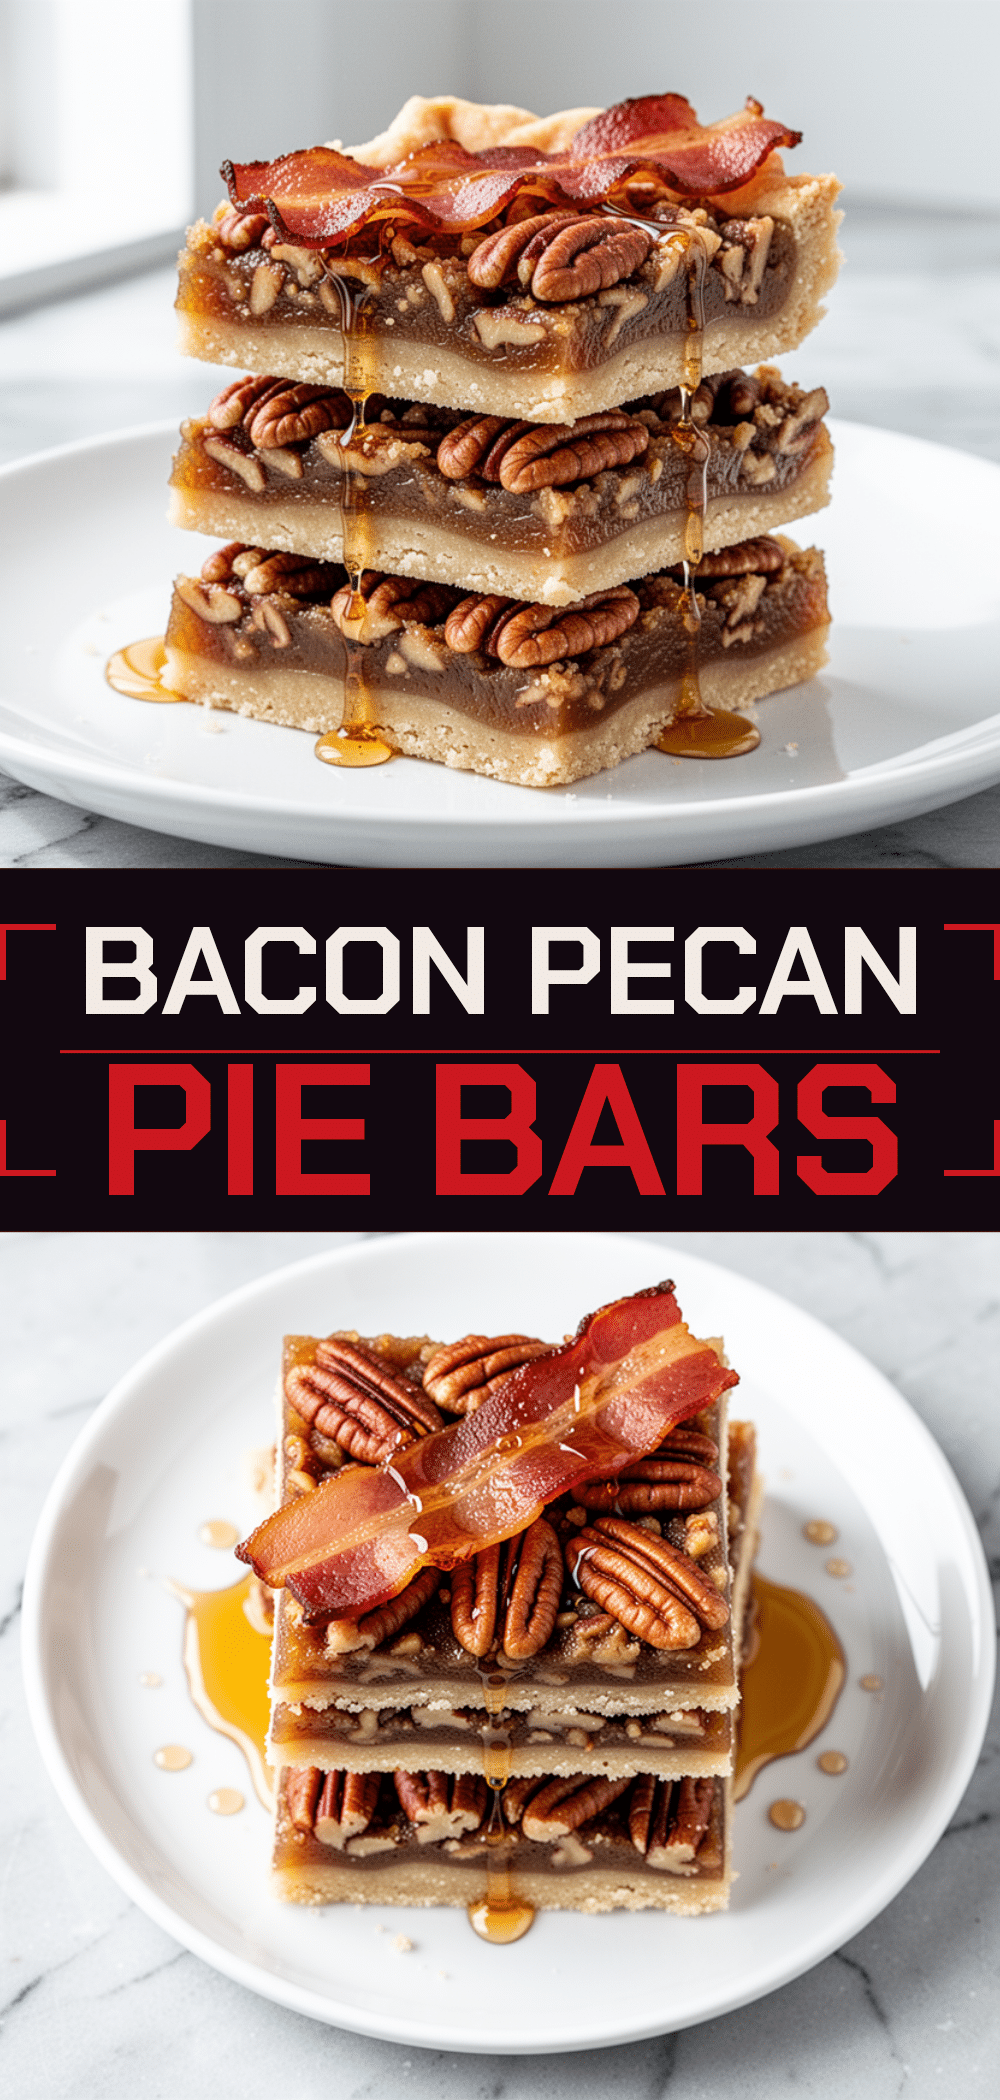
Fall Maple Bacon Pecan Pie Bars
- Total Time: 1 hour 10 minutes
- Yield: 16 servings 1x
Description
Rich, chewy, and salty-sweet holiday bars featuring a buttery shortbread crust, a gooey maple-pecan filling, and crispy bacon topping.
Ingredients
- 1/2 cup (113g) unsalted butter, softened
- 1 cup (120g) all-purpose flour
- 1/4 cup (50g) granulated sugar
- 1/4 teaspoon salt
- 1/2 teaspoon vanilla extract
- 1/2 cup (120ml) 100% pure maple syrup
- 1/2 cup (100g) packed brown sugar
- 1/4 cup (57g) unsalted butter, melted
- 2 large eggs, room temperature
- 1 teaspoon vanilla extract
- 1/2 teaspoon salt
- 1 cup (100g) chopped pecans, toasted
- 6–8 slices thick-cut bacon
Instructions
- Preheat oven to 350°F (175°C). Line an 8×8 inch baking pan with parchment paper and grease lightly.
- In a medium bowl, mix softened butter, granulated sugar, salt, and vanilla until creamy. Add flour and mix until a cohesive dough forms.
- Press dough evenly into the bottom of the prepared pan. Prick with a fork.
- Blind bake the crust for 15 minutes until lightly golden around edges. Remove and leave oven on.
- While crust bakes, toast pecans in a dry skillet for 3-4 minutes until fragrant, then chop coarsely.
- Cook bacon in the same skillet until just starting to crisp but still flexible. Drain on paper towels, cool, and chop into small pieces.
- In a large bowl, whisk maple syrup, brown sugar, melted butter, eggs, vanilla, and salt vigorously for 1-2 minutes until emulsified.
- Stir in chopped pecans and half of the chopped bacon.
- Pour filling over the partially baked crust. Sprinkle remaining bacon evenly over the top.
- Bake for 35-40 minutes until edges are bubbly and center is set but has a slight jiggle. Tent with foil if browning too quickly.
- Cool completely in the pan on a wire rack for at least 2 hours (or refrigerate for an hour) before cutting.
Notes
Toast pecans to enhance flavor. Use real maple syrup, not pancake syrup. Thick-cut bacon is essential to prevent burning. Cool completely before cutting for clean squares. Can be made gluten-free by using a 1:1 gluten-free flour blend. Can be made dairy-free by using dairy-free butter.
- Prep Time: 20 minutes
- Cook Time: 50 minutes
- Category: Dessert
- Cuisine: American
Nutrition
- Serving Size: 1 bar
- Calories: 280
- Sugar: 24
- Sodium: 220
- Fat: 16
- Saturated Fat: 7
- Carbohydrates: 32
- Fiber: 2
- Protein: 4
Keywords: pecan pie bars, maple bacon bars, holiday dessert, shortbread crust, fall baking, easy dessert, make-ahead dessert