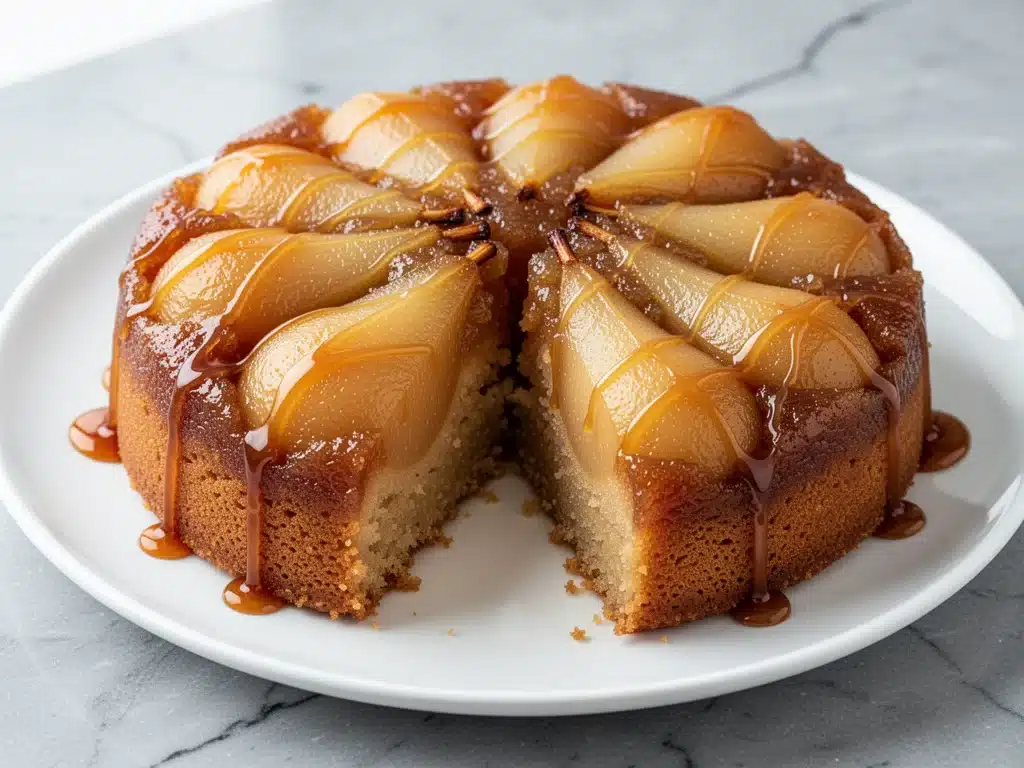
I have a confession to make. I used to think upside-down cakes were just a relic from my grandmother’s era—sweet, dense, and usually served with a side of judgment if you didn’t eat it warm. I’d pick out the pear slices and leave the rest on my plate. Then, last October, I walked into a small café in Vermont during a rainstorm and ordered a slice of brown butter pear cake. One bite changed everything.
The caramelization was deep and nutty, not just sugary sticky. The pears weren’t mushy; they had a slight bite. And that brown butter? It tasted like toasted hazelnuts and comfort in a way I couldn’t explain. I spent the next three months testing versions in my kitchen, burning butter twice (oops) and overcooking pears once (don’t judge me). Now, I’ve got it down to a foolproof 5-step process that tastes like it came from a high-end bakery but is actually easier to make than overnight cinnamon roll french toast.
This Fall Brown Butter Pear Upside-Down Cake isn’t just a dessert; it’s a mood. It’s the sound of rain against the window, the smell of spices filling your house, and the feeling of being praised by your family for something that took less than an hour. I’ve made this for potlucks, date nights, and random Tuesday dinners when I wanted something special without the stress. It always impresses. Here’s why you’re going to love it.
Why You’ll Love This Recipe
There are a lot of pear desserts out there, but this one is different. It’s not just sliced fruit on top of batter. It’s a structural masterpiece of flavor and texture that looks stunning but requires zero fancy skills. If you can melt butter and slice an apple, you can make this. Seriously.
The Brown Butter Magic — Most upside-down cakes use regular butter. Not this one. Browning the butter adds a nutty, toffee-like depth that pairs perfectly with the mild sweetness of the pears. It’s the difference between a good cake and a “wait, is this store-bought?” cake. I’ve tested this with regular butter, and it just doesn’t hit the same notes.
Zero Fail Caramel — The biggest fear with upside-down cakes is that the caramel won’t release or will be too hard. I’ve developed a specific ratio of brown sugar and butter that creates a glossy, pourable syrup that stays soft even after cooling. No rock-hard bottoms. Just silky, gooey goodness.
Uses Ripe Pears (Even the Weird Ones) — This recipe is forgiving. You can use Bosc, Anjou, or Bartlett pears. If they’re a little soft or a little firm, it works. I’ve used pears that were starting to get too ripe for snacking, and they turned into tender, jammy jewels in the cake. No waste, all flavor.
Make-Ahead Friendly — Unlike delicate soufflés or meringues, this cake actually improves if you let it sit. I’ve made it the night before and served it at room temperature the next day. The flavors meld, the caramel sets just enough to slice cleanly, and it’s still moist. Perfect for entertaining when you’re stressed.
One Bowl (Mostly) — You don’t need a stand mixer. You don’t need to separate eggs. You whisk the wet ingredients, fold in the dry, and pour. Cleanup is a breeze. This is the kind of recipe that makes you feel like a genius without the work.
This cake has become my go-to for autumn gatherings. It’s warm, it’s spiced, and it smells like home. My husband, who usually prefers cookies, asks for this specifically. It’s reliable, it’s delicious, and it’s going to be your new signature dessert.
Ingredients You’ll Need
Here’s the good news: you probably have most of these ingredients already. This recipe relies on simple pantry staples and fresh fruit. The secret weapon is the brown butter, but everything else is straightforward.
For the Caramel Layer
Unsalted Butter (½ cup / 113g) — This needs to be unsalted so you can control the sweetness. I use European-style butter like Kerrygold or Plugrá because it has a higher fat content, which browns better and tastes richer. Don’t substitute with margarine or light butter; it won’t work.
Brown Sugar (1 cup / 200g, packed) — Dark brown sugar is best here because it has more molasses, which gives that deep, toffee-like flavor. Light brown sugar works in a pinch, but the flavor won’t be as complex. Pack it tightly into your measuring cup for accuracy.
Vanilla Extract (1 teaspoon) — Use real vanilla, not imitation. It makes a noticeable difference in the caramel sauce. If you have vanilla bean paste, even better.
For the Cake Batter
All-Purpose Flour (1 cup / 120g) — Standard AP flour is perfect. You don’t need cake flour for this; you want a tender but sturdy crumb to hold the fruit. Spoon it into your measuring cup and level it off. Don’t scoop directly from the bag, or you’ll pack it down and get a dry cake.
Baking Powder (1 teaspoon) — Make sure it’s fresh! Old baking powder is the #1 reason cakes don’t rise. If it’s been in your cupboard for more than 6 months, toss it and buy a new can.
Salt (½ teaspoon) — Even though we’re making a sweet cake, salt is crucial. It balances the sugar and enhances the flavor of the pears and brown butter. Use fine sea salt or table salt.
Cinnamon (1 teaspoon) — Ground cinnamon is standard, but if you want extra warmth, add ¼ teaspoon of nutmeg or allspice. I keep it simple with just cinnamon for this version.
Eggs (2 large) — Room temperature eggs are best. They emulsify better into the batter, creating a smoother, more uniform cake. If you forget, just crack them into a small bowl and microwave for 10 seconds.
Sour Cream (½ cup / 120g) — This is the secret ingredient for moisture. Sour cream adds tang and tenderness. Greek yogurt works too, but sour cream gives a richer texture. Don’t use fat-free; it will make the cake dry.
Milk (¼ cup / 60ml) — Whole milk is best for richness. Buttermilk works too and adds extra tang. Just don’t use skim milk.
For the Topping
Pears (3 medium, about 1.5 lbs / 680g) — I recommend Bosc or Anjou pears. They hold their shape better during baking and don’t turn to mush. Bartlett pears work but are softer and might break down more. Look for firm, ripe pears with no bruises.
Butter for greasing — Just a tiny bit to grease the pan before adding the caramel.
Equipment Needed
You don’t need anything fancy for this recipe. Here’s what I actually use in my kitchen.
9-Inch Cast Iron Skillet or Round Cake Pan — A cast iron skillet is ideal because it conducts heat evenly and gives you that rustic, beautiful presentation. I use my Lodge skillet. If you don’t have cast iron, a 9-inch round cake pan (metal or glass) works fine. Just make sure it’s oven-safe.
Small Saucepan — For browning the butter. A light-colored pan is best so you can see the color change clearly. I use a 2-quart saucepan.
Mixing Bowls — One medium bowl for wet ingredients, one large for dry. Plastic or glass works fine.
Whisk and Spatula — A silicone spatula is essential for folding the batter and scraping the caramel layer. Don’t use a wooden spoon for folding; it doesn’t get into the corners as well.
Knife and Cutting Board — For slicing the pears. A sharp paring knife makes this easy.
Measuring Cups and Spoons — Standard stuff. If you don’t have them, you can eyeball it, but baking is chemistry, so measuring is better.
Wire Rack — For cooling the cake. Placing the hot pan directly on a counter can crack it or cook the bottom too much.
How to Make It: Step-by-Step
Alright, let’s make this! I’m walking you through exactly how I do it, including the little tricks I’ve picked up over years of testing. This process is straightforward, but each step matters for the final result.
Step 1: Prep Your Oven and Pan (5 minutes)
Preheat your oven to 350°F (175°C). This is crucial—make sure it’s fully heated before you put the cake in. Grease your 9-inch cast iron skillet or cake pan with a little butter. This helps the caramel release later. Set it aside.
Step 2: Brown the Butter (5-7 minutes)
Place your unsalted butter in a small saucepan over medium heat. Stir constantly with a wooden spoon. The butter will melt, then foam up, and then start to quiet down. Watch it closely! It goes from golden to brown quickly. You’re looking for a deep amber color and a nutty aroma (like toasted hazelnuts). This takes about 5-7 minutes. Remove from heat immediately and pour into your prepared pan. Swirl to coat the bottom evenly.
Step 3: Add the Brown Sugar (2 minutes)
While the butter is still hot, sprinkle the packed brown sugar evenly over the top. It will sizzle and melt into the butter. Stir gently with a spatula to combine into a smooth, bubbling caramel. Pour this mixture into the greased pan. It will look like a glossy, dark syrup. Set it aside.
Step 4: Slice the Pears (5-8 minutes)
While the caramel cools slightly, prep the pears. Peel them (or leave the skin on if you like the color and texture), halve them, remove the core, and slice them into ¼-inch thick half-moons. Arrange them in a single layer over the caramel in the pan. Overlap them slightly so there are no gaps. You want a beautiful, tight pattern. Press them down gently.
Step 5: Make the Batter (5 minutes)
In a medium bowl, whisk together the flour, baking powder, salt, and cinnamon. In a separate bowl, whisk the eggs, sour cream, milk, and vanilla until smooth. Pour the wet ingredients into the dry ingredients. Fold gently with a spatula until just combined. Do not overmix! A few lumps are fine. Overmixing makes the cake tough.
Step 6: Assemble and Bake (35-40 minutes)
Pour the batter evenly over the pears. Use a spatula to smooth the top. Bake in the preheated oven for 35-40 minutes. The cake is done when the top is golden brown and a toothpick inserted into the center (avoiding the pears) comes out clean. If the top is browning too fast, cover it loosely with foil for the last 10 minutes.
Step 7: Cool and Flip (20 minutes)
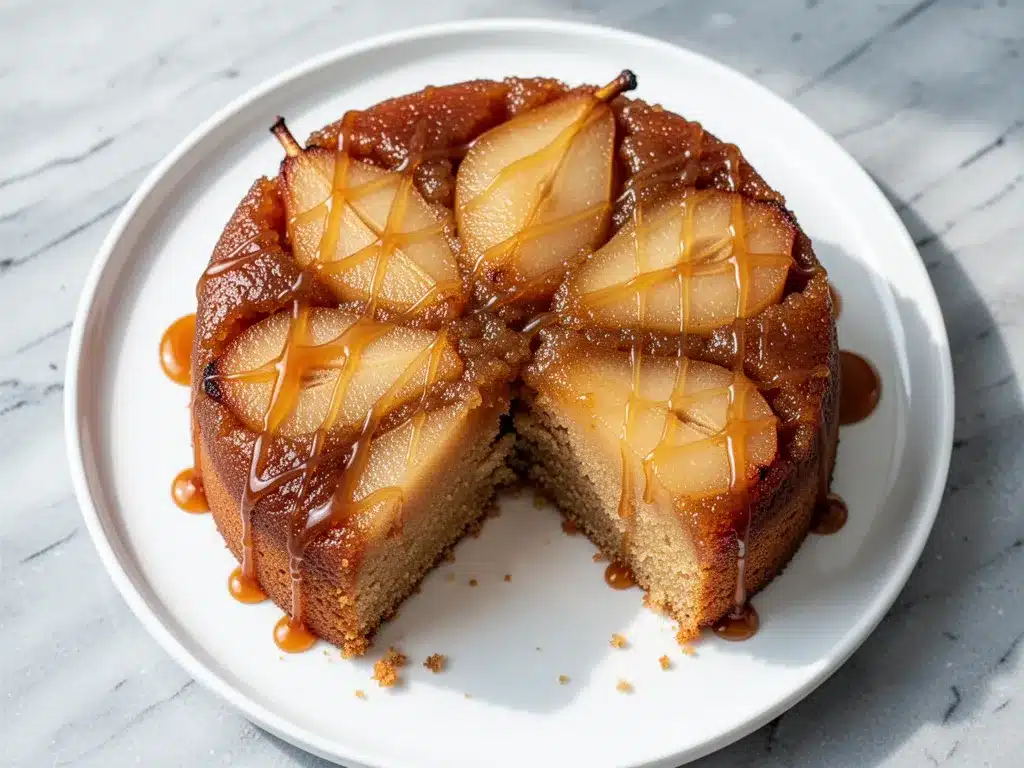
Remove the cake from the oven and let it cool in the pan for 10 minutes. This is critical—if you flip it too soon, it will fall apart. If you wait too long, the caramel might stick. After 10 minutes, run a knife around the edge to loosen it. Place a large serving plate upside down over the pan. Using oven mitts, confidently flip the pan and plate over. Lift the pan off. If any pears stick, just push them back into place. Drizzle any remaining caramel from the pan over the top.
Expert Tips & Tricks
Here’s everything I’ve learned from making this dozens of times. These tips will save you from my mistakes.
Don’t Burn the Butter
The #1 mistake is letting the butter turn black. It should be amber, like the color of a penny. If it smells burnt, start over. Burnt butter tastes bitter and ruins the whole cake. I keep a timer set for 5 minutes and watch it like a hawk.
Use Firm Pears
Soft pears will disintegrate. Choose pears that are ripe but still firm to the touch. If you buy pears that are rock hard, let them sit on the counter for 2-3 days until they yield slightly to pressure.
Don’t Skip the Cool Down
I know you want to eat it immediately. But the caramel is liquid hot sugar. If you flip it too soon, it will pool on the counter and make a mess. Wait the full 10 minutes. It’s worth the patience.
Save the Caramel
If there’s extra caramel in the pan after flipping, don’t pour it out! Spoon it over the top of the cake. It’s liquid gold. You can also save it for drizzling over ice cream later.
Room Temperature Ingredients
Make sure your eggs, sour cream, and milk are at room temperature. Cold ingredients can cause the batter to separate, leading to a dense cake. Take them out of the fridge 30 minutes before you start.
Variations & Substitutions
Once you’ve nailed the basic version, here’s how you can mix it up. I’ve tried all of these.
Apple Version
Swap the pears for apples. Use Honeycrisp or Fuji apples for the best texture. Slice them thinly and arrange them just like the pears. The flavor will be more classic and tart.
Peach Version
In late summer, swap pears for peaches. Use freestone peaches so they’re easier to slice. The caramel and peach combo is amazing. Just note that peaches are juicier, so you might need to bake for an extra 5 minutes.
Spiced Up
Add ½ teaspoon of cardamom or ginger to the batter for extra warmth. Or sprinkle a little turbinado sugar on top of the pears before baking for a crunchy crust.
Gluten-Free
Use a 1:1 gluten-free flour blend. It works perfectly in this recipe. Just make sure your baking powder is gluten-free.
Dairy-Free
Use dairy-free butter for browning. Replace sour cream with coconut cream or a dairy-free yogurt. Use maple syrup instead of brown sugar for the caramel. It’s delicious and still moist.
Serving & Storage
How to Serve
I usually serve this warm, right out of the pan. It’s best with a dollop of whipped cream or a scoop of vanilla ice cream. The contrast of hot cake and cold cream is heaven. I also like it with a cup of coffee or tea.
Side Dishes
This is a dessert, so it doesn’t need sides. But if you’re having a full autumn dinner, it pairs well with loaded baked potato soup or a simple green salad.
Storage
Store leftovers in an airtight container at room temperature for up to 3 days. The caramel keeps the cake moist, so it actually stays good for longer than most cakes. You can also refrigerate it for up to 5 days, but let it come to room temperature before serving.
Reheating
Microwave slices for 15-20 seconds to warm them up. The caramel will become gooey again. Don’t overheat, or the cake will get tough.
Nutrition Information
I’m not a nutritionist, but here’s the breakdown if you’re tracking. This is a rich dessert, so portion control is key.
Per Serving (based on 8 servings):
– Calories: 380
– Protein: 4g
– Carbs: 52g
– Fiber: 3g
– Sugar: 38g
– Fat: 18g
– Saturated Fat: 11g
– Cholesterol: 65mg
– Sodium: 180mg
What’s Good:
– Real fruit provides some fiber and vitamins
– No artificial ingredients
– Made with whole foods
What to Know:
– High in sugar from the caramel
– High in saturated fat from butter and sour cream
– Not suitable for low-sugar or low-fat diets
My Take:
Look, this is a decadent dessert. It’s not a health food. But it’s made with real ingredients, and it’s so much better than anything from a box. Enjoy it in moderation, and pair it with a cup of tea to savor every bite.
Final Thoughts
So that’s my Fall Brown Butter Pear Upside-Down Cake! I’ve probably talked your ear off at this point, but when you make a recipe this often, you have a lot to say about it. This cake has saved my social life. It’s my answer to “I need to bring something to the party” when I’m tired and don’t want to buy something generic. My friends are obsessed, and my family requests it for birthdays.
Make it yours! Try different pears, add extra spices, or serve it with different toppings. The best recipes are the ones you adapt to your tastes. If you make this, drop a comment and let me know what you think! I love hearing how recipes turn out in your kitchen. And if something doesn’t work, tell me that too—I’m here to help troubleshoot.
Happy baking! And I hope your kitchen smells half as good as mine does right now.
Frequently Asked Questions
Can I use canned pears?
You can, but fresh pears are much better. Canned pears are softer and wetter, which can make the cake soggy. If you must use canned, drain them very well and pat them dry with paper towels. You might need to reduce the baking time by 5 minutes.
Why did my caramel stick to the pan?
This usually happens if you flipped the cake too soon. The caramel needs to cool and set slightly before you flip it. Wait the full 10 minutes. Also, make sure your pan is well-greased before adding the caramel. If it sticks, just run a knife around the edge and try flipping again, gently.
Can I make this ahead of time?
Yes! Make the cake the night before. Let it cool completely, then cover it with plastic wrap. Store it at room temperature. It will be even better the next day as the flavors meld. Just flip it and serve it when you’re ready.
Why did my cake sink in the middle?
This is usually caused by underbaking or opening the oven door too early. Make sure you bake it for the full 35-40 minutes. Test with a toothpick in the center. If it comes out clean, it’s done. Don’t open the oven door for the first 25 minutes.
Can I freeze this cake?
You can freeze it, but the texture might change slightly. Wrap individual slices in plastic wrap and aluminum foil. Freeze for up to 2 months. Thaw at room temperature before serving. The caramel might get a bit sticky, but it’s still delicious.
What kind of pears are best?
Bosc and Anjou pears are best because they hold their shape well. Bartlett pears are softer and might break down more. Avoid very hard, unripe pears—they won’t cook through properly.
Can I use honey instead of brown sugar?
You can try it, but the texture will be different. Honey is sweeter and more liquid. Use ¾ cup of honey instead of 1 cup of brown sugar. It will be more gooey and less caramel-like. I recommend sticking with brown sugar for the classic texture.
Pin This Recipe!
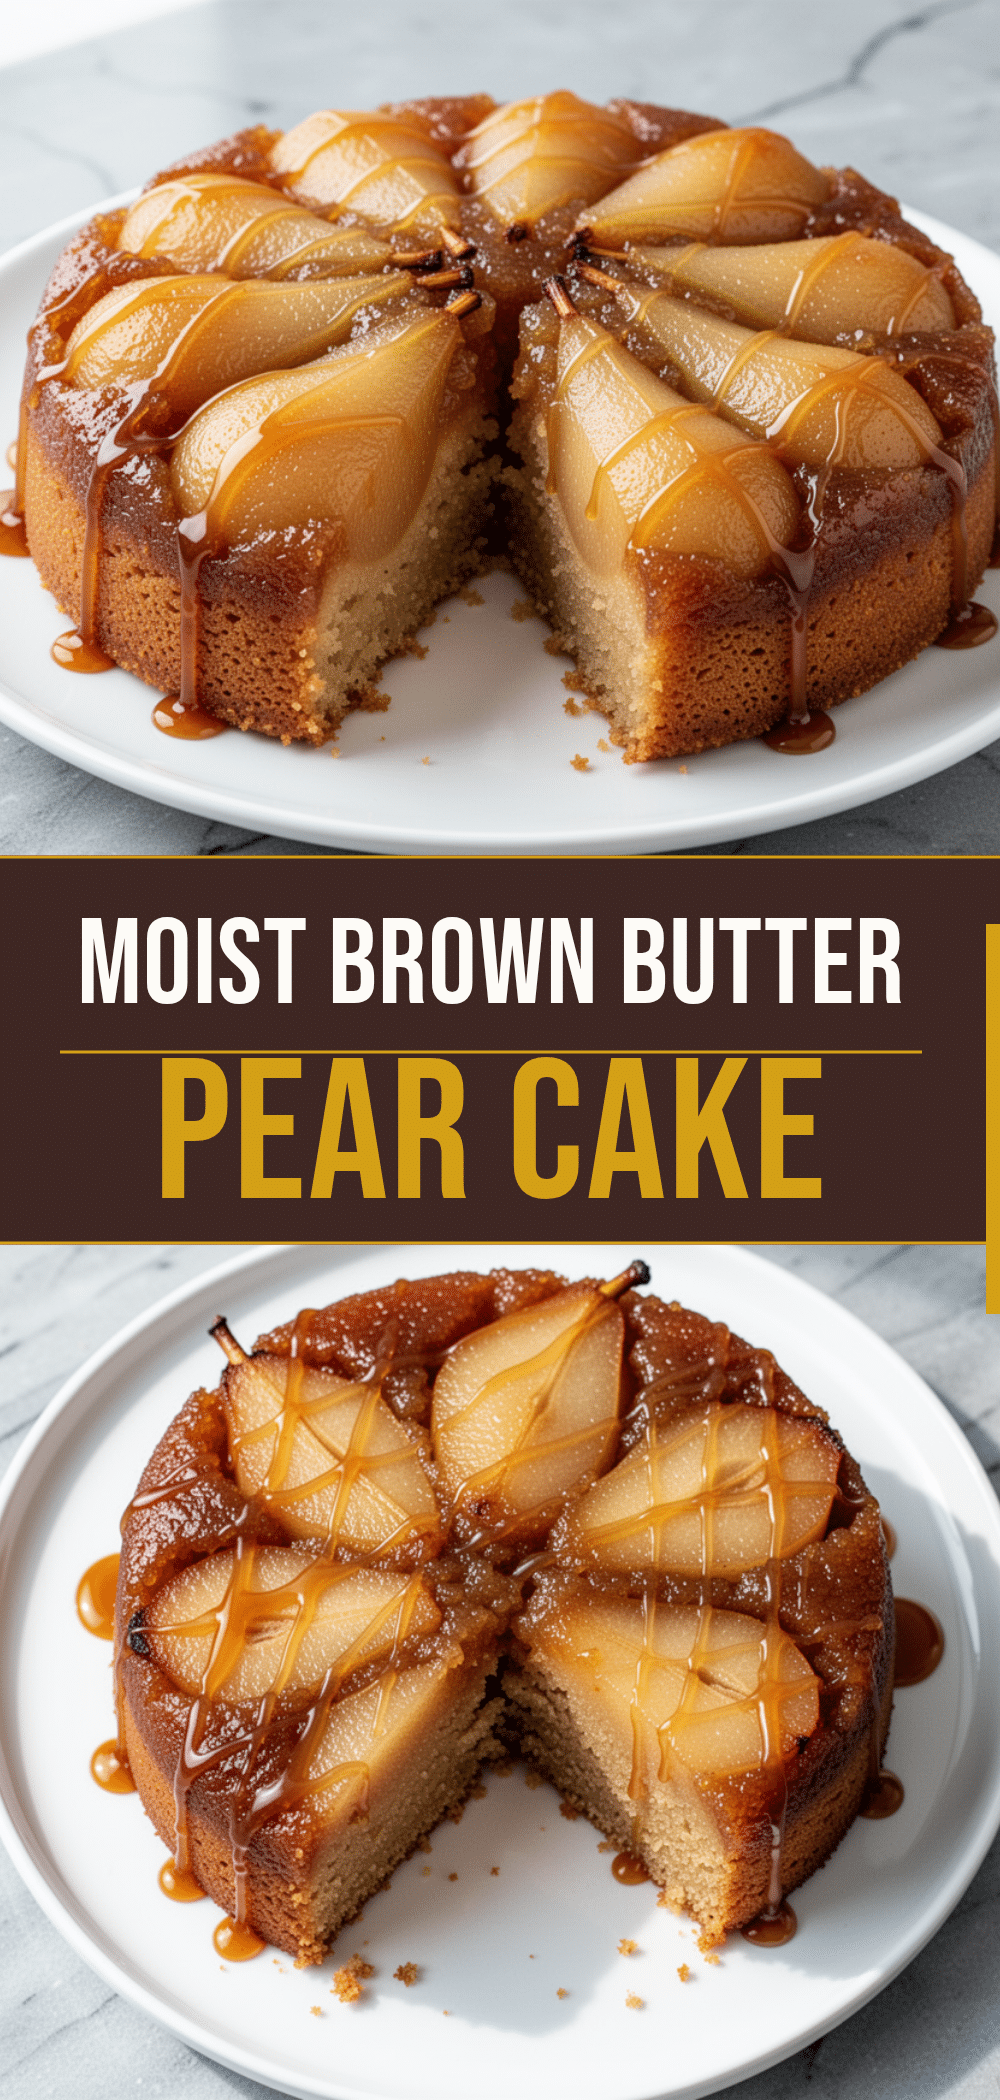
Fall Brown Butter Pear Upside-Down Cake: 5-Step Easy Dessert
- Total Time: 60 minutes
- Yield: 8 servings 1x
Description
A foolproof, one-bowl upside-down cake featuring nutty brown butter, a glossy brown sugar caramel, and tender ripe pears. This dessert is make-ahead friendly and requires zero fancy skills.
Ingredients
- ½ cup (113g) unsalted butter (for caramel)
- 1 cup (200g) packed dark brown sugar
- 1 teaspoon vanilla extract
- 1 cup (120g) all-purpose flour
- 1 teaspoon baking powder
- ½ teaspoon salt
- 1 teaspoon ground cinnamon
- 2 large eggs (room temperature)
- ½ cup (120g) sour cream
- ¼ cup (60ml) whole milk
- 3 medium pears (about 1.5 lbs / 680g), peeled and sliced
- Butter for greasing the pan
Instructions
- Preheat oven to 350°F (175°C). Grease a 9-inch cast iron skillet or round cake pan with butter and set aside.
- Melt unsalted butter in a small saucepan over medium heat, stirring constantly until it turns deep amber and smells nutty (5-7 minutes). Pour into the prepared pan and swirl to coat.
- Sprinkle packed brown sugar over the hot butter in the pan. Stir gently to combine into a smooth caramel, then pour into the greased pan.
- Slice pears into ¼-inch thick half-moons. Arrange them in a single, overlapping layer over the caramel in the pan.
- In a medium bowl, whisk together flour, baking powder, salt, and cinnamon. In a separate bowl, whisk eggs, sour cream, milk, and vanilla until smooth.
- Pour wet ingredients into dry ingredients and fold gently until just combined. Do not overmix.
- Pour batter evenly over the pears. Bake for 35-40 minutes until golden brown and a toothpick inserted in the center comes out clean.
- Cool in the pan for 10 minutes. Run a knife around the edge, place a serving plate upside down over the pan, and flip confidently. Lift off the pan and drizzle any remaining caramel over the top.
Notes
Ensure butter is browned to a deep amber color, not black. Use firm pears like Bosc or Anjou to prevent mushiness. Let the cake cool for 10 minutes before flipping to prevent the caramel from pooling. Ingredients should be at room temperature for best emulsification.
- Prep Time: 20 minutes
- Cook Time: 40 minutes
- Category: Dessert
- Cuisine: American
Nutrition
- Serving Size: 1 slice
- Calories: 380
- Sugar: 38
- Sodium: 180
- Fat: 18
- Saturated Fat: 11
- Carbohydrates: 52
- Fiber: 3
- Protein: 4
Keywords: brown butter cake, pear upside down cake, fall dessert, easy baking, one bowl cake, autumn recipes