I have a confession to make. For the longest time, I was terrified of charcuterie boards. I’d scroll through Pinterest, see these massive, intricate spreads that looked like they required a degree in interior design and a warehouse full of artisanal meats, and I’d immediately close the tab. I thought, “I don’t have time for that. I don’t have a cheese wheel. I don’t know what a quince paste is.”
Then, a friend invited me to a small dinner party last month. She didn’t have a fancy board. She had a wooden cutting board, a bag of crackers, some grapes, and this incredible garlic parmesan mixture that was basically the star of the show. We spent the entire evening dipping bread into it, arguing over who got the last piece of honeycomb, and realizing that the best food is often the simplest food. That night, I realized I’d been overcomplicating entertaining. You don’t need to be a chef to impress people. You just need to know what flavors work together.
So, I decided to try making my own version. I wanted something that felt luxurious but required zero actual cooking skills. I wanted the garlic parmesan flavor profile we all love—think creamy, savory, punchy—but in a way that’s easy to assemble. I added honeycomb because the sweet-and-salty combo is just irresistible (and it looks stunning on camera, which is a bonus for your feed).
This garlic parmesan charcuterie board has become my go-to for everything from last-minute guests to casual game nights. It’s foolproof. Seriously. If you can open a package and spread something, you can make this. I’ve tested it with three different types of cheese and five different crackers, and it works every single time. The garlic parmesan dip is the secret weapon here—it’s rich, it’s garlicky, and it pairs perfectly with the crunch of honeycomb. Let’s get into how to build this board so you can stop stressing and start snacking.
Why You’ll Love This Garlic Parmesan Charcuterie Board
There are about a million reasons why this board works, but let’s be real: you want something that looks impressive but doesn’t require hours in the kitchen. Here is why this specific combination is a total win:
- Zero Cooking Required — Seriously. I’m not exaggerating. You don’t turn on the stove. You don’t preheat the oven. You just chop, spread, and arrange. I’ve made this while watching TV, and it turned out better than my friend’s three-hour prep effort.
- The Flavor Combo is Obsessive — The mix of sharp parmesan, roasted garlic, and creamy brie or goat cheese hits every spot. Then you add the honeycomb? That’s the game-changer. The salty, umami punch of the cheese mixed with the floral sweetness of the honey is addictive. It’s like a flavor explosion in every bite.
- It’s Forgiving — You really can’t mess this up. Did you chop the strawberries too big? No one cares. Did you run out of prosciutto? Swap in some salami or just add more cheese. The board looks rustic and intentional, so “messy” actually looks good. It’s perfect for beginners who are nervous about presentation.
- Pantry-Friendly Ingredients — You probably have most of this already. Crackers? Check. Parmesan? Check. Honeycomb? Check. Garlic? Check. You don’t need to go on a specialty shopping trip. This is a “grab what you have and make it work” recipe, which is my favorite kind.
- It’s a Crowd-Pleaser — I’ve served this to cheese snobs and people who only eat chicken nuggets. Everyone loves it. The garlic parmesan dip is universally liked, and the honeycomb adds that “wow” factor that makes people ask for the recipe immediately.
This is my answer to “I need to bring something to a party but I’m tired.” It’s elegant, it’s delicious, and it takes less time than ordering takeout. Once you make this, you’ll realize that entertaining doesn’t have to be hard.
Ingredients You’ll Need
Here’s the best part: the ingredient list is short. I’m particular about a few things here, mostly because texture and flavor balance are key. I’ll tell you exactly why I choose each item.
For the Garlic Parmesan Dip
Soft Cream Cheese (8 oz / 225g, room temperature) — This is the base. It needs to be softened so it whips up smooth. If it’s cold, you’ll get lumps, and nobody wants a lumpy dip. Let it sit on the counter for 30 minutes before you start.
Shredded Parmesan Cheese (1 cup / 100g) — I use freshly grated if I have it, but pre-shredded works fine here. You want that sharp, salty punch. If you use a mild parmesan, the flavor won’t pop as much, so stick to a good aged parmesan.
Roasted Garlic (4-5 cloves, minced or mashed) — This is the star. I roast my own garlic because it’s sweet and mellow, not sharp and biting. But if you’re in a rush, you can use jarred roasted garlic. Just drain it well. Fresh raw garlic is too harsh for this dip; you want the cooked, sweet flavor.
Sour Cream (2 tablespoons) — This adds tang and helps thin out the dip so it’s spreadable. It balances the heaviness of the cream cheese.
Dried Parsley (1 teaspoon) — For color and a hint of herbal freshness. It’s not the main flavor, but it makes the dip look green and appetizing.
Black Pepper (½ teaspoon, freshly cracked) — Always use fresh pepper. Pre-ground just doesn’t have the same kick.
For the Board Assembly
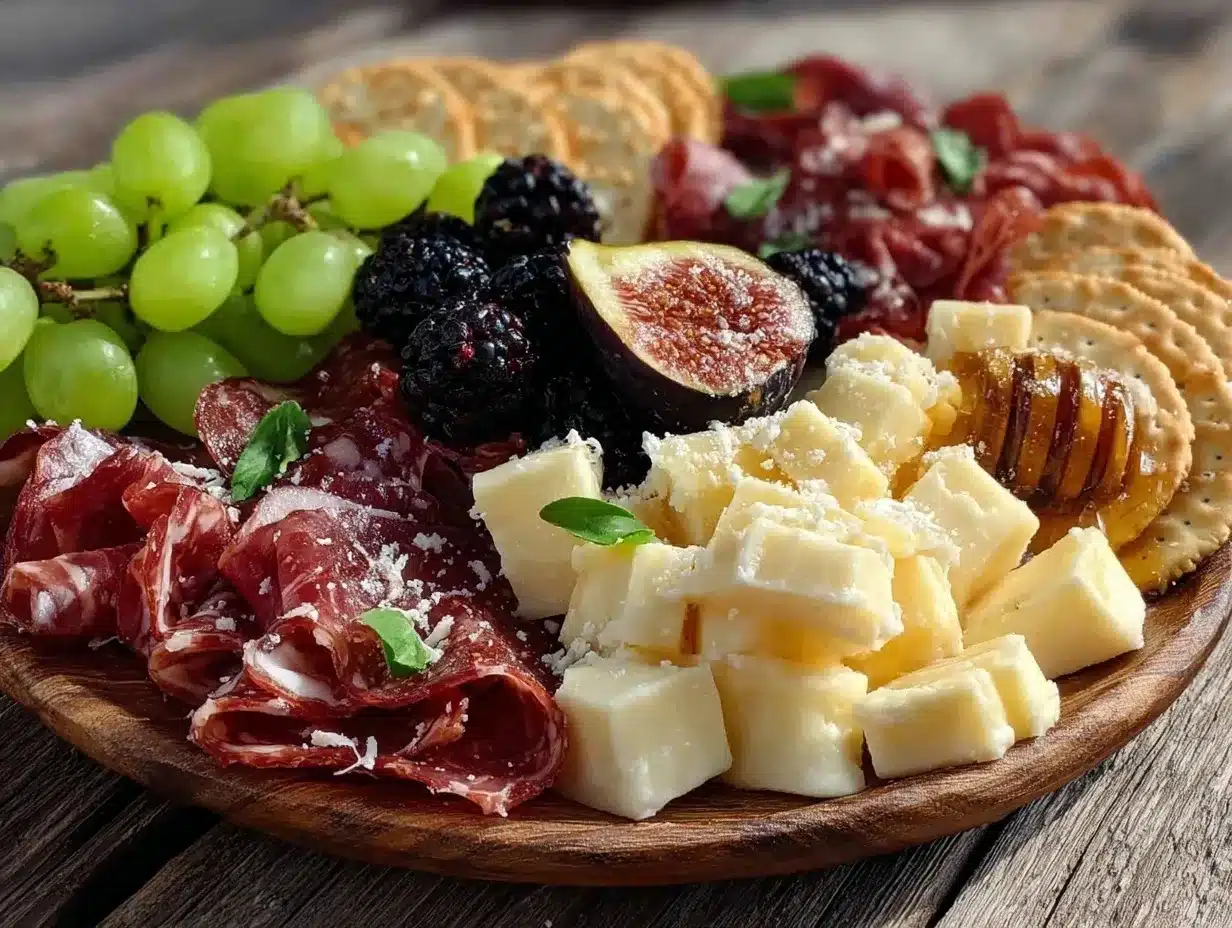
Brie or Goat Cheese Wheel (8 oz / 225g) — I love brie for its creamy, buttery texture. Goat cheese is a great alternative if you prefer something tangier. Both pair amazingly with the garlic dip.
Honeycomb (1 small chunk) — This is the fancy stuff that looks hard to find, but it’s actually in the honey aisle of most grocery stores. It adds that crucial sweet element. If you can’t find it, high-quality honey drizzle works, but the comb adds texture.
Assorted Crackers (2-3 varieties) — I recommend a mix. Try some water crackers (neutral, good for dipping), some seeded crackers (for crunch), and maybe a crostini or baguette slice. You want variety in texture.
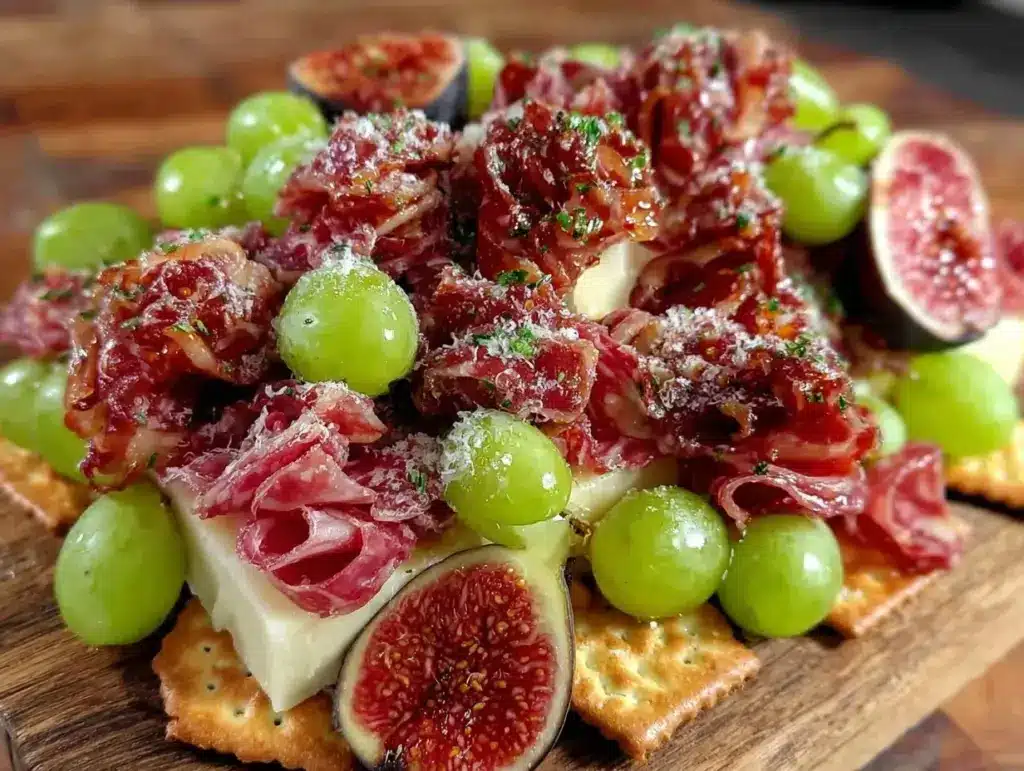
Fresh Fruit (Grapes, strawberries, or figs) — Grapes are classic because they’re easy to grab. Strawberries add a pop of red color. Figs are fancy but taste incredible with cheese. Whatever you have, just wash it and leave it whole.
Salted Nuts (Almonds, walnuts, or pecans) — A handful of nuts adds crunch and protein. Salted is better because it enhances the cheese flavor. I usually just pour them into a small bowl on the board.
Optional: Cured Meats — Prosciutto, salami, or chorizo. I often skip these if I’m keeping it vegetarian-friendly, but if you eat meat, fold a few slices loosely for visual appeal.
Equipment Needed
You don’t need fancy equipment for this. Here’s what I actually use:
A Cutting Board or Platter — I use a large wooden board. It looks rustic and warm. A marble slab is nice too, but wood is friendlier for spreading. Make sure it’s clean and dry.
A Small Mixing Bowl — Just any bowl you have for mixing the dip. A ceramic one is nice so you can serve the dip directly in it on the board.
A Fork or Hand Mixer — For whipping the cream cheese. I usually just use a fork if I’m being lazy, but a mixer makes it super smooth in 30 seconds.
A Small Knife — For slicing the brie or cutting the honeycomb. You don’t need a whole knife set. Just one good sharp knife is enough.
Spoons — A couple of small spoons or spreaders for the dip. If you’re serving guests, give them their own utensils so they don’t double-dip.
Small Bowls — For holding the nuts or olives if you add them. It keeps the board from looking too cluttered.
How to Make It: Step-by-Step
Alright, let’s make this! I’m walking you through exactly how I do it. It’s so simple, you’ll wonder why you ever stressed about entertaining.
Step 1: Prep the Garlic Parmesan Dip (5 minutes)
Start with your cream cheese. Make sure it’s softened. If it’s still cold, microwave it for 10-15 seconds to take the chill off. In your small mixing bowl, add the cream cheese, sour cream, and shredded parmesan. Add the minced roasted garlic, dried parsley, and black pepper. Mix it all together until it’s smooth and creamy. If it’s too thick, add a teaspoon more of sour cream. Taste it. Does it need more garlic? Add a little more. More pepper? Go for it. This is your base, so get it right.
Step 2: Transfer Dip to Serving Bowl
Once the dip is mixed, scoop it into your serving bowl. I like to smooth the top with a spoon. If you have extra parmesan, sprinkle a little on top for garnish. Set this aside. It can sit out while you build the board.
Step 3: Place the Cheeses
Now, let’s build the board. Place your large cutting board in the center of the table. Place your bowl of garlic parmesan dip in the middle or slightly to the side. This is the anchor of the board. Next, place your brie or goat cheese wheel. If it’s a wheel, you can slice it in half or leave it whole. I like to leave it whole and place a small knife next to it. If you’re using multiple cheeses, place them around the board, leaving space for the other items.
Step 4: Add the Crackers
Stack your crackers in piles or fan them out around the cheeses. I like to create “nooks” for the crackers. Don’t just lay them flat; stack them slightly to add height. It makes the board look more abundant. Place them on the edges of the board, leaving room for the fruit and nuts.
Step 5: Add the Honeycomb and Fruit
This is the fun part. Place your honeycomb chunk near the brie. The contrast of the golden honey against the white cheese is beautiful. Arrange your grapes, strawberries, or figs in clusters. I like to tuck them into the empty spaces between the crackers and cheeses. The red of the strawberries and the purple of the grapes will make the board look vibrant.
Step 6: Scatter the Nuts and Meats
Pour your nuts into a small bowl and place it on the board. If you’re adding meat, loosely fold the slices and drape them over the edge of a cheese or across the board. It adds movement and visual interest. Don’t lay the meat flat; fold it up to create peaks and valleys.
Step 7: Final Touches
Step back and look at your board. Does it look balanced? If one side is heavy on crackers, add more fruit to the other. Add a few fresh herbs like rosemary or thyme sprigs for a pop of green. These are edible and smell amazing. Your garlic parmesan charcuterie board is ready to serve!
Expert Tips & Tricks
Here’s everything I’ve learned from making this dozens of times. These tips will save you from my mistakes.
Room Temperature is Key
Cheese tastes better at room temperature. If you take the brie or goat cheese out of the fridge an hour before serving, it will be softer and more flavorful. Cold cheese can taste waxy. This is a non-negotiable for me.
Don’t Overcrowd the Board
It’s tempting to pack everything in, but leave some empty space. Negative space makes the board look intentional and elegant. If it’s too full, it looks like a snack dump. Let each item have its own moment.
Use a Sharp Knife
When you’re serving the brie, a dull knife will crush it. A sharp knife will slice it cleanly. I keep a small paring knife on the board for this purpose. It’s a small detail that makes a big difference.
Pairing Logic
Think about flavors. Sweet goes with salty (honeycomb and parmesan). Crunchy goes with creamy (crackers and dip). Acid goes with fat (fruit and cheese). If you follow this logic, you can’t go wrong. You don’t need to be a food critic; you just need to balance the textures.
Make the Dip Ahead
You can make the garlic parmesan dip up to 24 hours in advance. Store it in the fridge in an airtight container. Let it come to room temperature before serving. This saves you so much stress on the day of the party.
Variations & Substitutions
Once you’ve nailed the basic version, here’s how you can mix it up. I’ve tried all of these.
Spicy Kick
Add a teaspoon of red pepper flakes or a dash of hot sauce to the garlic parmesan dip. It adds a nice heat that cuts through the richness of the cheese. I like this version for winter parties.
Vegan Version
Use vegan cream cheese and nutritional yeast instead of parmesan. For the cheese wheel, use a vegan brie. Swap the honeycomb for agave nectar drizzle. It’s not exactly the same, but it’s still delicious and inclusive.
Low-Carb Option
Skip the crackers and use cucumber slices, bell pepper strips, or pork rinds. The garlic parmesan dip is naturally low-carb (except for the sour cream, which is minimal), so it fits perfectly into a keto or low-carb lifestyle.
Summer Twist
Add fresh peaches or watermelon chunks. They pair surprisingly well with the salty parmesan. I made this version last July, and it was a huge hit. The sweetness of the fruit was perfect with the savory dip.
Herb-Infused Dip
Add fresh chopped chives or basil to the dip instead of dried parsley. It gives a fresher, brighter flavor. Great for spring gatherings.
Serving & Storage
How to Serve:
I usually serve this straight from the board at the dinner table. It’s rustic and inviting. But here are other ways I’ve enjoyed it:
- Appetizer Hour — Serve it with drinks before dinner. It keeps people happy and stops them from eating too many appetizers before the main meal.
- Movie Night — Set it on the coffee table. It’s easier to eat than a plate of popcorn and way more satisfying.
- Brunch Addition — Swap the crackers for baguette slices and add some smoked salmon. It’s a fancy but easy brunch item.
Storage Instructions:
Refrigerator:
Store any leftover dip in an airtight container in the fridge for up to 3 days. The crackers and fruit should be kept separate. Fruit will wilt if stored with the dip. I usually store the fruit in a bowl and the dip in the fridge.
Reheating:
You don’t need to reheat the dip. In fact, you don’t want to. It’s best served at room temperature. If it’s too cold, let it sit out for 15 minutes. The flavors develop as it warms up.
Freezing:
Don’t freeze the dip. The texture of cream cheese changes when frozen—it can become grainy. It’s better to make a fresh batch. The honeycomb and nuts can be stored at room temperature for weeks.
Pro Tip:
If you’re making this for a party, assemble it 30 minutes before guests arrive. This gives the cheese time to soften and the flavors to meld. But don’t assemble it too early, or the crackers will get soggy from the dip if they’re too close.
Nutrition Information
I’m not a nutritionist, but here’s the breakdown if you’re tracking. Keep in mind that this is a snack/appetizer, so portions vary.
Per Serving (based on 8 servings, approx. 1/8 of the board):
- Calories: 250
- Protein: 8g
- Carbs: 15g
- Fiber: 1g
- Sugar: 6g
- Fat: 18g
- Saturated Fat: 8g
- Sodium: 350mg
What’s Good:
- Good source of calcium from the cheese
- Protein from the cheese and nuts
- Healthy fats from the nuts and olive oil (if used)
What to Know:
- Higher in sodium due to the parmesan and cured meats
- Contains dairy and gluten (unless using gluten-free crackers)
- Calorie-dense, so moderation is key
My Take:
Look, this is cheese and crackers. It’s not a salad. It’s meant to be enjoyed in moderation as a treat or appetizer. When I want to make it lighter, I add more fruit and fewer crackers. But usually? I just enjoy it and balance it out with veggies later in the day.
Final Thoughts
So that’s my garlic parmesan charcuterie board! I’ve probably talked your ear off at this point, but when you make a recipe this often, you have a lot to say about it. This board has saved me so many times. It’s my answer to “I need to impress people but I have no energy.” It’s elegant, it’s delicious, and it’s so easy that you’ll forget you were nervous about it.
Make it yours! Try different fruits, swap the crackers, add some spicy salami. The best recipes are the ones you adapt to your tastes. And remember, you really can’t mess this up. If it looks a little messy, just call it “rustic.” It’s charming.
If you make this, drop a comment and let me know what you think! I love hearing how recipes turn out in your kitchen. And if something doesn’t work, tell me that too—I’m here to help troubleshoot. Happy snacking!
Frequently Asked Questions
Can I make the dip ahead of time?
Absolutely. You can make the garlic parmesan dip up to 24 hours in advance. Store it in the fridge in an airtight container. Let it come to room temperature before serving. This actually helps the flavors meld together, making it taste even better.
What kind of crackers work best?
I love a mix. Water crackers are neutral and great for dipping. Seeded crackers add crunch. Crostini or baguette slices are perfect for spreading the dip. If you want something fancy, try almond crackers. Just avoid crackers that are too sweet, as they might clash with the savory cheese.
Can I use pre-shredded parmesan?
Yes, but freshly grated is better. Pre-shredded parmesan has anti-caking agents that can make the dip slightly grainy. If you’re in a rush, pre-shredded works fine, but if you have 2 minutes, grate your own. It makes a noticeable difference in texture.
Why did my dip turn out too thick?
Cream cheese can vary in thickness depending on the brand and how long it’s been in the fridge. If it’s too thick, add more sour cream or a splash of milk, one teaspoon at a time, until it reaches your desired consistency. You want it to be spreadable, not stiff.
Can I substitute the honeycomb?
If you can’t find honeycomb, you can drizzle high-quality honey over the cheese instead. Or, you can skip it entirely and add some fig jam or apple butter. The sweet element is important to balance the salt, so try to include something sweet if you can.
How long can I leave the board out?
Food safety guidelines say that perishable items like cheese and meat should not be left out for more than 2 hours. If it’s hot outside (above 90°F), cut that down to 1 hour. Plan your party timing so the board doesn’t sit out too long.
Is this board gluten-free?
Not by default, because of the crackers. But you can easily make it gluten-free by using gluten-free crackers, rice crackers, or even vegetable sticks like cucumber and bell peppers. The dip and cheese are naturally gluten-free, so just check your cracker labels.
Pin This Recipe!

Garlic Parmesan Charcuterie Board: Easy No-Fail Recipe
- Total Time: 15 minutes
- Yield: 8 servings 1x
Description
A foolproof, no-cook charcuterie board featuring a creamy garlic parmesan dip, brie or goat cheese, honeycomb, and assorted crackers and fruits. Perfect for impressing guests with minimal effort.
Ingredients
- 8 oz (225g) soft cream cheese, room temperature
- 1 cup (100g) shredded aged parmesan cheese
- 4–5 cloves roasted garlic, minced or mashed
- 2 tablespoons sour cream
- 1 teaspoon dried parsley
- 1/2 teaspoon freshly cracked black pepper
- 8 oz (225g) brie or goat cheese wheel
- 1 small chunk honeycomb
- 2–3 varieties of assorted crackers (e.g., water crackers, seeded crackers, crostini)
- Fresh fruit (grapes, strawberries, or figs)
- Salted nuts (almonds, walnuts, or pecans)
- Optional: Cured meats (prosciutto, salami, or chorizo)
Instructions
- Ensure cream cheese is softened to room temperature. If needed, microwave for 10-15 seconds to remove chill.
- In a small mixing bowl, combine cream cheese, sour cream, shredded parmesan, roasted garlic, dried parsley, and black pepper.
- Mix ingredients until smooth and creamy. Adjust seasoning or consistency with more sour cream if needed.
- Transfer the dip to a serving bowl, smoothing the top. Garnish with extra parmesan if desired.
- Place a large cutting board or platter on the table. Position the bowl of garlic parmesan dip in the center or slightly to the side.
- Place the brie or goat cheese wheel on the board. Leave whole or slice in half, placing a small knife next to it.
- Stack or fan out assorted crackers around the cheeses, creating height and leaving space for other items.
- Place the honeycomb chunk near the brie. Arrange clusters of grapes, strawberries, or figs in empty spaces.
- Pour salted nuts into a small bowl and place on the board. If using cured meats, loosely fold slices and drape them over cheese or across the board.
- Add fresh herbs like rosemary or thyme for color and aroma. Serve immediately.
Notes
[‘Cheese tastes best at room temperature; remove from fridge 1 hour before serving.’, ‘The garlic parmesan dip can be made up to 24 hours in advance and stored in the fridge.’, ‘Do not freeze the dip as the texture of cream cheese will become grainy.’, ‘Leave negative space on the board to avoid a cluttered look.’, ‘Perishable items should not be left out for more than 2 hours (1 hour if above 90°F).’]
- Prep Time: 15 minutes
- Cook Time: 0 minutes
- Category: Appetizer
- Cuisine: American
Nutrition
- Serving Size: Approx. 1/8 of the b
- Calories: 250
- Sugar: 6
- Sodium: 350
- Fat: 18
- Saturated Fat: 8
- Carbohydrates: 15
- Fiber: 1
- Protein: 8
Keywords: charcuterie board, garlic parmesan dip, no cook recipe, appetizer ideas, party food, brie cheese, honeycomb, easy entertaining