
Let me be honest with you. When I first started making baked oatmeal, I made a huge mistake. I dumped everything into a bowl, stirred it once, and baked it in a standard muffin tin. What came out wasn’t a cup. It was a dense, soggy brick that stuck to the pan and tasted like wet cardboard. I threw the whole batch in the trash and ordered donuts.
That was three years ago. Today, I make these apple cinnamon baked oatmeal cups at least twice a week. They are my go-to breakfast when I want something that tastes like a comforting pie but actually has some fiber in it. They are portable, they reheat beautifully, and—this is the most important part—they are incredibly hard to mess up.
There is no whisking egg whites until they form stiff peaks. There is no folding flour gently to avoid deflating anything. You just dump, stir, and bake. If you can follow those three verbs, you can make this. Seriously. I’ve watched my teenage nephew make this batch after batch, and he hasn’t failed once. It’s the kind of recipe that builds your confidence in the kitchen because the margin for error is basically zero.
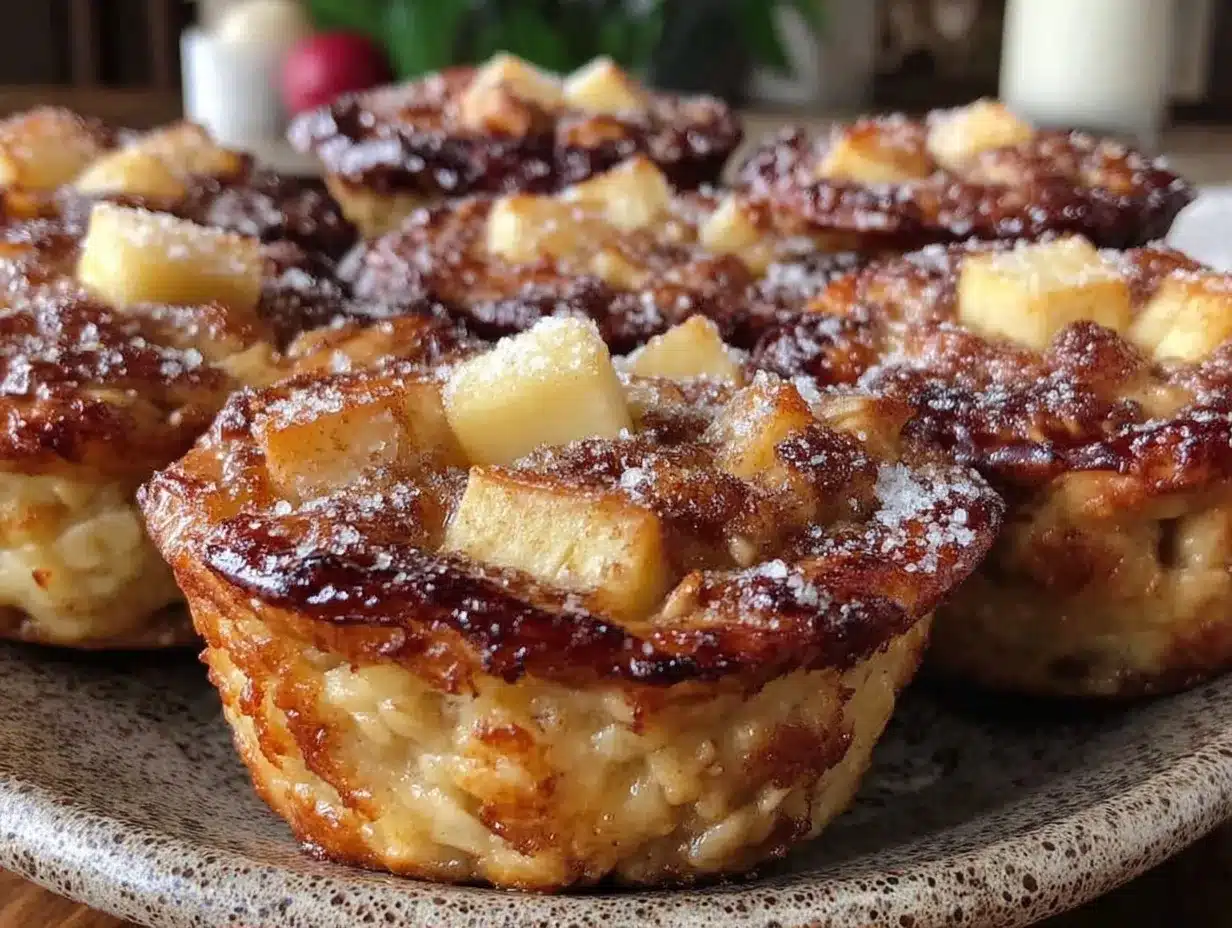
These cups are soft in the middle, slightly crisp on the edges, and packed with warm cinnamon and tender apples. They smell like a fall bakery the second they come out of the oven. Whether you’re meal prepping for a busy week or just want a cozy weekend breakfast that isn’t just toast, this is the one. It’s the breakfast recipe I come back to when I want simplicity and flavor without the fuss.
Why You’ll Love This Recipe
I’ve tried a lot of breakfast ideas over the years, from overnight oats (which get boring) to smoothies (which don’t keep me full). These apple cinnamon baked oatmeal cups hit a sweet spot. Here’s why they’ve earned a permanent spot in my weekly rotation.
- One Bowl, One Pan — Seriously, this is the easiest cleanup I’ve ever experienced. You mix everything in one large bowl, spoon it into a muffin tin, and bake. No extra dishes. No washing a dozen measuring cups. Just one bowl and one pan.
- Beginner-Proof — You really can’t mess this up. There are no tricky techniques. No tempering chocolate. No kneading dough. Just mix and bake. If you can stir, you can make this.
- Foolproof Texture — I’ve tested this recipe so many times to get the ratio right. The result is always moist and cake-like, never dry or crumbly. The oats absorb the liquid perfectly, creating a tender crumb that holds together well.
- Make-Ahead Friendly — These taste just as good cold as they do warm. I make a batch on Sunday, and they last in the fridge for five days. They’re perfect for grabbing on a rushed morning or taking as a snack.
- Customizable — Love nuts? Add them. Hate apples? Use pears. Want extra protein? Stir in some Greek yogurt. The base is forgiving, so you can tweak it to fit your pantry.
- Actually Healthy — No refined sugar. No weird additives. Just oats, fruit, eggs, and a little honey. It’s a balanced breakfast that keeps you full until lunch without the sugar crash.
This is my answer to “what’s for breakfast?” when I want something homemade but don’t want to spend an hour in the kitchen. It’s reliable, delicious, and simple. Just like it should be.
Ingredients You’ll Need
Here’s the best part: you probably have most of these ingredients already. This recipe relies on simple, whole-food ingredients. I’m particular about three things here—oats, apples, and cinnamon—and I’ll tell you exactly why they matter.
For the Base
Old-Fashioned Rolled Oats (3 cups / 270g) — Do not use instant oats. They turn to mush. Do not use steel-cut oats. They stay too hard. Old-fashioned rolled oats are the sweet spot—they soften nicely but keep some texture. I buy the store brand; it’s the same stuff as the fancy names.
Apples (3 medium, about 600g peeled and diced) — I use Honeycrisp or Gala for these. They hold their shape when baked and have a nice balance of sweet and tart. Granny Smiths work if you like them tart, but they can be a bit sharp. Peel them, dice them into small ½-inch pieces. Small pieces ensure you get a bit of apple in every bite.
Eggs (2 large) — These bind everything together. Room temperature eggs mix more evenly, but cold eggs work fine too. Just crack them into the bowl and whisk.
Milk (1½ cups / 360ml) — I use whole milk for richness, but any milk works. Almond, oat, or soy milk are great substitutes. The key is enough liquid to hydrate the oats fully.
Greek Yogurt (½ cup / 120g) — This is my secret ingredient. It adds protein and makes the texture incredibly creamy and moist. I use plain, non-fat Greek yogurt. It doesn’t add sweetness, just texture. If you don’t have yogurt, you can skip it, but the cups will be slightly less tender.
For the Flavor
Honey (¼ cup / 85g) — I prefer honey over maple syrup here because it’s slightly less sweet and has a floral note that pairs well with cinnamon. Maple syrup works too if you want a vegan option (just use maple syrup and skip the yogurt or use a dairy-free alternative).
Vanilla Extract (1 teaspoon) — Pure vanilla makes a huge difference. I use the brown bottle kind, not the imitation stuff. It adds warmth and depth.
Cinnamon (1½ teaspoons) — This is the star spice. Don’t skimp. If you’re a cinnamon lover, go for 2 teaspoons. It should taste distinctly like apple pie.
Nutmeg (¼ teaspoon) — Just a pinch. It adds a subtle background note that makes the cinnamon taste more complex. Don’t skip it if you have it.
Salt (½ teaspoon) — Essential. Salt makes the sweetness pop. Use kosher salt or table salt. It balances the honey and apples.
For the Topping (Optional but Recommended)
Butter (2 tablespoons, melted) — Or coconut oil if you’re dairy-free. Brush this over the tops before baking.
Extra Cinnamon (½ teaspoon) — Mix with 1 tablespoon brown sugar for a crunchy, sweet top. I love this part. It makes them feel like a treat.
Walnuts or Pecans (¼ cup, chopped) — Optional. I add them sometimes for crunch. If you’re not a nut person, leave them out.
Equipment Needed
You don’t need fancy gear for this. Here’s what I actually use.
Large Mixing Bowl — I use a 4-quart bowl. It needs to be big enough to hold the oats, apples, and wet ingredients without spilling when you stir.
12-Cup Muffin Tin — Standard size. I use my aluminum one. If you don’t have a muffin tin, you can use a 9×13 baking dish, but the baking time will change (see notes below).
Measuring Cups and Spoons — Standard stuff. Dollar store versions work fine. Just make sure they’re accurate.
Whisk — For mixing the wet ingredients and combining everything. A fork works in a pinch, but a whisk is faster.
Silicone Spatula — To scrape the bowl and fold the ingredients. Helps get everything mixed evenly.
Pastry Brush — For brushing the melted butter on top. A spoon works too, just spread it gently.
Knife and Cutting Board — For dicing the apples. A small paring knife is perfect for this.
Cooling Rack — Optional but helpful. Letting them cool for 5 minutes helps them set so they don’t fall apart when you remove them.
How to Make It: Step-by-Step
Alright, let’s make this! I’m walking you through exactly how I do it. It’s simple, and I’ll point out the little tricks that make the difference.
Step 1: Prep the Oven and Pan (2 minutes)
Preheat your oven to 350°F (175°C). This is crucial. If the oven isn’t hot enough when the cups go in, they’ll be dense. Line your muffin tin with paper liners or spray it generously with non-stick cooking spray. I use liners because cleanup is zero, but spray works fine if you don’t mind washing the tin.
Step 2: Dice the Apples (5 minutes)
Peel and dice the apples into small ½-inch pieces. Smaller pieces cook more evenly and distribute better throughout the cup. If you cut them too large, you’ll get big chunks of apple and dry oats in between. Aim for consistency. Toss the diced apples in a little lemon juice if you’re not baking immediately to prevent browning, but usually, I bake right away.
Step 3: Mix the Wet Ingredients (2 minutes)
In your large bowl, whisk together the eggs, milk, Greek yogurt, honey, vanilla extract, cinnamon, nutmeg, and salt. Whisk until the honey is fully dissolved and the mixture is uniform. It should look like a creamy, spiced milk. Taste it if you want—it should taste sweet and spiced. If you want it sweeter, add a little more honey.
Step 4: Combine Everything (2 minutes)
Add the rolled oats and diced apples to the wet mixture. Stir well with a spatula or spoon. Make sure all the oats are submerged in the liquid. The oats will start absorbing the liquid immediately, so don’t let the mixture sit too long before baking, or it’ll get thick. Stir until everything is evenly distributed. You want a spoonful of apples in every scoop.
Step 5: Fill the Muffin Tin (3 minutes)
Spoon the mixture into the prepared muffin cups. Fill each cup about ¾ full. Don’t overfill them, or they’ll bubble over in the oven. Use the back of your spoon to smooth the tops slightly. If you’re doing the cinnamon-sugar topping, sprinkle it on now.
Step 6: Bake (20-25 minutes)
Place the tin in the preheated oven. Bake for 20-25 minutes. You’ll know they’re done when the tops are golden brown and a toothpick inserted into the center comes out clean or with just a few moist crumbs. The edges should look slightly set, and the center should jiggle just a tiny bit—it will firm up as it cools. Do not overbake, or they’ll be dry.
Step 7: Cool and Serve (10 minutes)
Let the cups cool in the pan for 5 minutes. This is important. They are very hot and fragile right out of the oven. Letting them rest allows them to set. After 5 minutes, remove them from the pan and transfer to a cooling rack. They can be eaten warm, at room temperature, or cold. Store leftovers in an airtight container in the fridge.
Total Time: About 40 minutes (5 minutes prep, 25 minutes bake, 10 minutes cool)
Expert Tips & Tricks
Here’s everything I’ve learned from making this dozens of times. These tips will save you from my early mistakes.
Use Old-Fashioned Oats
I can’t stress this enough. Instant oats absorb liquid too quickly and turn into a paste. Steel-cut oats never soften enough in this short bake time. Old-fashioned rolled oats are the only choice. If you only have quick oats, you can use them, but reduce the milk by 2 tablespoons and check them at 15 minutes. They’ll be softer.
Don’t Skip the Salt
Salt isn’t just for savory food. A pinch of salt in sweet baked goods enhances the flavor of the cinnamon and honey. Without it, the cups taste flat. I use ½ teaspoon for this batch. It makes a noticeable difference.
Dice Apples Uniformly
Consistent sizing ensures even cooking. If you have large chunks and tiny pieces, the large ones might be raw while the small ones are mushy. Aim for ½-inch cubes. It’s a small effort that pays off in texture.
Let Them Cool
I know it’s tempting to eat them hot. But baked oatmeal is very delicate when hot. Letting them cool for 5 minutes allows the structure to set. If you pull them out too early, they might fall apart in your hand. Patience pays off.
Storage is Simple
These keep well in the fridge for up to 5 days. They also freeze beautifully for up to 3 months. I usually freeze half the batch. To reheat, microwave for 30-60 seconds or toast in a toaster oven for a crispier edge.
Variations & Substitutions
Once you’ve nailed the basic version, here’s how you can mix it up. I’ve tried all of these, and they all work.
Blueberry Lemon
Swap the apples for 1½ cups fresh blueberries. Add the zest of one lemon to the wet ingredients. Reduce cinnamon to ½ teaspoon. It’s bright, tangy, and perfect for spring.
Pumpkin Spice
Replace the apples with 1 cup pumpkin puree. Use pumpkin pie spice instead of cinnamon and nutmeg. Add ½ cup chopped pecans. It tastes like fall in a cup. Great for October.
Chocolate Chip
Add ½ cup mini chocolate chips to the mixture. Reduce honey to 2 tablespoons. Add 1 teaspoon extra cinnamon. It’s like a cookie for breakfast. My kids love this version.
Peanut Butter Banana
Slice one banana into the cups. Add 1 tablespoon peanut butter to each cup before baking. Use cinnamon or nutmeg. It’s rich and filling. Great for post-workout breakfasts.
Dietary Modifications
Vegan — Use flax eggs (2 tablespoons ground flax + 5 tablespoons water, let sit 5 minutes) instead of eggs. Use maple syrup instead of honey. Use oat milk and dairy-free yogurt. It works well.
Gluten-Free — Use certified gluten-free rolled oats. The rest of the ingredients are naturally gluten-free. Just check your oats package to be sure.
Dairy-Free — Use oat or almond milk. Skip the Greek yogurt or use a dairy-free alternative. Use coconut oil instead of butter. The texture is slightly less creamy but still delicious.
Serving & Storage
I usually serve these warm, straight from the microwave, with a dollop of Greek yogurt on top. But here are other ways I’ve enjoyed them.
How to Serve
They’re great on their own. But if you want to dress them up, try these toppings:
- A drizzle of honey or maple syrup
- A spoonful of almond butter or peanut butter
- Extra fresh fruit like berries or sliced banana
- A sprinkle of granola for crunch
- A dusting of powdered sugar for a treat feel
Storage Instructions
Refrigerator: Store in an airtight container for up to 5 days. They actually get slightly firmer in the fridge, which some people prefer. They taste great cold right out of the container.
Freezer: Let them cool completely. Wrap each cup individually in plastic wrap or aluminum foil, then place in a freezer bag. They last up to 3 months. Thaw in the fridge overnight or microwave from frozen for 1-2 minutes.
Reheating: Microwave for 30-60 seconds until warm. For a crispier edge, toast in a toaster oven at 350°F for 5 minutes. Avoid the microwave if you want texture; it makes them soft.
Nutrition Information
I’m not a nutritionist, but here’s the breakdown if you’re tracking. This is per cup (based on 12 cups).
Per Serving:
- Calories: 180
- Protein: 6g
- Carbs: 30g
- Fiber: 3g
- Sugar: 12g
- Fat: 5g
- Saturated Fat: 1g
- Cholesterol: 35mg
- Sodium: 150mg
These are a balanced breakfast with complex carbs, fiber, and protein. The sugar comes naturally from the fruit and honey. If you use Greek yogurt, you boost the protein. If you add nuts, you add healthy fats. It’s a flexible recipe that fits most diets.
Final Thoughts
So that’s my apple cinnamon baked oatmeal cups! I’ve probably talked your ear off at this point, but when you make a recipe this often, you have a lot to say about it.
This has saved my mornings more times than I can count. It’s my answer to “what’s for breakfast?” when I want something homemade but don’t want to stress. It’s forgiving, it’s delicious, and it’s simple. My kids love them, my husband loves them, and I love them because they’re easy.
Make it yours! Try different fruits, swap the spices, add nuts or seeds. The best recipes are the ones you adapt to your tastes. If you make this, drop a comment and let me know what you think! I love hearing how recipes turn out in your kitchen.
Happy cooking! And I hope your kitchen smells half as good as mine does right now.
Frequently Asked Questions
Can I use instant oats instead of rolled oats?
You can, but the texture will be different. Instant oats absorb liquid faster and can make the cups mushy. If you must use them, reduce the milk by 2 tablespoons and check them at 15 minutes. They’ll be softer and less cake-like. Old-fashioned rolled oats are best for the right texture.
How do I store these baked oatmeal cups?
Store them in an airtight container in the fridge for up to 5 days. They also freeze well for up to 3 months. Wrap them individually in plastic wrap or foil before freezing. Reheat in the microwave or toaster oven.
Can I make this in a baking dish instead of a muffin tin?
Yes! Use a 9×13 inch baking dish. Grease it well. The baking time will be longer, about 30-35 minutes. Check with a toothpick in the center. The edges might be crispier, and the center softer. You can cut it into squares to serve.
Why did my oatmeal cups turn out dry?
This usually means they were overbaked. Oatmeal continues to cook as it cools. Remove them from the oven when the toothpick comes out with just a few moist crumbs. Also, make sure you’re using old-fashioned oats, not instant, which can absorb too much liquid if not measured correctly.
Can I make these ahead for meal prep?
Absolutely! This recipe is perfect for meal prep. Make a batch on Sunday, store them in the fridge, and grab one each morning. They taste great cold or reheated. I usually make two batches at once to have enough for the week.
Can I add protein powder?
Yes, you can add 1 scoop of vanilla or unflavored protein powder. It might make the cups slightly denser, so add an extra tablespoon of milk if the batter looks too thick. It’s a great way to boost protein for a post-workout breakfast.
Pin This Recipe!


Apple Cinnamon Baked Oatmeal Cups
- Total Time: 40 minutes
- Yield: 12 servings 1x
Description
These portable, beginner-proof baked oatmeal cups are soft in the middle, slightly crisp on the edges, and packed with warm cinnamon and tender apples. They are easy to make, healthy, and perfect for meal prep.
Ingredients
- 3 cups old-fashioned rolled oats
- 3 medium apples (Honeycrisp or Gala), peeled and diced into ½-inch pieces
- 2 large eggs
- 1½ cups milk (whole, almond, oat, or soy)
- ½ cup plain non-fat Greek yogurt
- ¼ cup honey
- 1 teaspoon vanilla extract
- 1½ teaspoons cinnamon
- ¼ teaspoon nutmeg
- ½ teaspoon salt
- 2 tablespoons melted butter or coconut oil (optional, for topping)
- ½ teaspoon extra cinnamon mixed with 1 tablespoon brown sugar (optional, for topping)
- ¼ cup chopped walnuts or pecans (optional)
Instructions
- Preheat oven to 350°F (175°C). Line a 12-cup muffin tin with paper liners or spray generously with non-stick cooking spray.
- Peel and dice the apples into small ½-inch pieces.
- In a large mixing bowl, whisk together the eggs, milk, Greek yogurt, honey, vanilla extract, cinnamon, nutmeg, and salt until uniform.
- Add the rolled oats and diced apples to the wet mixture. Stir well with a spatula to ensure all oats are submerged and ingredients are evenly distributed.
- Spoon the mixture into the prepared muffin cups, filling each about ¾ full. Smooth the tops with the back of a spoon.
- If using the topping, sprinkle the cinnamon-sugar mixture and/or nuts over the tops. Brush with melted butter or coconut oil.
- Bake for 20-25 minutes, or until the tops are golden brown and a toothpick inserted into the center comes out clean or with moist crumbs.
- Let the cups cool in the pan for 5 minutes to allow them to set. Remove from the pan and transfer to a cooling rack.
- Serve warm, at room temperature, or cold.
Notes
Do not use instant oats as they turn to mush; do not use steel-cut oats as they stay too hard. Old-fashioned rolled oats are essential for the correct texture. Let the cups cool for 5 minutes before removing from the pan to prevent them from falling apart. They can be stored in the fridge for up to 5 days or frozen for up to 3 months.
- Prep Time: 15 minutes
- Cook Time: 25 minutes
- Category: Breakfast
- Cuisine: American
Nutrition
- Serving Size: 1 cup
- Calories: 180
- Sugar: 12
- Sodium: 150
- Fat: 5
- Saturated Fat: 1
- Carbohydrates: 30
- Fiber: 3
- Protein: 6
Keywords: baked oatmeal, oatmeal cups, apple cinnamon, breakfast recipe, meal prep, healthy breakfast, easy baking, gluten-free option, vegan option



