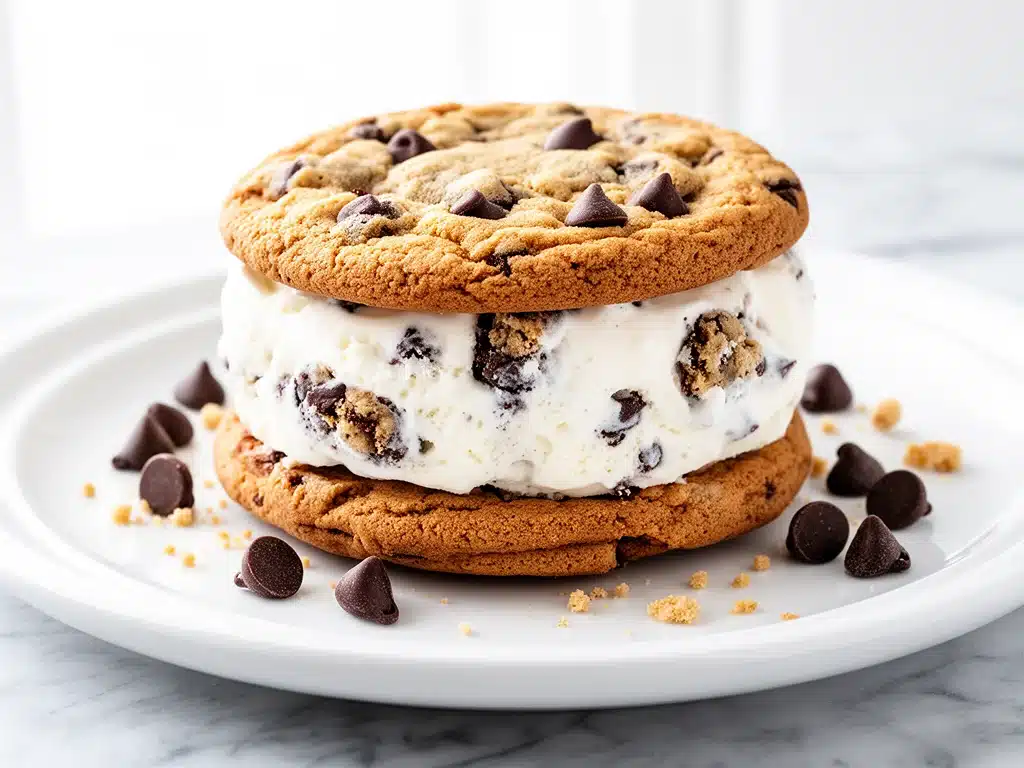
Last July, I was standing in my kitchen at 10 PM, staring at a container of cookie dough that had been sitting in the fridge for three days. My husband was asleep, the kids were finally quiet, and I was craving something sweet that wasn’t just another bowl of cereal. I pulled out the ice cream, grabbed a spoon, and thought, Why am I eating these separately? That’s when the idea hit me: what if I sandwiched that gooey, chocolate-loaded dough between two scoops of vanilla bean ice cream, froze it, and turned it into a portable dessert?
I was skeptical. I’ve made my fair share of kitchen disasters over the years (remember that time I tried to make soufflés during a thunderstorm?). But this? This was different. I lined a baking sheet with parchment paper, spooned out circles of cookie dough, placed a scoop of ice cream on half of them, and topped them with the other halves. I shoved the whole tray into the freezer and went to bed.
When I pulled them out the next morning, they were solid. Perfectly solid. I took a bite, and it was like eating a childhood dream. The cold, creamy ice cream cut through the rich, buttery sweetness of the edible cookie dough, and the chocolate chips added that necessary crunch. My husband woke up, saw me sneaking around the kitchen with a plate, and asked what the mystery treat was. He took one bite and immediately asked for the recipe.
That was six months ago. Now, Chocolate Chip Cookie Dough Ice Cream Sandwiches are a staple in our freezer. They’re the reason I’ve stopped buying store-bought sandwiches (which are usually just wafers and stale ice cream). They’re the reason my neighbors keep asking me for the recipe. And they’re the reason I’ve finally mastered the art of no-bake desserts that actually taste homemade.
If you’ve ever stared into the freezer door at 2 AM wondering what to eat, or if you’re looking for a dessert that will make your kids think you’re a wizard, you need to make these. They’re easier than you think, they require zero baking, and they taste like heaven. I’ve tested this method at least ten times to get the ratio of dough to ice cream just right, and I’m sharing everything I’ve learned. Trust me, once you try these, you’ll never go back to regular sandwiches again.
Why You’ll Love This Recipe
There are about a million reasons I keep making Chocolate Chip Cookie Dough Ice Cream Sandwiches, but here are the big ones that keep me coming back to the kitchen:
Zero Baking Required — Seriously. No oven, no preheating, no waiting for cookies to cool. If you can scoop ice cream and press dough, you can make this. I’ve made these while my toddler was napping, and the entire process took less time than it takes to boil water for pasta.
Edible Cookie Dough Safety — I used to be terrified of eating raw cookie dough because of the raw flour and eggs. Not anymore. This recipe uses heat-treated flour and no raw eggs, so you can eat as much dough as you want while you’re assembling. My kids love this part—they get to lick the spoon, which is a win in my book.
Impressively Fancy — These look like something you’d buy at a high-end gelato shop for $8. But they cost about $3 to make. When I serve these to friends, they always assume I went to the store. I let them believe it for the first five minutes, then drop the truth bomb. Their faces are priceless.
Perfectly Portable — Unlike a bowl of ice cream that melts into a puddle on your lap, these stay solid in the freezer for weeks. I wrap them individually, so they’re ready to grab. They’re the perfect treat for lunchboxes (if you have a freezer at school), picnics, or late-night study sessions.
Customizable to Infinity — Want to add sprinkles? Go for it. Want to use mint chocolate chip ice cream? Done. Want to dip the edges in crushed Oreos? Why not? This recipe is a blank canvas for your sweet tooth.
This is my go-to when I need a dessert that feels special but requires zero effort. No complicated techniques, no weird ingredients, just reliable, delicious food that makes everyone happy. It’s the kind of treat that turns a regular Tuesday into a celebration.
Ingredients You’ll Need
Here’s the best part: you probably have most of this already. I’m particular about three ingredients here, and I’ll tell you exactly why. For Chocolate Chip Cookie Dough Ice Cream Sandwiches, you need quality ingredients because there’s nowhere to hide bad flavor.
For the Cookie Dough:
Butter (½ cup / 115g) — Unsalted butter is key. I use real butter, not margarine. Margarine has too much water and makes the dough greasy. Let it soften to room temperature so it mixes easily.
Heat-Treated Flour (1 cup / 120g) — This is the most important step. You cannot use raw flour directly from the bag. I spread my flour on a baking sheet and bake it at 350°F (175°C) for 5 minutes to kill any bacteria. Let it cool completely before using. This makes the dough safe to eat raw.
Packed Brown Sugar (½ cup / 100g) — Brown sugar gives that molasses-rich, chewy texture. Light brown is fine, but dark brown adds more depth. Don’t use white sugar—it makes the dough hard.
Granulated Sugar (¼ cup / 30g) — Just enough sweetness to balance the salt.
Milk (1-2 tablespoons) — I use whole milk. It helps bind the dough. Start with 1 tablespoon; you might need a bit more depending on your flour’s moisture content.
Vanilla Extract (1 teaspoon) — Pure vanilla, not imitation. It makes a huge difference in flavor.
Salt (½ teaspoon) — Essential to cut the sweetness. Don’t skip it.
Chocolate Chips (½ cup / 85g) — Semi-sweet or dark chocolate chips work best. I like to use a mix of mini chips and regular chips for varied texture.
For the Ice Cream:
Vanilla Bean Ice Cream (1 pint / 473ml) — I use a high-quality store-bought brand like Häagen-Dazs or Ben & Jerry’s. If you have time, homemade vanilla bean ice cream is amazing, but store-bought works perfectly fine. The key is that it needs to be soft enough to scoop but not melted.
Optional Add-ins:
Crushed Cookies — For dipping the edges. Oreos, chocolate wafers, or even crushed graham crackers work great.
Sprinkles — Rainbow sprinkles add a fun pop of color and texture.
Extra Chocolate Chips — For pressing into the top before freezing.
Pro Tip: I keep a bag of heat-treated flour in my pantry specifically for this recipe. It saves so much time. You can make a big batch of heat-treated flour at the start of the month and keep it in an airtight container.
Equipment Needed
You don’t need fancy equipment for this. Here’s what I actually use:
Baking Sheet — I use a standard half-sheet pan. It needs to fit in your freezer. If you have a smaller freezer, you might need two smaller pans.
Parchment Paper — Essential. Do not use wax paper; it will stick. Parchment paper ensures these slide off easily after freezing.
Mixing Bowls — Two medium bowls. One for the dough, one for mixing if needed.
Spatula — A silicone spatula is best for mixing the dough. It scrapes the bowl clean.
Ice Cream Scoop — A standard scoop works. If you don’t have one, a tablespoon works, but the scoop makes uniform sandwiches.
Knife — A sharp knife for trimming any uneven edges if you want them to look perfect.
Ziploc Bags or Airtight Container — For storing the finished sandwiches. I prefer individual bags so they don’t stick together.
Small Saucepan — Optional, if you want to heat-treat your flour on the stove instead of in the oven.
Tool Tip: I’m obsessed with my silicone spatulas. They’re cheap, durable, and make cleanup a breeze. If you don’t have one, a regular spoon works, but you’ll miss bits of dough stuck to the sides.
How to Make It: Step-by-Step

Alright, let’s make this! I’m walking you through exactly how I do it, including the little tricks I’ve picked up over the last year.
Step 1: Heat-Treat the Flour (5-10 minutes)
This is the non-negotiable step. Spread your flour evenly on a small baking sheet. Bake at 350°F (175°C) for 5 minutes. You’re just killing bacteria, not cooking the flour. It should look slightly toasted but not browned. Let it cool completely. If you use warm flour, it will melt the butter in your dough.
Step 2: Make the Cookie Dough (5 minutes)
In a medium bowl, cream together the softened butter, brown sugar, and granulated sugar until smooth. Add the vanilla extract and salt. Mix well. Add the cooled, heat-treated flour a little at a time, mixing until a dough forms. If it’s too dry, add milk one teaspoon at a time. Fold in the chocolate chips. Chill the dough in the fridge for 15 minutes. This makes it easier to scoop.
Step 3: Prep the Ice Cream (2 minutes)
Take your vanilla ice cream out of the freezer. Let it sit at room temperature for 5-10 minutes. You want it soft enough to scoop easily but still frozen solid. If it’s too soft, it will melt into the dough. If it’s too hard, you’ll crack the ice cream.
Step 4: Scoop and Assemble (10 minutes)
Line your baking sheet with parchment paper. Scoop small balls of cookie dough (about 1 tablespoon each) and place them on the sheet. Flatten them slightly into discs. Scoop a ball of ice cream (about 2 tablespoons) and place it on half of the dough discs. Top each with another flattened disc of dough. Press gently to seal the edges. The ice cream should be sandwiched in the middle.
Step 5: Freeze (1-2 hours)
Place the baking sheet in the freezer. Freeze for at least 1 hour, or until the sandwiches are solid. If you want to dip them in crushed cookies or sprinkles, do this after the first hour when the outside is firm but the center is still slightly soft.
Step 6: Store (Ongoing)
Once frozen solid, transfer the sandwiches to an airtight container or individual Ziploc bags. Label with the date. They’ll last in the freezer for up to 3 months.
Total Time: About 25 minutes active, plus 1 hour freezing.
Built-in Troubleshooting:
Dough too sticky? Add a tablespoon more flour.
Dough too crumbly? Add a teaspoon more milk or butter.
Ice cream melting? Work faster, or return the ice cream to the freezer for 5 minutes before scooping.
Expert Tips & Tricks
Here’s everything I’ve learned from making Chocolate Chip Cookie Dough Ice Cream Sandwiches dozens of times. These tips will save you from my mistakes.
Chill Your Dough
This is the #1 tip. Chilling the dough for 15 minutes makes it firmer and easier to handle. If the dough is warm, it will melt the ice cream, and your sandwiches will fall apart. I forget this sometimes, and I pay the price with a mess in the freezer.
Soft Ice Cream is Key
Don’t scoop straight from the freezer. Let the ice cream soften for 5-10 minutes. You want it pliable. If it’s too hard, you’ll create air pockets, and your sandwiches won’t seal properly.
Use a Scoop for Uniformity
I know it seems fussy, but using a cookie scoop or ice cream scoop ensures each sandwich is the same size. This makes them look professional and stack neatly in the freezer.
Seal the Edges
Press the edges of the dough together firmly. This prevents the ice cream from sticking out and freezing into a weird shape. If you want them to look perfect, use a knife to trim any excess dough after freezing.
Don’t Skimp on Salt
Salt enhances the chocolate and vanilla flavors. Don’t make them too sweet. A little salt balances the sugar.
Common Mistakes (and how to avoid them):
Mistake: Sandwiches are too thick
Fix: Use less ice cream. Aim for a 1:1 ratio of dough to ice cream by volume. Too much ice cream makes the sandwich unstable.
Mistake: Dough is too sweet
Fix: Use semi-sweet chocolate chips and reduce the sugar by 1 tablespoon. You can always add more sugar later.
Mistake: Ice cream sticks to the parchment
Fix: Make sure your parchment paper is high quality. Cheap parchment can let moisture through. If it sticks, let the sandwich sit at room temperature for 30 seconds before trying to lift it.
Pro Tricks I’ve Learned:
For Restaurant-Quality Finish
Dip the edges in crushed Oreos or sprinkles before the final freeze. It adds a nice crunch and makes them look fancy.
For Extra Flavor
Add a pinch of cinnamon to the dough. It pairs surprisingly well with vanilla and chocolate.
For Better Texture
Use a mix of mini and regular chocolate chips. Mini chips distribute more evenly, while regular chips provide bigger chunks.
Variations & Substitutions
Once you’ve nailed the basic version, here’s how you can mix it up. I’ve tried all of these.
Peanut Butter Cup Version
Use peanut butter ice cream and add mini Reese’s Pieces to the dough. My husband’s favorite. The salty-sweet combo is addictive.
Mint Chip Version
Use mint chocolate chip ice cream and add crushed peppermint candies to the dough. Refreshing and perfect for summer.
Red Velvet Version
Add red food coloring to the dough and use vanilla ice cream with red velvet cake crumbs. It’s festive and delicious.
Cookie Butter Version
Swirl cookie butter into the ice cream before scooping. Use graham cracker crumbs instead of chocolate chips. It tastes like a Biscoff sandwich.
Dietary Modifications:
Gluten-Free
Use gluten-free flour for the heat treatment. Most GF flours work fine, but rice flour can be gritty. Almond flour is a great alternative for a nutty flavor.
Dairy-Free
Use dairy-free butter and dairy-free ice cream. The dough will be slightly different, but still tasty. I’ve used Miyoko’s butter and it works well.
Vegan
Use coconut cream instead of milk in the dough, and vegan ice cream. Add flax egg if needed for binding. It’s not exactly the same, but it’s close.
Lower-Sugar
Use erythritol or stevia instead of sugar. The texture will be different, but it’s a good option for diabetics. I’ve tried Swerve and it works okay.
Serving & Storage
How to serve these babies? Straight from the freezer, of course. They’re best eaten within 10 minutes of taking them out, because that’s when the dough is chewy and the ice cream is cold.
Side Dishes:
These are a dessert, so they don’t need sides. But if you’re having a party, serve them with fresh berries or whipped cream on the side.
Toppings Bar:
When I have guests, I put out crushed cookies, sprinkles, and drizzled chocolate. Everyone customizes their sandwich.
Storage Instructions:
Refrigerator:
Do not store these in the fridge. They will melt. Store them in the freezer.
Freezer:
Store in an airtight container or individual bags for up to 3 months. They will last longer, but the texture might change after that. I usually eat them within a month.
Reheating:
Let them sit at room temperature for 5 minutes before eating. This softens the dough slightly and makes it easier to bite.
Pro Tip: If you’re meal-prepping, make a big batch and freeze them in individual bags. They’re perfect for lunchboxes or after-school snacks.
Nutrition Information
I’m not a nutritionist, but here’s the breakdown if you’re tracking. Keep in mind that this is a treat, so enjoy it in moderation.
Per Serving (based on 6 sandwiches):
- Calories: 350
- Protein: 4g
- Carbs: 45g
- Fiber: 1g
- Sugar: 30g
- Fat: 18g
- Saturated Fat: 10g
- Cholesterol: 40mg
- Sodium: 150mg
What’s Good:
- Small treat size (if you keep them small)
- No artificial preservatives (if homemade)
- Can be made with healthier ingredients (see variations)
What to Know:
- High in sugar and fat (it’s ice cream and cookie dough!)
- Contains dairy and gluten (unless modified)
- Portion control is key
My Take:
Look, this is a dessert. It’s not a health food. But it’s way better than store-bought sandwiches, which are full of weird ingredients. When I want to make it lighter, I use the dairy-free version and reduce the sugar. But usually? I just eat one and enjoy it.
Final Thoughts
So that’s my Chocolate Chip Cookie Dough Ice Cream Sandwiches! I’ve probably talked your ear off at this point, but when you make a recipe this often, you have a lot to say about it.
This has saved summer evenings more times than I can count. It’s my answer to “what’s for dessert” when I don’t want to bake, but still want something special. My kids are happy, my husband’s happy, and I’m happy because I’m not stressed about cooking.
Make it yours! Try different ice cream flavors, add different mix-ins, adjust the sweetness. The best recipes are the ones you adapt to your family’s tastes.
If you make this, drop a comment and let me know what you think! I love hearing how recipes turn out in your kitchen. And if something doesn’t work, tell me that too—I’m here to help troubleshoot.
Happy cooking! And I hope your kitchen smells half as good as mine does right now.
Frequently Asked Questions
Can I use store-bought cookie dough?
You can, but homemade tastes so much better. Store-bought dough often has preservatives that change the texture. If you must use store-bought, let it come to room temperature before scooping. But honestly, making your own takes only 5 minutes.
Why did my sandwiches fall apart?
Usually means the ice cream was too soft or the dough was too warm. Make sure you chill the dough and soften the ice cream just enough. Also, press the edges firmly to seal them.
Can I make these ahead for a party?
Absolutely. Make them up to 3 months ahead and store in the freezer. They’re perfect for parties because they’re individual servings and easy to grab. I make a big batch on weekends for the whole week.
Can I use homemade ice cream?
Yes! Homemade ice cream works great. Just make sure it’s churned and frozen solid before scooping. If it’s too soft, freeze it for an hour first. The flavor will be amazing.
How do I prevent the dough from sticking to my hands?
Wet your hands slightly with water before scooping the dough. It prevents sticking and makes it easier to shape. You can also use a cookie scoop.
Can I freeze these without parchment paper?
I don’t recommend it. Parchment paper ensures they don’t stick to the pan. If you don’t have it, use a silicone baking mat. Wax paper will stick.
Can I double this recipe?
Yes! Double everything and use two baking sheets. The cooking and freezing times stay the same. I do this when I’m feeding a crowd or meal-prepping.
Pin This Recipe!

Chocolate Chip Cookie Dough Ice Cream Sandwiches
- Total Time: 1 hour 30 minutes
- Yield: 6 servings 1x
Description
A no-bake dessert featuring edible cookie dough sandwiches with a center of vanilla bean ice cream. These treats are easy to make, customizable, and perfect for freezing.
Ingredients
- 1 cup (120g) heat-treated flour
- 1/2 cup (115g) unsalted butter, softened to room temperature
- 1/2 cup (100g) packed brown sugar
- 1/4 cup (30g) granulated sugar
- 1–2 tablespoons whole milk
- 1 teaspoon pure vanilla extract
- 1/2 teaspoon salt
- 1/2 cup (85g) semi-sweet or dark chocolate chips
- 1 pint (473ml) vanilla bean ice cream
- Optional: Crushed cookies, sprinkles, or extra chocolate chips for dipping
Instructions
- Spread flour evenly on a baking sheet and bake at 350°F (175°C) for 5 minutes to heat-treat. Let cool completely.
- In a medium bowl, cream together softened butter, brown sugar, and granulated sugar until smooth.
- Add vanilla extract and salt; mix well.
- Add the cooled, heat-treated flour a little at a time, mixing until a dough forms. If too dry, add milk one teaspoon at a time.
- Fold in chocolate chips. Chill the dough in the fridge for 15 minutes.
- Take vanilla ice cream out of the freezer and let it sit at room temperature for 5-10 minutes until soft enough to scoop.
- Line a baking sheet with parchment paper.
- Scoop small balls of cookie dough (about 1 tablespoon each) and flatten into discs.
- Place a scoop of ice cream (about 2 tablespoons) on half of the dough discs.
- Top each with another flattened disc of dough and press gently to seal edges.
- Freeze for at least 1 hour until solid.
- Transfer to an airtight container or individual bags for storage.
Notes
Ensure flour is heat-treated to kill bacteria. Chill dough to make it easier to handle. Soften ice cream slightly before scooping to prevent cracking. Store in freezer for up to 3 months.
- Prep Time: 25 minutes
- Cook Time: 5 minutes
- Category: Dessert
- Cuisine: American
Nutrition
- Serving Size: 1 sandwich
- Calories: 350
- Sugar: 30
- Sodium: 150
- Fat: 18
- Saturated Fat: 10
- Carbohydrates: 45
- Fiber: 1
- Protein: 4
Keywords: no-bake, ice cream sandwich, cookie dough, dessert, freezer treat, easy recipe, chocolate chip



