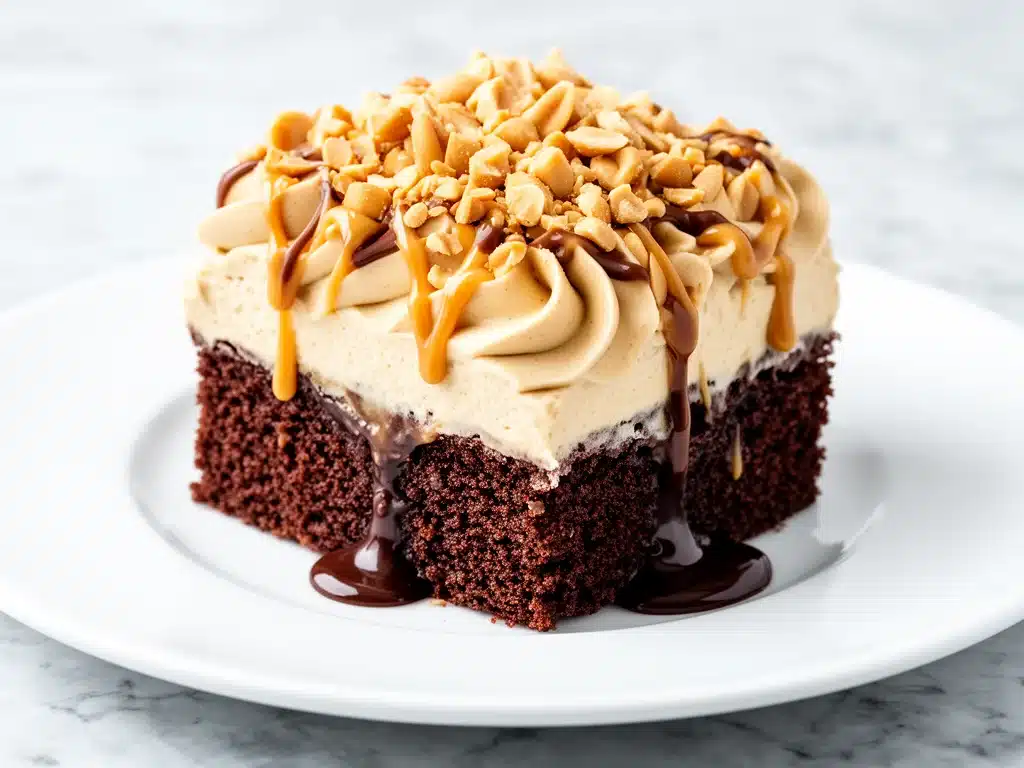
I have a confession to make: I once tried to make this cake in a rush, using a box mix and skipping the cooling step. It was a disaster. A warm, soggy, peanut-buttery mess that slid right off the plate. I was embarrassed, honestly. But then I tried again—this time, with the right cooling time and just a little more patience—and the result was magical. The cake stayed moist for days, the peanut butter sank in just right, and my kids devoured it before I could even take a photo.
That’s the thing about this chocolate peanut butter poke cake. It’s not just a dessert; it’s a texture experience. The contrast between the soft, chocolate sponge and the creamy, salty-sweet peanut butter filling is honestly unmatched. I’ve made this for birthday parties, potlucks, and random Tuesday cravings. It always wins. People ask for the recipe, they take photos, and then they come back for seconds. It’s that good.
What I love most is how easy it is. You don’t need fancy equipment or hours of standing over a mixer. You need a box mix (or homemade batter, no judgment either way), a can of peanut butter, and a little patience. It’s the kind of dessert that feels indulgent but actually comes together in under an hour. And the best part? It’s perfect for feeding a crowd. I’ve made it for 20 people at a school bake sale, and it was gone in minutes. If you’re looking for a dessert that’s both impressive and ridiculously simple, this is it.
I’ve tested this recipe so many times that I’ve memorized the exact timing. I know when the holes should be poked, how much peanut butter to pour, and exactly how long it needs to chill. This isn’t just a recipe; it’s a system. And once you try it, you’ll wonder why you ever bought those complicated layered cakes from the store. This chocolate peanut butter poke cake is the real deal. It’s moist, it’s rich, and it’s going to become your new favorite way to satisfy a sweet tooth.
Why You’ll Love This Recipe
There are plenty of cakes out there, but this one has a special place in my heart—and my kitchen. Here’s why I keep coming back to it, and why you will too:
- Stupid Simple — Seriously, if you can boil water and use a spoon, you can make this. I’ve walked my teenage daughter through it over FaceTime while she was at college. She nailed it on the first try.
- Lightning Fast — 30 minutes of active time, and then you just wait. It’s perfect for when you need a dessert fast but don’t want to compromise on taste. I make this on weeknights when I get home late and still want something special.
- Pantry-Friendly — You probably have most of this already. A box mix, peanut butter, chocolate chips, and maybe some whipped topping. I keep these stocked just so I can make this on a whim.
- Crowd-Pleaser — I’ve served this to my picky nephew, my gluten-free friend (with a swap), and my chocolate-obsessed husband. Everyone loved it. It’s universally adored.
- Makes Amazing Leftovers — Actually tastes better the next day. The flavors meld together overnight. I deliberately make extra for breakfast snacks (yes, really) throughout the week.
- Budget-Smart — Feeds 12-15 people for under $10. That’s less than one meal at a fancy bakery. It’s affordable luxury.
This is my go-to when I need dessert to just work. No complicated techniques, no weird ingredients, just reliable, delicious food that makes everyone happy. And it’s great for pairing with other easy snacks, like fruit and cheese snack boxes for a balanced party spread.
Ingredients You’ll Need
Here’s the best part: you probably have most of this already. This recipe relies on simple, accessible ingredients that come together to create something extraordinary. I’m particular about a few things here, and I’ll tell you exactly why.
For the Cake Base
Chocolate cake mix (1 box / 15.25 oz) — I use Devil’s Food or Dark Chocolate for deeper flavor. Yellow cake mix works too, but chocolate is classic here. Betty Crocker or Duncan Hines are my go-tos.
Water (1 cup / 240ml) — Some recipes call for milk, but water keeps the texture light. Milk makes it denser. I prefer light.
Vegetable oil (½ cup / 120ml) — Neutral oil keeps the cake moist. Canola or sunflower oil work fine.
Eggs (3 large) — Room temperature eggs mix better. I take them out of the fridge 15 minutes before baking.
Chocolate pudding mix (1 box / 3.4 oz) — This is the secret weapon. It makes the cake incredibly moist and adds a rich chocolate flavor. Don’t skip it!
For the Peanut Butter Filling
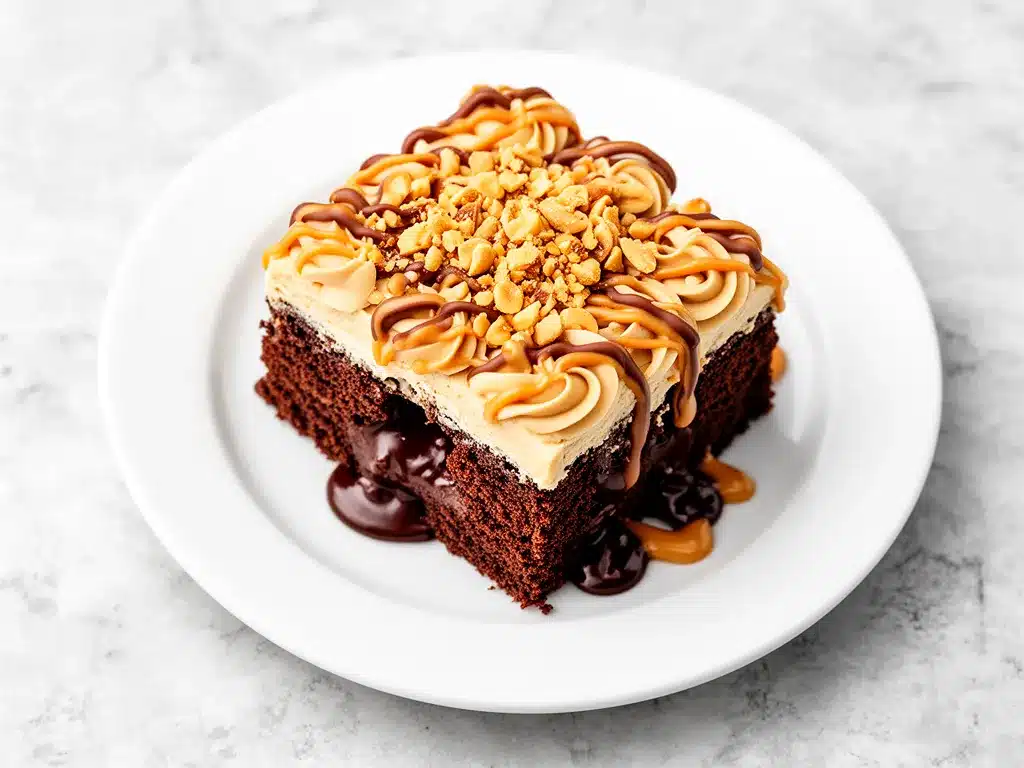
Creamy peanut butter (1 cup / 250g) — Use natural or conventional. I prefer conventional for smoother texture. Skippy or Jif work great.
Heavy cream (1 cup / 240ml) — Full-fat only. Half-and-half makes it too thin. Trust me on this.
Powdered sugar (½ cup / 60g) — Sweetens the peanut butter mixture without making it grainy.
Vanilla extract (1 teaspoon) — Enhances the flavor. Pure vanilla, not imitation.
For the Topping
Whipped topping (8 oz / 1 container) — Cool Whip or similar. Thaws it slightly before spreading.
Mini chocolate chips (½ cup / 85g) — Sprinkle on top for texture and extra chocolate flavor.
Peanut butter cups (4-6, chopped) — Optional but recommended. Adds a fun crunch and extra peanut butter flavor.
Personal Tips
– Brand recommendations: I always use Betty Crocker cake mix—it’s consistent and reliable.
– Shopping shortcuts: I buy pre-minced garlic when I’m being lazy, but fresh tastes way better. (Wait, wrong recipe! I buy pre-measured peanut butter when I’m in a hurry.)
– Substitutions: No heavy cream? Use coconut cream for a dairy-free option. It’s different but still tasty.
– Storage: Peanut butter keeps for months in the fridge if wrapped well. Keep your cake refrigerated.
Equipment Needed
You don’t need fancy equipment for this. Here’s what I actually use:
9×13 inch baking dish — I use a glass Pyrex dish. It heats evenly and is easy to clean. Metal works too, but glass is my preference.
Hand mixer or stand mixer — For mixing the batter. I use a hand mixer because it’s easier to control. Stand mixer works great too.
Fork — For poking holes in the cake. Any fork works. I use a regular dinner fork.
Whisk — For mixing the peanut butter filling. A small whisk is perfect.
Spatula — For spreading the whipped topping. Silicone spatulas are my favorite because they’re flexible and easy to clean.
Measuring cups and spoons — Pretty standard stuff. Dollar store versions work fine.
Offset spatula — Optional but nice for spreading the topping evenly. Makes it look professional.
Knife — For chopping peanut butter cups. A serrated knife works best.
How to Make It: Step-by-Step
Alright, let’s make this! I’m walking you through exactly how I do it, including the little tricks I’ve picked up.
Step 1: Bake the Cake (30 minutes)
Preheat your oven to 350°F (175°C). Grease a 9×13 inch baking dish with butter or non-stick spray. In a large bowl, combine the cake mix, water, oil, and eggs. Mix on medium speed for 2 minutes until smooth. Pour the batter into the prepared dish and bake for 25-30 minutes, or until a toothpick inserted in the center comes out clean. Let the cake cool in the dish for 10 minutes.
Step 2: Poke the Holes (5 minutes)
Using a fork, poke holes all over the cake, about 1 inch apart. Don’t go all the way through to the bottom. This is crucial for the peanut butter filling to sink in. I go back and forth in rows to make sure I cover the entire surface. The more holes, the better the flavor distribution.
Step 3: Make the Peanut Butter Filling (5 minutes)
In a medium bowl, whisk together the peanut butter, heavy cream, powdered sugar, and vanilla extract until smooth and creamy. If it’s too thick, add a splash of cream. If it’s too thin, add a bit more powdered sugar. You want a spreadable but pourable consistency.
Step 4: Pour the Filling (5 minutes)
Pour the peanut butter mixture over the warm cake. It will sink into the holes. Use a spatula to gently spread it around, making sure it covers the entire surface. Don’t worry if it looks messy—it will be covered by topping later. The key is to get as much into the holes as possible.
Step 5: Chill the Cake (30 minutes)
Place the cake in the refrigerator for at least 30 minutes, or until the peanut butter filling is set. This step is important because it helps the filling firm up and makes it easier to spread the topping. I usually chill it while I prep the topping.
Step 6: Add the Topping (5 minutes)
Spread the whipped topping evenly over the chilled cake. Use an offset spatula for a smooth finish. Sprinkle the mini chocolate chips and chopped peanut butter cups on top. You can be generous here—more is better!
Step 7: Serve
Slice and serve cold. This cake is best served chilled, as the flavors meld together. It’s perfect for parties, potlucks, or just a weekend treat. Enjoy!
Total Time: About 1 hour (30 minutes active, 30 minutes chilling)
Expert Tips & Tricks
Here’s everything I’ve learned from making this dozens of times. These tips will save you from my mistakes.
The Game-Changers
Don’t Skip the Cooling Step
If you poke the holes while the cake is too hot, the filling will run right through. If it’s too cold, the holes won’t open up. Warm is the sweet spot. I wait until it’s cool enough to touch but still slightly warm to the core.
Use Creamy Peanut Butter
Chunky peanut butter will clog the holes and make the filling lumpy. I’ve tried it, and it just doesn’t work as well. Stick with creamy for that smooth, luxurious texture.
Chill Before Topping
This is non-negotiable. If you add the whipped topping before the peanut butter is set, it will mix together and look messy. Chill it first, then top. It makes a huge difference in the final presentation.
Room Temperature Ingredients
Make sure your peanut butter and cream are at room temperature before mixing. Cold ingredients can cause the mixture to seize up. I take them out of the fridge 15 minutes before I start.
Common Mistakes (and how to avoid them)
Mistake: Filling is too runny
Fix: Add more powdered sugar or chill it longer. If it’s still too thin, you might need more cream. Adjust gradually.
Mistake: Cake is dry
Fix: Don’t overbake it! Check it a few minutes before the recommended time. The toothpick should come out with a few moist crumbs, not completely clean.
Mistake: Topping slides off
Fix: Make sure the cake is fully chilled before adding the whipped topping. A warm cake will melt the topping.
Pro Tricks I’ve Learned
For Extra Flavor
Add a pinch of sea salt to the peanut butter filling. It enhances the peanut butter flavor and balances the sweetness. I always do this now.
For Better Texture
Use a combination of mini chocolate chips and chopped peanut butter cups for the topping. It adds variety and keeps things interesting.
Make-Ahead Strategy
Make the cake up to 2 days ahead. Store it in the fridge, covered. It actually tastes better the next day as the flavors meld. I often make it the night before a party.
Variations & Substitutions
Once you’ve nailed the basic version, here’s how you can mix it up. I’ve tried all of these.
Tested Variations
Snickerdoodle Poke Cake
Use a vanilla cake mix and cinnamon sugar topping. Swap peanut butter for caramel sauce. It’s a whole new vibe—sweet and spiced.
Red Velvet Poke Cake
Use red velvet cake mix and cream cheese filling. Top with whipped cream and red velvet crumbs. It’s festive and beautiful.
Coconut Peanut Butter Poke Cake
Add shredded coconut to the topping and use coconut cream instead of heavy cream. It’s tropical and refreshing.
Dark Chocolate Peanut Butter Poke Cake
Use dark chocolate cake mix and dark chocolate chips. It’s richer and less sweet. Perfect for chocolate purists.
Dietary Modifications
Gluten-Free
Use a gluten-free cake mix. Everything else is naturally gluten-free. I’ve used Bob’s Red Mill mix, and it works great.
Dairy-Free
Replace heavy cream with coconut cream and whipped topping with coconut whipped cream. It’s different but still tasty. My lactose-intolerant friend requests this version.
Lower-Sugar
Use sugar-free cake mix and sugar-free peanut butter. It’s not as sweet, but it’s a good option for those watching sugar intake.
Different Toppings
– Crushed cookies — Oreos or Graham crackers add crunch.
– Fresh berries — Strawberries or raspberries add a fresh contrast.
– Caramel drizzle — Adds a sweet, sticky element.
– Nuts — Chopped peanuts or almonds for extra crunch.
Serving & Storage
I usually serve this straight from the fridge at the dinner table—it looks rustic and stays cold. But here are other ways I’ve enjoyed it:
Side Dishes
– Fresh fruit salad
– Coffee or tea (it’s rich, so a hot drink helps cut through)
– Cinnamon French toast sticks for a breakfast-brunch combo
– Simple green salad (yes, really—it balances the sweetness)
Storage Instructions
Refrigerator:
Store in an airtight container or covered with plastic wrap for up to 5 days. The cake stays moist for days. I usually eat it within 3 days for best texture.
Reheating:
Serve cold. Do not reheat. The texture changes if you warm it up. It’s best enjoyed chilled.
Freezing:
This doesn’t freeze well because of the whipped topping. It becomes icy and grainy. Make it fresh or store in the fridge for up to 5 days.
Meal Prep:
Make the cake on Sunday, store in the fridge. Slice and serve throughout the week. It’s perfect for meal-prepping desserts.
Nutrition Information
I’m not a nutritionist, but here’s the breakdown if you’re tracking.
Per Serving (based on 12 servings):
| Nutrient | Amount |
|---|---|
| Calories | 380 |
| Protein | 6g |
| Carbs | 45g |
| Fiber | 2g |
| Sugar | 35g |
| Fat | 20g |
| Saturated Fat | 10g |
| Cholesterol | 45mg |
| Sodium | 350mg |
What’s Good:
- Decent protein from peanut butter
- Calcium from dairy
- Can add vegetables to boost nutrition (if you’re sneaking them in)
What to Know:
- Higher in calories from cream and cheese
- Contains dairy and gluten
- Moderate sodium (use low-sodium cake mix to reduce)
My Take:
Look, this is comfort food with cream and cheese. It’s not a diet recipe. But it’s way better than store-bought cakes, costs less, and I know exactly what’s in it. When I want to make it lighter, I use the half-and-half version and load up on vegetables. But usually? I just eat a reasonable portion and enjoy it.
Final Thoughts
So that’s my go-to chocolate peanut butter poke cake! I’ve probably talked your ear off at this point, but when you make a recipe this often, you have a lot to say about it.
This has saved dessert nights more times than I can count. It’s my answer to “what’s for dessert” when I’m tired, don’t want to bake from scratch, and still want something that tastes really good. My kids are happy, my husband’s happy, and I’m happy because I’m not stressed about cooking.
Make it yours! Try different add-ins, swap in your favorite toppings, adjust the sweetness. The best recipes are the ones you adapt to your family’s tastes.
If you make this, drop a comment and let me know what you think! I love hearing how recipes turn out in your kitchen. And if something doesn’t work, tell me that too—I’m here to help troubleshoot.
Happy baking! And I hope your kitchen smells half as good as mine does right now.
Frequently Asked Questions
Can I use homemade cake mix?
Yes! Any chocolate cake recipe will work. I’ve used my favorite from-scratch chocolate cake recipe, and it turned out great. Just make sure it’s a sponge-like cake that can absorb the filling. Dense cakes like pound cake won’t work as well.
My filling is too runny—what happened?
Usually means you didn’t chill it long enough, or you used too much cream. Let the cake chill for at least 30 minutes. If it’s still runny, add more powdered sugar or refrigerate it longer. The filling should be spreadable but not liquid.
Can I make this ahead for a party?
Absolutely! Make it up to 2 days ahead. Store it in the fridge, covered. It actually tastes better the next day as the flavors meld. I often make it the night before a party to save time.
Why did my topping slide off?
The cake wasn’t chilled enough before adding the topping. Make sure the peanut butter filling is set and the cake is cold. Also, don’t spread the topping too thickly. A thin, even layer works best.
Can I use natural peanut butter?
You can, but it might be runnier. Natural peanut butter separates, so make sure to stir it well before using. If it’s too thin, add more powdered sugar. I prefer conventional peanut butter for consistency.
How do I store leftovers?
Store in an airtight container in the fridge for up to 5 days. Cover with plastic wrap or foil. It stays moist for days. Do not freeze, as the texture changes.
Can I double this recipe?
Yes! Double everything and use a larger baking dish (like a 9×13 inch dish). The cooking times stay the same. I do this when I’m feeding a crowd. Just make sure your dish is big enough for the batter.
Pin This Recipe!
Chocolate Peanut Butter Poke Cake: Easy 5-Ingredient Recipe
- Total Time: 1 hour
- Yield: 12 servings 1x
Description
A moist, rich chocolate poke cake filled with a creamy salty-sweet peanut butter mixture and topped with whipped cream and chocolate chips. This crowd-pleasing dessert is simple to make using a box mix and comes together in under an hour.
Ingredients
- 1 box (15.25 oz) chocolate cake mix (Devil’s Food or Dark Chocolate)
- 1 cup water
- ½ cup vegetable oil
- 3 large eggs
- 1 box (3.4 oz) chocolate pudding mix
- 1 cup creamy peanut butter
- 1 cup heavy cream
- ½ cup powdered sugar
- 1 teaspoon vanilla extract
- 8 oz whipped topping (thawed)
- ½ cup mini chocolate chips
- 4–6 peanut butter cups, chopped (optional)
Instructions
- Preheat oven to 350°F (175°C) and grease a 9×13 inch baking dish.
- In a large bowl, combine cake mix, water, oil, and eggs. Mix on medium speed for 2 minutes until smooth.
- Pour batter into the prepared dish and bake for 25-30 minutes, or until a toothpick inserted in the center comes out clean.
- Let the cake cool in the dish for 10 minutes until warm but not hot.
- Using a fork, poke holes all over the cake surface, about 1 inch apart, ensuring not to go all the way through to the bottom.
- In a medium bowl, whisk together peanut butter, heavy cream, powdered sugar, and vanilla extract until smooth and creamy.
- Pour the peanut butter mixture over the warm cake, allowing it to sink into the holes. Gently spread to cover the surface.
- Refrigerate the cake for at least 30 minutes, or until the peanut butter filling is set.
- Spread the whipped topping evenly over the chilled cake using an offset spatula.
- Sprinkle mini chocolate chips and chopped peanut butter cups on top.
- Slice and serve cold.
Notes
Do not skip the cooling step; poke holes when the cake is warm but not hot. Use creamy peanut butter to prevent clogging holes. Chill the cake thoroughly before adding whipped topping to prevent sliding. Store in the refrigerator for up to 5 days. Do not freeze as the texture of the whipped topping will suffer.
- Prep Time: 30 minutes
- Cook Time: 30 minutes
- Category: Dessert
- Cuisine: American
Nutrition
- Serving Size: 1 slice
- Calories: 380
- Sugar: 35
- Sodium: 350
- Fat: 20
- Saturated Fat: 10
- Carbohydrates: 45
- Fiber: 2
- Protein: 6
Keywords: chocolate peanut butter poke cake, easy dessert, box mix cake, peanut butter filling, crowd-pleaser dessert, quick baking



