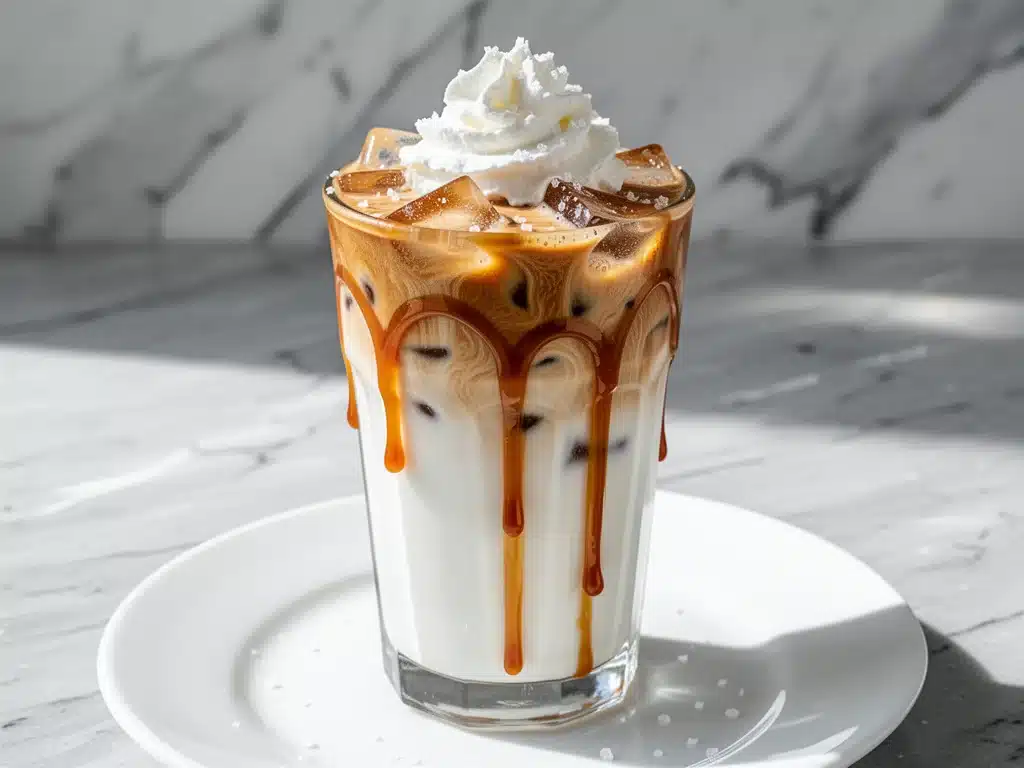
Last October, I stood in line at a popular coffee chain, shivering in the drafty entrance, waiting for a drink that cost $7.50. I wasn’t even that thirsty. I just wanted something sweet and cold to get me through the rest of my workday. When I finally got my iced caramel latte, it was lukewarm, the caramel sauce was a weird, sugary syrup that tasted like it came in a squeeze bottle, and I felt guilty about spending nearly eight dollars on coffee.
I took one sip, walked out, and went home. That night, I decided enough was enough. I wanted the taste of that overpriced coffee shop drink, but I wanted it to taste real. I wanted the deep, buttery richness of actual caramel, not that fake vanilla-bean stuff. I wanted it cold, creamy, and ready in minutes because, let’s be honest, I don’t have time for a complicated barista ritual when I’m trying to finish a report by 5 PM.
So I tried to make a homemade salted caramel sauce. And I failed. spectacularly. The first batch seized up into a rock-hard candy that I almost chipped a tooth on. The second batch was too thin and runny. I spent weeks tweaking the ratio of sugar to butter, experimenting with cream temperatures, and figuring out the exact moment to pull it off the heat. But finally? I cracked the code.
Now, this creamy iced caramel latte with homemade salted caramel sauce is my weekly obsession. It takes three steps. That’s it. Three. And the taste? It’s infinitely better than the coffee shop version. It’s richer, saltier in the best way, and costs about 50 cents to make. If you’re tired of spending a fortune on drinks that taste artificial, you need to try this. It’s the perfect treat for busy weeknights when you need a little pick-me-up without the hassle.
Why You’ll Love This Recipe
I’ve made this iced caramel latte at least thirty times in the last six months. I’ve made it on rainy mornings, stressed-out afternoons, and lazy Sundays. Here’s why it keeps me coming back:
Three Steps, Seriously — I’m not exaggerating. You make the sauce, you brew the coffee, you assemble. If you can boil water and pour, you can do this. I’ve made this while answering emails on my phone. It’s that simple.
Real Caramel, Not Syrup — Most recipes online just tell you to buy caramel sauce. But homemade salted caramel has a depth of flavor that you just can’t get from a jar. It’s buttery, complex, and slightly savory. It changes the game completely.
Ready in 10 Minutes — You might think making caramel takes forever, but it actually cooks faster than brewing a pot of coffee. Once the sauce is done (which takes about 10 minutes, mostly waiting), you just grab some ice, pour your cold coffee, and you’re done. No blending, no frothing, no waiting for a machine to heat up.
Customizable Sweetness — Want it sweeter? Add more sauce. Want it more coffee-forward? Use a stronger brew. Don’t like dairy? Swap the milk for oat or almond. This recipe bends to your mood, not the other way around.
Costs Pennies — The ingredients for this creamy iced caramel latte with homemade salted caramel sauce cost less than $2. That’s a fraction of what you’d pay at a cafe. Plus, you get to keep the jar of leftover caramel sauce for pancakes, ice cream, or just eating with a spoon (don’t judge me).
This is my go-to when I need a treat that feels indulgent but actually makes sense. No fancy equipment, no weird ingredients, just reliable, delicious coffee that makes you feel like a barista.
Ingredients You’ll Need
Here’s the best part: you probably have most of this already. The caramel sauce is just four pantry staples, and the latte is just coffee and milk. I’m particular about a few things, though, so pay attention to the details.
For the Homemade Salted Caramel Sauce
White granulated sugar (1 cup / 200g) — This is your base. Don’t use brown sugar here; it has molasses which will change the flavor profile. You want that clear, golden amber color. I use regular granulated sugar because it melts evenly.
Unsalted butter (½ cup / 113g, cubed) — Use high-quality butter if you can. Since there are only four ingredients, the butter flavor shines through. Cut it into cubes before you start so it melts quickly and evenly when you add it.
Heavy cream (½ cup / 120ml) — This needs to be room temperature or slightly warm. Crucial tip: Do not add cold cream to hot caramel. It will bubble over violently and burn you. I usually microwave it for 30 seconds before adding. Full fat is non-negotiable for that silky texture.
Flaky sea salt (½ teaspoon) — I love Maldon sea salt for this. It adds those nice crunchy bursts of saltiness that cut through the sweetness. Regular table salt works too, but use less of it because it’s denser and saltier.
Vanilla extract (1 teaspoon) — Just a splash to round out the flavors. Make sure it’s real vanilla, not imitation. It adds that warm, comforting aroma.
For the Creamy Iced Caramel Latte
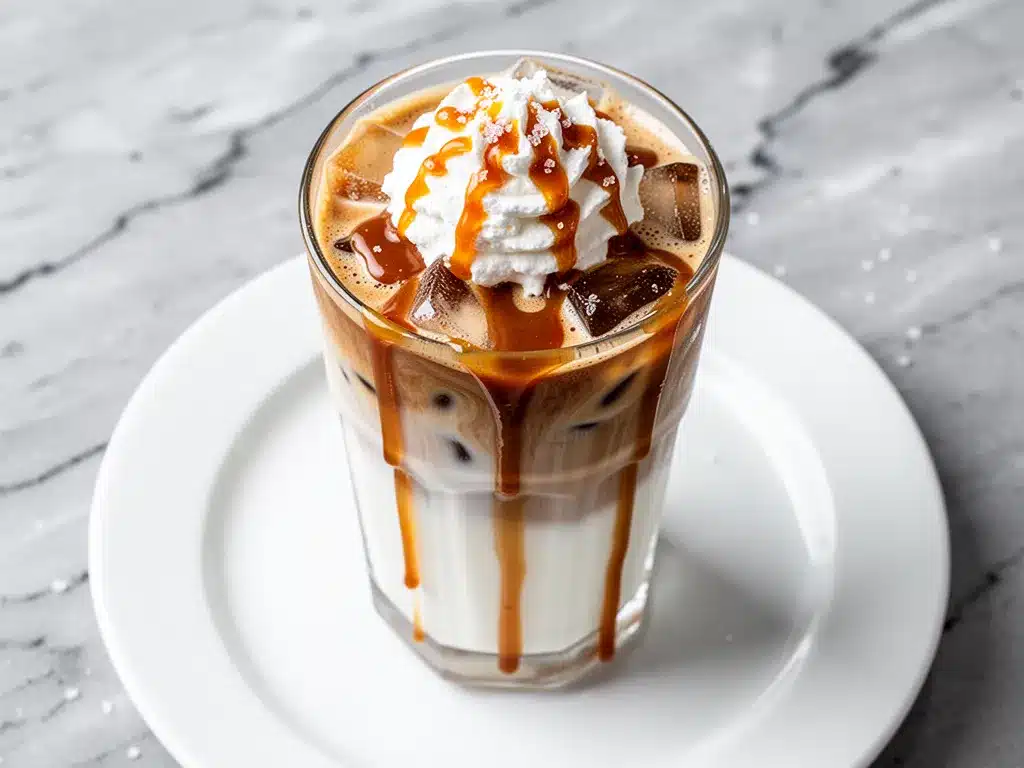
Strong brewed coffee (1 cup / 240ml) — You can use drip coffee, but I prefer cold brew concentrate or espresso shots cooled down. If you use hot brewed coffee, let it cool completely in the fridge first. Hot coffee will melt the ice too fast and water down your drink.
Milk of your choice (¾ cup / 180ml) — Whole milk makes it the creamiest, but oat milk is my personal favorite for that coffee-shop texture. Almond milk works too, though it’s thinner. Dairy-free milks with higher fat content work best.
Ice cubes — Lots of them. You want the drink to stay cold without getting watery immediately.
Extra caramel sauce — For drizzling on top. Don’t skip this. It’s the visual and flavor finisher.
Common Questions About Ingredients
Can I use light cream instead of heavy cream? — You can, but the sauce will be thinner and less rich. It’ll still taste good, but it won’t have that luxurious, pourable consistency. Heavy cream is worth the extra calories for this.
Where do I find flaky sea salt? — Most grocery stores have it in the baking or spice aisle. If you can’t find it, just use regular kosher salt or sea salt, but reduce the amount by half.
Can I make the caramel sauce ahead? — Yes! It keeps in the fridge for up to two weeks in an airtight jar. Reheat it gently in the microwave for 15-20 seconds to loosen it up before using.
Equipment Needed
You don’t need fancy equipment for this. Here’s what I actually use:
Saucepan — A small, heavy-bottomed saucepan is ideal. I use a 2-quart saucepan. Heavy bottom helps distribute heat evenly so the sugar doesn’t burn in spots. Stainless steel or non-stick both work fine.
Whisk — You need a whisk to stir the sugar as it melts and to emulsify the butter and cream. A silicone whisk is nice because it won’t scratch your pan, but a metal whisk works too.
Measuring cups and spoons — Standard stuff. Accuracy matters more here than in baking because the sugar chemistry is precise.
Blender or Shaker Bottle — Optional, but if you want that frothy, creamy texture without an espresso machine, a blender or a mason jar with a lid works great to mix the coffee, milk, and ice.
Jar for storage — A small glass jar (like a mason jar or a reused pasta sauce jar) is perfect for storing your leftover caramel sauce.
Ice cube tray — Obviously. Make sure you have ice ready to go.
High-speed blender — If you want it extra creamy, a blender helps emulsify the milk and coffee. But a whisk and a vigorous shake works too.
That’s it. No fancy espresso machine, no special gadgets. Just basic kitchen tools you already own.
How to Make It: Step-by-Step
Alright, let’s make this! I’m walking you through exactly how I do it, including the little tricks I’ve picked up so you don’t burn your kitchen down.
Step 1: Melt the Sugar (5-7 minutes)
Pour the sugar into your saucepan over medium heat. Do not stir it yet. Just let it sit. You’ll see the sugar start to melt around the edges, turning into a liquid amber color. Use your whisk to gently stir the edges into the center as it melts. Keep whisking constantly. The sugar will look clumpy at first, then turn into a clear, golden liquid. Watch it closely—it goes from perfect to burnt in about 10 seconds.
Step 2: Add the Butter (2 minutes)
Once the sugar is a deep amber color (like an old penny), remove the pan from the heat immediately. Carefully add the cubed butter. It will bubble up aggressively. Whisk it in until the butter is completely melted and incorporated. The mixture might look separated at first, but keep whisking.
Step 3: Whisk in the Cream (2 minutes)
Slowly pour in the warm heavy cream while whisking constantly. Again, it will bubble up, so go slow. Keep whisking until the sauce is smooth and glossy. Return the pan to low heat for just 30 seconds to ensure everything is fully combined, then remove from heat. Stir in the vanilla extract and sea salt. Pour the sauce into your jar and let it cool slightly. It will thicken as it cools.
Step 4: Assemble the Latte (2 minutes)
Fill a tall glass with ice cubes. Pour in your cold brewed coffee or cooled espresso. Add the milk. If you want it extra creamy, you can blend the coffee, milk, and a tablespoon of the caramel sauce together for 10 seconds. If not, just stir it well.
Step 5: Top and Serve
Drizzle a generous amount of your homemade salted caramel sauce over the top of the ice. Use about 2-3 tablespoons for a sweet drink, or less if you prefer it milder. Stir it all together before drinking, or enjoy the layers as they mix. Serve immediately with a straw.
Total Time: About 10 minutes active, plus cooling time for the coffee.
Troubleshooting: If your caramel sauce seizes up and becomes grainy, don’t panic. Add a splash of warm water and heat it gently while whisking. It should come back together. If it’s too thick after cooling, just microwave it for 10 seconds.
Expert Tips & Tricks
Here’s everything I’ve learned from making this dozens of times. These tips will save you from my mistakes.
Watch the Color, Not the Clock — Every stove is different. Your sugar might take 5 minutes, mine might take 8. Don’t set a timer and walk away. Watch the sugar. When it’s the color of amber, pull it. If it looks dark brown, it’s already burnt and will taste bitter.
Warm Your Cream — I cannot stress this enough. Cold cream hitting hot sugar causes a violent reaction. It can splash hot caramel onto your arm. Warm your cream in the microwave for 30 seconds. It’s a small step that prevents a big accident.
Use a Heavy-Bottomed Pan — Thin pans have hot spots that burn sugar instantly. A heavy stainless steel or enamel pan distributes heat evenly. If you only have a thin pan, keep the heat lower and stir more often.
Don’t Stir the Sugar Initially — When you first put the sugar in the pan, let it melt undisturbed. Stirring too early can cause the sugar to crystallize and become grainy. Let it liquefy on its own, then start whisking.
Cool the Coffee First — Hot coffee poured over ice will melt the ice instantly, diluting your drink. Brew your coffee the night before and let it cool in the fridge. Cold brew is even better because it’s naturally less acidic and smoother.
Make a Double Batch of Sauce — The sauce is addictive. I always make double the caramel sauce because I’ll inevitably use some on pancakes or ice cream later. It keeps for weeks in the fridge.
Pro Trick: The Blender Method — For the creamiest texture, blend the coffee, milk, ice, and a spoonful of caramel sauce together. It creates a frothy, milkshake-like consistency that’s incredibly satisfying.
Variations & Substitutions
Once you’ve nailed the basic version, here’s how you can mix it up. I’ve tried all of these.
Decaf Version — Use decaf coffee or cold brew. Perfect for evenings when you want the treat without the caffeine jolt.
Vegan Caramel Latte — Swap the heavy cream in the sauce for coconut cream (the thick part from a can of full-fat coconut milk). Use oat milk or soy milk for the latte. The coconut adds a nice tropical twist that pairs well with the caramel.
Mocha Caramel Latte — Add a tablespoon of cocoa powder or chocolate syrup to the coffee mixture. The combination of chocolate and salted caramel is divine. It’s like a dessert in a glass.
Spiced Caramel Latte — Add a pinch of cinnamon or nutmeg to the caramel sauce while it’s cooking. Or sprinkle cinnamon on top of the ice. It adds a warm, cozy flavor that’s great for fall.
Dirty Caramel Latte — Add a shot of espresso to the cold coffee base for an extra kick. Or add a tablespoon of bourbon to the caramel sauce for a grown-up twist (just skip the bourbon if making for kids).
Lower-Sugar Version — Use less caramel sauce. The sauce itself is sweet, so you can often skip adding extra sweetener to the coffee. Use unsweetened almond milk to reduce calories.
Coconut Oil Caramel — For a dairy-free sauce, swap the butter for coconut oil. It sets firmer in the fridge, so let it sit at room temperature for a few minutes before pouring.
Serving & Storage
How to Serve: I usually serve this straight from the blender or shaker. The condensation on the outside of the glass is part of the experience. Garnish with a drizzle of caramel and maybe a few flakes of sea salt on top for presentation.
Side Dishes: This latte is a treat, so pair it with something savory. A cheesy sausage and egg breakfast casserole is perfect for weekend mornings. Or grab a piece of fluffy buttermilk blueberry pancakes to dip into the leftover caramel sauce.
Storage Instructions:
Caramel Sauce: Store in an airtight jar in the fridge for up to 2 weeks. It will thicken significantly in the fridge. To use, microwave for 15-20 seconds and whisk until smooth. It can also be frozen for up to 3 months.
Leftover Latte: Don’t store the assembled latte. The ice will melt and water it down. Store the coffee and milk separately in the fridge for up to 3 days. Assemble fresh when you’re ready to drink.
Reheating: You don’t need to reheat the latte—it’s an iced drink! But if you want a hot version, just heat the coffee and milk together and pour over the table. The caramel sauce can be heated and poured over the top.
Nutrition Information
I’m not a nutritionist, but here’s the breakdown if you’re tracking. This is a treat, so enjoy it guilt-free!
Per Serving (based on 1 latte with 2 tbsp caramel sauce):
– Calories: 280
– Protein: 6g
– Carbs: 35g
– Fiber: 0g
– Sugar: 32g
– Fat: 14g
– Saturated Fat: 8g
– Cholesterol: 35mg
– Sodium: 180mg
What’s Good: The caramel sauce provides a quick energy boost. The coffee has antioxidants. You control the sugar amount by adjusting the sauce.
What to Know: This is higher in sugar and fat due to the cream and caramel. If you’re watching your intake, use less sauce or swap to oat milk. It’s not a diet food, but it’s homemade, so you know exactly what’s in it.
Final Thoughts
So that’s my go-to creamy iced caramel latte with homemade salted caramel sauce! I’ve probably talked your ear off at this point, but when you make a recipe this often, you have a lot to say about it.
This has saved my afternoons more times than I can count. It’s my answer to “I need a treat” when I’m tired, don’t want to go out, and still want something that tastes really good. My kids are happy (they love the sweetness), my husband’s happy (he loves the coffee kick), and I’m happy because I’m not spending $8 on a drink that’s mostly ice.
Make it yours! Try different milks, add spices, or just enjoy the simplicity. The best recipes are the ones you adapt to your tastes. If you make this, drop a comment and let me know what you think! I love hearing how recipes turn out in your kitchen. And if something doesn’t work, tell me that too—I’m here to help troubleshoot.
Happy brewing! And I hope your kitchen smells half as good as mine does right now.
Frequently Asked Questions
Can I make the caramel sauce ahead of time?
Absolutely. In fact, I recommend it. The sauce tastes even better after it’s had a day to meld in the fridge. Store it in an airtight jar for up to two weeks. If it gets too thick, just microwave it for 15 seconds to loosen it up.
Why did my caramel seize up?
Usually, this happens if the cream was too cold or if you added it too quickly. The shock of cold liquid hitting hot sugar causes it to harden. Always warm your cream first, and add it slowly while whisking constantly. If it seizes, add a tablespoon of warm water and heat gently while whisking—it should come back together.
Can I use cold brew concentrate instead of brewed coffee?
Yes! Cold brew is actually better because it’s less acidic and smoother. If you use concentrate, you might want to dilute it with a little water or milk before assembling the latte, depending on how strong it is.
Is there a way to make this without a stove?
You can buy high-quality caramel sauce, but the homemade version is so easy and tastes way better. If you absolutely can’t use a stove, try using a microwave-safe bowl to melt the sugar in short bursts, stirring often. It’s trickier but possible.
Can I freeze the iced latte?
Don’t freeze the assembled drink. The ice will melt and separate the milk. You can freeze the coffee in ice cube trays and use those instead of regular ice cubes. This way, as they melt, they just add more coffee flavor instead of water.
How sweet is this drink?
It’s moderately sweet. The caramel sauce is the main source of sugar. If you prefer less sweet, use only 1 tablespoon of sauce per drink. You can also taste the sauce before adding it—if it’s very sweet, use less. The salt helps balance the sweetness, so don’t skip that!
Can I make this with decaf coffee?
Yes! This recipe works perfectly with decaf. In fact, it’s great for evening treats when you want the flavor without the caffeine. Just make sure your coffee is cold before assembling.
Pin This Recipe!

Creamy Iced Caramel Latte with Homemade Salted Caramel Sauce
- Total Time: 10 minutes
- Yield: 1 serving 1x
Description
A simple, three-step recipe for a rich iced caramel latte using homemade salted caramel sauce. This drink is ready in 10 minutes, costs pennies to make, and offers a superior taste compared to coffee shop versions.
Ingredients
- 1 cup (200g) white granulated sugar
- 1/2 cup (113g) unsalted butter, cubed
- 1/2 cup (120ml) heavy cream, room temperature or slightly warm
- 1/2 teaspoon flaky sea salt
- 1 teaspoon vanilla extract
- 1 cup (240ml) strong brewed coffee, cooled
- 3/4 cup (180ml) milk of choice (whole, oat, or almond)
- Ice cubes
- Extra caramel sauce for drizzling
Instructions
- Pour sugar into a heavy-bottomed saucepan over medium heat. Let it melt undisturbed until it turns into a clear, golden amber liquid, then gently whisk the edges into the center.
- Once the sugar is deep amber, remove the pan from heat. Carefully add the cubed butter (it will bubble aggressively) and whisk until completely melted and incorporated.
- Slowly pour in the warm heavy cream while whisking constantly. Return to low heat for 30 seconds to combine, then remove from heat. Stir in vanilla extract and sea salt. Pour into a jar to cool.
- Fill a tall glass with ice cubes. Pour in the cold brewed coffee and milk.
- Drizzle 2-3 tablespoons of the homemade salted caramel sauce over the top. Stir to combine or enjoy layered, and serve immediately.
Notes
Ensure heavy cream is warm before adding to hot caramel to prevent violent bubbling. If caramel seizes, add a splash of warm water and whisk gently. Coffee must be cooled completely to prevent melting ice too quickly. Caramel sauce keeps in the fridge for up to 2 weeks.
- Prep Time: 5 minutes
- Cook Time: 5 minutes
- Category: Beverage
- Cuisine: American
Nutrition
- Serving Size: 1 tall glass
- Calories: 280
- Sugar: 32
- Sodium: 180
- Fat: 14
- Saturated Fat: 8
- Carbohydrates: 35
- Protein: 6
Keywords: iced caramel latte, homemade caramel sauce, salted caramel, coffee recipe, easy dessert drink, vegan option, cold brew



