
It was 11:30 PM on a Tuesday. My husband had just walked in the door, exhausted, and the only thing I could think about was finding something fast, cheap, and aggressively flavorful to make us feel alive. We had leftover fried chicken from Sunday dinner—three pieces, cold, sitting in the fridge looking sad—and a jar of Nashville hot seasoning I’d bought on a whim three months ago and completely forgotten about.
So I did the only logical thing. I threw the cold chicken into a skillet with some oil, let it crisp up, and then dumped half the seasoning jar on top. I expected it to be okay. Maybe a little spicy. What I got was a flavor bomb that woke up my entire nervous system. It was crispy, it was fiery, it was messy, and it was absolutely perfect.
That accidental midnight snack turned into an obsession. I spent the next two weeks testing different methods, trying to recreate that specific crunch and heat profile that you usually only get at crowded, sticky-floored joints in Nashville. I tried cornstarch, I tried flour, I tried buttermilk, and I finally landed on a method that delivers Crispy Nashville Hot Chicken Sandwiches better than takeout every single time.
The secret isn’t just the spice; it’s the technique. Most people make this wrong by adding the oil too early or skipping the vinegar kick. But once you get the balance right—crunchy crust, creamy slaw, and that smoky, sweet, fiery glaze—you’ll never order delivery again. These sandwiches are my go-to for date nights, busy weeknights, and honestly, just because I like the way my kitchen smells when I make them.
Why You’ll Love This Recipe
I’ve made these sandwiches at least a dozen times since that Tuesday night, and they’ve earned a permanent spot in our dinner rotation. Here’s why they’re worth the extra 20 minutes of active cooking:
Unbeatable Crunch — We’re talking restaurant-quality crispiness. I use a mix of cornstarch and flour, which keeps the coating from getting soggy even when you add the wet hot sauce. I’ve tried regular fried chicken, and it just doesn’t hold up. This method stays crunchy for days.
Actual Heat, Not Just Flavor — A lot of “hot chicken” recipes taste more like paprika dust. This one has real kick. The cayenne and brown sugar glaze hits your tongue with warmth that lingers. It’s spicy in a way that makes you reach for a cold drink, not a glass of water.
Ready in 30 Minutes — If you buy pre-cut chicken thighs (which I highly recommend), you’re looking at 15 minutes of prep and 15 minutes of cooking. That’s faster than waiting for a delivery driver to find your apartment. I’ve timed it. It’s fast.
Comfort Food, Elevated — It’s messy. It’s greasy (in the best way). It’s served with a cool, tangy coleslaw that cuts through the heat. It feels like a treat, but it’s actually made from pantry staples. Plus, if you’re looking for other easy meal ideas, these pair perfectly with a simple fruit and cheese snack box for a balanced meal.
Ingredients You’ll Need
Here’s the thing: you don’t need anything fancy. I’m particular about three things here—the oil, the spice blend, and the cheese—but otherwise, this is standard grocery store stuff.
For the Chicken and Coating
Chicken thighs (2 pounds / 900g, boneless, skinless) — Thighs are non-negotiable. Breast meat dries out too fast under high heat and heavy coating. Thighs stay juicy. If you must use breast, pound it thin and watch the clock.
Buttermilk (1 cup / 240ml) — This tenderizes the meat. If you’re out, mix 1 cup milk with 1 tablespoon lemon juice or white vinegar and let it sit for 10 minutes. It’s the same chemical reaction.
All-purpose flour (1 cup / 120g) — The base of the crust. Don’t use self-rising; you don’t need the extra leavening.
Cornstarch (½ cup / 60g) — This is the secret weapon. It creates that shatteringly crisp texture that flour alone can’t achieve. I always keep a bag in my pantry just for this.
Egg (1 large) — Acts as the glue between the buttermilk and the flour. Whisk it well.
Vegetable or Canola oil (2-3 cups / 480-720ml) — You need enough to shallow fry. Peanut oil is great if you have it, but vegetable oil works fine. Don’t use olive oil; it smokes too much.
For the Nashville Hot Glaze

Brown sugar (2 tablespoons) — This balances the heat and gives that signature dark, sticky look. Light brown is fine, but dark adds more molasses depth.
Cayenne pepper (1-2 tablespoons) — This is where you control the heat. Start with 1 tablespoon if you’re sensitive to spice. I use 2 for maximum burn. Don’t skip it.
Smoked paprika (1 teaspoon) — Adds that smoky backend flavor. Regular paprika is too sweet; you want the depth.
Garlic powder (1 teaspoon) — Essential for savory depth.
Black pepper (½ teaspoon) — Freshly cracked is best.
Hot sauce (2 tablespoons) — Frank’s RedHot or any cayenne-based sauce. It adds vinegar tang and more heat.
Butter (2 tablespoons) — Fat carries flavor. Melted butter helps the spice paste stick to the chicken.
For the Sandwich Assembly
Brioche or Potato Rolls (4 large) — Brioche is sweet and soft, which contrasts nicely with the spicy chicken. Potato rolls are chewier. Avoid cheap white sandwich rolls; they’ll fall apart.
Cheddar cheese (4 slices) — Sharp cheddar cuts through the richness. I like to put it on the bottom bun so it melts slightly from the hot chicken.
Coleslaw (2 cups) — Plain, creamy coleslaw. No dressing needed; the slaw adds the cool, crunchy element. If you’re making this for kids or want a lighter option, a simple chicken Caesar wrap might be a better fit, but for the real deal, you need this slaw.
Equipment Needed
You don’t need a deep fryer. In fact, I’d argue you don’t want one. Here’s what I actually use:
Heavy-bottomed skillet or Dutch oven — Cast iron is ideal because it holds heat evenly. If the oil temperature drops too much, your chicken gets greasy. A heavy pot prevents this.
Candy or deep-fry thermometer — This is non-negotiable. I’ve fried chicken by eye before, and it’s inconsistent. You want the oil at 350°F (175°C). If it’s too hot, the outside burns before the inside cooks. If it’s too cool, the chicken soaks up oil like a sponge.
Wire rack — Place your fried chicken on a wire rack set over a baking sheet. This lets air circulate so the bottom doesn’t get soggy. I also use it to keep the chicken warm in the oven while I fry the rest.
Small saucepan — For melting the butter and mixing the glaze. You don’t want to burn the spices in the hot frying oil.
Tongs — For flipping the chicken safely. Your fingers are not designed for splattering hot oil.
How to Make It: Step-by-Step
Alright, let’s make this! I’m walking you through exactly how I do it, including the little tricks I’ve picked up so you don’t end up with a greasy mess.
Step 1: Marinate the Chicken (15-30 minutes)
Put your chicken thighs in a bowl or zip-top bag. Pour the buttermilk over them. Make sure they’re fully submerged. If you’re in a rush, let it sit for 15 minutes. If you have time, let it sit for up to 24 hours in the fridge. The longer it sits, the more tender and flavorful the meat gets. I usually do this the morning of if I’m planning dinner.
Step 2: Mix the Dredge
In a large shallow dish (a pie plate works great), whisk together the flour, cornstarch, 1 teaspoon salt, ½ teaspoon black pepper, and 1 teaspoon paprika. This is your dry coating. Keep it separate from the buttermilk.
Step 3: Heat the Oil
Pour about 1-2 inches of oil into your skillet or Dutch oven. Heat it over medium-high heat until it reaches 350°F (175°C). This takes about 10-15 minutes. Don’t skip the thermometer check. If you don’t have one, stick a wooden chopstick in the oil; if bubbles form around it steadily, it’s ready.
Step 4: Dredge and Fry
Take a chicken thigh out of the buttermilk, letting the excess drip off. Press it firmly into the flour mixture. Make sure it’s coated on all sides, and press down hard to create little peaks and crags. Those crags are where the crunch lives. Shake off any loose flour.
Carefully lower the chicken into the hot oil. Don’t overcrowd the pan. Fry 2 pieces at a time. Cook for 5-6 minutes per side, or until the coating is deep golden brown and the internal temperature reaches 165°F (74°C). Flip once. The oil should bubble vigorously around the chicken.
Remove the chicken and place it on the wire rack. Keep it warm in a 200°F (95°C) oven if you’re frying in batches.
Step 5: Make the Nashville Glaze
While the chicken rests, melt the butter in a small saucepan over low heat. Stir in the brown sugar, cayenne pepper, smoked paprika, garlic powder, and black pepper. Whisk until it forms a thick, dark paste. Stir in the hot sauce. This mixture should be dark red and smell smoky and sweet.
Step 6: Coat the Chicken
This is the critical step. While the chicken is still hot from the fryer, brush or spoon the glaze generously over each piece. You want every nook and cranny covered. The heat from the chicken helps the glaze stick. If the chicken is cold, the glaze will slide off.
Step 7: Assemble the Sandwich
Toast your brioche buns lightly. Place a slice of cheddar on the bottom bun. Add a scoop of coleslaw. Place the hot chicken on top. Cap with the top bun. Serve immediately. The contrast of the hot, spicy chicken and the cool, creamy slaw is everything.
Expert Tips & Tricks
Here’s everything I’ve learned from making this dozens of times. These tips will save you from my mistakes.
Maintain Oil Temperature
The biggest mistake people make is dropping the temperature when adding the chicken. If your oil drops below 325°F, the chicken absorbs oil and gets greasy. Let the oil come back to 350°F between batches. It takes patience, but it’s worth it.
Don’t Skip the Cornstarch
I know it feels like an extra ingredient, but cornstarch creates that shatteringly crisp crust that flour alone can’t achieve. It also absorbs moisture, keeping the coating from getting soggy under the wet glaze.
Use Thighs, Not Breasts
I’ve tried breasts. They dry out. Thighs have more fat and connective tissue, which keeps them juicy even after frying and glazing. If you’re watching calories, use breasts, but know that the texture won’t be the same.
Glaze While Hot
The glaze needs the heat from the chicken to adhere. If you let the chicken cool completely, you’ll need to reheat it slightly or the glaze will just sit on top and slide off. Hot chicken, cold slaw, warm bun. That’s the texture triangle.
Make Your Own Slaw
Store-bought slaw is okay, but homemade is better. Toss shredded cabbage and carrots with a little mayo, vinegar, sugar, and salt. It’s ready in 5 minutes and tastes fresher. If you’re short on time, a quick mozzarella pizza pocket snack might be a better side, but for this sandwich, fresh slaw is key.
Variations & Substitutions
Once you’ve nailed the basic version, here’s how you can mix it up. I’ve tried all of these.
Mild Version
Reduce the cayenne to 1 teaspoon and use sweet paprika instead of smoked. The brown sugar will still provide flavor. Good for kids or spice-averse adults.
Spicy Version
Add ½ teaspoon of crushed red pepper flakes to the glaze. Or, add a dash of hot sauce directly into the buttermilk marinade for internal heat.
Chicken Tenders
You can use chicken strips instead of thighs. They cook faster (3-4 minutes per side), so watch the clock. The coating might be thinner, but it’s still delicious.
Gluten-Free
Substitute the flour with a 1:1 gluten-free baking blend. Cornstarch is naturally gluten-free. Make sure your hot sauce and spices are certified GF.
Vegan Version
Use a plant-based chicken alternative (like Gardein or Beyond). Use vegan buttermilk (soy milk + vinegar) and vegan butter for the glaze. The technique remains the same.
Serving & Storage
How to Serve:
I usually serve this straight from the skillet at the dinner table—it looks rustic and stays warm. But here are other ways I’ve enjoyed it:
Side Dishes:
- French Fries — Classic pairing. Crispy fries match the chicken texture.
- Coleslaw — Essential for cooling the palate.
- Pickles — Dill pickle chips add acidity and crunch.
- Corn on the Cob — Buttered corn is a sweet, comforting contrast.
Storage Instructions:
Refrigerator: Store leftover chicken in an airtight container for up to 3 days. The glaze will soften the crust, which is unfortunate but inevitable.
Reheating: Do not microwave. It will make the coating soggy. Reheat in an air fryer at 375°F for 3-4 minutes to restore crispiness. Or, bake in a 400°F oven for 10 minutes.
Freezing: You can freeze the fried chicken before glazing. Thaw and reheat in the oven, then glaze while hot. Freezing after glazing is not recommended; the moisture from the glaze will make the crust mushy when thawed.
Nutrition Information
I’m not a nutritionist, but here’s the breakdown if you’re tracking. This is indulgent food, so enjoy it mindfully.
Per Serving (1 sandwich with slaw, based on 4 servings):
- Calories: 680
- Protein: 32g
- Carbs: 55g
- Fiber: 3g
- Fat: 35g
- Sodium: 850mg
What’s Good:
- High protein from the chicken
- Contains vegetables from the slaw
What to Know:
- High in calories and fat from frying and butter
- High sodium from the seasoning and hot sauce
My Take:
Look, this is comfort food. It’s not a salad. But it’s way better than takeout, costs less, and I know exactly what’s in it. When I want to make it lighter, I bake the chicken instead of frying it (use cooking spray and bake at 400°F for 20 minutes), and I use a light mayo slaw. But usually? I just eat a reasonable portion and enjoy it.
Final Thoughts
So that’s my go-to Crispy Nashville Hot Chicken Sandwiches! I’ve probably talked your ear off at this point, but when you make a recipe this often, you have a lot to say about it.
This has saved weeknight dinners more times than I can count. It’s my answer to “what’s for dinner” when I’m tired, don’t want takeout, and still want something that tastes really good. My kids are happy (if they can handle the heat), my husband’s happy, and I’m happy because I’m not stressed about cooking.
Make it yours! Try different add-ins, swap in your favorite vegetables, adjust the garlic (though more is always better in my opinion). The best recipes are the ones you adapt to your family’s tastes. And if you’re looking for a sweet treat to follow this spicy meal, these cinnamon French toast sticks are a perfect way to end the night.
If you make this, drop a comment and let me know what you think! I love hearing how recipes turn out in your kitchen. And if something doesn’t work, tell me that too—I’m here to help troubleshoot.
Happy cooking! And I hope your kitchen smells half as good as mine does right now.
Frequently Asked Questions
Can I use chicken breast instead of thighs?
You can, but thighs are much more forgiving. Breast meat dries out quickly under high heat. If you use breast, pound it to an even thickness (about ½ inch) and watch the cooking time closely. It will cook faster, around 4-5 minutes per side. You might lose some juiciness, but the flavor will still be great.
Why is my coating not crispy?
Usually, this happens for two reasons: the oil wasn’t hot enough, or you didn’t let the chicken rest on a wire rack. If the oil is too cool, the chicken absorbs oil instead of crisping. If you put the chicken on a plate lined with paper towels, the steam gets trapped and makes the bottom soggy. Always use a wire rack.
Can I make this ahead for a party?
Sort of. You can fry the chicken up to 2 hours ahead and keep it warm in a 200°F oven on a wire rack. Reheat in a 375°F oven for 10 minutes to crisp it back up before glazing. Do not glaze it ahead of time; the glaze will make the crust soggy. Glaze it right before serving.
How do I make it less spicy?
Reduce the cayenne pepper in the glaze to 1 teaspoon or even ½ teaspoon. You can also add more brown sugar to balance the heat. The smoked paprika and garlic powder will still give you great flavor without the burn. For kids, serve the glaze on the side so they can dip if they want.
Can I bake this instead of frying?
Yes, but the texture will be different. It won’t be as crispy. To bake, place the dredged chicken on a wire rack over a baking sheet. Spray lightly with cooking oil spray. Bake at 400°F for 20-25 minutes, flipping halfway, until internal temperature reaches 165°F. The crust will be more bread-like than crunchy.
What type of hot sauce should I use?
Frank’s RedHot is the traditional choice for Nashville hot chicken because it’s cayenne-based and has that specific vinegar tang. You can use any cayenne-based hot sauce, but avoid garlic-heavy sauces like Cholula, as they will change the flavor profile. Stick to the classics for authenticity.
How long does the coleslaw last?
Homemade coleslaw lasts 3-4 days in the refrigerator. The flavors actually meld and get better after a day. If you’re making it ahead, keep it in an airtight container. Give it a good stir before serving to redistribute the dressing.
Pin This Recipe!
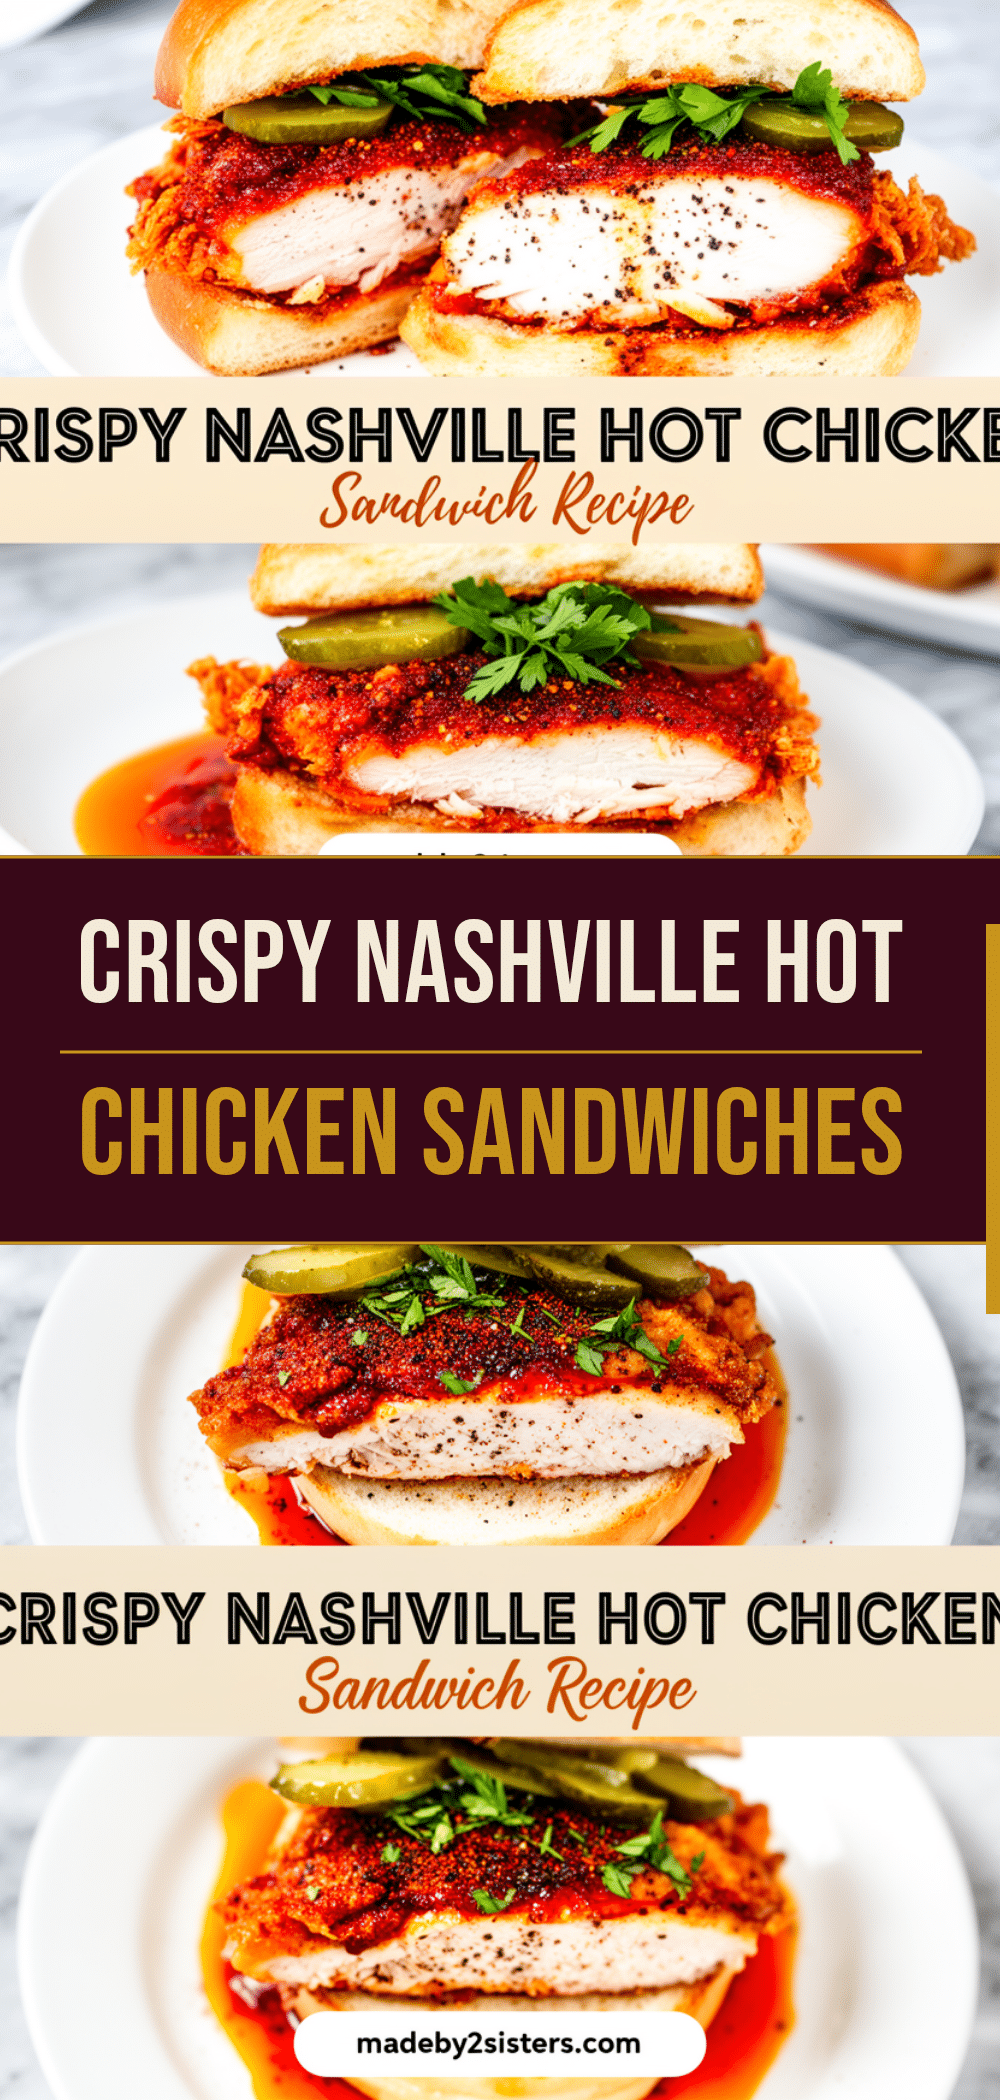

Crispy Nashville Hot Chicken Sandwiches
- Total Time: 30 minutes
- Yield: 4 servings 1x
Description
A fast, flavorful, and crispy Nashville-style hot chicken sandwich featuring a buttermilk-marinated thigh, a cornstarch-flour dredge, and a fiery brown sugar-cayenne glaze, served on a brioche bun with cheddar and coleslaw.
Ingredients
- 2 pounds boneless, skinless chicken thighs
- 1 cup buttermilk
- 1 cup all-purpose flour
- 1/2 cup cornstarch
- 1 large egg
- 2–3 cups vegetable or canola oil (for frying)
- 1 teaspoon salt
- 1 teaspoon paprika
- 1/2 teaspoon black pepper
- 2 tablespoons brown sugar
- 1–2 tablespoons cayenne pepper
- 1 teaspoon smoked paprika
- 1 teaspoon garlic powder
- 2 tablespoons hot sauce (e.g., Frank’s RedHot)
- 2 tablespoons butter
- 4 large brioche or potato rolls
- 4 slices sharp cheddar cheese
- 2 cups creamy coleslaw
Instructions
- Marinate chicken thighs in buttermilk for 15-30 minutes (or up to 24 hours in the fridge).
- In a shallow dish, whisk together flour, cornstarch, salt, 1/2 teaspoon black pepper, and 1 teaspoon paprika.
- Heat oil in a heavy-bottomed skillet or Dutch oven to 350°F (175°C).
- Remove chicken from buttermilk, letting excess drip off, then press firmly into the flour mixture to coat all sides, creating crags for crunch.
- Fry chicken in batches (2 pieces at a time) for 5-6 minutes per side until golden brown and internal temperature reaches 165°F. Place on a wire rack to drain.
- In a small saucepan, melt butter over low heat. Stir in brown sugar, cayenne, smoked paprika, garlic powder, and remaining black pepper to form a paste. Whisk in hot sauce.
- While chicken is still hot, brush or spoon the glaze generously over each piece.
- Toast brioche buns lightly. Place cheddar on the bottom bun, add coleslaw, top with glazed chicken, and cap with the top bun.
- Serve immediately.
Notes
Maintain oil temperature at 350°F to ensure crispiness. Use chicken thighs for juiciness; if using breasts, pound thin and cook for 4-5 minutes per side. Glaze chicken while hot to help the sauce adhere. Do not microwave leftovers; reheat in an air fryer or oven to restore crispness.
- Prep Time: 15 minutes
- Cook Time: 15 minutes
- Category: Main Course
- Cuisine: American
Nutrition
- Serving Size: 1 sandwich with cole
- Calories: 680
- Sodium: 850
- Fat: 35
- Carbohydrates: 55
- Fiber: 3
- Protein: 32
Keywords: Nashville hot chicken, chicken sandwich, spicy chicken, fried chicken, brioche bun, coleslaw, comfort food, easy dinner, 30 minute meal



