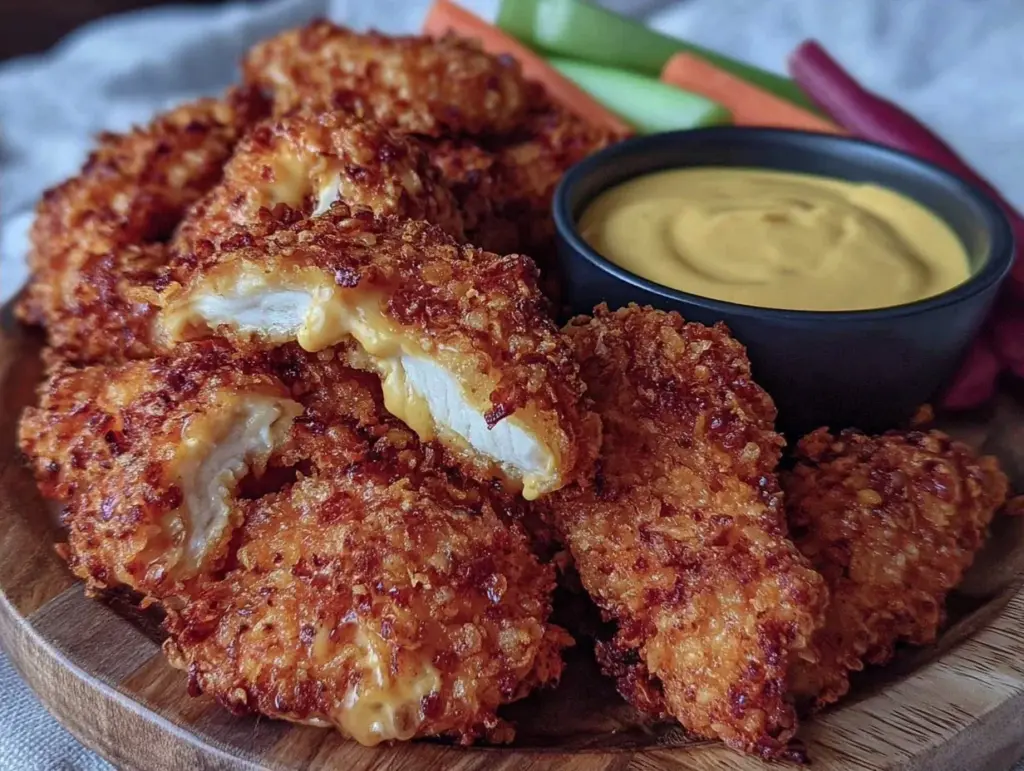
I have a confession to make. For years, I was the person who would order takeout chicken tenders instead of making dinner. Not because I was lazy—though, let’s be honest, some nights I definitely am—but because I genuinely believed that air-fried chicken couldn’t compete with the real thing. You know the real thing: golden, shattering-crisp, hot grease, the kind of tenders you get at a county fair or that greasy spoon diner. The air fryer version always felt… sad. Doughy. Like a chicken strip that had given up on life.
Then, about six months ago, I had a sudden, desperate craving for those diner tenders. I didn’t want to order out. I didn’t want to heat up the stove and deal with a pan of oil that would take twenty minutes to cool down. So, I threw some breaded chicken strips into my air fryer, set it for 20 minutes, and waited for disappointment.
What came out was not disappointment. It was magic.
Actually, it was just really good technique. But it felt like magic. The outside was shatteringly crisp. The inside was juicy. And it took less time than it takes to scroll through delivery apps. Since then, I’ve made these Extra-Crispy Air Fryer Chicken Tenders at least once a week. They’ve saved me from ordering Uber Eats on nights when I’m too tired to cook but still refuse to eat cereal for dinner. If you’ve been skeptical about your air fryer’s ability to handle breading, this recipe is your turning point. It’s the one trick that changes everything.
Why You’ll Love This Recipe
There are a lot of chicken tender recipes out there. But most of them fall into one of two camps: the “healthy” version that tastes like cardboard, or the “fried” version that leaves you with a greasy mess and a conscience full of regret. This recipe sits perfectly in the middle. It’s indulgent without being heavy, fast without being processed, and it actually tastes like the good stuff.
Here’s why this has become my go-to weeknight hero:
Lightning Fast from Freezer to Table — Seriously, if you can boil water, you can make this. From start to finish, it takes about 20 minutes. I’m talking 5 minutes of prep, 15 minutes of cooking. I’ve made this after getting home from work at 7:30 PM, and we were eating by 7:55. That’s not a typo.
Actually Crispy (Not Just “Dry”) — I know what you’re thinking. “Air fryer breading gets hard.” It doesn’t, if you do it right. We’re using a specific breading technique that creates a craggy, crunchy exterior that stays crisp for days (okay, maybe two days, but still). It’s not just dry chicken; it’s textured, golden, and satisfying.
Pantry-Friendly Ingredients — You don’t need fancy spices or obscure flours. You probably have the base ingredients already: chicken, flour, eggs, and breadcrumbs. The secret is in the seasoning blend, which is just salt, pepper, garlic powder, and paprika. Simple. Effective. No special trips to the store.
Less Mess, More Joy — No splattering oil. No lingering smell of fried food in your house for three days. Just clean counters and happy kids. My husband loves that he doesn’t have to help me clean up a grease-covered stovetop afterward.
Budget-Smart — Chicken tenders are expensive at the grocery store, but buying a whole chicken breast and cutting it yourself saves you money. Plus, these freeze beautifully. I make a double batch on Sundays so I have quick lunches for the rest of the week.
This is my answer to “What’s for dinner?” when I’m tired, broke, or just don’t feel like cooking. It’s reliable. It’s delicious. And it makes everyone at the table happy.
Ingredients You’ll Need
Here’s the best part: you probably have most of this already. I’m particular about a few things here, but mostly, this is standard kitchen stuff. I’ll tell you exactly why each ingredient matters.
Chicken Breasts (2 large, about 1.5 lbs / 680g) — I buy boneless, skinless chicken breasts. Look for ones that are relatively uniform in size so they cook evenly. If they’re huge, pound them down. If they’re tiny, trim them. You want strips that are about 1 inch wide and 1/2 inch thick.
All-Purpose Flour (1 cup / 120g) — This is the first layer of the breading. It helps the egg stick to the chicken. Don’t skip it. It creates that initial crust that holds everything together.
Eggs (2 large, beaten) — The glue. Whisk them well with a fork until they’re completely smooth. No chunks of white or yolk. You want a uniform liquid bed for the breadcrumbs.
Panko Breadcrumbs (2 cups / 160g) — This is the secret weapon. Regular breadcrumbs are fine, but Panko? Panko is jagged and airy. It creates more surface area for crisping. It’s lighter, crunchier, and holds seasoning better. I always keep a box in my pantry specifically for this reason. Trust me on this one.
Garlic Powder (2 teaspoons) — Not fresh garlic. Powder. It distributes evenly and doesn’t burn in the air fryer. Fresh garlic will turn black and bitter before the chicken is cooked.
Smoked Paprika (1 teaspoon) — This gives it that “fried” flavor. Regular paprika is sweet, but smoked paprika adds a depth that mimics the taste of oil-frying. It’s subtle but essential.
Cayenne Pepper (1/2 teaspoon, optional) — Just a pinch. It adds a warm background heat without making it spicy. If you’re sensitive to spice, skip it or use less. If you like a kick, go for it.
Salt (1 teaspoon, plus more for seasoning) — Don’t be shy. The breading needs salt to taste good. Taste it before you cook. It should taste slightly salty on its own.
Cooking Spray — Olive oil or avocado oil spray. This is crucial. It helps the breadcrumbs brown and crisp up. Without it, they stay pale and soft.
Optional Add-ins:
– Parmesan Cheese (1/4 cup, grated) — Mix this into the Panko for a nutty, savory crust.
– Dried Parsley (1 teaspoon) — Adds color and a fresh herbal note.
Equipment Needed
You don’t need fancy equipment for this. Here’s what I actually use.
Air Fryer — Obviously. I use a 5.8-quart basket style. If you have a smaller one, you’ll need to cook in batches. Do not overcrowd the basket. This is the most common mistake people make.
Three Shallow Bowls — You need three for the dredging station. One for flour, one for egg, one for Panko. Glass or ceramic works best. I use Pyrex mixing bowls because they don’t slide around.
Whisk — For beating the eggs. A fork works, but a whisk makes it smoother.
Pastry Brush or Spray Bottle — For applying the oil. I prefer a spray bottle for even coverage, but cooking spray works fine too.
Tongs — For turning the chicken. Metal tongs are best. They’re sturdy and easy to clean.
Cutting Board and Knife — For trimming the chicken. Make sure your knife is sharp. Dull knives slip and are dangerous.
Wire Rack (Optional) — If your air fryer basket doesn’t have holes, a small wire rack can help air circulate underneath. But most modern air fryers are fine without it.
How to Make It: Step-by-Step
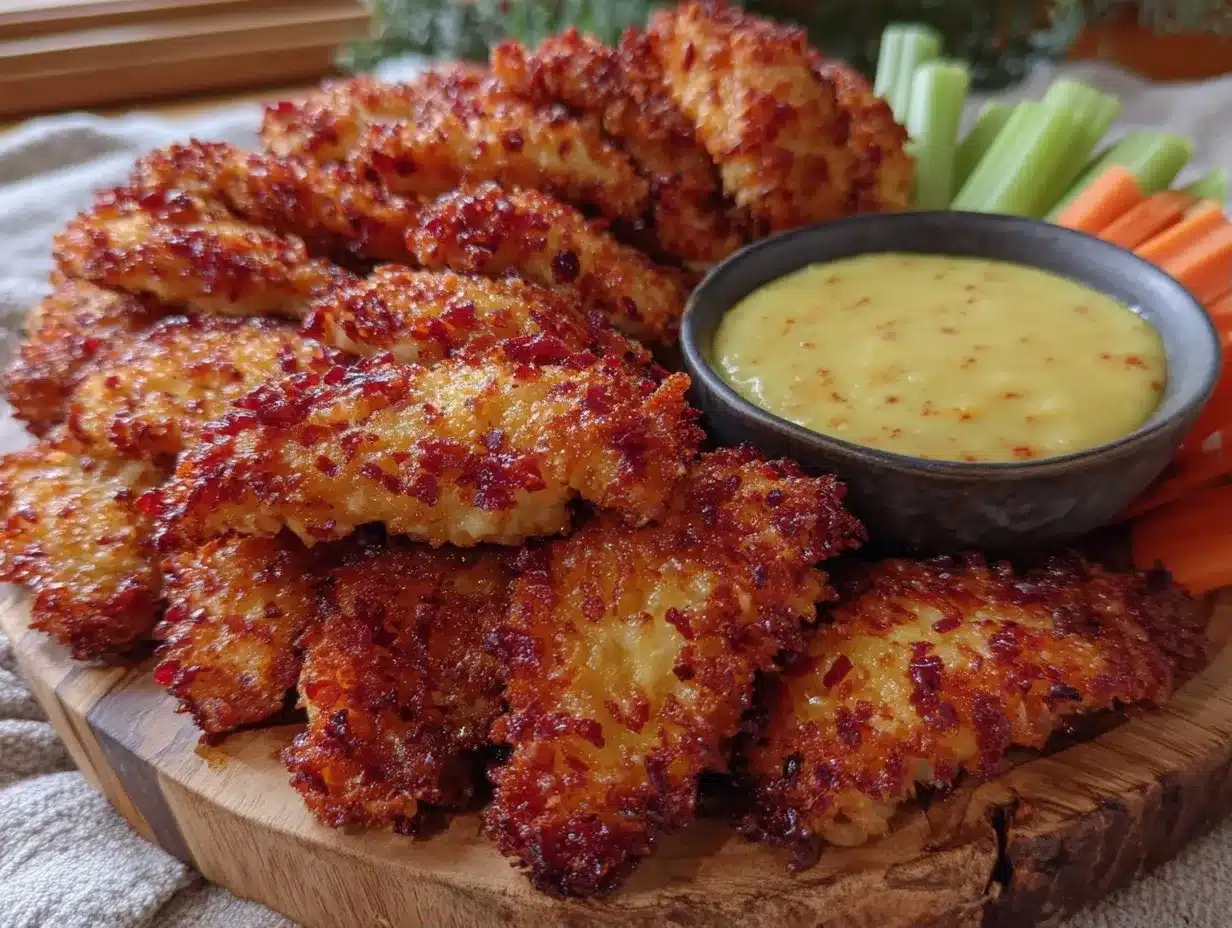
Alright, let’s make this! I’m walking you through exactly how I do it, including the little tricks I’ve picked up. The key here is the dredging station. Set it up before you start cooking chicken. It makes the process smooth and prevents cross-contamination.
Step 1: Prep the Chicken (5 minutes)
Take your chicken breasts and pat them dry with paper towels. Moisture is the enemy of crispiness. If the chicken is wet, the breading won’t stick. Slice each breast into strips that are about 1 inch wide. If the breast is thick, slice it horizontally to make thinner cutlets. You want uniform thickness so they cook evenly. Season the raw chicken strips lightly with salt and pepper.
Step 2: Set Up Your Dredging Station (2 minutes)
Arrange three shallow bowls in a line.
Bowl 1: All-purpose flour.
Bowl 2: Beaten eggs.
Bowl 3: Panko breadcrumbs mixed with garlic powder, smoked paprika, cayenne, and salt.
Mix the dry ingredients in Bowl 3 thoroughly. You want the spices distributed evenly throughout the crumbs.
Step 3: Dredge the Chicken (5 minutes)
This is the technique part. Pick up a chicken strip with your fingers (or tongs, if you’re worried about germs). Dredge it in the flour, shaking off any excess. Then dip it into the egg wash, letting the excess drip off. Finally, press it firmly into the Panko mixture. Use your fingers to press the crumbs onto the chicken. You want a thick, even coating. Don’t be shy. Press it in. The pressure creates that craggy, crunchy texture.
Place the breaded tenders on a clean plate or wire rack. Do not stack them. Let them sit for 5 minutes while you preheat the air fryer. This helps the breading set so it doesn’t fall off during cooking.
Step 4: Preheat the Air Fryer (3 minutes)
Preheat your air fryer to 400°F (200°C). This is important. A hot start ensures immediate crisping. If you skip this, the chicken might steam instead of fry.
Step 5: Cook the Tenders (12-15 minutes)
Lightly spray the air fryer basket with oil. Place the chicken tenders in a single layer. Do not overcrowd. Leave space between each tender for air to circulate. If you have a small air fryer, cook in batches. Overcrowding is the #1 reason for soggy chicken.
Spray the tops of the tenders generously with oil. This is the step most people skip, and it’s why their breading stays pale. You want them golden brown.
Cook at 400°F (200°C) for 12-15 minutes. Flip the tenders halfway through (around 6-7 minutes) and spray the other side with oil. The chicken is done when the internal temperature reaches 165°F (74°C) and the breading is deep golden brown.
Step 6: Rest and Serve (2 minutes)
Remove the tenders from the air fryer and let them rest on a wire rack for 2-3 minutes. This keeps the bottom crisp. If you put them on a plate immediately, steam will make the bottom soggy. Serve with your favorite dipping sauce.
Total Time: About 20 minutes (5 minutes prep, 15 minutes cook).
Expert Tips & Tricks
Here’s everything I’ve learned from making this dozens of times. These tips will save you from my mistakes.
The Double Dip Method
If you want super thick, crunchy coating, double dip the chicken. Flour, egg, Panko, then egg again, then Panko again. It’s a bit more work, but the crust is restaurant-quality. I do this when I’m feeling fancy.
Don’t Skip the Oil Spray
I know it’s “air frying,” but the breading needs fat to brown. Without oil, Panko stays pale and soft. Spray generously. It’s worth it.
Let the Breading Set
After breading, let the tenders sit for 5 minutes before cooking. This hydrates the flour and egg, creating a bond that keeps the crumbs on during cooking. I used to cook them immediately, and the breading would fall off in the basket. Now? Perfect adherence every time.
Use a Meat Thermometer
Chicken tenders cook fast. It’s easy to overcook them and get dry chicken. Use a instant-read thermometer. Pull them at 165°F. They’ll carryover cook slightly while resting.
Keep Them Warm
If you’re cooking in batches, keep the first batch warm in a 200°F oven on a wire rack. Don’t cover them with foil, or they’ll steam and get soggy.
Common Mistakes (and how to avoid them):
– Soggy Breading: Overcrowded basket or not spraying with oil.
– Dry Chicken: Overcooked. Use a thermometer.
– Breading Falling Off: Didn’t let it set, or didn’t press crumbs in firmly.
Variations & Substitutions
Once you’ve nailed the basic version, here’s how you can mix it up. I’ve tried all of these.
Spicy Version
Add 1 teaspoon of cayenne and 1 teaspoon of chili powder to the Panko. Serve with spicy mayo for dipping.
Herb-Crusted
Add 1 tablespoon of dried Italian seasoning and 1 tablespoon of grated Parmesan to the Panko. Tastes like a chicken parm without the mess.
Gluten-Free
Use gluten-free flour and gluten-free Panko (or crushed gluten-free cornflakes for extra crunch). Everything else is naturally gluten-free.
Dairy-Free
This recipe is already dairy-free, but if you’re worried about cross-contamination, just double-check your Panko. Some brands use milk derivatives.
Different Proteins
– Turkey Tenders: Same method, but cook 1-2 minutes longer. Turkey is leaner and dries out faster.
– Fish Sticks: Use cod or tilapia fillets cut into strips. Cook for 8-10 minutes. Delicate, so handle gently.
Serving & Storage
How to Serve:
I usually serve these with honey mustard, BBQ sauce, or ranch. But honestly, ketchup is fine. I also like to serve them with a simple side salad or roasted veggies. They pair well with roasted butternut squash and apple salad for a balanced meal.
Side Dishes:
– French fries (air-fried, obviously)
– Coleslaw
– Mac and cheese
– Steamed broccoli
Storage Instructions:
Store leftovers in an airtight container in the fridge for up to 3 days. The breading will soften slightly, but it’s still good.
Reheating:
Best method: Air fryer at 350°F for 3-4 minutes. This restores the crispiness.
Microwave: 30 seconds. But the breading will get chewy. Not recommended.
Oven: 350°F for 10 minutes. Works, but takes longer.
Freezing:
You can freeze uncooked, breaded tenders. Place them on a baking sheet and freeze until solid, then transfer to a freezer bag. They’ll last for 2 months. Cook from frozen, adding 2-3 minutes to the cook time. This is my meal prep hack.
Nutrition Information
I’m not a nutritionist, but here’s the breakdown if you’re tracking. This is per serving (based on 4 servings, 4 tenders per serving).
– Calories: 320
– Protein: 28g
– Carbs: 24g
– Fiber: 1g
– Sugar: 1g
– Fat: 12g
– Saturated Fat: 2g
– Cholesterol: 110mg
– Sodium: 450mg
What’s Good:
– High protein
– Lower fat than fried chicken
– Simple ingredients
What to Know:
– Contains gluten and eggs
– Sodium can be adjusted by reducing salt in the breading
Look, this is comfort food. It’s not a diet recipe. But it’s way better than takeout, costs less, and I know exactly what’s in it. When I want to make it lighter, I use less oil spray and more veggies on the side. But usually? I just eat a reasonable portion and enjoy it.
Final Thoughts
So that’s my go-to Extra-Crispy Air Fryer Chicken Tenders! I’ve probably talked your ear off at this point, but when you make a recipe this often, you have a lot to say about it.
This has saved weeknight dinners more times than I can count. It’s my answer to “what’s for dinner” when I’m tired, don’t want takeout, and still want something that tastes really good. My kids are happy, my husband’s happy, and I’m happy because I’m not stressed about cooking.
Make it yours! Try different seasonings, swap in your favorite dipping sauce, adjust the garlic. The best recipes are the ones you adapt to your family’s tastes.
If you make this, drop a comment and let me know what you think! I love hearing how recipes turn out in your kitchen. And if something doesn’t work, tell me that too—I’m here to help troubleshoot.
Happy cooking! And I hope your kitchen smells half as good as mine does right now.
Frequently Asked Questions
Can I use regular breadcrumbs instead of Panko?
You can, but the texture will be different. Regular breadcrumbs are finer and denser. They’ll still crisp up, but they won’t be as light and shattery as Panko. If you use regular breadcrumbs, you might need to spray them with a bit more oil to get them golden.
Why is my chicken tender soggy?
Usually, this means the basket was overcrowded, or you didn’t spray the breading with oil. Air needs to circulate around the chicken to crisp it up. Also, make sure you’re not stacking the tenders. Cook in batches if necessary.
Can I make these ahead of time?
Yes! Bread them and store them on a baking sheet in the fridge for up to 24 hours. They’ll cook from cold, just add 1-2 minutes to the cook time. Or freeze them uncooked for longer storage.
How do I know when the chicken is done?
Use a meat thermometer. The internal temperature should reach 165°F (74°C). If you don’t have a thermometer, cut into the thickest part. The juice should run clear, and the meat should be white throughout, not pink.
Can I double the recipe?
Absolutely! Just make sure you have enough bowls for the dredging station, and cook in batches. Don’t overcrowd the air fryer basket. It’s better to cook two smaller batches than one big, soggy one.
What dipping sauces go best with these?
Honey mustard is a classic. BBQ sauce, ranch, and spicy mayo are also great. I also like a simple mixture of ketchup and hot sauce. Get creative! These tenders are a blank canvas.
Is this recipe kid-friendly?
Yes! Kids love chicken tenders. If you’re worried about the spices, reduce the cayenne and paprika. They’ll still taste good with just salt, pepper, and garlic powder. Serve with ketchup, and they’ll be gone in minutes.
Pin This Recipe!
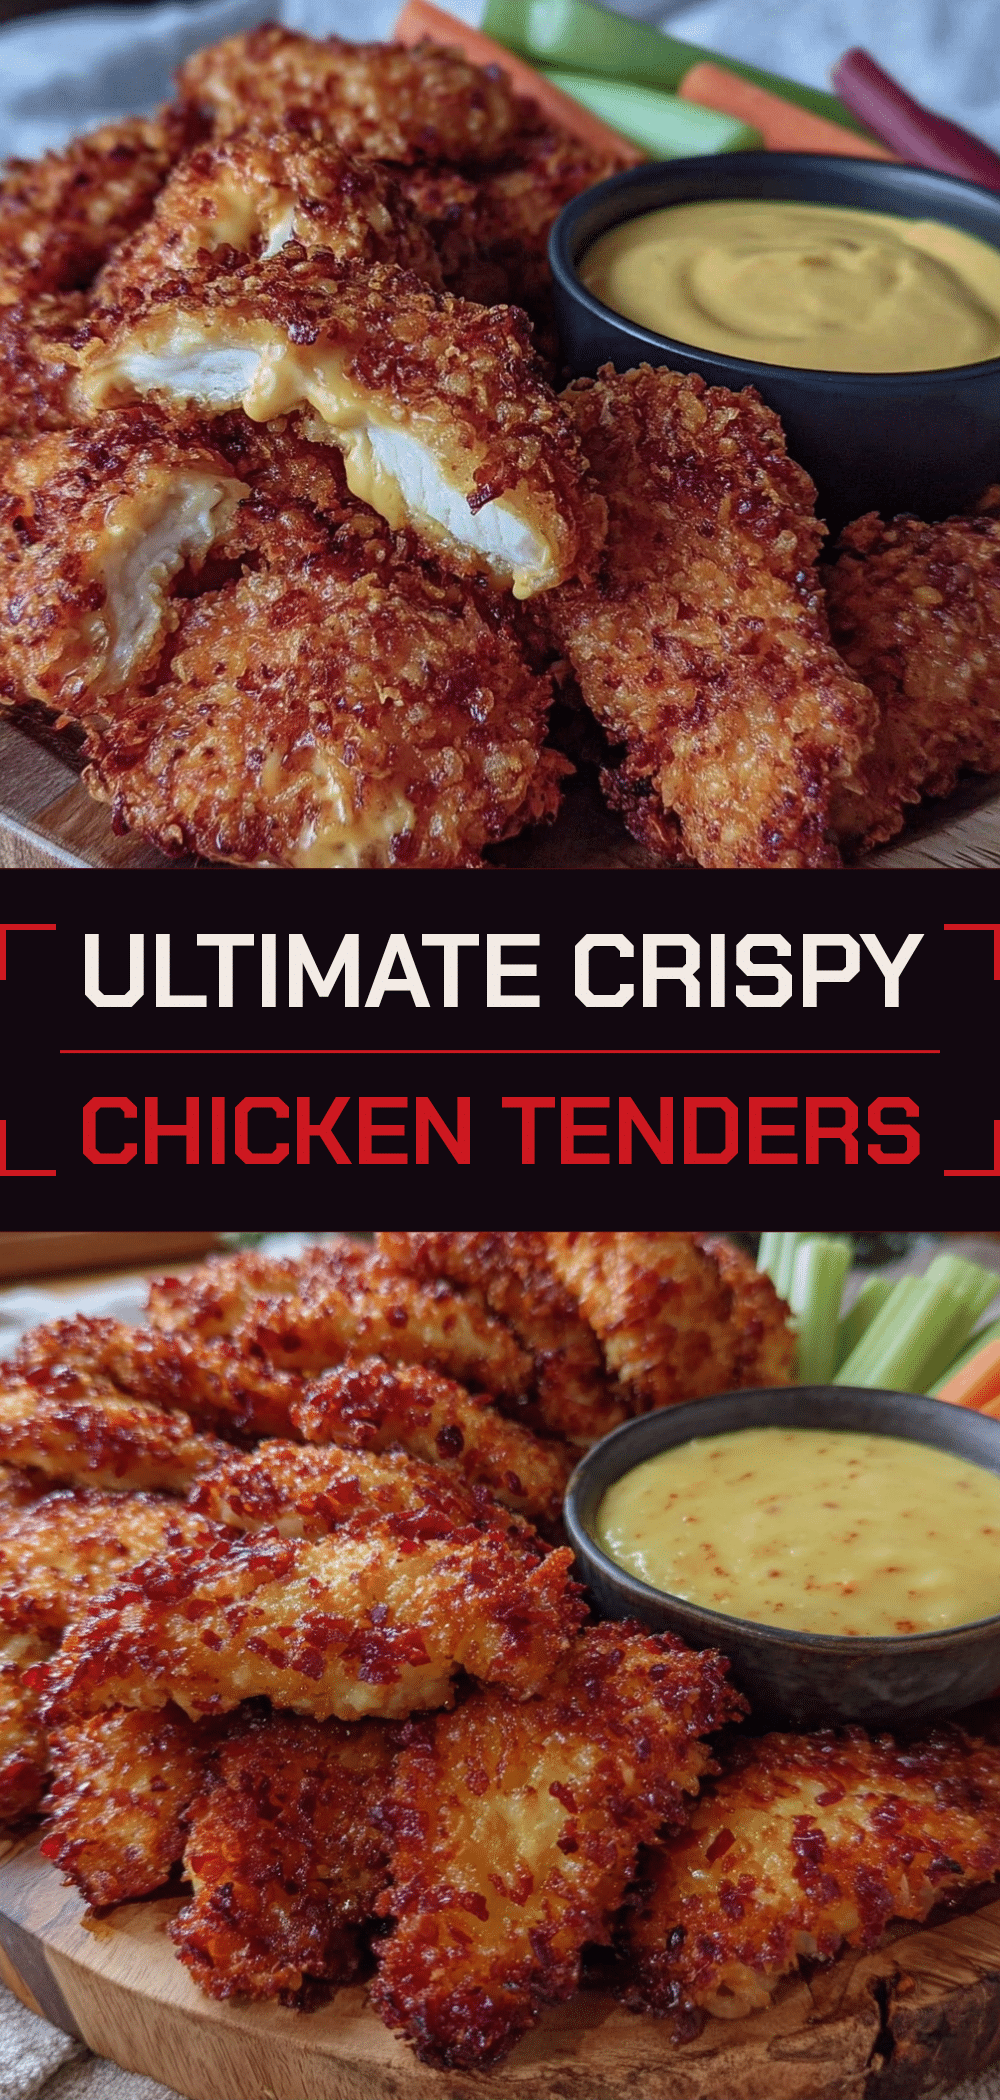

Extra-Crispy Air Fryer Chicken Tenders
- Total Time: 20 minutes
- Yield: 4 servings 1x
Description
These air fryer chicken tenders are golden, shatteringly crisp, and juicy inside, ready in just 20 minutes. Using a simple dredging technique and Panko breadcrumbs, this recipe delivers diner-quality flavor with less mess and oil than traditional frying.
Ingredients
- 2 large boneless, skinless chicken breasts (about 1.5 lbs / 680g)
- 1 cup all-purpose flour
- 2 large eggs, beaten
- 2 cups Panko breadcrumbs
- 2 teaspoons garlic powder
- 1 teaspoon smoked paprika
- 1/2 teaspoon cayenne pepper (optional)
- 1 teaspoon salt (plus more for seasoning)
- Cooking spray (olive oil or avocado oil)
Instructions
- Pat chicken breasts dry with paper towels and slice into strips about 1 inch wide and 1/2 inch thick. Season lightly with salt and pepper.
- Set up a dredging station with three shallow bowls: Bowl 1 with flour, Bowl 2 with beaten eggs, and Bowl 3 with Panko breadcrumbs mixed with garlic powder, smoked paprika, cayenne, and salt.
- Dredge each chicken strip in flour, shaking off excess. Dip into the egg wash, letting excess drip off. Press firmly into the Panko mixture to ensure a thick, even coating.
- Place breaded tenders on a clean plate or wire rack and let sit for 5 minutes to allow the breading to set.
- Preheat the air fryer to 400°F (200°C).
- Lightly spray the air fryer basket with oil. Place tenders in a single layer without overcrowding.
- Spray the tops of the tenders generously with oil.
- Cook at 400°F (200°C) for 12-15 minutes, flipping halfway through and spraying the other side with oil.
- Chicken is done when internal temperature reaches 165°F (74°C) and breading is deep golden brown.
- Remove tenders and let rest on a wire rack for 2-3 minutes before serving to maintain crispiness.
Notes
Do not overcrowd the air fryer basket to ensure proper air circulation and crispiness. Letting the breaded chicken sit for 5 minutes before cooking helps the breading adhere. For extra crunch, try the double dip method (flour, egg, panko, egg, panko). If cooking from frozen, add 2-3 minutes to the cook time.
- Prep Time: 5 minutes
- Cook Time: 15 minutes
- Category: Main Course
- Cuisine: American
Nutrition
- Serving Size: 4 tenders per servin
- Calories: 320
- Sugar: 1
- Sodium: 450
- Fat: 12
- Saturated Fat: 2
- Carbohydrates: 24
- Fiber: 1
- Protein: 28
Keywords: air fryer chicken tenders, crispy chicken, quick dinner, weeknight meals, healthy fried chicken, panko chicken, 20 minute meals



