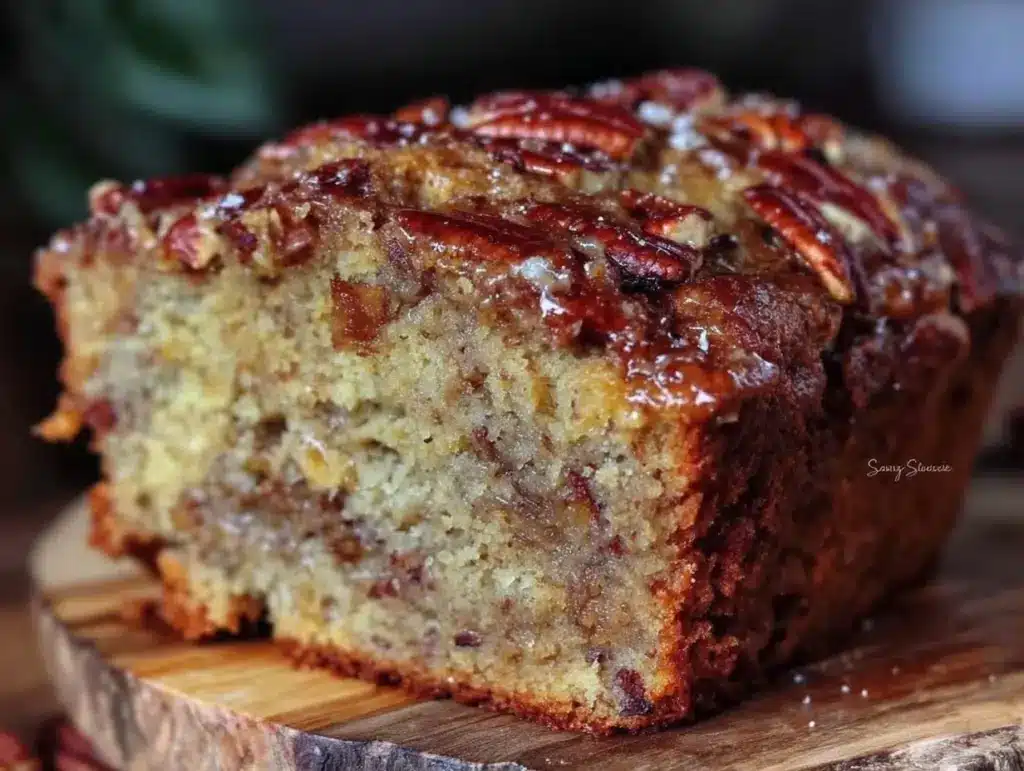
I have a confession to make. For years, I was terrified of banana bread. Not because I didn’t like it—I love the idea of warm, moist bread with crispy edges—but because every time I tried to make it, something went wrong. Sometimes it was a dense brick. Sometimes it was a soggy mess in the middle. And don’t even get me started on the dry, crumbly disasters that tasted like cardboard.
Then I stumbled into a little café in Vermont last October. It was raining, the air smelled like wet leaves, and the owner handed me a slice of banana bread that changed everything. It was studded with toasted pecans, drizzled with a salty maple glaze, and so moist it fell apart if you looked at it wrong. I ate the whole thing in one sitting. I asked for the recipe. She laughed and said, “It’s just bananas, sugar, and patience. But you’re overthinking it.”
She wasn’t wrong. I was overthinking it.
So I went home and tested this Fall Maple Pecan Banana Bread over and over. And over. I’ve made it at least fifteen times in the last two months, tweaking the ratios, testing different flours, and arguing with my oven. And here’s the thing: I finally cracked the code. It’s not complicated. It’s not fancy. It’s actually stupid simple. One bowl. No mixer. No fuss. And it’s so forgiving that even if you’re a total beginner, you really can’t mess this up.
This isn’t just banana bread. It’s your new weekend ritual. It’s the smell that fills your house and makes your neighbors ask what you’re baking. It’s the slice you save for yourself before anyone else gets near the pan. And once you try it, you’ll wonder why you ever bought the loaf from the grocery store.
If you can only make one thing this weekend, make this. Seriously. You’ll thank me later.
Why You’ll Love This Recipe
There are a dozen reasons I keep coming back to this banana bread, but let’s be real—you don’t need more reasons. You need results. And this recipe delivers. Every. Single. Time.
One Bowl, Zero Excuses — Seriously. You don’t need a stand mixer. You don’t need a dozen bowls. You mix everything in one large bowl, pour it into a loaf pan, and bake it. That’s it. I’ve made this while holding my phone, talking to my mom, and still got perfect results.
Beginner-Proof — I’ve walked my teenage niece through this recipe over FaceTime. She’s never baked before. She didn’t burn the house down. She actually made a second loaf the next day. This recipe is designed for people who think they can’t cook. It’s forgiving. It’s hard to mess up.
Flavor That Actually Tastes Like Fall — Most banana breads taste like… well, banana bread. This one tastes like autumn. The maple syrup adds a deep, caramel sweetness that pairs perfectly with the toasted pecans. It’s not just sweet; it’s complex. It’s cozy. It’s the kind of flavor that makes you want to sit by a window with a mug of tea.
Makes Amazing Leftovers — I know, I know. Banana bread is usually gone in a day. But this one? It stays moist for days. I deliberately make extra for breakfast throughout the week. Toast a slice in the morning, and it’s like a warm hug in bread form.
Stays Fresh Longer — Because of the maple syrup and the oil (yes, oil, not butter), this bread stays soft for up to five days. I’ve left it on the counter, wrapped in foil, and it’s still good on day four. No dry edges. No crumbly bits. Just perfect banana bread.
This is my go-to when I want something that feels special but takes almost no effort. No complicated techniques. No weird ingredients. Just reliable, delicious food that makes everyone happy. And honestly? It’s better than any bakery version I’ve ever tried.
Ingredients You’ll Need
Here’s the best part: you probably have most of this already. I’m particular about three ingredients here, and I’ll tell you exactly why. But don’t worry, substitutions are easy.
Ripe bananas (3 medium, about 1 ½ cups mashed / 350g) — The riper, the better. I mean *spotty brown* ripe. Black if you can find it. Those bananas are packed with sugar and flavor. If yours are still yellow, put them in the oven at 300°F for 15 minutes to speed things up. Trust me, it makes a difference.
Maple syrup (½ cup / 120ml) — Use real maple syrup, not pancake syrup. The kind in the bottle that says “pancake syrup” is basically corn syrup with flavoring. Real maple syrup adds depth, complexity, and that fall flavor we’re after. I use Grade B because it’s stronger, but Grade A works too.
Neutral oil (⅓ cup / 80ml) — I use vegetable or canola oil. Some people use butter, but oil keeps this bread moist for longer. Butter makes it denser. Oil makes it tender. I’ve tested both, and oil wins every time for this specific recipe.
Granulated sugar (½ cup / 100g) — This isn’t a low-sugar recipe. The sugar balances the tartness of the bananas and helps create that crispy top. Don’t skip it. You can reduce it slightly if you want, but don’t go below ⅓ cup or the texture suffers.
Large egg (1 egg / 50g) — Room temperature is ideal, but cold works fine. Just whisk it well. This binds everything together.
Vanilla extract (1 teaspoon / 5ml) — Pure vanilla, not imitation. I know it’s expensive, but it makes a huge difference in baked goods. If you’re being lazy, imitation works, but pure is worth the few extra dollars.
All-purpose flour (1 ½ cups / 190g) — Don’t overmeasure! Spoon it into the cup and level it off. Packing it down makes the bread dense. I use Gold Medal because it’s consistent, but any brand works.
Baking soda (1 teaspoon / 5g) — This is what makes it rise. Make sure it’s fresh! If your baking soda is more than six months old, it might not work. Test it by dropping a little in vinegar—it should fizz like crazy.
Salt (½ teaspoon / 3g) — This isn’t optional. Salt brings out the flavor of the bananas and the maple. Without it, the bread tastes flat. I use fine sea salt.
Chopped pecans (1 cup / 100g) — Toast them first! It’s a two-minute step that adds so much flavor. I toast them in a dry skillet over medium heat for 3-4 minutes, stirring constantly, until they smell nutty. Don’t skip this.
Optional: Extra pecans for topping (½ cup) — I like to press a few into the top of the batter before baking for that bakery look.
Equipment Needed
You don’t need fancy equipment for this. Here’s what I actually use.
Large mixing bowl — I use a 4-quart stainless steel bowl. Needs to be big enough to mix everything comfortably. My old plastic bowl works fine too.
Loaf pan — 9×5 inch. I use a metal pan. Glass pans take longer to bake and can result in a darker crust. If you only have glass, reduce the oven temperature by 25°F.
Paper towels or plastic wrap — To line the pan. I line it with paper towels first, then plastic wrap. This makes removing the bread so much easier. Clean-up is a breeze.
Pastry brush — For brushing the maple glaze on top. I use a silicone brush. If you don’t have one, a regular spoon works.
Whisk — For mixing the wet ingredients. A fork works too, but a whisk is faster.
Spatula — For folding in the pecans and scraping the bowl. Silicone spatulas are best because they don’t scratch the bowl.
Measuring cups and spoons — Standard stuff. Dollar store versions work fine.
Small saucepan — For heating the maple glaze. Or you can use the microwave. Your call.
Wire rack — For cooling the bread. Don’t skip this! Letting it cool on the pan makes it soggy.
How to Make It: Step-by-Step
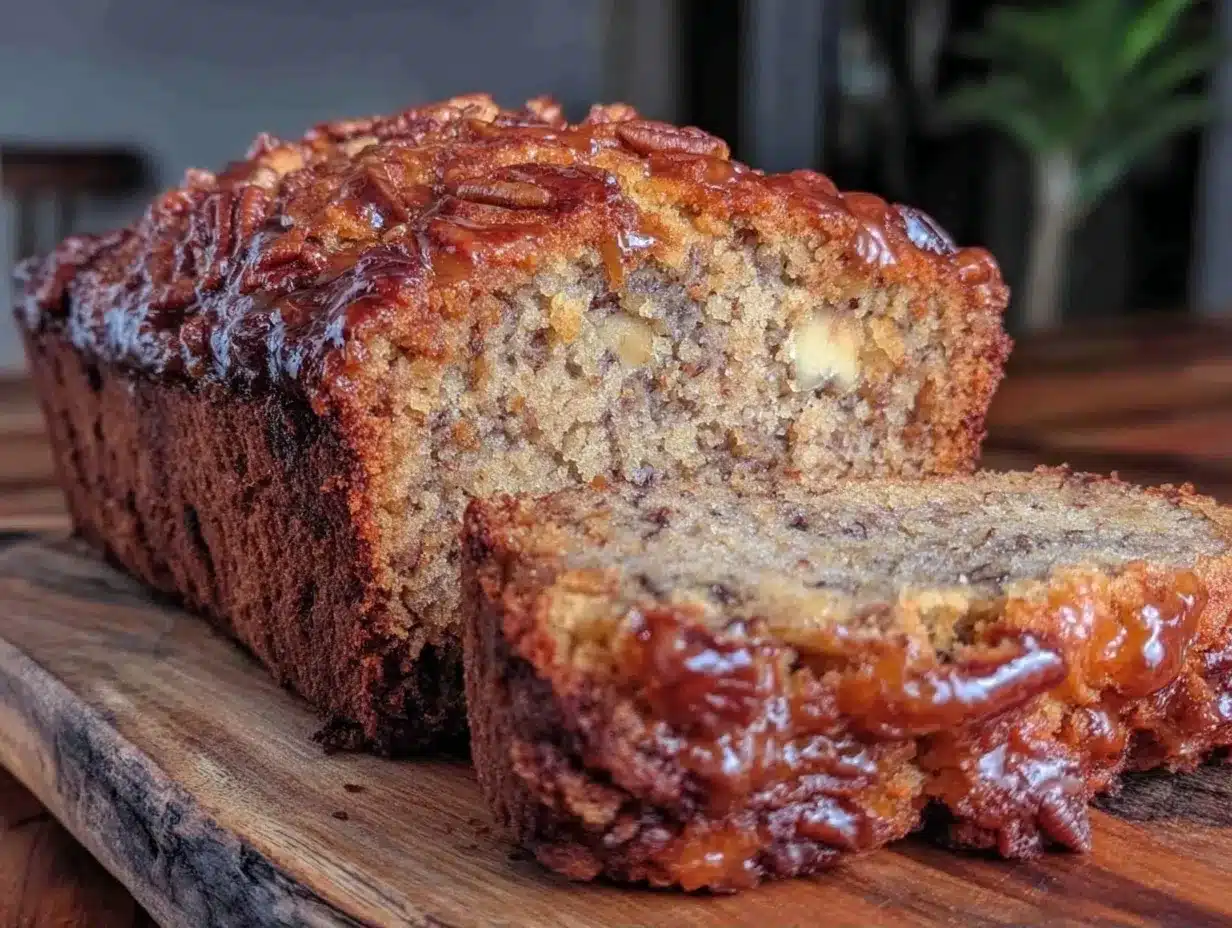
Alright, let’s make this! I’m walking you through exactly how I do it, including the little tricks I’ve picked up.
Step 1: Prep Your Pan and Oven (5 minutes)
Preheat your oven to 350°F (175°C). Line your 9×5 loaf pan with paper towels, then plastic wrap, leaving an overhang on the sides. This is your secret weapon for easy removal. Spray the inside lightly with cooking spray.
Step 2: Mash the Bananas (2 minutes)
In your large mixing bowl, mash the ripe bananas with a fork. You want it smooth but not completely liquidy. A few small lumps are fine. I usually get about 1 ½ cups of mashed banana from three medium bananas.
Step 3: Mix the Wet Ingredients (3 minutes)
Add the maple syrup, oil, egg, and vanilla extract to the mashed bananas. Whisk everything together until smooth. It should look glossy and well-combined. No streaks of egg or oil should be visible.
Step 4: Add the Dry Ingredients (2 minutes)
Add the flour, baking soda, and salt to the wet mixture. Stir gently with a spatula until just combined. Do not overmix! A few lumps are okay. Overmixing makes the bread dense. I stop as soon as I see no more white streaks of flour.
Step 5: Fold in the Pecans (1 minute)
Gently fold in the toasted pecans. Reserve a few for the top. Use a folding motion, not a stirring motion. You want to keep the air in the batter.
Step 6: Bake the Bread (55-65 minutes)
Pour the batter into the prepared loaf pan. Smooth the top with a spatula. Press the reserved pecans into the top if you’re using them. Bake for 55-65 minutes. The bread is done when a toothpick inserted in the center comes out clean or with a few moist crumbs (no wet batter). If the top is browning too fast, cover it loosely with foil after 40 minutes.
Step 7: Make the Glaze (2 minutes)
While the bread bakes, combine 2 tablespoons maple syrup and 1 tablespoon heavy cream in a small saucepan. Heat over medium until warm and thinned. Alternatively, microwave for 30 seconds. Set aside.
Step 8: Cool and Glaze (10 minutes)
Remove the bread from the oven. Let it cool in the pan for 10 minutes. Then, lift it out using the paper towel overhang and place it on a wire rack. Brush the warm maple glaze over the top while the bread is still warm. The glaze will soak in slightly and create a shiny, sticky finish.
Expert Tips & Tricks
Here’s everything I’ve learned from making this dozens of times. These tips will save you from my mistakes.
Use Super Ripe Bananas
This is the #1 tip. Brown, spotty bananas are sweeter and more flavorful. If you don’t have any, bake yellow bananas at 300°F for 15 minutes. They’ll turn brown and release their sugars. It’s a game-changer.
Toast Your Pecans
Raw pecans taste flat. Toasted pecans taste nutty and aromatic. It takes two minutes in a dry skillet. Just stir constantly until they smell amazing. Don’t walk away! They burn fast.
Don’t Overmix the Batter
Overmixing develops gluten, which makes the bread tough. Mix until just combined. A few lumps are fine. I’ve made this mistake before, and the difference in texture is night and day.
Check Early
Ovens vary. Start checking at 50 minutes. If the toothpick comes out clean, it’s done. If it’s wet, give it 5 more minutes. Don’t rely solely on the timer.
Glaze While Warm
The glaze soaks into warm bread better than cold bread. Wait 10 minutes after baking, then glaze. It creates that sticky, bakery-style finish.
Common Mistakes (and how to avoid them):
Mistake: Bread is dry
Fix: You overbaked it. Check early. Also, make sure you’re using ripe bananas. Unripe bananas have less moisture.
Mistake: Bread is dense
Fix: You overmixed the batter. Or your baking soda is old. Test your baking soda. And mix gently!
Mistake: Glaze is too runny
Fix: You didn’t heat it enough. Warm it until it thins out. It should coat the back of a spoon.
Variations & Substitutions
Once you’ve nailed the basic version, here’s how you can mix it up. I’ve tried all of these.
Chocolate Chip Version
Replace pecans with 1 cup chocolate chips. Or do both! My kids love this version. It’s like a banana bread cookie.
Peanut Butter Swirl
Before baking, dollop 2 tablespoons peanut butter on top and swirl it in with a knife. It adds a salty-sweet contrast that’s amazing.
Gluten-Free
Use a 1:1 gluten-free flour blend. Everything else stays the same. I’ve used Bob’s Red Mill and it works great.
Dairy-Free
Replace heavy cream in the glaze with oat milk or coconut cream. The rest is naturally dairy-free.
Vegan
Replace egg with a flax egg (1 tablespoon ground flax + 3 tablespoons water). Replace maple syrup with agave if needed. It works, but the texture is slightly different.
Other Nuts
Walnuts, hazelnuts, or almonds work just as well as pecans. I’ve tried hazelnuts, and they’re delicious.
Serving & Storage
How to Serve:
I usually serve this straight from the rack, sliced thick. It’s perfect with coffee or tea. But here are other ways I’ve enjoyed it:
Side Dishes:
- Simple green salad (yes, really)
- Roasted vegetables
- Another slice of banana bread (because why not?)
Toppings Bar:
When I have guests, I put out: extra pecans, whipped cream, chocolate chips. Everyone customizes their slice.
Storage Instructions:
Refrigerator:
Store in an airtight container for up to 5 days. It stays moist. I keep it on the counter if I’m eating it within 2 days.
Freezing:
Yes, it freezes! Wrap the whole loaf or individual slices in plastic wrap, then foil. Freeze for up to 3 months. Thaw at room temperature. It tastes almost as good as fresh.
Reheating:
Toast a slice in the toaster oven for 2 minutes. It brings back that crispy edge. Microwave for 20 seconds if you’re in a hurry.
Nutrition Information
I’m not a nutritionist, but here’s the breakdown if you’re tracking.
Per Serving (based on 10 slices):
- Calories: 280
- Protein: 4g
- Carbs: 42g
- Fiber: 2g
- Sugar: 24g
- Fat: 11g
- Saturated Fat: 1g
- Cholesterol: 15mg
- Sodium: 220mg
What’s Good:
- Decent fiber from bananas and pecans
- Healthy fats from pecans
- More filling than it looks
What to Know:
- Higher in sugar from maple syrup and bananas
- Contains gluten and nuts
- Moderate calories
My Take:
Look, this is comfort food. It’s sweet, it’s rich, and it’s delicious. It’s not a diet recipe. But it’s way better than store-bought, costs less, and I know exactly what’s in it. When I want to make it lighter, I reduce the sugar and add more pecans. But usually? I just eat a slice and enjoy it.
Final Thoughts
So that’s my go-to Fall Maple Pecan Banana Bread! I’ve probably talked your ear off at this point, but when you make a recipe this often, you have a lot to say about it.
This has saved my weekends more times than I can count. It’s my answer to “what should I bake?” when I want something easy, delicious, and impressive. My family is happy, my neighbors are happy, and I’m happy because I’m not stressed about cooking.
Make it yours! Try different nuts, add chocolate chips, adjust the maple. The best recipes are the ones you adapt to your tastes.
If you make this, drop a comment and let me know what you think! I love hearing how recipes turn out in your kitchen. And if something doesn’t work, tell me that too—I’m here to help troubleshoot.
Happy baking! And I hope your kitchen smells half as good as mine does right now.
Frequently Asked Questions
Can I use butter instead of oil?
You can, but the bread will be denser and won’t stay as moist. Oil keeps it tender. If you must use butter, melt it and let it cool slightly before adding. I’ve tested both, and oil wins for moisture.
My bread is dry—what happened?
Usually means you overbaked it. Check early! Start checking at 50 minutes. Also, make sure you’re using ripe bananas. Unripe bananas have less sugar and moisture.
Can I make this ahead for a party?
Absolutely! Bake it a day ahead. Store it wrapped at room temperature. Glaze it right before serving. It actually tastes better the next day because the flavors meld.
Why did my bread sink in the middle?
Underbaked. The structure wasn’t set yet. Check with a toothpick. If it’s wet, bake longer. Also, don’t open the oven door too early—it can cause sinking.
Can I use honey instead of maple syrup?
You can, but the flavor will be different. Honey is sweeter and has a stronger taste. I prefer maple for that fall flavor. If you use honey, reduce the amount slightly.
How do I reheat leftovers without it getting dry?
Toast it! A toaster oven or regular oven at 350°F for 5-10 minutes brings back the freshness. Microwave for 20 seconds if you’re in a hurry, but it won’t be as good.
Can I double this recipe?
Yes! Use two loaf pans. The baking time stays the same. I do this when I’m feeding a crowd. Just make sure your oven has room for both pans.
Pin This Recipe!
Fall Maple Pecan Banana Bread: 1 Bowl, No Fail
- Total Time: 72 minutes
- Yield: 10 servings 1x
Description
A moist, forgiving banana bread recipe made in one bowl with no mixer required. Featuring toasted pecans and a salty maple glaze, this beginner-proof loaf delivers bakery-quality flavor with minimal effort.
Ingredients
- 3 medium ripe bananas (about 1 ½ cups mashed / 350g)
- ½ cup maple syrup (real maple syrup, not pancake syrup)
- ⅓ cup neutral oil (vegetable or canola)
- ½ cup granulated sugar
- 1 large egg (room temperature)
- 1 teaspoon vanilla extract
- 1 ½ cups all-purpose flour
- 1 teaspoon baking soda
- ½ teaspoon salt
- 1 cup chopped pecans (toasted)
- ½ cup extra pecans for topping (optional)
- 2 tablespoons maple syrup (for glaze)
- 1 tablespoon heavy cream (for glaze)
Instructions
- Preheat oven to 350°F (175°C). Line a 9×5 inch loaf pan with paper towels and plastic wrap, leaving an overhang on the sides, and spray lightly with cooking spray.
- In a large mixing bowl, mash the ripe bananas with a fork until smooth but with a few small lumps.
- Add the maple syrup, oil, egg, and vanilla extract to the mashed bananas. Whisk until the mixture is glossy and well-combined with no streaks visible.
- Add the flour, baking soda, and salt to the wet mixture. Stir gently with a spatula until just combined; do not overmix. A few lumps are okay.
- Gently fold in the toasted pecans, reserving a few for the top. Use a folding motion to keep air in the batter.
- Pour the batter into the prepared loaf pan and smooth the top. Press the reserved pecans into the top if using.
- Bake for 55-65 minutes. The bread is done when a toothpick inserted in the center comes out clean or with a few moist crumbs. If the top browns too quickly, cover loosely with foil after 40 minutes.
- While the bread bakes, combine 2 tablespoons maple syrup and 1 tablespoon heavy cream in a small saucepan. Heat over medium until warm and thinned, or microwave for 30 seconds.
- Remove the bread from the oven and let it cool in the pan for 10 minutes. Lift out using the overhang and place on a wire rack.
- Brush the warm maple glaze over the top of the bread while it is still warm to create a shiny, sticky finish.
Notes
Use super ripe, spotty brown bananas for maximum sweetness and moisture. Toast pecans in a dry skillet for 3-4 minutes until nutty before adding to batter. Do not overmix the batter to avoid a dense texture. The bread stays moist for up to 5 days if stored in an airtight container. It can be frozen for up to 3 months.
- Prep Time: 12 minutes
- Cook Time: 60 minutes
- Category: Dessert
- Cuisine: American
Nutrition
- Serving Size: 1 slice
- Calories: 280
- Sugar: 24
- Sodium: 220
- Fat: 11
- Saturated Fat: 1
- Carbohydrates: 42
- Fiber: 2
- Protein: 4
Keywords: banana bread, maple pecan bread, fall baking, one bowl recipe, easy banana bread, gluten-free option, vegan option



