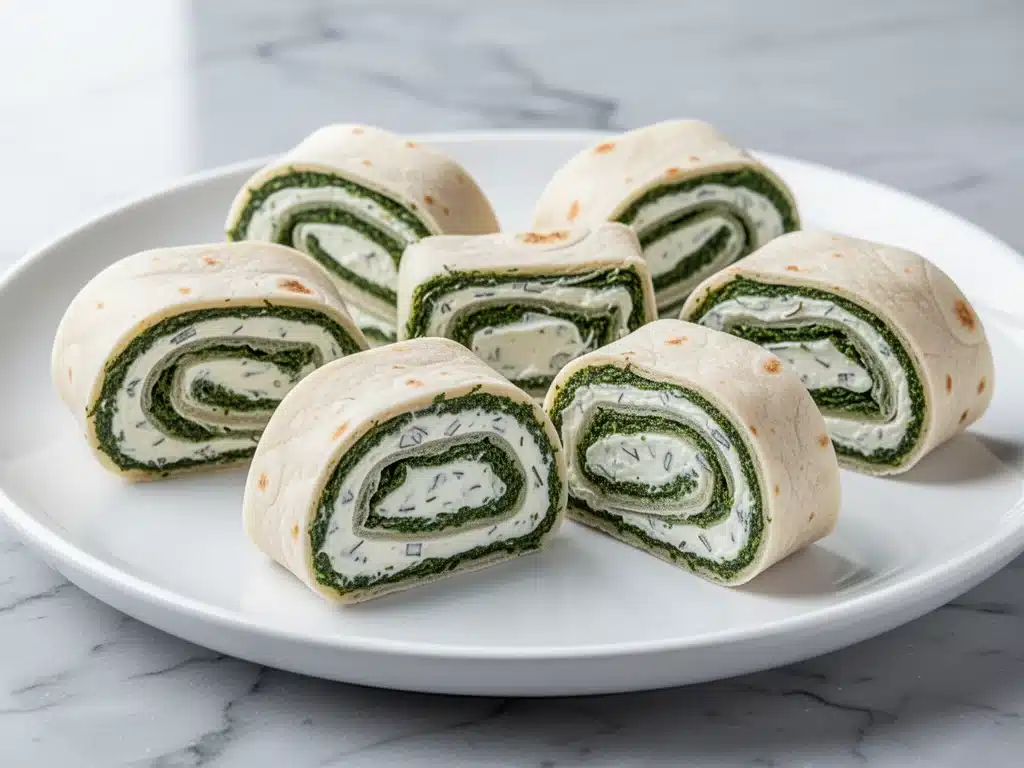
Last February, I was standing in my kitchen at 11:00 PM on a Sunday, staring at a half-eaten bag of pretzels and a block of cream cheese that had been sitting out way too long. My house was empty. The Super Bowl was over, the commercials were done, and my husband was already asleep upstairs. I had zero energy to cook a “real” dinner, but my stomach was growling loud enough to wake the neighbors. So, I did what any desperate, hungry person would do: I grabbed four slices of white bread, slathered them with cream cheese, threw on some turkey and cheese, rolled them up tight, and sliced them into little pinwheels. I ate three of them standing over the sink.
Fast forward to today, and that desperate late-night snack has evolved into something much more sophisticated. It’s now the cornerstone of every gathering I host, from backyard BBQs to the big game parties. These Football Party Pinwheel Sandwiches are my secret weapon. They’re finger food that feels like a meal, they’re easy to make in bulk, and they disappear faster than my husband’s attention span during the fourth quarter. I’ve tested this recipe over two dozen game days, tweaking the fillings and the bread types until I found the perfect balance of savory, creamy, and sturdy enough to handle being picked up with sweaty hands.
There is something deeply satisfying about a good pinwheel. It’s nostalgic, sure, reminding us of school lunchboxes and birthday parties, but it also feels elevated when you get the ingredients right. I’ve seen too many sad, dry pinwheels at parties—those sad affairs where the bread is stale and the filling is just… there. Not here. We’re talking about fresh, soft bread. We’re talking about a filling that’s actually flavorful, not just bland deli meat. We’re talking about a snack that keeps your guests happy between the kickoff and the halftime show without weighing them down too much.
If you’ve ever struggled with what to serve when you have twenty people showing up and only three hours to prepare, you need this recipe in your life. It’s foolproof, it’s visually appealing (those swirls look great on a platter), and it’s customizable enough that even the pickiest eaters will find something they like. Let’s get into why this is the ultimate game day snack and how to make it perfectly every single time.
Why You’ll Love This Recipe
I’ve hosted game day parties for years, and I’ve learned that the best snacks are the ones that are out of sight, out of mind, until they’re gone. These pinwheel sandwiches fit that description perfectly. Here’s why this recipe has earned a permanent spot in my rotation:
Stupid Simple Assembly — Seriously, if you can spread cream cheese and roll a sleeping bag, you can make these. There is no cooking required for the filling. You just assemble, chill, and slice. I’ve made these while watching the pre-game shows, and they turned out perfect every time. No heat, no mess, no stress.
Make-Ahead Friendly — This is the biggest game-changer. You can assemble these pinwheels the night before your party. They actually taste better after chilling overnight because the flavors have time to meld together. I usually prep these on Saturday afternoon for a Sunday game, which means my Sunday is completely free to hang out with my guests instead of being stuck in the kitchen.
Easy on the Budget — You don’t need expensive ingredients to make these taste amazing. Deli meat, standard cream cheese, and basic veggies are all very affordable. I can feed a crowd of 15-20 people with pinwheels for less than it would cost to order a large pizza. Plus, leftovers are easy to repurpose or just eat for lunch the next day.
Visually Stunning — Let’s be honest, we eat with our eyes first. The spiral pattern of the pinwheels looks festive and intentional. They look like you put in way more effort than you actually did. I love arranging them on a platter with some celery sticks and carrot rounds for a pop of green. It looks like a charcuterie board, but it’s actually just sandwiches. It’s a win-win.
Customizable for Everyone — Whether your guests are carnivores, vegetarians, or just picky about textures, you can make a version for them. I often make two or three different flavors at once, and it takes almost the same amount of effort. This way, no one is left hungry or complaining that there’s nothing they can eat.
This is my go-to when I need a crowd-pleaser that doesn’t require me to be a chef. It’s reliable, delicious, and makes me look like a party planning pro. If you want your guests to leave with full bellies and happy memories, you need to add this to your menu.
Ingredients You’ll Need
Here’s the best part: you probably have most of the core ingredients for these Football Party Pinwheel Sandwiches already. You don’t need a trip to the store for anything exotic. The magic is in the combination of simple, high-quality items. I’m particular about a few things here, so pay close attention to the notes below.
For the Bread Base
Soft White Sandwich Bread (1 loaf / 16 slices) — I specifically recommend soft white bread like Texas Toast or any brand that has a squishy texture. Avoid sourdough or crusty artisan breads for this recipe because they don’t roll well and can crack. You want something pliable. If you need a gluten-free option, look for a soft gluten-free sandwich bread, though the rolling technique might take a little more care.
Butter (2 tablespoons, softened) — This is optional but recommended. Lightly buttering the outside of the bread before rolling helps keep it from getting soggy from the cream cheese and adds a tiny bit of richness. It also helps the bread hold its shape better.
For the Creamy Filling
Cream Cheese (8 ounces / 225g, softened) — This is the glue that holds everything together. Make sure it’s fully softened to room temperature. If it’s cold and chunky, you’ll get lumps in your pinwheels. I usually take it out of the fridge about 30 minutes before I start assembling. Full-fat cream cheese works best for flavor and texture.
Mayonnaise (2 tablespoons) — I add a little mayo to the cream cheese to make it smoother and easier to spread. It also adds a subtle tang that cuts through the richness. You can use regular mayo or light mayo, depending on your preference.
Ranch Seasoning Packet (1 packet / 1 ounce) — Or you can use 1 tablespoon of homemade ranch seasoning. This is what gives the pinwheels that classic game day flavor. If you’re not a fan of ranch, you can swap this for Italian seasoning or just salt and pepper, but ranch is the crowd favorite.
Garlic Powder (½ teaspoon) — Adds a savory depth that complements the ranch. Don’t skip this; it makes the flavor profile more complex.
For the Mix-Ins
Deli Turkey Breast (8 ounces / 225g) — I like to use the thick-sliced turkey for a heartier bite. Ham works just as well if you prefer pork. Avoid the thin-sliced turkey if possible, as it can get lost in the cream cheese.
Shredded Cheddar Cheese (1 cup / 100g) — Sharp cheddar adds a nice kick. You can also use a Mexican blend or pepper jack if you want some heat. Grate your own cheese if you can; pre-shredded cheese has anti-caking agents that can make the filling a bit gritty.
Chopped Green Onions (½ cup) — Adds a fresh, oniony crunch without being overpowering. If you don’t like raw onion, you can swap this for finely chopped pickles or jalapeños.
Shredded Lettuce (½ cup, chopped) — I know, some people skip this, but I think it adds a necessary crunch and freshness. Use iceberg or romaine. Make sure it’s dry, or your pinwheels will get soggy.
Optional Add-Ins for Variety
Crispy Bacon Bits (½ cup) — For the meat lovers, adding crumbled bacon makes these absolutely irresistible. You can use real bacon or the dehydrated bacon bits from the store.
Sliced Black Olives (¼ cup, sliced) — Adds a salty, briny element that pairs well with the cream cheese.
Jalapeño Slices (¼ cup, sliced) — If you like it spicy, throw in some sliced jalapeños. It adds a nice kick that balances the creamy filling.
Red Pepper Flakes (½ teaspoon) — Sprinkle these on top of the cream cheese before rolling for a bit of heat and color.
Equipment Needed
You don’t need fancy equipment for this. Here’s what I actually use, and I keep it simple so you can get started right away.
Large Mixing Bowl — I use a medium-sized bowl to mix the cream cheese, mayo, and seasonings. Any bowl works, as long as it’s big enough to whisk everything together smoothly.
Electric Mixer or Whisk — An electric hand mixer makes short work of softening the cream cheese and mixing it with the mayo. But honestly, a good old-fashioned whisk works just as well if you’re patient. I use a whisk when I want to save time on cleanup.
Butter Knife or Offset Spatula — You’ll need a flat tool to spread the cream cheese mixture evenly over the bread. An offset spatula is ideal because it reaches the corners, but a butter knife works fine too. Just be gentle so you don’t tear the bread.
Sharp Knife — This is crucial. You need a sharp chef’s knife to slice the rolls into pinwheels. A dull knife will squish the rolls and make a mess. I keep a dedicated sharp knife for this purpose.
Plastic Wrap — You’ll need plenty of plastic wrap to wrap the rolls tightly before chilling. This is the secret to getting clean slices. I use heavy-duty wrap if I have it, but regular works too.
Large Cutting Board — You’ll need a sturdy surface to roll and slice the bread. A large cutting board is perfect because it gives you plenty of room to work.
Plates or Platter — For serving. I like to use a large rectangular platter to arrange the pinwheels in rows. It looks organized and makes it easy for guests to grab them.
Refrigerator — Obviously, you’ll need a fridge to chill the rolls. But seriously, don’t skip this step. Chilling firms up the cream cheese and makes slicing much easier.
How to Make It: Step-by-Step
Alright, let’s make this! I’m walking you through exactly how I do it, including the little tricks I’ve picked up over the years. This process is straightforward, but attention to detail makes all the difference.
Step 1: Prepare the Cream Cheese Filling (5 minutes)
In your mixing bowl, combine the softened cream cheese, mayonnaise, ranch seasoning packet, and garlic powder. Use your electric mixer or whisk to blend everything together until it’s completely smooth and creamy. There should be no lumps of cream cheese left. If the mixture is too thick, add a teaspoon of milk to thin it out. If it’s too thin, add a bit more cream cheese. You want a spreadable consistency, like thick frosting.
Step 2: Prep the Bread (2 minutes)
Lay out your slices of white bread on your cutting board. If you’re using soft bread, you might want to trim the crusts off for a neater look, but I usually leave them on for a more rustic feel. Just make sure the slices are flat and not curled. Lightly butter the outside of each slice if you’re using butter. This step helps prevent sogginess.
Step 3: Spread the Filling (5 minutes)
Take one slice of bread and spread a thin, even layer of the cream cheese mixture over the entire surface. Use your butter knife or offset spatula to get it into the corners. You don’t need a thick layer; too much filling will make the pinwheels burst when you slice them. Aim for a uniform coat. Repeat with all the bread slices.
Step 4: Add the Mix-Ins (5 minutes)
Once the cream cheese is spread, it’s time to add the fillings. Layer the deli turkey, shredded cheddar cheese, chopped green onions, and shredded lettuce over the cream cheese. Try to distribute the ingredients evenly so every bite has a bit of everything. If you’re adding bacon or olives, sprinkle them on now. Don’t overload the bread; a little goes a long way.
Step 5: Roll the Bread (5 minutes)
Starting from one long edge, tightly roll the bread up into a log. Use your fingers to tuck in the filling as you roll to keep it secure. The roll should be tight but not so tight that the bread tears. Once you’ve rolled it up, use your hands to gently squeeze the ends to seal them. Repeat with all the bread slices. You should end up with four or five tight logs, depending on how many slices you used.
Step 6: Chill the Rolls (At least 1 hour, ideally overnight)
This is the most important step. Wrap each roll tightly in plastic wrap. Make sure there are no air pockets. Place the wrapped rolls in the refrigerator for at least one hour, but preferably overnight. Chilling firms up the cream cheese and makes the rolls solid enough to slice cleanly. If you try to slice them without chilling, you’ll get a mess.
Step 7: Slice the Pinwheels (5 minutes)
Once the rolls are firm, unwrap them and place them on your cutting board. Using your sharp knife, slice each roll into 1-inch thick pinwheels. Use a gentle sawing motion; don’t press down hard, or you’ll squish the pinwheels. Wipe your knife clean between cuts if needed to keep the edges neat. You should get about 12-15 pinwheels per roll.
Step 8: Arrange and Serve
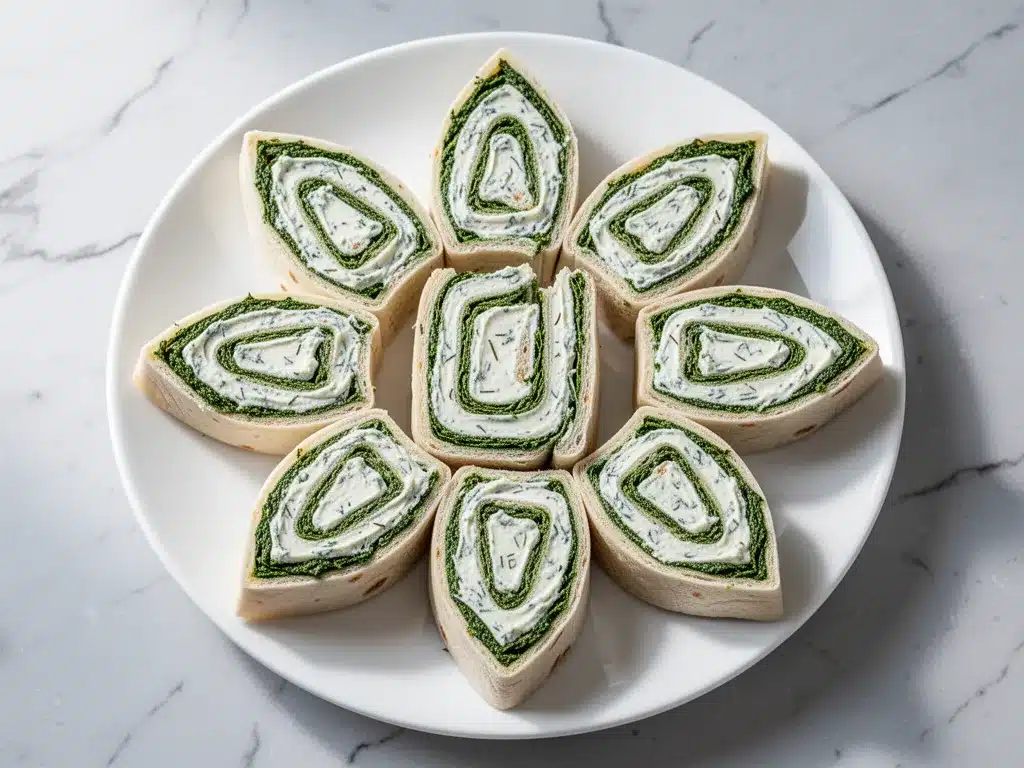
Arrange the pinwheels on a platter in a circular pattern or in neat rows. Garnish with a sprinkle of chopped parsley or a few whole green onions for color. Serve immediately, or cover and refrigerate until ready to serve. These are best eaten fresh, but they’ll keep in the fridge for up to 24 hours.
Total Time: About 30 minutes active, plus 1 hour chilling time.
Expert Tips & Tricks
Here’s everything I’ve learned from making these dozens of times. These tips will save you from my mistakes and ensure your pinwheels are perfect.
Keep it Tight — The key to clean pinwheels is a tight roll. If your roll is loose, the filling will spill out when you slice. Use your fingers to tuck in the edges as you roll. If the bread starts to tear, don’t worry; just press it back together. It’ll hold.
Don’t Skimp on Chilling — I know you want to eat them now, but patience pays off. If you slice them too soon, the cream cheese will be soft and the pinwheels will lose their shape. Chill them for at least one hour, but overnight is best. This step is non-negotiable for professional-looking results.
Use a Sharp Knife — A dull knife will crush the pinwheels. Use a sharp chef’s knife and a gentle sawing motion. If you don’t have a sharp knife, consider using a serrated bread knife. It cuts through the bread without squishing the filling.
Drain Your Veggies — If you’re using tomatoes or other watery vegetables, make sure to pat them dry with paper towels. Excess moisture can make the bread soggy and cause the pinwheels to fall apart. I usually chop my lettuce and green onions and let them sit on a paper towel for a few minutes to absorb any moisture.
Customize Your Seasoning — The ranch seasoning is classic, but you can experiment. Try Italian seasoning for a Mediterranean twist, or add a pinch of cayenne for heat. Get creative and make the flavor profile your own.
Make Ahead Strategy — You can assemble these pinwheels up to 24 hours in advance. Wrap them tightly in plastic wrap and store them in the fridge. When you’re ready to serve, just unwrap and slice. This makes party prep so much easier.
Variations & Substitutions
Once you’ve nailed the basic version, here’s how you can mix it up. I’ve tried all of these, and they’re all winners.
BLT Pinwheels — Swap the turkey and cheddar for crispy bacon, shredded lettuce, and sliced tomatoes. Add a little mayo to the cream cheese for extra richness. This is a classic combo that never fails.
Buffalo Chicken Pinwheels — Use shredded cooked chicken tossed in buffalo sauce instead of turkey. Add blue cheese crumbles to the cream cheese mixture for an authentic buffalo wing flavor. Serve with celery sticks on the side.
Veggie Pinwheels — Skip the meat and load up on vegetables. Use roasted red peppers, spinach, artichoke hearts, and feta cheese. Add a drizzle of balsamic glaze for extra flavor. This is a great option for vegetarian guests.
Spinach and Artichoke Pinwheels — Mix chopped spinach and artichoke hearts into the cream cheese filling. Add some shredded mozzarella cheese for a cheesy twist. This is inspired by the classic dip and tastes amazing.
Ham and Swiss Pinwheels — Swap the turkey for sliced ham and the cheddar for Swiss cheese. Add a little Dijon mustard to the cream cheese for a tangy flavor. This is a sophisticated option that feels fancy.
Gluten-Free Option — Use gluten-free sandwich bread. Make sure it’s soft and pliable, as gluten-free bread can be brittle. You may need to be extra gentle when rolling.
Dairy-Free Option — Use dairy-free cream cheese and cheddar alternatives. The flavor won’t be exactly the same, but it’ll still be tasty. You can also use hummus as a spread instead of cream cheese for a different texture.
Serving & Storage
How to serve these pinwheels is almost as important as how you make them. Presentation matters, especially for game day.
How to Serve: — I usually arrange the pinwheels on a large platter in a circular pattern, like a wheel. This looks festive and makes it easy for guests to grab them. I also like to place some celery sticks, carrot rounds, and ranch dressing on the side for dipping. It adds a nice touch of color and variety.
Side Dishes: — These pinwheels pair well with chips and salsa, olives, and other finger foods. I also like to serve them with cheesy spinach and artichoke stuffed bread for a double-dip experience. If you want something heartier, you can serve them alongside easy creamy southern-style pasta salad with bacon for a full spread.
Storage Instructions: — Store leftover pinwheels in an airtight container in the refrigerator for up to 2 days. They are best eaten fresh, but they’ll keep for a day or two. If they start to look dry, you can wrap them in a damp paper towel to add moisture back.
Reheating: — These are best served cold or at room temperature. Do not reheat them, as the cream cheese will melt and the bread will become soggy. If you need to warm them up slightly, let them sit out for 15 minutes before serving.
Nutrition Information
I’m not a nutritionist, but here’s the breakdown if you’re tracking. Keep in mind that these are estimates and can vary based on the specific ingredients you use.
Per Pinwheel (based on 20 pinwheels):
- Calories: 120
- Protein: 5g
- Carbs: 12g
- Fiber: 1g
- Sugar: 1g
- Fat: 6g
- Saturated Fat: 3g
- Cholesterol: 15mg
- Sodium: 250mg
What’s Good: — These pinwheels provide a decent amount of protein from the turkey and cheese. They’re also relatively low in sugar. You can add vegetables to boost the fiber content.
What to Know: — They are higher in sodium due to the deli meat and cream cheese. If you’re watching your sodium intake, look for low-sodium deli meat and light cream cheese. They also contain dairy and gluten, so adjust accordingly for dietary restrictions.
My Take: — Look, these are party snacks. They’re not health food. But they’re way better than processed chips and candy. When I want to make them lighter, I use low-fat cream cheese and load up on vegetables. But usually? I just enjoy them in moderation and appreciate the convenience.
Final Thoughts
So that’s my go-to Football Party Pinwheel Sandwiches! I’ve probably talked your ear off at this point, but when you make a recipe this often, you have a lot to say about it. These pinwheels have saved me from disaster more times than I can count. They’re my answer to “what’s for snacks?” when I’m tired, don’t want to cook, and still want something that looks impressive.
My guests are always happy with these. They’re easy to eat, they’re flavorful, and they don’t require any special skills to make. I love that I can prep them ahead of time and just focus on enjoying the game. Whether you’re watching the Super Bowl, the playoffs, or just a regular Sunday game, these pinwheels are a must-have.
Make them your own! Try different fillings, swap in your favorite cheeses, or add some spicy jalapeños. The best recipes are the ones you adapt to your tastes. If you make these, drop a comment and let me know what you think! I love hearing how recipes turn out in your kitchen. And if something doesn’t work, tell me that too—I’m here to help troubleshoot.
Happy cooking! And I hope your kitchen smells as good as mine does right now. Go get those pinwheels rolling!
Frequently Asked Questions
Can I use whole wheat bread instead of white bread?
You can, but whole wheat bread is denser and doesn’t roll as well. It can crack when you try to slice it. If you prefer whole wheat, look for a soft whole wheat sandwich bread. Just be extra gentle when rolling and slicing. White bread is still my top choice for its softness and neutral flavor.
Why did my pinwheels fall apart when I sliced them?
This usually happens if the rolls weren’t chilled long enough or if the knife wasn’t sharp enough. Make sure to chill the rolls for at least one hour, preferably overnight. Also, use a sharp knife and a gentle sawing motion. Don’t press down hard, or you’ll squish the filling out.
Can I make these ahead of time?
Yes! In fact, they taste better when made ahead. You can assemble the rolls and wrap them in plastic wrap up to 24 hours in advance. Store them in the fridge until you’re ready to slice and serve. This makes party prep so much easier.
How do I store leftover pinwheels?
Store leftover pinwheels in an airtight container in the refrigerator for up to 2 days. They are best eaten fresh, but they’ll keep for a day or two. If they start to look dry, you can wrap them in a damp paper towel to add moisture back. Do not freeze them, as the cream cheese will separate and the bread will become mushy when thawed.
Can I use cream cheese spread instead of block cream cheese?
You can, but block cream cheese is better because it has less moisture. Cream cheese spread often contains added stabilizers and water, which can make the filling too wet and cause the bread to get soggy. If you must use spread, reduce the amount of mayo you add to compensate.
What other fillings work well in pinwheels?
You can use almost any deli meat and cheese combination. Try ham and Swiss, turkey and cranberry sauce, or roast beef and horseradish. For vegetarian options, use hummus, roasted vegetables, or spinach and feta. Get creative and mix and match until you find your favorite combo.
Can I freeze these pinwheels?
I don’t recommend freezing them. The cream cheese and bread don’t freeze well together. The bread becomes soggy and the cream cheese separates. It’s best to make them fresh and store them in the fridge for up to 2 days. If you need to make them ahead, assemble the rolls and chill them, but wait to slice them until you’re ready to serve.
Pin This Recipe!

Football Party Pinwheel Sandwiches
- Total Time: 1 hour 30 minutes
- Yield: 20 pinwheels 1x
Description
Easy, make-ahead finger food sandwiches featuring soft white bread rolled with a creamy ranch cream cheese filling, deli turkey, cheddar cheese, and fresh veggies. Perfect for game day parties and crowds.
Ingredients
- 1 loaf (16 slices) soft white sandwich bread
- 2 tablespoons butter, softened (optional)
- 8 ounces (225g) cream cheese, softened to room temperature
- 2 tablespoons mayonnaise
- 1 packet (1 ounce) ranch seasoning
- 1/2 teaspoon garlic powder
- 8 ounces (225g) deli turkey breast, thick-sliced
- 1 cup (100g) shredded cheddar cheese
- 1/2 cup chopped green onions
- 1/2 cup shredded lettuce (iceberg or romaine, dried)
Instructions
- In a large mixing bowl, combine the softened cream cheese, mayonnaise, ranch seasoning, and garlic powder. Mix with an electric mixer or whisk until smooth and creamy.
- Lay out the bread slices on a cutting board. If desired, trim the crusts. Lightly butter the outside of each slice to prevent sogginess.
- Spread a thin, even layer of the cream cheese mixture over the entire surface of each bread slice.
- Layer the deli turkey, shredded cheddar cheese, green onions, and shredded lettuce evenly over the cream cheese.
- Starting from one long edge, tightly roll the bread into a log, tucking in the filling as you go. Gently squeeze the ends to seal.
- Wrap each roll tightly in plastic wrap, ensuring no air pockets remain.
- Refrigerate the wrapped rolls for at least 1 hour, preferably overnight, to firm up the cream cheese.
- Unwrap the rolls and place them on a cutting board. Using a sharp knife, slice each roll into 1-inch thick pinwheels using a gentle sawing motion.
- Arrange the pinwheels on a platter and serve immediately.
Notes
Ensure the cream cheese is fully softened to avoid lumps. Chilling the rolls is crucial for clean slicing; do not skip this step. Use dry lettuce to prevent soggy bread. These can be made up to 24 hours in advance. Do not freeze, as the texture will suffer.
- Prep Time: 30 minutes
- Cook Time: 0 minutes
- Category: Appetizer
- Cuisine: American
Nutrition
- Serving Size: 1 pinwheel
- Calories: 120
- Sugar: 1
- Sodium: 250
- Fat: 6
- Saturated Fat: 3
- Carbohydrates: 12
- Fiber: 1
- Protein: 5
Keywords: pinwheel sandwiches, game day snacks, football party food, make ahead appetizers, cream cheese pinwheels, easy party snacks, deli meat sandwiches



