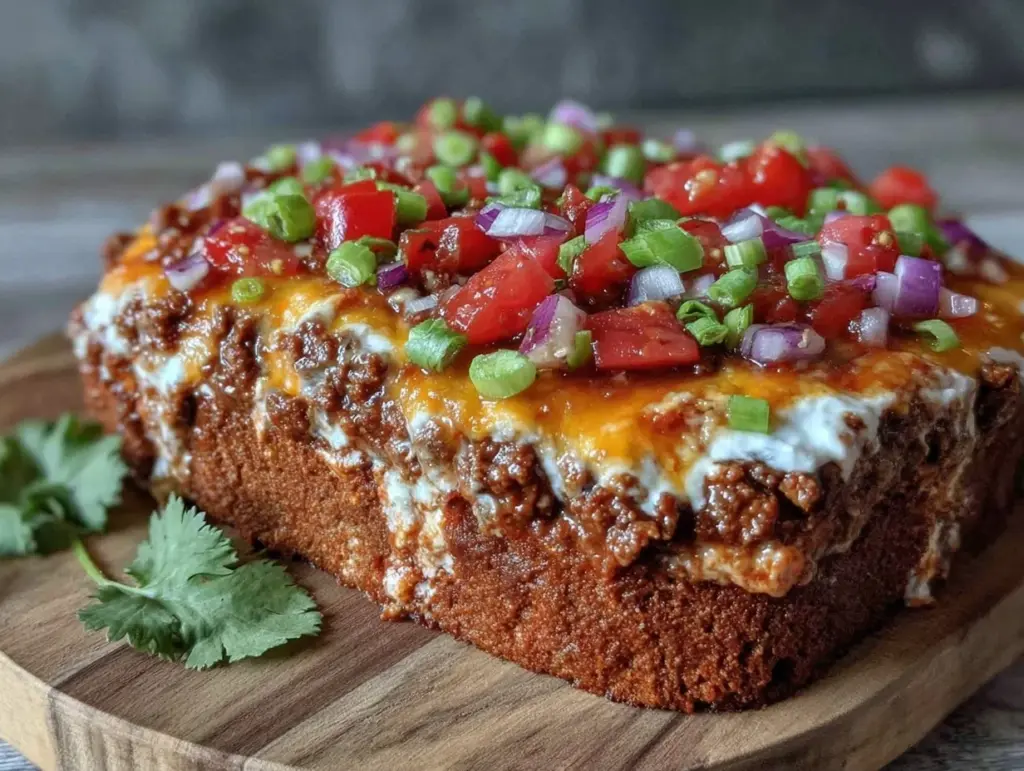
There is a specific kind of panic that sets in when you realize you’re hosting the tailgate, but you’ve spent the entire morning prepping a complicated roast that requires a thermometer, a basting brush, and a prayer. I’ve been there. I once showed up to a parking lot with a beautiful, perfectly roasted chicken, only to realize that everyone else was bringing finger foods they could eat with one hand while holding a beer with the other. Nobody wanted to sit down at a folding table with a plate of sliced meat. They wanted to graze. They wanted to grab, dip, and laugh.
That was the year I stopped trying to impress with complexity and started cooking for convenience. That’s when I discovered the magic of a layered taco dip. It’s the kind of dish that looks like you spent hours in the kitchen, but really, it’s just assembly. You brown some beef, you mix a few things in a bowl, you layer it in a baking dish, and you put it in the oven. While it’s bubbling away, you can actually sit down with your guests. You can watch the game. You can breathe.
This Football Tailgate Layered Taco Dip with Ground Beef is better than takeout, sure, but more importantly, it’s better than stress. It’s the ultimate “if you can only make one thing, make this” recipe. It’s forgiving, it’s flavorful, and it disappears faster than the good chips. I’ve made this for Super Bowl parties, casual Friday games, and even random Tuesday nights when I didn’t feel like cooking a full meal but still wanted something delicious. It works every single time.
People always ask me how I make it look so professional, with all those distinct layers. The secret isn’t fancy technique; it’s just knowing which ingredients go where so they don’t turn into a mushy mess. I’ve tested this dozens of times, adjusting the cheese ratios and the spice levels, until I landed on the version that makes people ask for the recipe before they’ve even finished their first scoop. It’s rich, it’s cheesy, it’s got that perfect taco flavor, and it’s incredibly easy to make. Let’s get into it.
Why You’ll Love This Layered Taco Dip
I know, another taco dip. But hear me out. This isn’t that sad, watery dip that sits out at a potluck for three hours and turns into a weird soup. This is substantial. It’s got a creamy base, a savory beef layer, and a cheesy top that gets golden and bubbly. It’s a meal in a bowl, essentially. Here’s why this Football Tailgate Layered Taco Dip with Ground Beef is the MVP of your game day spread:
- Zero Cooking Skills Required — Seriously. If you can chop an onion and stir a pot, you can make this. I’ve walked my niece through it over the phone while she was at college. She didn’t burn the kitchen down, and the dip was amazing. It’s foolproof.
- Builds in the Oven — You do almost all the work before you turn the oven on. Once it’s in there, you’re free. No standing over the stove stirring. No panicking about timing. It just gets better and hotter while you hang out.
- Feeds a Crowd Cheaply — You can feed 10-12 people for under $20. That’s incredible value. Ground beef is affordable, cream cheese is pantry-staple cheap, and tortilla chips are… well, they’re chips. It’s budget-friendly without feeling like it.
- It’s Better Than Takeout — I’m not joking. I’ve compared this to the layered dip from that popular chain restaurant, and honestly, homemade wins. You control the salt, you get fresh ingredients, and it doesn’t have that weird preservative taste. It tastes like real food.
- Transport-Friendly — This is the key for tailgating. You can bake it at home, put the whole dish in a cooler (with ice packs around it, not touching the dish), and carry it to the lot. It stays warm for a long time. Or, if you have a car with a cigarette lighter, you can keep it warm in the oven at 200°F. Either way, it travels well.
This dip has saved me more times than I can count. It’s my go-to when I need to bring something impressive but don’t have the energy to cook a whole roast. My friends think I’m a genius chef, but really, I just know how to layer things correctly. It’s confidence-building food.
Ingredients You’ll Need
Here’s the best part: you probably have most of this already. This Football Tailgate Layered Taco Dip with Ground Beef relies on simple, accessible ingredients. You don’t need to go to three different specialty stores. Just a standard grocery run will do.
For the Base Layer
Shredded Cheddar Cheese (2 cups / 200g) — Use a block and shred it yourself. Pre-shredded cheese has anti-caking agents that prevent it from melting smoothly. You want that gooey, stretchy melt, not a clumpy mess. Sharp cheddar gives the best flavor.
Cream Cheese (8 oz / 225g) — This is the binder. It needs to be softened to room temperature. If you try to mix cold cream cheese, you’ll get lumps that never go away. I usually take it out of the fridge about 30 minutes before I start.
Sour Cream (1 cup / 240g) — Full-fat only. Low-fat sour cream can separate and look oily when baked. You want richness here. It balances the sharpness of the cheese.
Taco Seasoning (1 packet / 28g) — I use a standard store-bought packet (like Old El Paso or McCormick). It’s consistent and has the right blend of cumin, chili powder, and garlic. You could make your own, but for a quick dip, the packet is perfect.
For the Meat Layer
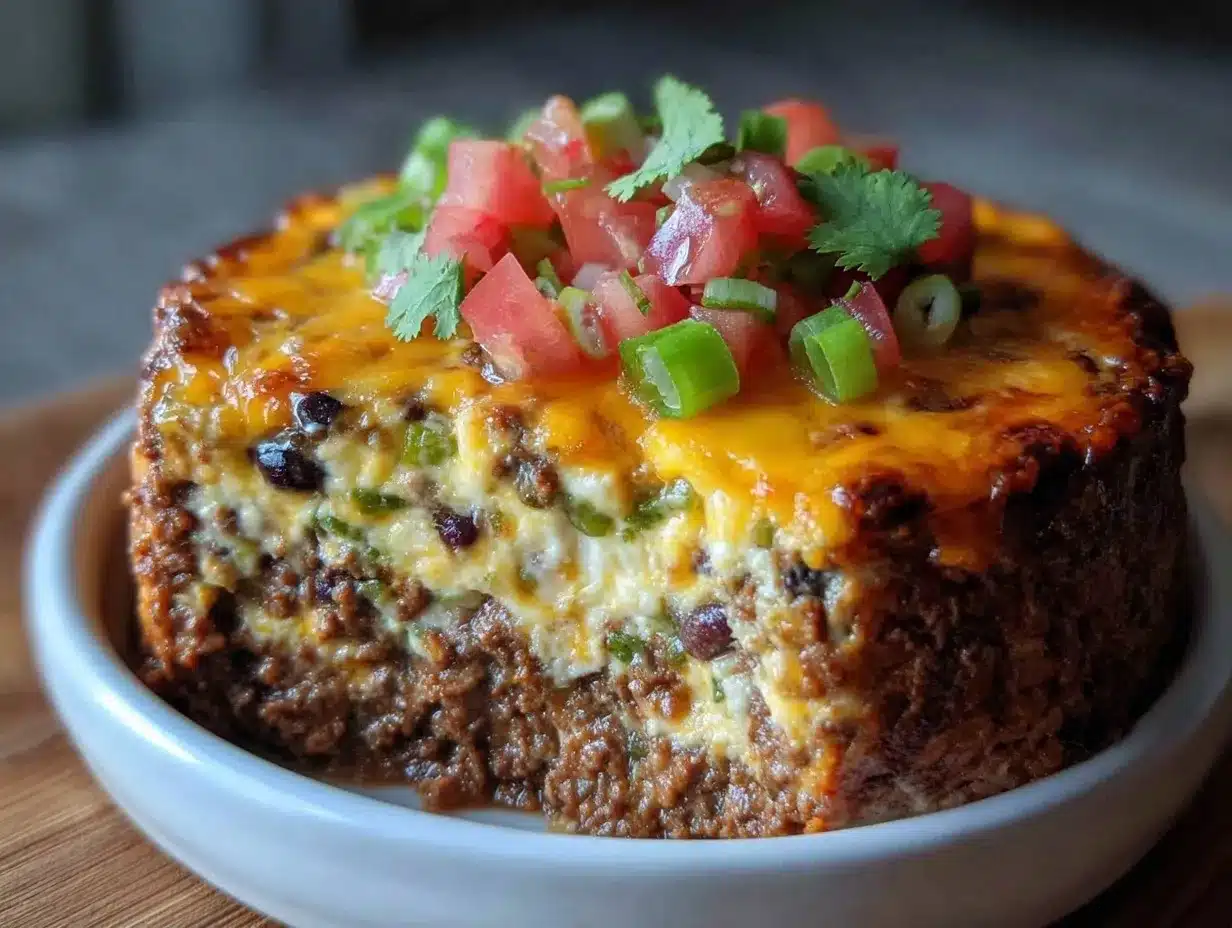
Ground Beef (1 pound / 450g) — 80/20 lean-to-fat ratio is ideal. You need that fat for flavor. If you use lean beef, the dip might taste dry. Brown it thoroughly and drain the grease. Seriously, drain it. You don’t want a greasy layer.
Onion (1 medium yellow onion, diced / about 150g) — Finely diced. You want it to disappear into the meat. If you hate onions, you can skip it, but it adds a necessary sweetness that balances the spice.
Black Beans (1 can / 15 oz, drained and rinsed) — This adds texture and makes the dip more filling without adding too many calories. It also helps absorb some of the moisture so the dip isn’t runny.
For the Topping
Monterey Jack Cheese (1 cup / 100g, shredded) — Jack cheese melts like a dream. It’s milder than cheddar, so it provides that stretchy, gooey top layer. Mix it with the cheddar for the best of both worlds.
Jalapeños (½ cup, sliced or diced) — Fresh or pickled, your choice. Fresh gives a brighter heat; pickled gives a tangier kick. I usually use fresh because I like the color. Remove the seeds if you don’t want it too spicy.
Cilantro (½ cup, chopped) — For freshness. It cuts through the richness of the cheese and beef. Don’t skip this. It makes the whole dish taste alive.
Tomatoes (2 medium Roma tomatoes, diced) — Add these right before serving, not before baking. If you bake them, they get mushy and watery. Fresh tomatoes on top give a nice crunch and acidity.
Tortilla Chips — For serving. I use thick, sturdy chips. Thin chips break and fall into the dip. You want something that can scoop up a good amount of cheese and beef.
Equipment Needed
You don’t need fancy equipment for this. Here’s what I actually use:
9×13 Inch Baking Dish — A standard glass or ceramic baking dish works best. It holds the layers perfectly. I prefer glass because I can see the bottom heating up, but ceramic is fine too.
Large Skillet — 12-inch works best for browning the beef. I use a stainless steel skillet, but non-stick is easier for cleanup. Just make sure it’s big enough to spread the beef out so it browns instead of steams.
Mixer — An electric hand mixer or stand mixer makes blending the cream cheese and sour cream super easy. But honestly, a sturdy spoon and a little elbow grease works too. I’ve done it both ways.
Colander — For draining the beans and the beef. Essential. Don’t skip draining the beef, or you’ll have a soup.
Wooden Spoon or Spatula — For stirring and layering. A spatula is helpful for spreading the cream cheese layer evenly.
Sharp Knife and Cutting Board — For dicing the onion, tomatoes, and jalapeños.
How to Make It: Step-by-Step
Alright, let’s make this! I’m walking you through exactly how I do it, including the little tricks I’ve picked up. This is the Football Tailgate Layered Taco Dip with Ground Beef, and it’s easier than you think.
Step 1: Prep Your Ingredients (10 minutes)
Before you turn on the stove, get everything ready. Dice the onion, chop the cilantro, dice the tomatoes, and shred your cheeses. Measure out the sour cream and taco seasoning. I know it seems fussy, but it makes the actual cooking way less stressful. Once you start browning the beef, things move fast. Set out your baking dish and make sure your cream cheese is soft.
Step 2: Brown the Beef (10 minutes)
Heat a large skillet over medium-high heat. Add the ground beef and the diced onion. Break up the beef with a wooden spoon as it cooks. Cook for about 8-10 minutes, until the beef is no longer pink and the onions are soft. You want a good brown color on the meat—it adds flavor. Once it’s done, drain the grease thoroughly. I usually pour it into a bowl and throw it away, rather than trying to drain it in the sink, which is messy. Sprinkle the taco seasoning over the beef and stir well. Let it sit for a minute so the flavors meld.
Step 3: Make the Creamy Base (5 minutes)
In a large mixing bowl, combine the softened cream cheese, sour cream, and half of the shredded cheddar cheese (save the other half for the top). Add the drained black beans and half of the diced tomatoes. Mix until smooth and creamy. It should be a thick, spreadable mixture. If it’s too stiff, add a splash of milk. If it’s too loose, add a bit more cream cheese.
Step 4: Assemble the Layers (5 minutes)
This is the fun part. Spread the cream cheese mixture evenly into the bottom of your 9×13 baking dish. It should cover the bottom completely. Next, spread the seasoned beef mixture over the cream cheese layer. Be gentle—don’t mix them together. You want distinct layers. Finally, sprinkle the remaining cheddar cheese and all of the Monterey Jack cheese evenly over the top. The cheese should cover the beef completely to prevent it from burning.
Step 5: Bake Until Bubbly (20 minutes)
Preheat your oven to 350°F (175°C). Place the baking dish in the center of the oven and bake for 20-25 minutes. You’ll know it’s done when the cheese is melted, bubbly, and slightly golden on top. The edges should be bubbling too. If you want it extra browned, you can broil it for the last 1-2 minutes, but watch it closely. Cheese burns fast.
Step 6: Add Fresh Toppings and Serve
Take the dip out of the oven and let it sit for 5 minutes. This is crucial. If you serve it immediately, it’s too hot to eat and the layers haven’t set. Letting it rest allows the cheese to firm up slightly, making it easier to scoop. Sprinkle the remaining diced tomatoes, sliced jalapeños, and chopped cilantro over the top. Serve immediately with sturdy tortilla chips.
Total Time: About 50 minutes (15 minutes prep, 35 minutes cook time)
Expert Tips & Tricks
Here’s everything I’ve learned from making this dozens of times. These tips will save you from my mistakes.
Drain the Beef Thoroughly
This is the #1 mistake people make. Greasy beef = greasy dip. After browning the beef, pour it into a colander and press down with a paper towel to absorb any remaining oil. It sounds excessive, but it makes a huge difference in the texture.
Softened Cream Cheese is Non-Negotiable
If your cream cheese is cold, you will have lumps. I’ve tried microwaving it for 10 seconds, but that often melts the edges. The best way is to just take it out of the fridge 30 minutes early. If you forget, cut it into small cubes and let them sit at room temperature for 15 minutes. They’ll soften up.
Don’t Overmix the Layers
When you’re spreading the beef over the cream cheese, be gentle. You want distinct layers, not a marbled mess. It looks better and gives you a better bite with each scoop.
Add Fresh Tomatoes Last
Never bake the fresh tomatoes. They release water when heated, which can make the dip watery. Add them right after you take the dip out of the oven. The residual heat will warm them slightly without turning them to mush.
Keep it Warm
If you’re tailgating, keep the dip warm in a slow cooker on the “warm” setting. Transfer it from the baking dish to the slow cooker once it’s out of the oven. It will stay perfect for hours.
Variations & Substitutions
Once you’ve nailed the basic version, here’s how you can mix it up. I’ve tried all of these.
Ground Turkey or Chicken
I’ve made this with ground turkey, and it’s lighter but still tasty. Just be sure to add a little extra seasoning, as turkey is milder. I also add a teaspoon of olive oil to the pan to keep it moist.
Vegetarian Version
Skip the beef and add an extra can of black beans, plus some corn. Sauté the onions and corn together, then season heavily. It’s still hearty and satisfying. My vegetarian friends love this version.
Spicy Kick
Add a can of diced green chiles to the cream cheese layer. Or, use spicy chorizo instead of ground beef. It changes the flavor profile completely, but it’s delicious.
Gluten-Free
This recipe is naturally gluten-free, just make sure your taco seasoning is certified gluten-free (some brands use wheat as a filler). Serve with gluten-free tortilla chips.
Dairy-Free
Use dairy-free cream cheese and sour cream, and skip the cheese topping or use a vegan cheese alternative. It won’t be as gooey, but it still works. I haven’t tested this extensively, so let me know if you try it!
Serving & Storage
How to Serve
I usually serve this straight from the baking dish, with a big bowl of chips on the side. But here are other ways I’ve enjoyed it:
Side Dishes: This dip is a main event, so it doesn’t need much. But if you want sides, try my Loaded Baked Potato Salad or some simple corn on the cob. It pairs well with grilled meats too, if you’re doing a full barbecue.
Toppings Bar: When I have guests, I put out: extra cilantro, diced onions, hot sauce, and sour cream. Everyone customizes their scoop.
Storage Instructions
Refrigerator: Store leftovers in an airtight container for up to 3 days. The flavors actually get better after a day or two.
Reheating: Reheat in the oven at 350°F for 15-20 minutes, or until warm. You can also microwave individual portions. The texture might change slightly, but it’s still good.
Freezing: This doesn’t freeze well. The dairy separates when thawed. Make it fresh or store in the fridge for up to 3 days.
Nutrition Information
I’m not a nutritionist, but here’s the breakdown if you’re tracking. This is a rich, indulgent dip, so portions matter.
Per Serving (based on 12 servings, ½ cup dip + 3 chips):
- Calories: 320
- Protein: 18g
- Carbs: 12g
- Fiber: 2g
- Fat: 22g
- Sodium: 450mg
It’s high in protein from the beef and cheese, and the beans add some fiber. But it’s also high in fat and sodium. Enjoy it as a treat, not a daily staple. If you want to make it lighter, use lean beef and reduced-fat dairy, though the texture will be different.
Final Thoughts
So that’s my go-to Football Tailgate Layered Taco Dip with Ground Beef. I’ve probably talked your ear off at this point, but when you make a recipe this often, you have a lot to say about it. This has saved me from culinary disasters more times than I can count. It’s my answer to “what do I bring?” when I’m tired, don’t want takeout, and still want something that tastes really good. My friends are happy, my family is happy, and I’m happy because I’m not stressed about cooking.
Make it yours! Try different add-ins, swap in your favorite vegetables, adjust the spice level. The best recipes are the ones you adapt to your tastes. If you make this, drop a comment and let me know what you think! I love hearing how recipes turn out in your kitchen. And if something doesn’t work, tell me that too—I’m here to help troubleshoot.
Happy cooking! And I hope your tailgate smells half as good as mine does right now.
Frequently Asked Questions
Can I make this ahead of time?
Yes! You can assemble the dip up to 24 hours in advance. Keep it covered in the fridge, then bake it when you’re ready. Just add 5-10 minutes to the baking time if it’s cold from the fridge. This is my preferred method for game days.
Why did my dip turn out watery?
This usually happens if the beef wasn’t drained well, or if you baked it too long. Make sure you press the beef with a paper towel to remove grease. Also, don’t overbake the tomatoes—add them fresh after baking.
Can I use ground turkey instead of beef?
Absolutely. Just be sure to add a little extra seasoning, as turkey is milder. I also add a teaspoon of olive oil to the pan to keep it moist. It’s a lighter option that still tastes great.
How do I keep the dip warm at a tailgate?
Transfer the dip to a slow cooker on the “warm” setting once it’s out of the oven. This keeps it at a safe temperature for hours. You can also keep it in a cooler with hot water bottles, but the slow cooker is easiest.
Can I freeze this dip?
I don’t recommend it. The dairy separates when thawed, and the texture becomes grainy. It’s best enjoyed fresh or stored in the fridge for up to 3 days.
What kind of chips work best?
Thick, sturdy tortilla chips are best. Thin chips break and fall into the dip. I like restaurant-style chips or sturdy tortilla strips. Avoid kettle chips if they’re too thin.
Pin This Recipe!
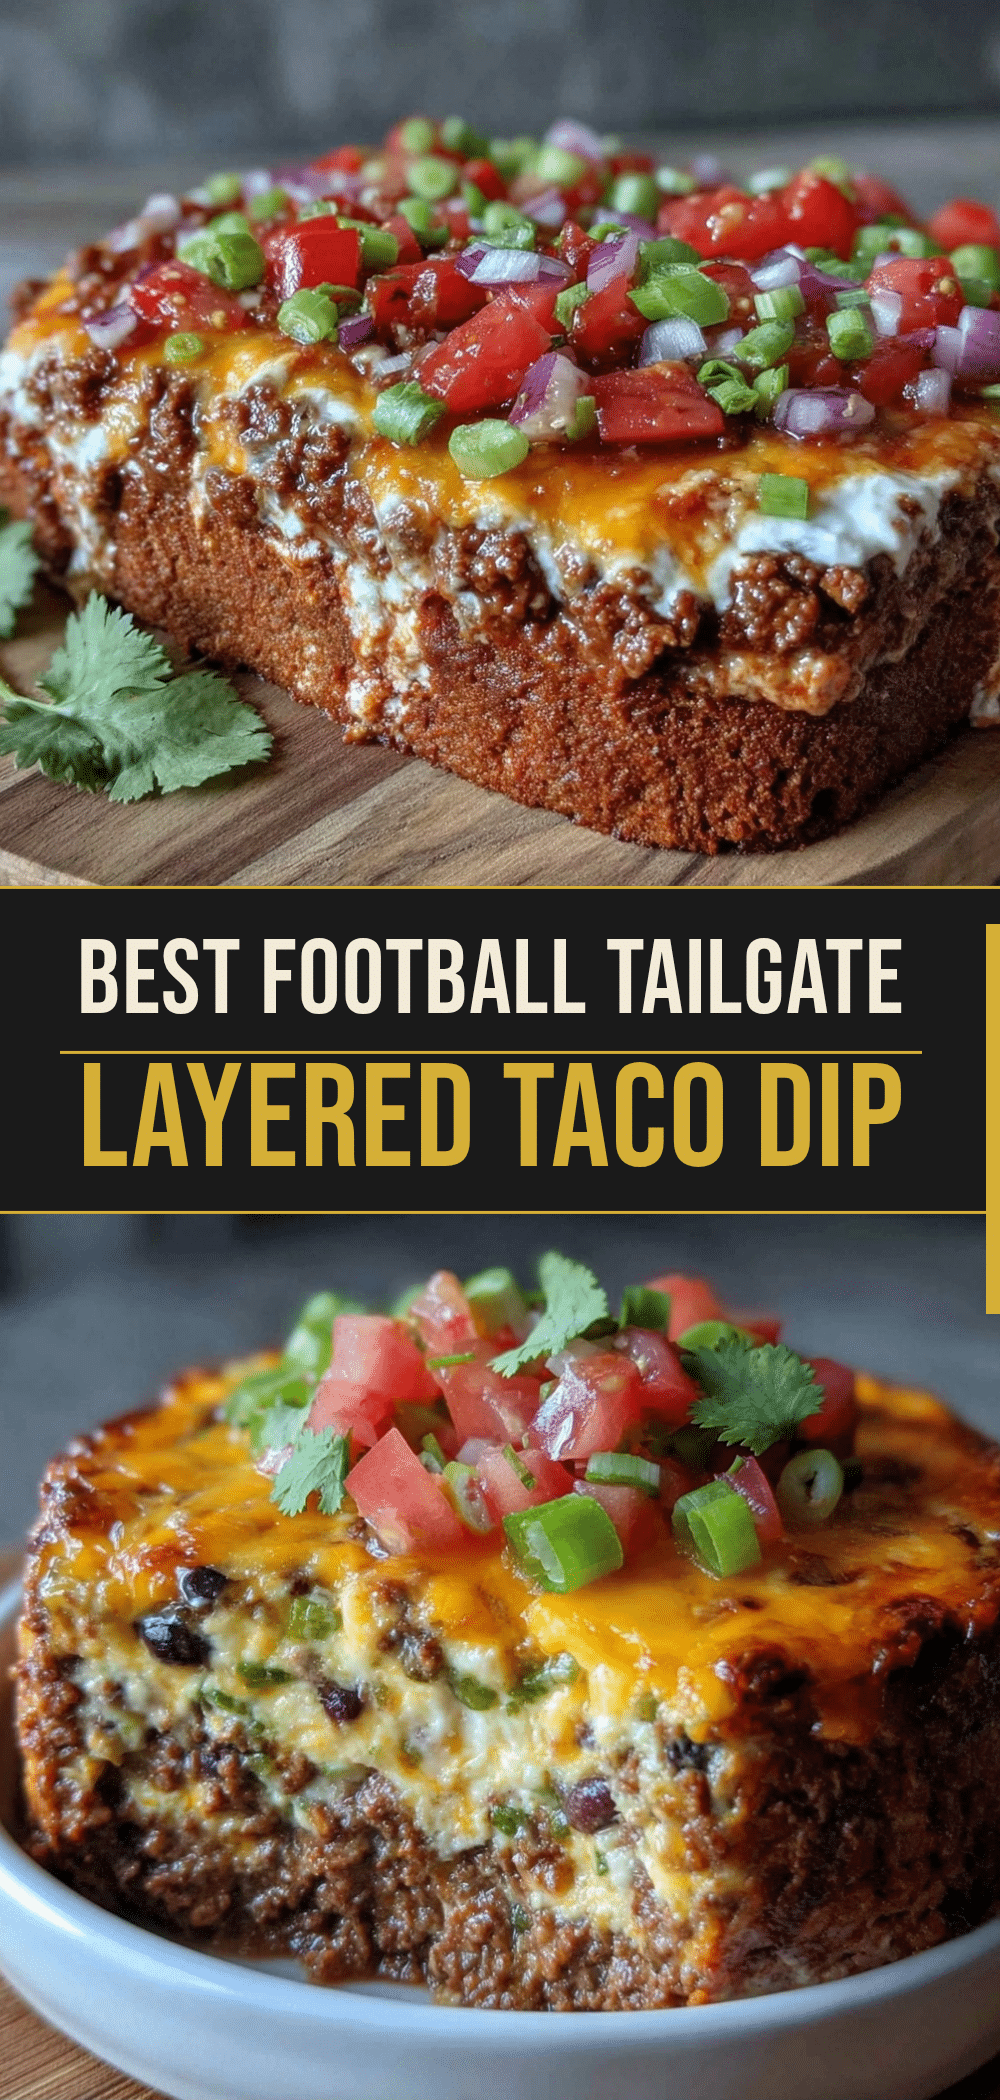
Football Tailgate Layered Taco Dip: 5-Ingredient Beginner Magic
- Total Time: 50 minutes
- Yield: 12 servings 1x
Description
This Football Tailgate Layered Taco Dip is a foolproof, crowd-pleasing appetizer that combines a creamy cheese base with seasoned ground beef and black beans, topped with melted cheddar and Monterey Jack. It is perfect for game days, requiring minimal active cooking time and offering impressive flavor with simple assembly.
Ingredients
- 2 cups (200g) shredded sharp cheddar cheese
- 8 oz (225g) cream cheese, softened to room temperature
- 1 cup (240g) full-fat sour cream
- 1 packet (28g) taco seasoning
- 1 pound (450g) ground beef (80/20 ratio)
- 1 medium yellow onion, finely diced
- 1 can (15 oz) black beans, drained and rinsed
- 1 cup (100g) shredded Monterey Jack cheese
- ½ cup sliced or diced jalapeños
- ½ cup chopped fresh cilantro
- 2 medium Roma tomatoes, diced
- Sturdy tortilla chips, for serving
Instructions
- Preheat oven to 350°F (175°C). Dice the onion, chop cilantro, dice tomatoes, and shred cheeses.
- Heat a large skillet over medium-high heat. Add ground beef and diced onion, breaking up the beef with a spoon. Cook for 8-10 minutes until browned and onions are soft.
- Drain the grease thoroughly from the beef. Sprinkle taco seasoning over the beef and stir well.
- In a large mixing bowl, combine softened cream cheese, sour cream, half of the cheddar cheese, drained black beans, and half of the diced tomatoes. Mix until smooth.
- Spread the cream cheese mixture evenly into the bottom of a 9×13 inch baking dish.
- Spread the seasoned beef mixture over the cream cheese layer.
- Sprinkle the remaining cheddar cheese and all of the Monterey Jack cheese evenly over the top.
- Bake for 20-25 minutes until cheese is melted, bubbly, and slightly golden.
- Remove from oven and let sit for 5 minutes to set.
- Top with remaining diced tomatoes, jalapeños, and cilantro. Serve immediately with tortilla chips.
Notes
[‘Drain the beef thoroughly to prevent a greasy dip; press with a paper towel if necessary.’, ‘Ensure cream cheese is softened to room temperature to avoid lumps.’, ‘Do not bake fresh tomatoes; add them after baking to prevent watery dip.’, “For tailgating, keep warm in a slow cooker on the ‘warm’ setting.”, ‘This recipe does not freeze well due to dairy separation.’]
- Prep Time: 15 minutes
- Cook Time: 35 minutes
- Category: Appetizer
- Cuisine: American
Nutrition
- Serving Size: ½ cup dip + 3 chips
- Calories: 320
- Sugar: 3
- Sodium: 450
- Fat: 22
- Saturated Fat: 12
- Carbohydrates: 12
- Fiber: 2
- Protein: 18
Keywords: taco dip, tailgate food, game day snacks, layered dip, ground beef recipe, easy appetizer, crowd pleaser, football party food



