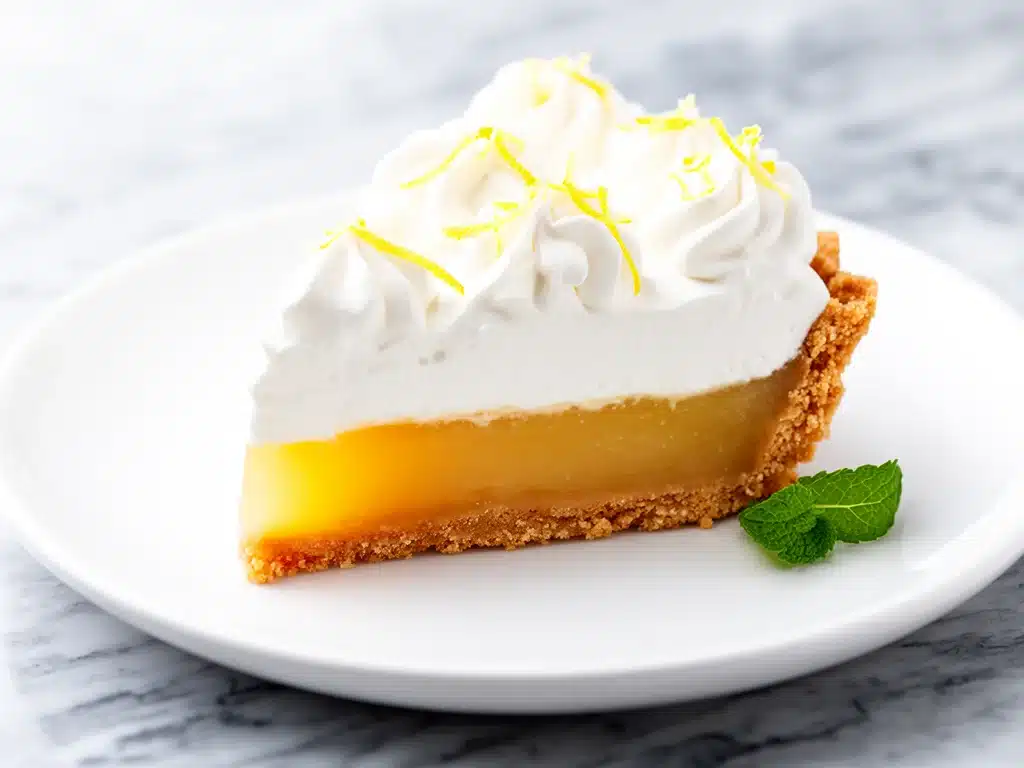
It was one of those humid July afternoons where the heat just hangs heavy in the air, making you not want to turn on the oven, let alone stand over a stove. I had just picked up my kids from soccer practice, we were all cranky, and I desperately wanted something sweet but light. Not heavy. Not chocolate-chip-cookie-heavy. I wanted something that tasted like a vacation.
I had lemons. I had cream cheese. I had graham crackers. I figured, “How hard can a no-bake lemon icebox pie be?” I whipped up the filling, poured it into the crust, and shoved it in the fridge to chill. But then life happened. A phone call. A spilled drink. A kid who needed help with a homework problem that somehow took forty-five minutes. By the time I remembered the pie, it had been sitting in the cold for about eight hours. I was ready to just scrape it into the trash and order pizza.
But then I looked at it. The top was perfectly smooth, slightly firm but yielding, and the scent of lemon was actually pulling me toward the kitchen. I cut a slice. The crust was crisp at the edges and soft in the middle. The filling was tangy, sweet, and impossibly creamy. It didn’t taste rushed. It tasted intentional. It tasted like I had planned this all week.
That was the moment I realized that the “lazy” way was actually the smart way. This no-bake lemon icebox pie has been on my dinner table for every summer gathering since that night. It’s my secret weapon when I want to impress guests without spending hours in the kitchen. And the best part? It’s stupidly simple. You don’t need a mixer. You don’t need an oven. You just need five ingredients and a little bit of patience.
If you’re tired of complicated desserts that require twelve steps and three different bowls, you need to try this. I’ve made it so many times that I can do it in my sleep (though I still recommend paying attention so you don’t burn the graham crackers). It’s the kind of dessert that disappears before you can even finish washing the dishes. Seriously, I’ve had people ask for the recipe while still chewing the last bite.
Why You’ll Love This No-Bake Lemon Icebox Pie
There are about a million reasons to make this pie, but let’s be real—you’re here because you want dessert that works. You want something that tastes gourmet but requires minimal effort. Here’s why this no-bake lemon icebox pie has earned a permanent spot in my weekly rotation:
- Zero Oven Required — Seriously. If your kitchen is hot, or if you just hate turning on the oven for a small dessert, this is your answer. The crust is no-bake (unless you prefer it pre-baked, which is fine too), and the filling sets in the fridge. It’s the ultimate low-stress baking.
- Five Ingredients Only — I’m not exaggerating. Cream cheese, powdered sugar, lemon juice, lemon zest, and graham crackers. That’s it. No weird stabilizers, no gelatin packets, no trips to three different specialty stores. It’s pantry-friendly in the best way.
- Makes Incredible Leftovers — Unlike some fruit pies that get soggy or lose their texture, this one actually improves after a day. The flavors meld together. The crust softens just enough to be tender but still holds its shape. I deliberately make extra for lunch the next day.
- Light and Refreshing — It’s not heavy on the stomach. The acidity from the lemon cuts through the richness of the cream cheese, so you can eat a generous slice and still feel good. It’s perfect for warm weather or after a heavy meal.
- Impressive Presentation — It looks like it came from a fancy bakery. The bright yellow filling against the dark graham cracker crust is visually striking. Add a few lemon slices on top, and you’ve got a centerpiece that screams “I put effort into this” (even if you didn’t).
This is my go-to when I need a dessert to just work. No complicated techniques, no weird ingredients, just reliable, delicious food that makes everyone happy. It’s also a great way to use up those lemons that have been sitting in your fruit bowl for a week.
Ingredients You’ll Need
Here’s the best part: you probably have most of this already. This no-bake lemon icebox pie relies on simple, high-quality ingredients because there’s nowhere to hide. If one ingredient is off, you’ll taste it. So let’s talk about what to buy and what to skip.
For the Crust
Graham cracker crumbs (1 ½ cups / 150g) — You can buy pre-crushed crumbs, but I usually just crush a few boxes of graham crackers in a bag with a rolling pin. It takes two minutes and tastes fresher. Use regular honey graham crackers, not the chocolate ones (unless you want a dessert pizza vibe).
Unsalted butter (6 tablespoons / 85g, melted) — This binds the crust. Use real butter, not margarine. Margarine has too much water and can make the crust soggy. If you’re out of butter, you can use coconut oil, but the flavor will be different.
Granulated sugar (2 tablespoons / 25g) — Just a little bit to sweeten the crust. If your graham crackers are already very sweet, you can skip this. I usually leave it in for balance.
For the Filling
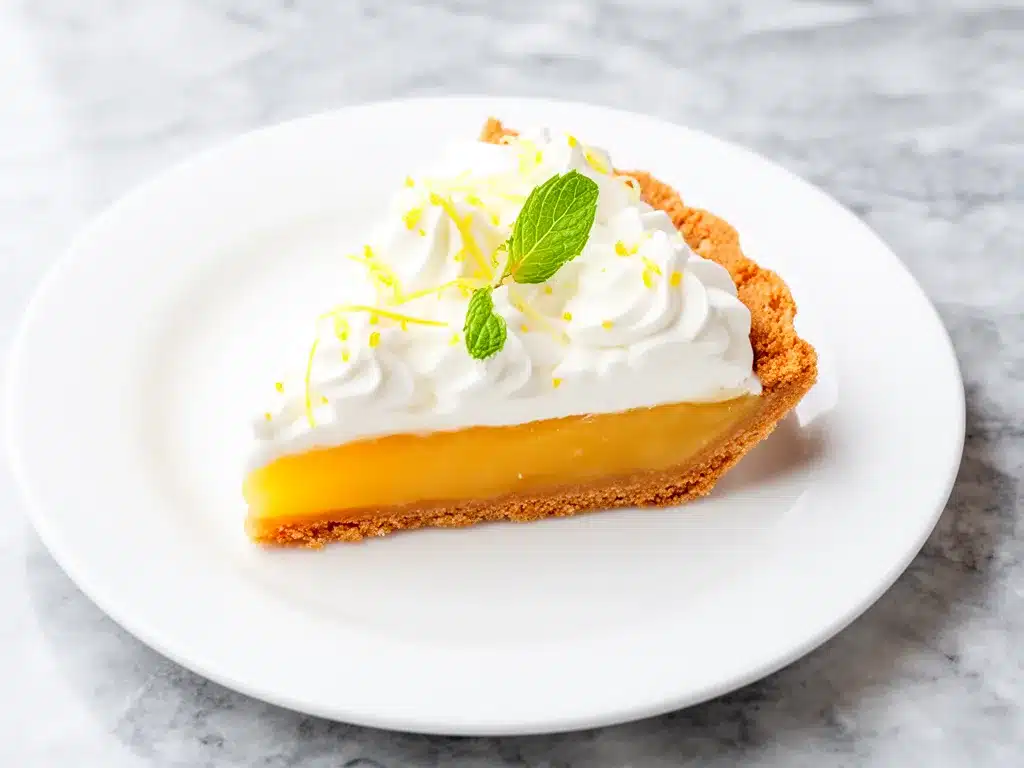
Full-fat cream cheese (8 ounces / 225g, softened) — This is the base of your pie. It needs to be softened to room temperature so it mixes smoothly. If you try to mix cold cream cheese, you’ll get lumps. I take it out of the fridge about 30 minutes before I start. Block cream cheese works better than the tub kind, which is lighter and airier.
Powdered sugar (1 cup / 120g) — Also known as confectioners’ sugar. Do not use granulated sugar here; it won’t dissolve in the cold filling and will feel gritty. Sift it if it’s clumpy. I’ve made the mistake of using unsifted sugar before, and the texture was off.
Fresh lemon juice (½ cup / 120ml) — About 3-4 large lemons. Please, I beg you, do not use bottled lemon juice. It has a metallic, preserved taste that ruins the fresh flavor of this pie. Squeeze the lemons yourself. It’s worth the effort.
Lemon zest (2 teaspoons) — This is where the real lemon flavor lives. The oil in the zest is more potent than the juice. Use a microplane or fine grater. Avoid the white pith, which is bitter. I usually zest the lemons before I juice them.
Optional Toppings
Whipped cream — Store-bought is fine, but homemade is better. I like a light dollop on each slice.
Lemon slices — Thinly sliced fresh lemons for garnish. They look beautiful and add a pop of color.
Grated white chocolate — For a sweeter, richer finish. It pairs surprisingly well with the tart lemon.
Edible flowers or mint — If you’re serving this to guests, a little green mint or a purple flower makes it look fancy. I don’t always do this, but it’s a nice touch.
Equipment Needed
You don’t need fancy equipment for this. Here’s what I actually use:
9-inch pie dish — Glass or ceramic works best. Metal can get too hot if you ever decide to briefly bake the crust. I use a classic Pyrex dish because I can see the crust browning.
Medium mixing bowl — For the crust. Any bowl works.
Large mixing bowl — For the filling. Make sure it’s big enough to mix comfortably.
Electric hand mixer or stand mixer — You can use a whisk and elbow grease, but a mixer makes the cream cheese smooth and airy in minutes. I use my hand mixer because it’s faster to clean than the stand mixer.
Zester or grater — A microplane is ideal. It gets the zest without the pith.
Citrus juicer — A handheld squeeze juicer works well. Or just your hands if you’re feeling rustic.
Spatula — For scraping the bowl. Don’t waste any filling.
Plastic wrap — To cover the pie while it sets. Or you can use foil.
Serving spatula — A thin, sharp knife or a pie server helps get clean slices. Run it under hot water for cleaner cuts.
How to Make It: Step-by-Step
Alright, let’s make this! I’m walking you through exactly how I do it, including the little tricks I’ve picked up over the years.
Step 1: Prepare the Crust (5 minutes)
In a medium bowl, mix the graham cracker crumbs, melted butter, and sugar. Stir until it looks like wet sand. Press this mixture firmly into the bottom and up the sides of your 9-inch pie dish. Use the bottom of a measuring cup to pack it down tightly. If it’s loose, the crust will crumble when you cut it. I usually chill the crust in the fridge for 10 minutes while I make the filling. This helps it set.
Step 2: Beat the Cream Cheese (2 minutes)
In a large bowl, beat the softened cream cheese with an electric mixer on medium speed until it’s completely smooth and creamy. No lumps! This is crucial. If you see lumps, keep beating. Scrape down the sides of the bowl. This usually takes about 1-2 minutes.
Step 3: Add Sugar and Zest (1 minute)
Add the powdered sugar and lemon zest to the cream cheese. Beat on low speed until combined. Scrape the bowl again. The mixture should be pale yellow and fluffy.
Step 4: Incorporate Lemon Juice (2 minutes)
Gradually add the fresh lemon juice while mixing on low speed. Start with ¼ cup, mix, then add the rest. Be careful not to overmix once the juice is in, or you might incorporate too much air. The filling should be smooth and thick. If it’s too thin, it might not set properly. If it’s too thick, add a teaspoon more lemon juice.
Step 5: Assemble the Pie (2 minutes)
Pour the filling into the prepared crust. Spread it evenly with a spatula. Smooth the top so it’s flat. This looks nice and makes slicing easier.
Step 6: Chill (At least 4 hours, preferably overnight)
Cover the pie with plastic wrap or foil. Place it in the fridge. It needs to set for at least 4 hours, but I recommend overnight. The longer it chills, the firmer it gets and the better the flavors meld. If you’re in a hurry, you can put it in the freezer for 30 minutes, but don’t leave it too long or the crust will get too hard.
Step 7: Serve
Remove from the fridge. Garnish with whipped cream, lemon slices, or white chocolate. Slice with a sharp knife. Serve cold. Enjoy!
Total Time: About 15 minutes active, plus 4+ hours chilling.
Expert Tips & Tricks
Here’s everything I’ve learned from making this no-bake lemon icebox pie dozens of times. These tips will save you from my mistakes.
Softened Cream Cheese is Non-Negotiable
If your cream cheese is cold, you will get lumps. And nobody wants lumpy lemon pie. I leave it on the counter for 30 minutes. If I forget, I cut it into small cubes and microwave it for 10-second bursts, stirring in between. It should be soft but not melted.
Fresh Lemon Juice Only
Bottled lemon juice tastes like chemicals. It has preservatives that change the flavor profile. Fresh juice is bright and tangy. If you don’t have fresh lemons, buy a carton of fresh-squeezed juice from the store, but squeeze your own if you can.
Don’t Skip the Zest
The juice provides the tartness, but the zest provides the aroma. Without zest, it tastes like sweetened cream cheese. With zest, it tastes like lemon. Use the yellow part only. The white pith is bitter.
Chill the Pie Dish
If you have time, put your pie dish in the fridge before you start. A cold dish helps the crust set faster and keeps the filling cool while you work.
Prevent a Soggy Crust
If you’re worried about a soggy crust, brush the inside of the crust with a thin layer of melted chocolate or white chocolate. Let it set, then add the filling. This creates a barrier. I don’t always do this, but it’s a good trick for humid days.
Common Mistakes
Mistake: Filling is too runny.
Fix: You might have added too much juice, or the cream cheese wasn’t cold enough. Chill it longer. Next time, use less juice.
Mistake: Crust is crumbly.
Fix: You didn’t press it down hard enough, or there wasn’t enough butter. Pack it firmly next time.
Mistake: Pie is too tart.
Fix: You used too much lemon juice. Next time, use ⅓ cup instead of ½ cup, or add a bit more powdered sugar.
Variations & Substitutions
Once you’ve nailed the basic version, here’s how you can mix it up. I’ve tried all of these.
Lime Icebox Pie
Swap lemon juice and zest for lime. It’s called Key Lime Pie for a reason. It’s tangier and greener. I love this variation in the spring.
Mixed Berry Lemon
Layer fresh strawberries or blueberries on top of the filling before chilling. The berries add color and a fresh fruit contrast. I do this when berries are in season.
Chocolate Chip Lemon
Stir ½ cup mini chocolate chips into the filling. It sounds weird, but the chocolate and lemon pair well. It’s like a lemon chip cookie in pie form.
Gluten-Free
Use gluten-free graham crackers. Most brands work fine. Just check the label to make sure they’re crushed well.
Dairy-Free
Use vegan cream cheese (like Kite Hill or Miyoko’s) and coconut cream instead of dairy cream cheese. It’s tangier and lighter. It works, but the texture is different.
Lower Sugar
Reduce powdered sugar to ½ cup and use stevia or monk fruit sweetener. It’s less sweet but still flavorful. Good for diabetics or low-sugar diets.
Serving & Storage
How to Serve:
I usually serve this straight from the fridge. It’s best cold. I top it with a dollop of whipped cream and a lemon slice. It looks elegant and tastes amazing. I also like to serve it with a side of fresh berries.
Side Dishes:
This pie is a dessert, so it doesn’t need sides. But if you’re serving it as part of a larger meal, it pairs well with light appetizers like these fruit and cheese snack boxes or simple salads.
Storage:
Refrigerator: Store covered in the fridge for up to 3 days. It’s best eaten within 2 days for optimal texture.
Freezer: You can freeze this pie for up to 1 month. Wrap it tightly in plastic wrap and foil. Thaw in the fridge overnight. The texture might be slightly different, but it’s still good.
Reheating: Do not reheat. This pie is meant to be eaten cold. Reheating will melt the filling and ruin the texture.
Nutrition Information
I’m not a nutritionist, but here’s the breakdown if you’re tracking.
Per Serving (based on 8 servings):
- Calories: 280
- Protein: 4g
- Carbs: 32g
- Fiber: 1g
- Sugar: 24g
- Fat: 15g
- Saturated Fat: 9g
- Cholesterol: 40mg
- Sodium: 180mg
What’s Good:
- It’s no-bake, so you save energy.
- It’s light and not overly heavy.
- You can control the sugar level.
What to Know:
- It contains dairy and gluten.
- It’s high in sugar due to the powdered sugar and graham crackers.
- Portion control is key. It’s easy to eat more than one slice.
My Take:
Look, this is a dessert. It’s sweet, it’s creamy, and it’s meant to be enjoyed. It’s not a health food. But it’s better than store-bought pie because you know exactly what’s in it. When I want to make it lighter, I use less sugar and more lemon. But usually? I just eat a slice and enjoy it.
Final Thoughts
So that’s my no-bake lemon icebox pie! I’ve probably talked your ear off at this point, but when you make a recipe this often, you have a lot to say about it.
This has saved summer dinners more times than I can count. It’s my answer to “what’s for dessert” when I’m tired, don’t want to bake, and still want something that tastes really good. My kids are happy, my husband’s happy, and I’m happy because I’m not stressed about cooking.
Make it yours! Try different toppings, swap in your favorite berries, adjust the lemon (though more is always better in my opinion). The best recipes are the ones you adapt to your family’s tastes.
If you make this, drop a comment and let me know what you think! I love hearing how recipes turn out in your kitchen. And if something doesn’t work, tell me that too—I’m here to help troubleshoot.
Happy cooking! And I hope your kitchen smells half as good as mine does right now.
Frequently Asked Questions
Can I use bottled lemon juice?
You can, but I don’t recommend it. Bottled lemon juice has preservatives that change the flavor. It tastes metallic and flat. Fresh juice is bright and tangy. If you must use bottled, mix it with some fresh zest to mask the flavor. But fresh is always better.
Can I make this ahead of time?
Yes! In fact, it’s better if you make it ahead. It needs at least 4 hours to set, but overnight is best. You can make it 1-2 days in advance. Just keep it covered in the fridge.
Why did my filling turn out runny?
Usually, this means the cream cheese wasn’t cold enough, or you added too much lemon juice. Cream cheese needs to be firm to hold the structure. If it’s warm, it won’t set properly. Next time, chill the cream cheese and use less juice.
Can I freeze this pie?
Yes, you can freeze it for up to 1 month. Wrap it tightly in plastic wrap and foil. Thaw in the fridge overnight. The texture might be slightly different, but it’s still good. Don’t refreeze it after thawing.
Can I use a different crust?
Yes! You can use a pre-made graham cracker crust, oreo crust, or even a shortbread crust. Just make sure it’s sturdy enough to hold the filling. I’ve also used a french toast crust idea for a unique twist, though it’s less traditional.
How long does this pie last?
It lasts up to 3 days in the fridge. After that, it starts to lose its texture and flavor. It’s best eaten fresh.
Can I make this dairy-free?
Yes, use vegan cream cheese and coconut cream. It’s tangier and lighter, but it works. The texture will be different, but it’s still delicious.
Pin This Recipe!


No-Bake Lemon Icebox Pie: 5-Ingredient Easy Dessert
- Total Time: 4 hours 15 minutes
- Yield: 8 servings 1x
Description
A light, refreshing, and creamy no-bake lemon pie that requires only five ingredients and minimal effort. Perfect for hot summer days when you want to avoid using the oven.
Ingredients
- 1 ½ cups (150g) graham cracker crumbs
- 6 tablespoons (85g) unsalted butter, melted
- 2 tablespoons (25g) granulated sugar
- 8 ounces (225g) full-fat cream cheese, softened
- 1 cup (120g) powdered sugar
- ½ cup (120ml) fresh lemon juice
- 2 teaspoons lemon zest
Instructions
- In a medium bowl, mix graham cracker crumbs, melted butter, and sugar until it resembles wet sand.
- Press the mixture firmly into the bottom and up the sides of a 9-inch pie dish. Chill in the fridge for 10 minutes.
- In a large bowl, beat the softened cream cheese with an electric mixer on medium speed until smooth and creamy.
- Add powdered sugar and lemon zest to the cream cheese. Beat on low speed until combined and fluffy.
- Gradually add fresh lemon juice while mixing on low speed. Stop mixing once incorporated to avoid incorporating too much air.
- Pour the filling into the prepared crust and spread evenly with a spatula.
- Cover the pie with plastic wrap or foil and refrigerate for at least 4 hours, preferably overnight, until set.
- Serve cold, optionally topped with whipped cream, lemon slices, or white chocolate.
Notes
Ensure cream cheese is softened to room temperature to avoid lumps. Use fresh lemon juice and zest for the best flavor; bottled juice can taste metallic. For a firmer crust, chill the pie dish before starting. If the filling is too runny, chill longer or reduce lemon juice slightly. If the crust is crumbly, press it down more firmly or add a bit more butter.
- Prep Time: 15 minutes
- Cook Time: 0 minutes
- Category: Dessert
- Cuisine: American
Nutrition
- Serving Size: 1 slice
- Calories: 280
- Sugar: 24
- Sodium: 180
- Fat: 15
- Saturated Fat: 9
- Carbohydrates: 32
- Fiber: 1
- Protein: 4
Keywords: no-bake, lemon pie, icebox pie, summer dessert, easy dessert, 5-ingredient dessert, cream cheese pie, gluten-free option



