Last Saturday, my neighbor’s kid turned six. It’s one of those parties where the parents are trying to keep it low-key, but you know there’s going to be cake. I showed up with a store-bought sheet cake because, let’s be honest, I was running on three hours of sleep and a grocery store run. I walked into the kitchen, put it on the counter, and watched the mom’s face. It wasn’t mean, but it was… polite. And then I saw the dad take a bite and immediately ask, “Is this the bakery on 4th Street? It tastes better than that.”
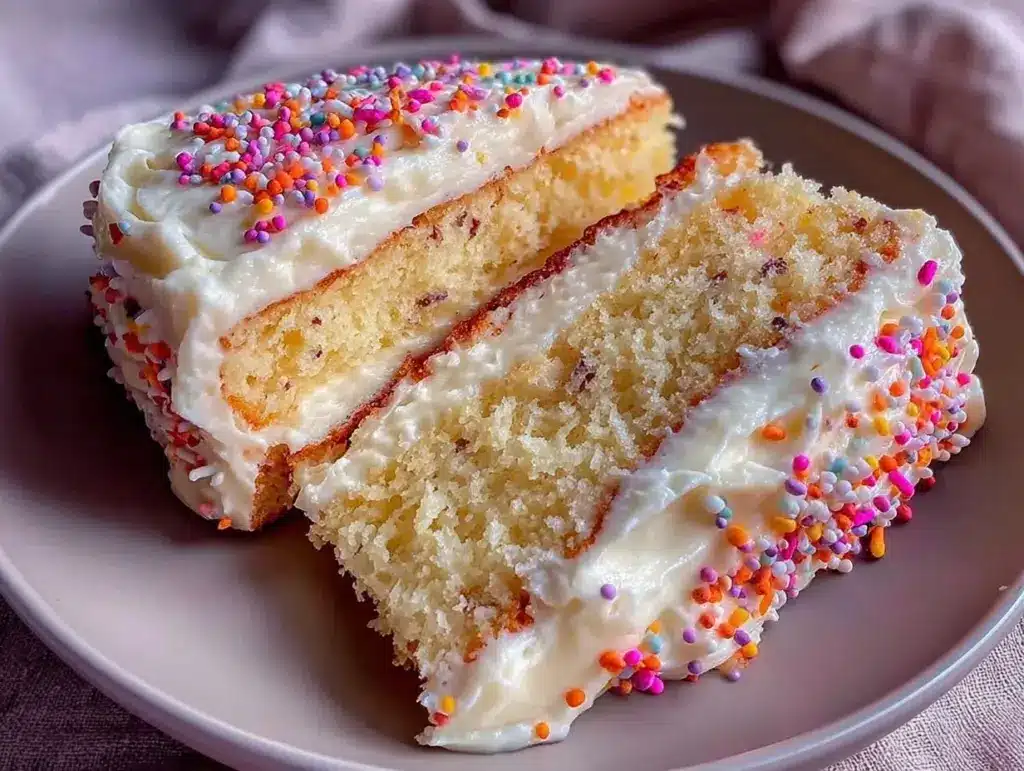
That moment stuck with me. Not because I felt bad, but because it reminded me of why I started baking in the first place. I don’t bake for show. I bake because I want people to close their eyes when they take a bite and forget they’re eating something from my kitchen. That’s why I created this small batch vanilla bean birthday cake. It’s the kind of cake that makes people stop mid-chew and ask, “What is in this?” It’s not complicated. It’s not fancy. But it is undeniably, mouth-wateringly good.
I’ve tested this recipe more times than I can count, mostly because I make it for myself when I need a little pick-me-up. The best part? It’s a small batch. You’re making two 6-inch round cakes, or one big 8-inch cake. That means you’re not stuck with twelve layers of leftover sponge sitting in your fridge for a week. You make just enough for the party, the leftovers fit in a single Tupperware, and you’re happy. Seriously, if you can only make one cake recipe this year, make this one. You really can’t mess it up.
Why You’ll Love This Small Batch Vanilla Bean Birthday Cake
There are a million cake recipes out there. Most of them call for a dozen ingredients, a stand mixer, and a degree in food science. This one? It’s different. It’s built for real life, real kitchens, and real taste buds. Here’s why this small batch vanilla bean birthday cake has become my go-to whenever I want to feel like a baking pro without the stress.
- It’s Actually Small Batch — This is huge. Most recipes are designed for 12-inch pans that feed a crowd. This makes two 6-inch rounds. Perfect for an intimate birthday, a couple of sweet treats, or just satisfying a craving without the guilt of a whole pan of leftovers. No waste. Just joy.
- Real Vanilla Flavor — I’m not talking about that artificial vanilla extract that tastes like cough syrup. I’m talking about real vanilla bean paste or scraped seeds. The difference is night and day. You get those beautiful speckles and that deep, floral aroma that makes everyone think you spent hours on it. Spoiler: You didn’t.
- Simple Ingredients — You likely have everything in your pantry right now. Flour, sugar, butter, eggs, milk, vanilla. That’s it. No weird stabilizers, no obscure flours, no fancy gadgets. If you can measure and mix, you can make this.
- Beginner-Proof — I’ve had people with zero baking experience make this and come back to tell me they felt like they were in a bakery. The method is straightforward: cream the butter and sugar, add the wet stuff, mix in the dry stuff. No folding, no whipping egg whites, no tempering. Just solid, reliable mixing.
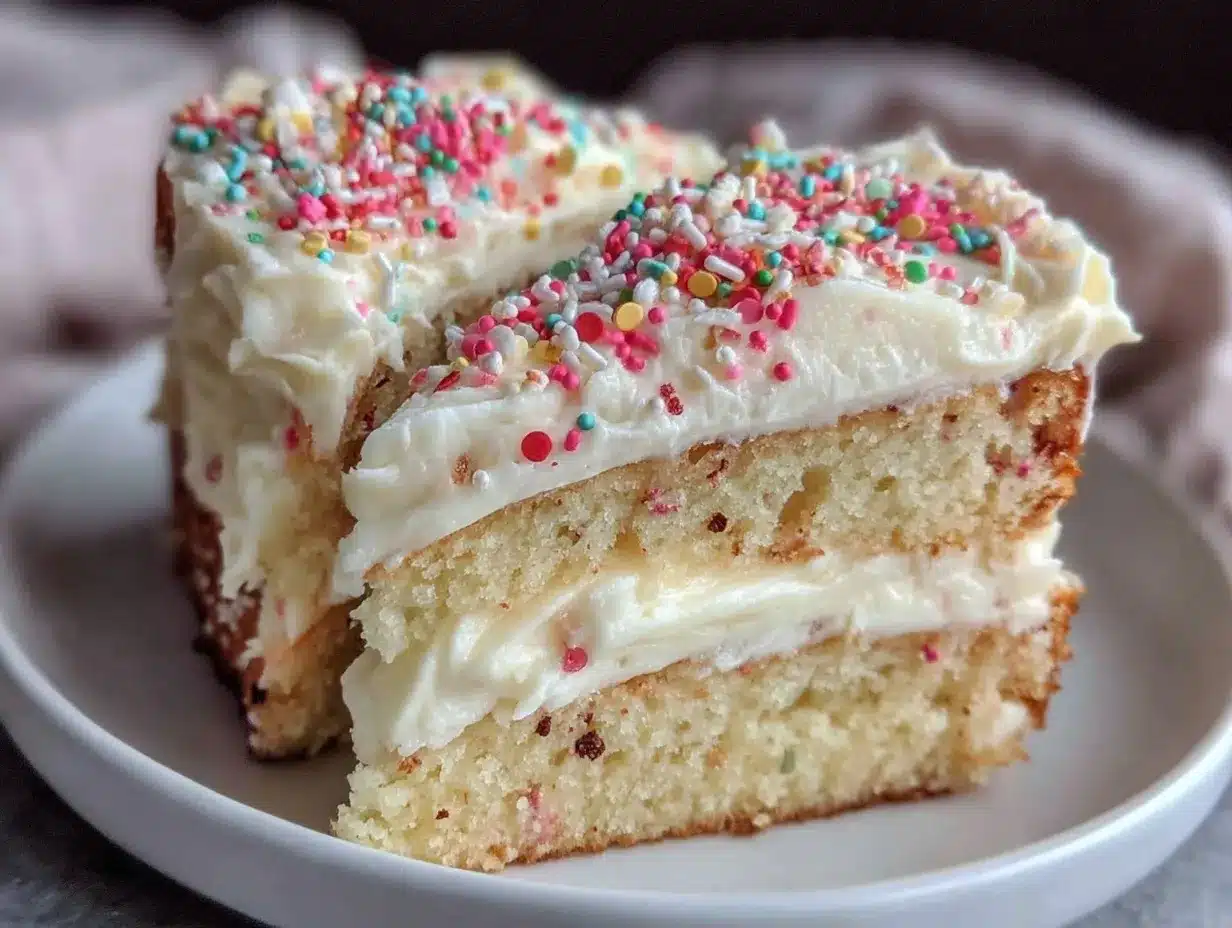
- Classic Taste, Elevated Look — It tastes like the best vanilla cake you’ve ever had, but the presentation is clean and elegant. The vanilla bean speckles make it look artisanal. It’s the kind of cake that looks like it came from a high-end patisserie but tastes like home.
This cake is my answer to “I want something special but I don’t want to spend all day in the kitchen.” It’s foolproof, forgiving, and absolutely delicious. Once you try it, you’ll wonder why you ever bought boxed mixes or settled for mediocre bakery cakes.
Ingredients You’ll Need
Here’s the thing about this small batch vanilla bean birthday cake: it doesn’t need a lot. In fact, the simplicity is what makes it shine. I’m particular about three things here, but the rest is pantry staples. I’ve included US and metric measurements because I know everyone measures differently.
For the Cake
Unsalted butter (1/2 cup / 113g) — Room temperature is non-negotiable. If you microwave it, it’s melted, not softened. Softened means you can leave an indent with your finger. This helps it cream properly with the sugar for a light texture.
Granulated white sugar (3/4 cup / 150g) — Don’t reduce the sugar. It’s not just for sweetness; it helps tenderize the cake and create that nice crust. I use regular white sugar, not brown. Brown sugar makes it denser, and we want light and fluffy.
Large eggs (2) — Room temperature eggs blend better into the batter. Cold eggs can cause the butter to seize up. I take them out of the fridge 30 minutes before I start. If you forget, drop them in warm water for 5 minutes.
Vanilla bean paste (2 teaspoons) — Or 1 vanilla bean, scraped. Vanilla bean paste is easier because it has the seeds already suspended in it. It looks gorgeous in the batter and tastes incredible. You can find it in the baking aisle of most grocery stores. If you can’t find it, use 1 tablespoon of high-quality vanilla extract plus 1/2 teaspoon of seeds from a scraped bean.
All-purpose flour (1 1/2 cups / 190g) — Spoon it into the cup and level it off. Don’t scoop directly from the bag, or you’ll pack it down and get a dense cake. I use Gold Medal or King Arthur. Both work great.
Baking powder (1 1/2 teaspoons) — Make sure it’s fresh! Old baking powder makes flat cakes. I check the date on the can every time I bake.
Salt (1/2 teaspoon) — Enhances the vanilla flavor. Don’t skip it. It’s not there to make it salty; it’s there to make it taste like vanilla.
Whole milk (1/2 cup / 120ml) — Room temperature again. I use whole milk for richness. Skim milk will make the cake dry. Buttermilk works too, but you’ll need to adjust the baking powder slightly (use 1 teaspoon instead of 1 1/2).
For the Vanilla Bean Buttercream
Unsalted butter (1 cup / 226g) — Softened. Same rule as above. It should be soft enough to squish but not oily.
Powdered sugar (4 cups / 480g) — Sifted. This is crucial. Powdered sugar has cornstarch in it, and if you don’t sift it, you’ll get lumps in your frosting. I sift it twice to be safe.
Vanilla bean paste (1 tablespoon) — More vanilla never hurts. This makes the frosting taste as good as the cake.
Heavy cream (2-3 tablespoons) — Just enough to loosen the frosting. Add it one tablespoon at a time. You want a spreadable consistency, not a runny one.
Salt (1/4 teaspoon) — Cuts the sweetness of the powdered sugar. Essential.
Optional: Edible gold dust or sprinkles — Because it’s a birthday cake, and we like to celebrate. I keep a jar of gold luster dust for when I want to look fancy.
Equipment Needed
You don’t need a fancy kitchen for this. Here’s what I actually use. If you don’t have these exact items, you can probably substitute.
Two 6-inch round cake pans — Or one 8-inch round pan. If you use an 8-inch pan, the bake time will be shorter (check at 25 minutes). Grease and line the bottoms with parchment paper. This is the #1 way to ensure your cake doesn’t stick.
Mixing bowls — One large for the dry ingredients, one medium for the wet. I use glass bowls because they’re easy to see through and clean.
Hand mixer or stand mixer — I use a hand mixer because it’s easier to clean and I don’t have to haul out the big stand mixer for such a small batch. But a stand mixer works fine too. Just use the paddle attachment.
Spatula — A rubber spatula is great for scraping down the sides of the bowl. You want all that batter mixed evenly.
Cooling rack — Essential for cooling the cakes. If you leave them in the pans, they’ll steam and get soggy. I have a simple wire rack from the hardware store.
Offset spatula — Makes frosting easier. But a regular butter knife works if you’re in a pinch. I learned to frost with a butter knife in college; it’s not pretty, but it gets the job done.
How to Make It: Step-by-Step
Alright, let’s make this! I’m walking you through exactly how I do it. It’s straightforward, but I’ll point out the little tricks that make the difference between good and great.
Step 1: Prep Your Pans and Oven (5 minutes)
Preheat your oven to 350°F (175°C). Grease your 6-inch cake pans with butter or cooking spray. Then, cut a circle of parchment paper to fit the bottom. Grease the parchment too. This guarantees your cakes will slide out effortlessly. I’ve lost count of how many cakes I’ve ruined by forgetting the parchment. Don’t be me.
Step 2: Mix the Dry Ingredients (2 minutes)
In your medium bowl, whisk together the flour, baking powder, and salt. Whisking ensures the baking powder is evenly distributed. If it’s not, you might get pockets of bitter baking soda taste. Just a quick whisk is enough.
Step 3: Cream the Butter and Sugar (3-4 minutes)
In the large bowl, beat the softened butter and sugar together on medium-high speed. This is the most important step. You’re looking for a pale, fluffy mixture. It should look like sand that’s been fluffed up. This takes about 3-4 minutes. If you rush this, your cake will be dense. Be patient. Scrape down the sides of the bowl halfway through.
Step 4: Add Eggs and Vanilla (2 minutes)
Add the eggs one at a time, beating well after each addition. Then add the vanilla bean paste. Mix until just combined. The batter might look slightly curdled at this point. Don’t panic. It’s normal. Just keep mixing.
Step 5: Combine Wet and Dry (2 minutes)
Reduce the mixer speed to low. Add the flour mixture in three parts, alternating with the milk. Start and end with the flour. Mix until *just* combined. Overmixing at this stage develops gluten, which makes the cake tough. Stop as soon as you don’t see streaks of flour. The batter should be smooth and thick.
Step 6: Bake (20-25 minutes)
Distribute the batter evenly between the two pans. Smooth the tops with a spatula. Bake for 20-25 minutes. The cakes are done when a toothpick inserted into the center comes out clean or with a few moist crumbs. They should also pull away slightly from the sides of the pan. Do not overbake! They will continue to cook on the hot pan for a minute after you take them out.
Step 7: Cool Completely (1 hour)
Let the cakes cool in the pans for 10 minutes. Then, run a knife around the edges and flip them out onto a cooling rack. Peel off the parchment paper. Let them cool completely before frosting. If you frost warm cakes, the buttercream will melt and slide off. I know it’s tempting, but wait. Use this time to clean up your kitchen.
Step 8: Make the Buttercream (5 minutes)
While the cakes cool, make the frosting. Beat the softened butter on medium-high until creamy (2 minutes). Add the sifted powdered sugar, vanilla bean paste, and salt. Beat on low until combined, then increase to high and beat for 3 minutes until fluffy. Add heavy cream one tablespoon at a time until you reach your desired consistency. It should be thick enough to hold a peak but soft enough to spread easily.
Step 9: Assemble and Frost (10 minutes)
Place one cake layer on your serving plate. Spread a generous layer of buttercream on top. Place the second layer on top. Frost the top and sides with the remaining buttercream. Use a spatula to create swirls or a smooth finish. I like swirls; they look homemade and inviting. Sprinkle with gold dust or sprinkles if you’re feeling festive.
Total Time: About 1 hour 30 minutes (including cooling). Active time is only about 25 minutes.
Expert Tips & Tricks
Here’s everything I’ve learned from making this small batch vanilla bean birthday cake dozens of times. These tips will save you from my mistakes.
Room Temperature Ingredients Are Key
I can’t stress this enough. Cold eggs and butter won’t emulsify properly. Your batter will look separated, and your cake will be dense. Take your eggs and butter out of the fridge at least 30 minutes before you start. If you’re really short on time, the warm water trick works for eggs, and you can cut the butter into small cubes to soften it faster.
Don’t Overmix the Batter
Once you add the flour, mix until you *just* can’t see the flour anymore. Overmixing creates gluten, which leads to a chewy, bread-like cake instead of a tender, crumbly one. I set a timer for 30 seconds after adding the flour to remind myself to stop.
Sift Your Powdered Sugar
I know it’s annoying. I hate sifting too. But powdered sugar has lumps. If you don’t sift it, you’ll have lumpy frosting. It’s not worth it. Just do it. It takes 30 seconds and makes your frosting silky smooth.
Cool Completely Before Frosting
This is the most common mistake. Warm cake + cold frosting = melted frosting. Warm cake + warm frosting = a mess. Let the cakes cool on a rack until they’re at room temperature. You can touch them and not feel any heat. This usually takes about an hour.
Use Vanilla Bean Paste
If you haven’t tried vanilla bean paste, do it. It’s worth every penny. It gives you the flavor of real vanilla and those beautiful black speckles that scream “I put effort into this.” It’s not just for looks; the flavor is deeper and more complex than extract.
Variations & Substitutions
Once you’ve nailed the basic version, here’s how you can mix it up. I’ve tried all of these, and they all work.
Lemon Vanilla Cake
Add the zest of one lemon to the butter and sugar mixture. It adds a bright, fresh flavor that cuts through the sweetness. Perfect for spring birthdays.
Chocolate Chip Vanilla Cake
Fold 1/2 cup of mini chocolate chips into the batter after mixing. They add little bursts of chocolate that everyone loves. Just be careful not to overmix them in.
Gluten-Free Version
Use a 1:1 gluten-free flour blend. Make sure it contains xanthan gum, or add 1/2 teaspoon. The texture will be slightly denser, but still delicious. I’ve used King Arthur’s blend with great results.
Dairy-Free Version
Replace the butter with vegan butter (like Earth Balance) and the milk with oat milk or soy milk. The frosting will be slightly different in texture, but still tasty. Use a high-quality vegan butter that creams well.
Single Layer Cake
If you only want one layer, double the frosting amount. It makes for a gorgeous, tall slice. I love this for individual servings.
Flavor Add-Ins
Try adding 1 teaspoon of almond extract with the vanilla for a French vanilla twist. Or 1 teaspoon of maple syrup for a rustic flavor. The base recipe is very forgiving.
Serving & Storage
How to Serve:
I usually serve this cake with a simple dusting of powdered sugar and fresh berries. It’s elegant but not fussy. Pair it with a cup of coffee or tea. It’s also great with a glass of cold milk.
Storage:
Store leftover cake in an airtight container at room temperature for up to 2 days. The buttercream keeps it moist. If it’s very hot outside, refrigerate it, but let it come to room temperature before serving for the best texture.
Freezing:
You can freeze the unfrosted cake layers. Wrap them tightly in plastic wrap and then in foil. They’ll keep for up to 3 months. Thaw them in the fridge overnight before frosting. This is great for meal prepping your baking.
Reheating:
You don’t need to reheat this cake. It’s best at room temperature. If you’re in a hurry, you can microwave a slice for 10 seconds to soften it slightly, but it’s not necessary.
Nutrition Information
I’m not a nutritionist, but here’s the breakdown if you’re tracking. This is a rich cake, so a little goes a long way.
Per Serving (based on 8 slices):
- Calories: 380
- Protein: 4g
- Carbs: 45g
- Fiber: 1g
- Sugar: 32g
- Fat: 20g
- Saturated Fat: 12g
- Cholesterol: 65mg
- Sodium: 180mg
Look, this is a birthday cake. It’s supposed to be a treat. It’s not a health food. But it’s better than store-bought because you control the ingredients. When I make this, I use real butter and real vanilla, which makes a huge difference in how it tastes and feels. Enjoy it mindfully. It’s worth it.
Final Thoughts
So that’s my small batch vanilla bean birthday cake! I’ve probably talked your ear off at this point, but when you make a recipe this often, you have a lot to say about it. This cake has saved my baking reputation more times than I can count. It’s my answer to “I want to bake something special but I don’t want to stress out.” My family loves it, my friends ask for the recipe, and I love that it’s so forgiving.
Make it yours! Try different add-ins, swap in your favorite sprinkles, or just enjoy it plain. The best recipes are the ones you adapt to your tastes. And if you make this, I’d love to hear how it turns out. Drop a comment and let me know!
Happy baking! And I hope your kitchen smells half as good as mine does right now.
Frequently Asked Questions
Can I use vanilla extract instead of vanilla bean paste?
Yes, you can. Use 1 tablespoon of extract instead of 2 teaspoons of paste. You won’t get the pretty black speckles, but the flavor will still be great. I recommend using a high-quality, dark vanilla extract for the best flavor.
Why did my cake turn out dense?
This usually happens if you overmix the batter after adding the flour, or if your butter and sugar weren’t creamed enough. Make sure you beat the butter and sugar until it’s pale and fluffy (3-4 minutes), and stop mixing as soon as the flour is incorporated.
Can I make this in a 9-inch pan?
You can, but the bake time will be shorter. Start checking at 20 minutes. The cake will be thinner, so it might not have the same height as the 6-inch version. I prefer the 6-inch pans for the perfect slice thickness.
How do I get the vanilla bean speckles if I don’t have paste?
Buy a real vanilla bean. Slice it lengthwise and scrape the seeds out with the back of a knife. Add those seeds to the batter. It’s a bit more work, but the flavor and look are incredible.
Can I freeze the frosted cake?
I don’t recommend freezing the frosted cake. The buttercream can separate or become grainy when thawed. It’s better to freeze the unfrosted layers and frost them fresh when you’re ready to serve.
Is this cake too sweet?
The sweetness is balanced by the salt and the rich vanilla flavor. If you find it too sweet, reduce the sugar in the cake to 2/3 cup, but keep the frosting amount the same. The frosting is where the sweetness lives, so you can adjust that by adding a pinch more salt.
Pin This Recipe!
Small Batch Vanilla Bean Birthday Cake: Easy & Foolproof
- Total Time: 1 hour 30 minutes
- Yield: 8 servings 1x
Description
A foolproof, small-batch vanilla bean birthday cake that yields two 6-inch rounds or one 8-inch cake. Made with real vanilla bean paste for deep flavor and elegant speckles, this recipe is beginner-friendly and uses simple pantry staples.
Ingredients
- 1/2 cup (113g) unsalted butter, room temperature
- 3/4 cup (150g) granulated white sugar
- 2 large eggs, room temperature
- 2 teaspoons vanilla bean paste (or 1 vanilla bean, scraped)
- 1 1/2 cups (190g) all-purpose flour
- 1 1/2 teaspoons baking powder
- 1/2 teaspoon salt
- 1/2 cup (120ml) whole milk, room temperature
- 1 cup (226g) unsalted butter, softened (for frosting)
- 4 cups (480g) powdered sugar, sifted (for frosting)
- 1 tablespoon vanilla bean paste (for frosting)
- 2–3 tablespoons heavy cream (for frosting)
- 1/4 teaspoon salt (for frosting)
- Optional: Edible gold dust or sprinkles
Instructions
- Preheat oven to 350°F (175°C). Grease two 6-inch round cake pans (or one 8-inch pan) and line the bottoms with parchment paper.
- In a medium bowl, whisk together the flour, baking powder, and salt.
- In a large bowl, beat the softened butter and sugar on medium-high speed for 3-4 minutes until pale and fluffy. Scrape down the sides of the bowl halfway through.
- Add eggs one at a time, beating well after each addition. Mix in the vanilla bean paste until just combined.
- Reduce mixer speed to low. Add the flour mixture in three parts, alternating with the milk, starting and ending with the flour. Mix until just combined; do not overmix.
- Distribute batter evenly between pans. Bake for 20-25 minutes, or until a toothpick inserted into the center comes out clean.
- Let cakes cool in pans for 10 minutes, then flip onto a cooling rack to cool completely.
- While cakes cool, make the buttercream: Beat softened butter until creamy. Add sifted powdered sugar, vanilla bean paste, and salt. Beat on low until combined, then high for 3 minutes until fluffy. Add heavy cream one tablespoon at a time to reach desired consistency.
- Assemble the cake: Place one layer on a plate, spread buttercream on top, add second layer, and frost top and sides with remaining buttercream. Decorate with gold dust or sprinkles if desired.
Notes
Ensure all ingredients (butter, eggs, milk) are at room temperature for proper emulsification. Do not overmix the batter after adding flour to avoid a dense texture. Sift powdered sugar to prevent lumps in the frosting. Cool cakes completely before frosting to prevent melting. For gluten-free, use a 1:1 gluten-free flour blend with xanthan gum. For dairy-free, use vegan butter and oat/soy milk.
- Prep Time: 25 minutes
- Cook Time: 25 minutes
- Category: Dessert
- Cuisine: American
Nutrition
- Serving Size: 1 slice (based on 8
- Calories: 380
- Sugar: 32
- Sodium: 180
- Fat: 20
- Saturated Fat: 12
- Carbohydrates: 45
- Fiber: 1
- Protein: 4
Keywords: vanilla bean cake, small batch cake, birthday cake, easy vanilla cake, homemade cake, vanilla bean buttercream, foolproof cake recipe



