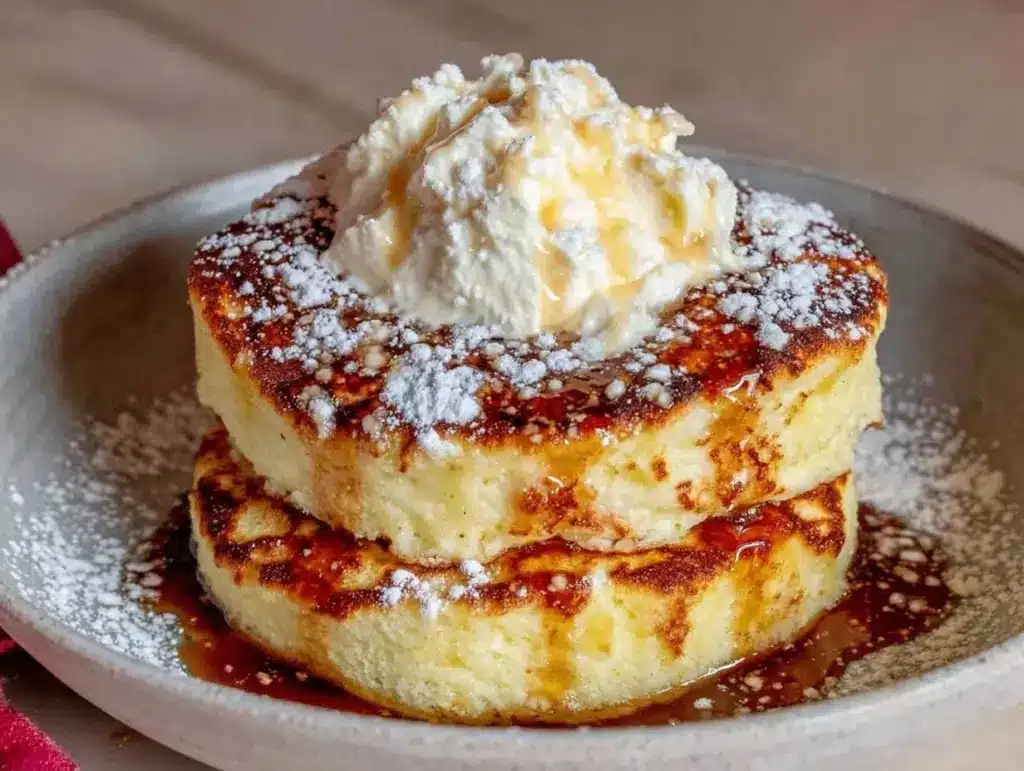
It was a rainy Saturday in November, the kind where the sky stays gray until noon and the only thing motivating me to leave my blankets was the smell of coffee brewing. I had no plans, no errands to run, and a sudden, overwhelming craving for something that felt like a hug from the inside. I didn’t want heavy waffles or greasy bacon. I wanted light. I wanted air. I wanted those impossibly tall, jiggly Japanese soufflé pancakes I’d seen all over Pinterest, convinced they were magic and impossible to make at home.
Let me save you the frustration I endured: they aren’t magic. But they are finicky. My first attempt was a flat, rubbery disc that tasted like disappointment. My second attempt burned the bottoms while the tops stayed raw. I spent three weekends in a row in the kitchen, tweaking ratios, adjusting heat, and learning exactly why that meringue is the secret to everything.
But here’s the thing—the third time was the charm. And honestly, the fifth time was even better. Now, these ultra-fluffy Japanese soufflé pancakes have become my go-to for slow weekends. They’re not just a treat; they’re a protein-packed fuel that keeps me going without that heavy, sluggish feeling you get from traditional breakfasts. I’ve refined this method to use simple ingredients, mostly whole foods, and I’ve made sure it’s actually doable for a tired home cook. If you’ve been intimidated by the idea of folding egg whites or managing low heat, this is the recipe to start with. It’s gentle, forgiving once you get the hang of it, and the result is absolutely worth the 30 minutes it takes.
I’ve tested this recipe dozens of times, and I’m sharing the exact steps that guarantee success. No more flat cakes. No more burnt bottoms. Just cloud-like, jiggly, protein-rich pancakes that taste like you’re eating dessert for breakfast (but actually fuels your day).
Why You’ll Love This Recipe
There are a lot of pancake recipes out there. But these Japanese soufflé pancakes are in a league of their own. Here’s why I keep coming back to this specific method, and why I think you will too:
- They’re Actually High in Protein — I know, it sounds like a contradiction. How can something this light be fuel? The secret is in the eggs and the optional yogurt or protein powder additions. I use whole eggs and separate them, whipping the whites to create structure, but the yolks and any added Greek yogurt or cottage cheese provide substantial protein. It’s not a diet pancake, but it’s definitely a nutrient-dense one. It keeps me full until lunch without the sugar crash.
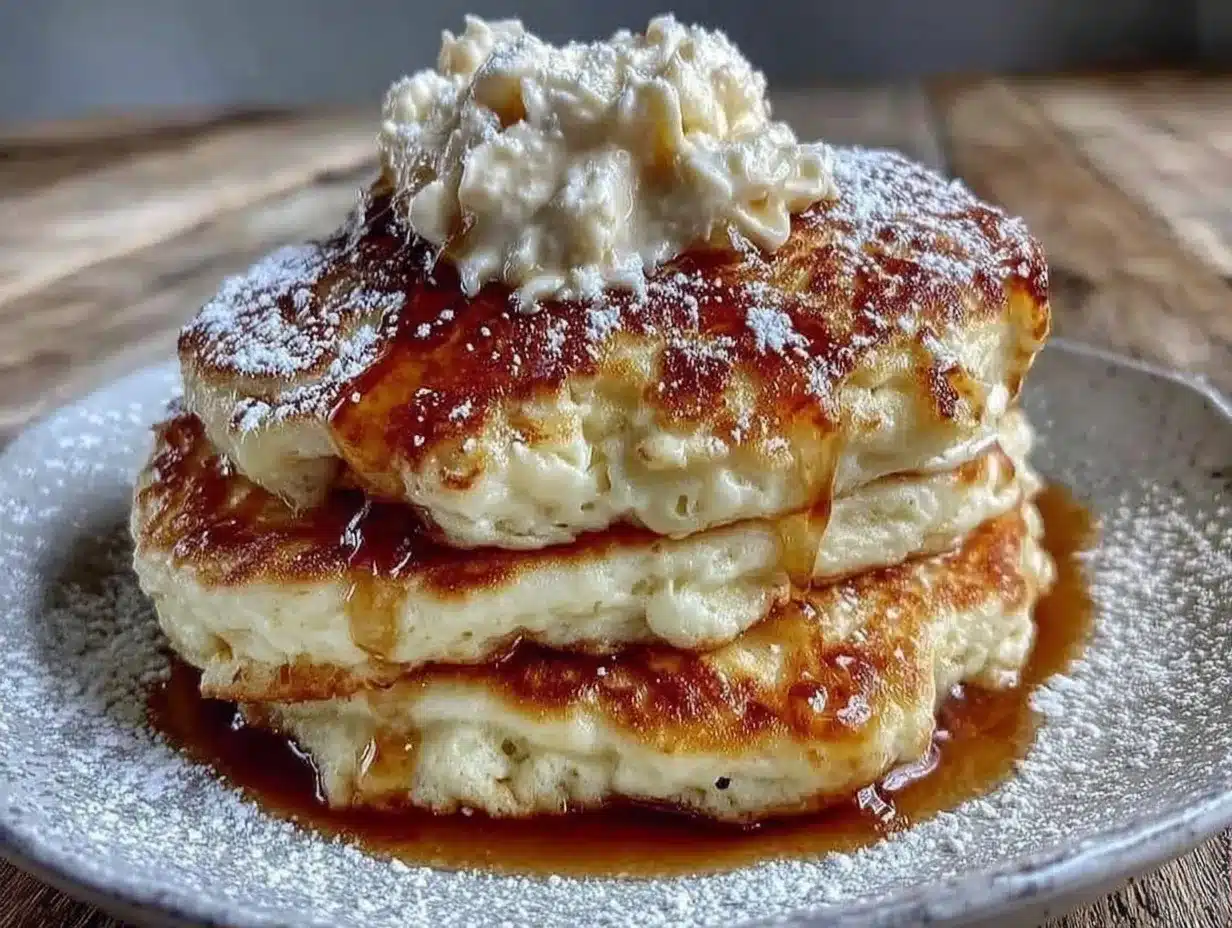
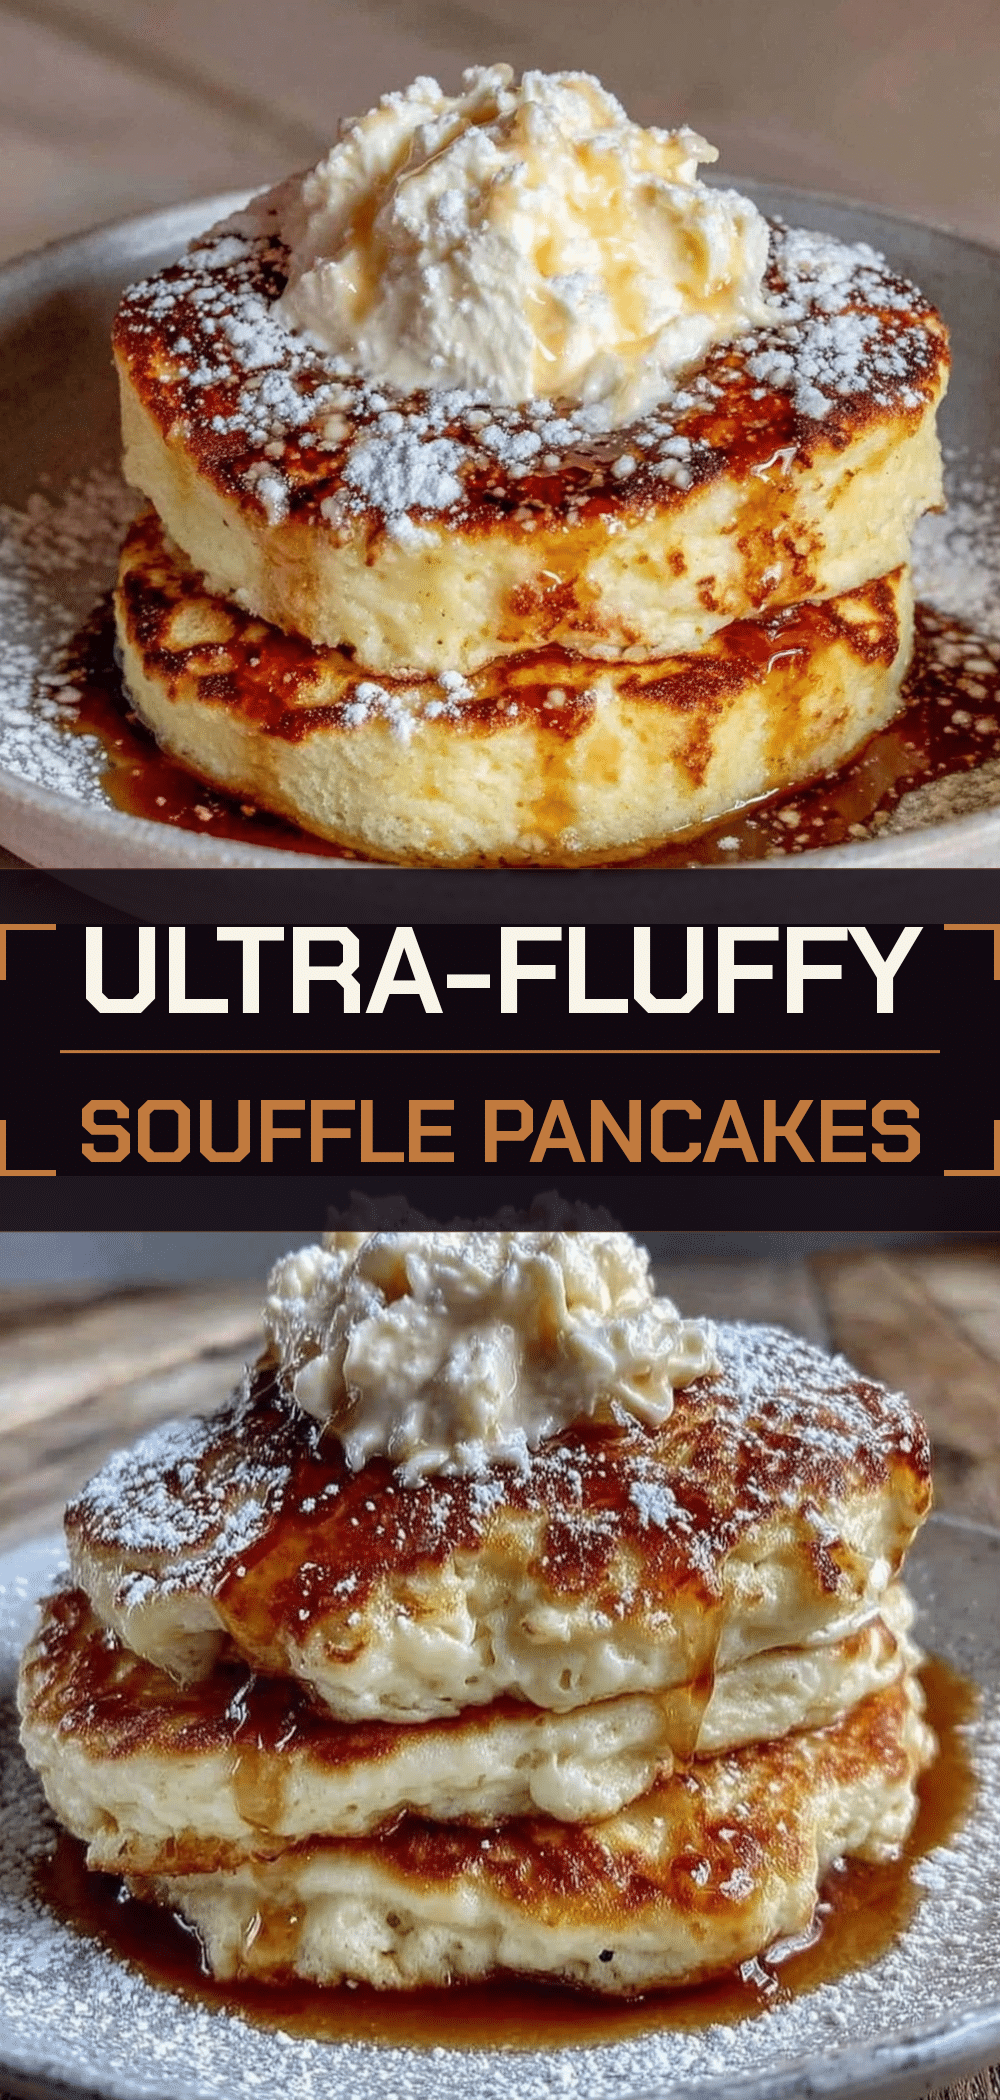
- The Texture Is Unmatched — Think of them as edible clouds. They are tall, airy, and have a slight jiggle when you cut into them. Unlike traditional buttermilk pancakes that can be dense or rubbery if overmixed, these are tender and melt-in-your-mouth. The exterior gets a tiny bit golden, while the inside stays soft and moist. It’s a texture experience that feels luxurious.
- They’re Perfect for Meal Prep (Sort Of) — I don’t recommend making a huge batch for the week ahead because they do best fresh. However, making a smaller batch for a slow weekend brunch or even a post-workout breakfast is incredibly satisfying. They freeze okay if you’re desperate, but I always say they taste best fresh off the griddle. That said, the ingredients are cheap and easy to find, so making them on a weekend feels like an affordable treat.
- They’re Naturally Refined Sugar-Free (If You Want) — You don’t need syrup to make these taste good. The eggs and a touch of vanilla or maple syrup are enough. I often serve them with fresh berries, which add fiber and antioxidants. It’s a way to enjoy a “sweet” breakfast that’s actually good for your body. It’s fuel that tastes like a cheat meal.
- They’re Impressive But Not Stressful — Once you understand the meringue technique, the actual cooking is low and slow. You’re just watching the pan, not frantically flipping. It’s a mindful cooking experience. I find it calming to stand over the stove, watching these little towers rise. It’s a break from the rush of weekday mornings.
This recipe has replaced my usual Saturday coffee cake routine. It’s lighter, it’s healthier, and it tastes incredible. If you’re looking for a way to make your weekend mornings feel special without spending hours in the kitchen, this is it.
Ingredients You’ll Need
The beauty of this recipe is that it doesn’t require a pantry full of exotic flours or weird additives. You probably have most of this already. The key is quality and temperature. I’m particular about using fresh eggs and good vanilla, but everything else is basic.
The Base
Eggs (3 large, room temperature) — This is the most important ingredient. Room temperature egg whites whip up higher and stiffer than cold ones. If you forgot to take them out, soak the eggs in warm water for 10 minutes. Cold eggs = flat pancakes. I’ve learned this the hard way.
Vanilla Extract (1 teaspoon) — Use real vanilla, not imitation. It adds a warm, sweet aroma that complements the eggs perfectly. If you don’t have vanilla, almond extract works too, but vanilla is classic.
Cottage Cheese or Greek Yogurt (2 tablespoons) — This is my secret weapon for protein and moisture. I use full-fat cottage cheese for a neutral taste, or thick Greek yogurt for a tangier flavor. It adds creaminess without making the batter heavy. It also helps bind the meringue, making it more stable. If you’re allergic to dairy, you can skip this or use a dairy-free yogurt, but the texture will be slightly different.
The Dry Mix
All-Purpose Flour (2 tablespoons) — You don’t need cake flour for this. All-purpose works just fine. It provides just enough structure to hold the air bubbles. Don’t use whole wheat flour unless you want dense pancakes; this recipe relies on lightness.
Cornstarch (1 tablespoon) — This is the magic dust. It tenderizes the gluten in the flour, ensuring the pancakes stay soft and fluffy rather than chewy. It’s a small ingredient, but it makes a huge difference in texture.
Sugar (1 tablespoon) — Just a little bit. It helps stabilize the meringue and adds a hint of sweetness. You can reduce this to 1 teaspoon if you’re watching sugar, but the meringue might be slightly less stable. I stick with 1 tablespoon for reliability.
The Cooking Medium
Butter or Oil (1 tablespoon) — For greasing the pan. I use butter for flavor, but avocado oil or coconut oil work too. Since we’re cooking on very low heat, you don’t need much. Just enough to prevent sticking.
Water (1-2 tablespoons) — For creating steam in the pan. This is crucial for the “soufflé” effect. The steam helps cook the tops gently without burning the bottoms.
Optional Add-ins — Fresh berries (blueberries, raspberries), a dollop of whipped cream, or a drizzle of maple syrup. I usually keep it simple with just berries to let the pancake shine.
Equipment Needed
You don’t need fancy gadgets, but you do need the right tools. Here’s what I actually use:
Non-stick Skillet (6-8 inches) — This is critical. I use a small, heavy-bottomed non-stick skillet. The smaller size helps the pancakes hold their shape and rise higher. A large pan will make them spread out and stay flat. If you don’t have a non-stick, you can use a well-seasoned cast iron, but non-stick is much easier for beginners.
Electric Hand Mixer or Stand Mixer — You need to whip the egg whites to stiff peaks. Doing this by hand is possible but exhausting and likely to fail. I use a hand mixer because it’s quick and gives consistent results. A stand mixer with a whisk attachment is also great.
Spatula (Silicone) — For folding the batter. You need to be gentle to keep the air in the meringue. A silicone spatula is flexible and won’t deflate the mixture.
Lid That Fits Your Pan — You need a lid to trap the steam. If your skillet lid is too big or too small, you can use aluminum foil, but a proper lid is best.
Bowl — A large, clean bowl for whipping egg whites. Make sure it’s completely free of grease or yolk residue, or the whites won’t whip.
Whisk — For mixing the yolks and dry ingredients.
Measuring Spoons — Precision matters here. Don’t eyeball the flour or cornstarch.
How to Make It: Step-by-Step
Alright, let’s make these! I’m walking you through exactly how I do it, including the little tricks I’ve picked up over dozens of attempts.
Step 1: Prep Your Egg Whites (5 minutes)
Separate your eggs, making sure no yolk gets into the whites. Even a tiny drop can prevent the whites from whipping. Place the whites in a clean, dry bowl. Let them come to room temperature if they’re cold. This takes time, so start here. If you’re in a hurry, soak the eggs in warm water for 10 minutes before separating.
Step 2: Whip the Meringue (3-4 minutes)
Using an electric mixer, beat the egg whites on medium-high speed. Start slowly to create bubbles, then increase to high. Beat until soft peaks form (the peaks droop slightly when you lift the beaters). Then, gradually add the sugar. Continue beating until stiff, glossy peaks form. The peaks should stand straight up when you lift the beaters. This is crucial. If the peaks droop, keep beating. This meringue is the structure of your pancakes. Don’t rush this step.
Step 3: Mix the Yolks (2 minutes)
In a separate bowl, whisk the egg yolks with the vanilla extract and cottage cheese (or yogurt) until smooth. The mixture should be creamy and uniform. Add the flour and cornstarch. Whisk gently until just combined. Do not overmix; you don’t want to develop gluten. The batter should be thick and smooth.
Step 4: Fold the Batter (3 minutes)
This is the most delicate step. Take about one-third of the meringue and fold it into the yolk mixture. This lightens the yolk batter, making it easier to fold in the rest without deflating. Use a silicone spatula. Cut down through the center, scoop up from the bottom, and fold over the top. Rotate the bowl and repeat. Be gentle. You want to keep the air in there. Once the yolk mixture is lightened, add the remaining meringue. Fold gently until just combined. Stop when you see no white streaks, but don’t overmix. The batter should be airy and fluffy.
Step 5: Cook the Pancakes (10-12 minutes)
Heat your non-stick skillet over very low heat. Add a small amount of butter or oil. The pan should be warm, not hot. If it’s too hot, the bottoms will burn before the tops cook. Spoon half of the batter into the pan, shaping it into a tall mound. Don’t spread it out; let it pile up. This is what gives them their height.
Once the batter is in the pan, add a tablespoon of water to the side of the pan (not on the pancakes) and immediately cover with a lid. The steam will help cook the tops. Cook for 6-7 minutes. Do not peek! Let the steam do its work.
Step 6: Flip and Finish (3-4 minutes)
After 6-7 minutes, the bottom should be golden brown and the top should be set (not jiggly). Carefully flip the pancake using a spatula. It will be delicate. Add a splash of water to the pan again and cover with the lid. Cook for another 3-4 minutes. The second side should be golden and the pancake should be cooked through.
Step 7: Serve
Serve immediately. They will start to deflate slightly as they cool, but they’ll still be tall and fluffy. Top with fresh berries, a dusting of powdered sugar, or a drizzle of maple syrup. They are best eaten warm.
Total Time: About 20-25 minutes (including prep and cooking time for 2 pancakes)
Expert Tips & Tricks
Here’s everything I’ve learned from making this dozens of times. These tips will save you from my mistakes.
Room Temperature Eggs Are Non-Negotiable
I can’t stress this enough. Cold egg whites will not whip to stiff peaks. If you forget to take them out, soak the whole eggs in a bowl of warm water for 10 minutes before separating. It saves time and ensures success.
Clean Bowl, Clean Whisk
Any trace of grease or yolk in the bowl will prevent the whites from whipping. Wipe your bowl and whisk with vinegar or lemon juice before starting. It’s a small step that makes a big difference.
Low and Slow Heat
This is the hardest part for beginners. You want the lowest heat setting on your stove. If your stove runs hot, you can use a heat diffuser (a metal disc that sits between the burner and the pan). If you don’t have one, just keep the heat on the lowest possible setting and be patient.
Don’t Peek
When you cover the pan with the lid, resist the urge to peek. The steam needs to build up and cook the tops. If you open the lid too early, the temperature drops, and the pancakes might collapse. Trust the process.
Fold, Don’t Stir
When combining the meringue and yolk batter, use a folding motion. Stirring will deflate the air bubbles you worked so hard to create. Be gentle and patient.
Use a Small Pan
I know it’s tempting to make a big batch, but these pancakes need to stack up to rise properly. A 6-8 inch skillet is ideal. If you use a larger pan, they will spread out and stay flat.
Cook in Batches
This recipe makes 2 large pancakes. You’ll need to cook them in batches. Keep the cooked pancakes warm in a 200°F oven while you cook the next batch. They’re best eaten fresh, so try to serve them as soon as they’re done.
Variations & Substitutions
Once you’ve nailed the basic version, here’s how you can mix it up. I’ve tried all of these.
Protein-Packed Version
Add a scoop of vanilla protein powder to the yolk mixture. It adds extra protein and makes them even more filling. You might need to add a splash of milk to keep the batter loose enough to fold.
Chocolate Chip
Fold a handful of dark chocolate chips into the batter after folding in the meringue. It’s a treat, but still relatively balanced if you use high-cocoa chocolate.
Berry Burst
Fold fresh blueberries or raspberries into the batter. The berries add natural sweetness and fiber. Just be gentle so they don’t break.
Lemon Vanilla
Add the zest of one lemon to the yolk mixture. It adds a bright, fresh flavor that pairs beautifully with the fluffy texture. Serve with a lemon glaze.
Gluten-Free
Substitute the all-purpose flour with a 1:1 gluten-free flour blend. The cornstarch helps keep them tender, so this works well. Just make sure your blend doesn’t contain xanthan gum, or reduce the amount slightly.
Dairy-Free
Skip the cottage cheese or yogurt. The pancakes will be slightly less creamy, but still fluffy. Use oil instead of butter for greasing the pan.
Vegan
This is trickier. You can try using aquafaba (the liquid from a can of chickpeas) instead of egg whites. Whip it with cream of tartar and sugar until stiff. For the yolks, use silken tofu blended with a little oil. It’s not exactly the same, but it’s a decent vegan alternative.
Serving & Storage
How to Serve:
I usually serve these straight from the pan, stacked high on a plate. They look rustic and inviting. But here are other ways I’ve enjoyed them:
- With Fresh Berries — Blueberries, raspberries, and strawberries add color and fiber. They’re the perfect counterpoint to the rich eggs.
- With Whipped Cream — If you’re feeling indulgent, a dollop of homemade whipped cream is amazing. But I usually skip it to keep it lighter.
- With Maple Syrup — A light drizzle of pure maple syrup is all you need. Don’t drown them; let the pancake flavor shine.
- With Nut Butter — A thin layer of almond or peanut butter adds healthy fats and protein. It makes them even more filling.
Storage Instructions:
Refrigerator:
Store leftovers in an airtight container for up to 2 days. They will deflate and become denser. Reheat in a toaster or a warm oven to restore some texture.
Freezing:
You can freeze these pancakes. Let them cool completely, then place them in a freezer-safe bag. They will lose some of their fluffiness when thawed, but they’re still good for a quick breakfast. Reheat in a toaster.
Reheating:
The best way to reheat is in a toaster or a 350°F oven for 5 minutes. Microwaving makes them rubbery, so avoid that if possible.
Nutrition Information
I’m not a nutritionist, but here’s the breakdown if you’re tracking. This is per serving (2 pancakes).
- Calories: 180
- Protein: 12g
- Carbs: 15g
- Fiber: 1g
- Sugar: 5g
- Fat: 8g
- Saturated Fat: 3g
- Cholesterol: 186mg
- Sodium: 110mg
What’s Good:
– High protein from the eggs and cottage cheese
– Low sugar compared to traditional pancakes
– Whole food ingredients
– Good source of choline from the eggs
What to Know:
– Contains eggs and dairy
– Moderate calories, but nutrient-dense
– Can be made gluten-free or dairy-free with substitutions
My Take:
Look, these are not a diet food, but they are definitely a healthier alternative to traditional pancakes. They’re packed with protein and fiber, and they don’t leave you feeling sluggish. I eat them as a weekend treat, but they’re substantial enough to be a real breakfast. When I want to make them lighter, I skip the syrup and load up on berries. But usually? I just enjoy them as they are. They’re fuel that tastes like a treat.
Final Thoughts
So that’s my go-to ultra-fluffy Japanese soufflé pancake recipe! I’ve probably talked your ear off at this point, but when you make a recipe this often, you have a lot to say about it. These pancakes have saved my slow weekends. They’re my answer to “what’s for breakfast” when I have time to relax but still want something that tastes amazing and fuels my day.
My family loves them, and I love making them. They’re a reminder that cooking can be a mindful, enjoyable experience, not just a chore. Make it yours! Try different toppings, swap in your favorite fruits, or add a scoop of protein powder. The best recipes are the ones you adapt to your tastes.
If you make this, drop a comment and let me know what you think! I love hearing how recipes turn out in your kitchen. And if something doesn’t work, tell me that too—I’m here to help troubleshoot. Happy cooking! And I hope your kitchen smells half as good as mine does right now.
Frequently Asked Questions
Q: Can I make these ahead of time?
A: Unfortunately, these pancakes are best eaten fresh. They rely on the air in the meringue to stay tall and fluffy, and that air escapes as they cool. You can prep the batter ahead and keep it in the fridge for up to an hour, but the meringue will start to deflate. It’s better to cook them just before eating.
Q: Why did my pancakes turn out flat?
A: This usually happens for one of three reasons: 1) The egg whites weren’t whipped to stiff peaks, 2) The batter was overmixed when folding, deflating the air, or 3) The heat was too high. Make sure your whites are glossy and stand straight up, fold gently, and keep the heat very low.
Q: Can I use almond flour instead of all-purpose flour?
A: You can, but the texture will be different. Almond flour is denser and doesn’t have the same gluten structure. If you use almond flour, you might need to add a little extra cornstarch to help with the lightness. I recommend sticking to all-purpose or a gluten-free blend for the best results.
Q: How do I keep them from sticking to the pan?
A: Use a good quality non-stick skillet and grease it well with butter or oil. If you’re using cast iron, make sure it’s well-seasoned. The low heat also helps prevent sticking, as the pancakes cook slowly and gently.
Q: Can I double this recipe?
A: Yes, but you’ll need to cook them in batches. The batter yields two large pancakes per batch. If you double the recipe, you’ll have four pancakes, which means two batches. Just make sure your pan is the right size for each batch.
Q: What’s the best topping for these pancakes?
A: I love them with fresh berries and a light drizzle of maple syrup. But they’re also great with a dollop of Greek yogurt, a sprinkle of cinnamon, or a spoonful of nut butter. The possibilities are endless!
Q: Can I make these in an air fryer?
A: It’s tricky. The air fryer circulates hot air, which can dry out the pancakes or cook them unevenly. I recommend sticking to the stovetop method for the best results. If you must use an air fryer, use a small silicone mold and cook at a low temperature, but the texture won’t be the same.
Pin This Recipe!
Ultra-Fluffy Japanese Souffle Pancakes: 3-Ingredient Protein Fuel
- Total Time: 25 minutes
- Yield: 2 servings 1x
Description
Light, airy, and protein-packed Japanese soufflé pancakes that are tall, jiggly, and perfect for a mindful weekend breakfast. Made with simple ingredients and a gentle cooking method for guaranteed success.
Ingredients
- 3 large eggs, room temperature
- 1 teaspoon vanilla extract
- 2 tablespoons cottage cheese or Greek yogurt
- 2 tablespoons all-purpose flour
- 1 tablespoon cornstarch
- 1 tablespoon sugar
- 1 tablespoon butter or oil (for greasing)
- 1–2 tablespoons water (for steam)
Instructions
- Separate eggs, ensuring no yolk gets into the whites. Let whites come to room temperature.
- Using an electric mixer, beat egg whites on medium-high speed until soft peaks form.
- Gradually add sugar and continue beating until stiff, glossy peaks form.
- In a separate bowl, whisk egg yolks with vanilla extract and cottage cheese (or yogurt) until smooth.
- Add flour and cornstarch to the yolk mixture and whisk gently until just combined.
- Fold one-third of the meringue into the yolk mixture to lighten it.
- Gently fold in the remaining meringue until just combined, being careful not to deflate the batter.
- Heat a non-stick skillet over very low heat and add butter or oil.
- Spoon half the batter into the pan, shaping it into a tall mound.
- Add water to the side of the pan and immediately cover with a lid. Cook for 6-7 minutes without peeking.
- Carefully flip the pancake. Add a splash of water and cover again. Cook for another 3-4 minutes.
- Serve immediately with fresh berries, whipped cream, or maple syrup.
Notes
Room temperature eggs are essential for whipping stiff peaks. Use a small pan to help pancakes rise. Keep heat very low to prevent burning. Do not peek while cooking to maintain steam. Best eaten fresh.
- Prep Time: 10 minutes
- Cook Time: 15 minutes
- Category: Breakfast
- Cuisine: Japanese
Nutrition
- Serving Size: 2 large pancakes
- Calories: 180
- Sugar: 5
- Sodium: 110
- Fat: 8
- Saturated Fat: 3
- Carbohydrates: 15
- Fiber: 1
- Protein: 12
Keywords: Japanese pancakes, soufflé pancakes, fluffy pancakes, high protein breakfast, gluten-free option, dairy-free option, easy breakfast recipe, weekend brunch



