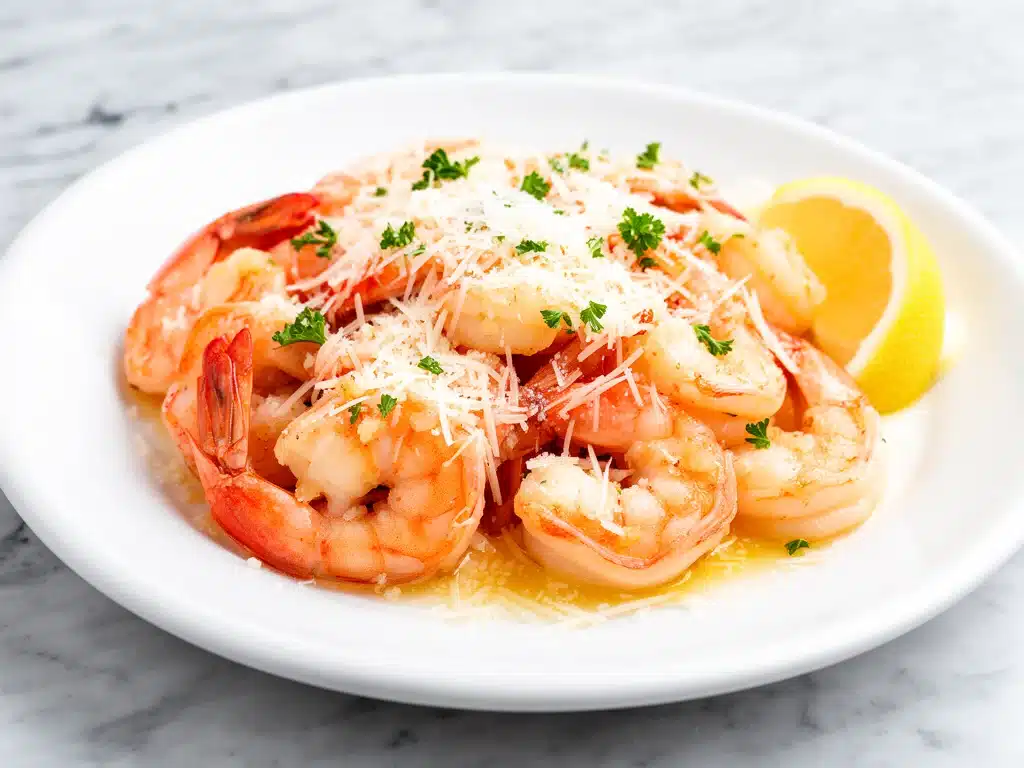
I still remember the first time I made this garlic parmesan baked shrimp. It was a Tuesday, I was exhausted, and my takeout craving was hitting hard. I was ready to order from that Chinese place down the street—the one with the greasy bags and the prices that always seem to creep up. But then I looked in my freezer and saw a bag of frozen shrimp I’d bought on sale weeks ago and completely forgot about.
I didn’t have time to thaw it properly, so I just threw it in the oven with whatever I had in the pantry. I figured it would be a mediocre dinner at best. What happened instead was… well, it was actually amazing. My husband came home, took one bite, and asked if I’d ordered out. When I told him no, he looked genuinely suspicious. That was the moment I knew I had something special.
It’s been three years, and I’ve made this garlic parmesan baked shrimp at least fifty times. It’s become my secret weapon for busy weeknights when I want something that feels fancy but takes less time than it takes to scroll through delivery apps. And honestly? It’s better than takeout. Not just “close to” takeout. Better. Crisper, fresher, and without the weird aftertaste of leftovers sitting in a plastic container.
Here’s the thing about baked shrimp. Most people think it’s hard to get right. They worry about rubbery texture or bland flavor. But the trick isn’t complicated techniques or expensive ingredients. It’s just a simple coating of butter, garlic, and parmesan, baked until golden and bubbly. That’s it. Seriously.
I’ve tested this recipe with both fresh and frozen shrimp, with different types of cheese, and with various cooking times. I’ve even made mistakes—burning the garlic, overcooking the shrimp until they were tough as shoe leather (don’t do that). Through all those trials, I’ve landed on the perfect method. And today, I’m sharing it with you so you can stop ordering expensive takeout and start making dinner that actually tastes like you care.
Why You’ll Love This Garlic Parmesan Baked Shrimp
There are about ten reasons I keep coming back to this recipe, but here are the big ones that make it a weekly staple in our house.
Incredibly Fast — We’re talking 15 minutes from start to finish. I mean that literally. If you have frozen shrimp, you can have this on the table before your pizza delivery guy even rings the doorbell. I’ve made this on nights when I came home from work at 7:30 pm and had it served by 7:45 pm. It’s that fast.
Zero Stress — Unlike stir-fries where you’re juggling multiple pans and timing every second, this is a one-pan wonder. You toss the shrimp in the coating, dump it on a baking sheet, and put it in the oven. You can sit down, relax, or help your kids with homework while it cooks. No standing over the stove, no splattering oil, no panic.
Restaurant Quality — The combination of butter, garlic, and parmesan creates a crust that’s crispy on the outside and tender on the inside. It mimics the texture of deep-fried appetizers without the oil. My friends who claim they can’t cook have made this and served it to their date without anyone suspecting it came from a home oven.
Super Versatile — You can serve this as an appetizer, a main course, or even a salad topping. I’ve put it over pasta, inside caesar wraps, and alongside roasted vegetables. It pairs well with almost anything because the garlic-parmesan flavor is just universally delicious.
Budget-Friendly — Shrimp can be expensive, but buying frozen raw shrimp is surprisingly affordable, especially if you watch for sales. This recipe feeds four people for under $20, which is a fraction of what you’d pay at a seafood restaurant. And unlike pizza pockets or other snack foods that leave you hungry an hour later, this is a satisfying, protein-rich meal.
Clean Up Is a Breeze — Line your baking sheet with parchment paper or foil, and you’re done. No scrubbing pots, no washing dishes while the food gets cold. This is crucial for me because I hate the idea of spending more time cleaning than cooking.
This is my go-to when I need dinner to just work. No complicated techniques, no weird ingredients, just reliable, delicious food that makes everyone happy. It’s the kind of recipe that makes you feel like a genius in the kitchen without actually trying very hard.
Ingredients You’ll Need
Here’s the best part: you probably have most of this already. This isn’t a recipe that requires a trip to three different specialty stores. It’s pantry-friendly, which is exactly why I love it.
Shrimp (1.5 pounds / 680g, peeled and deveined) — This is the star. I recommend buying raw, peeled, and deveined shrimp. You can use fresh or frozen. If using frozen, just thaw them under cold water for 5 minutes and pat dry. Look for “size 21-25” or “medium-large” shrimp—they’re the perfect size for this recipe. Avoid the tiny ones; they shrink too much and get lost in the coating.
Unsalted Butter (4 tablespoons / 60g) — This is non-negotiable. Butter gives the richness and helps the coating stick. I use unsalted so I can control the sodium. Melt it in the microwave or a small saucepan. Don’t brown it; just melt it until liquid.
Garlic (4-5 cloves, minced / about 2 tablespoons) — Yes, fresh garlic. Do not use jarred garlic for this. The flavor is too different, and in a recipe with only a few ingredients, you want the real thing. Mince it finely so it distributes evenly. If you’re worried about burning, you can mix the garlic with the butter first—it helps protect it.
Grated Parmesan Cheese (1 cup / 100g, freshly grated) — Buy a block of Parmigiano-Reggiano or a good quality Parmesan and grate it yourself. Pre-grated cheese has anti-caking agents that prevent it from melting properly, and you’ll end up with a gritty, clumpy coating. It takes two minutes to grate, and it makes a huge difference. I buy the big blocks because they last longer and cost less per ounce.
Panko Breadcrumbs (½ cup / 50g) — This is what gives the shrimp that crispy, crunchy texture. Regular breadcrumbs work, but they’re denser and don’t get as crisp. Panko is airy and golden. If you can’t find panko, you can pulse regular breadcrumbs in a food processor to break them up, but panko is worth seeking out.
Italian Seasoning (1 teaspoon) — Adds a subtle herbal note that complements the garlic and cheese. If you don’t have Italian seasoning, use a mix of dried basil, oregano, and thyme. It doesn’t need to be fancy; the standard jar from your supermarket works perfectly.
Red Pepper Flakes (¼ teaspoon, optional) — A little heat balances the richness of the butter and cheese. I always add this, but if you’re serving kids or people who hate spice, skip it or use just a pinch.
Lemon (1 lemon, cut into wedges) — For serving. The acidity cuts through the richness and brightens everything up. I always serve this with lemon wedges on the side so everyone can squeeze as much or as little as they want.
Fresh Parsley (2 tablespoons, chopped) — For garnish. It adds color and a fresh, grassy note. Dried parsley works in a pinch, but fresh is better. If you don’t have parsley, basil or chives are good substitutes.
Salt and Black Pepper — To taste. Remember that parmesan is already salty, so go easy on the salt. I usually add a light sprinkle after cooking, not before.
Cooking Spray or Extra Butter — For greasing the baking sheet. Parchment paper is my preference because cleanup is easier, but a light greasing works too.
Equipment Needed
You don’t need fancy equipment for this. Here’s what I actually use.
Baking Sheet — A standard 13×18 inch half-sheet pan works perfectly. I prefer a dark metal pan because it helps the coating get crispier, but light-colored metal or glass works fine too. Just keep an eye on it so it doesn’t burn.
Parchment Paper or Aluminum Foil — For lining the baking sheet. This is the secret to easy cleanup. I use parchment paper because food doesn’t stick, and I can just throw it away afterward. Foil works too if you grease it well.
Small Mixing Bowl — For combining the butter, garlic, parmesan, and breadcrumbs. Any bowl will do. I use a 2-cup bowl because it’s the right size for this amount of ingredients.
Fork or Whisk — For mixing the coating ingredients. A fork works fine. You don’t need anything fancy.
Tongs or Spatula — For tossing the shrimp in the coating and arranging them on the baking sheet. Tongs are easier for handling shrimp without breaking them.
Microplane or Box Grater — For grating the parmesan cheese. I use a microplane because it grates finer and faster, but a box grater works too. Just make sure you grate it finely so it melts evenly.
Garlic Press or Knife — For mincing the garlic. I prefer using a knife because I can control the texture, but a garlic press is faster. Just be sure to mince it finely either way.
Oven — Preheated to 400°F (200°C). Make sure your oven is properly preheated. If it’s too cool, the shrimp will steam instead of bake, and you won’t get that crispy coating.
Optional but nice:
- Food Processor — If you want to make your own panko, pulse regular breadcrumbs until they’re coarse and flaky.
- Kitchen Scale — For weighing the shrimp. It’s helpful for getting the right amount, but volume measurements work fine too.
How to Make It: Step-by-Step
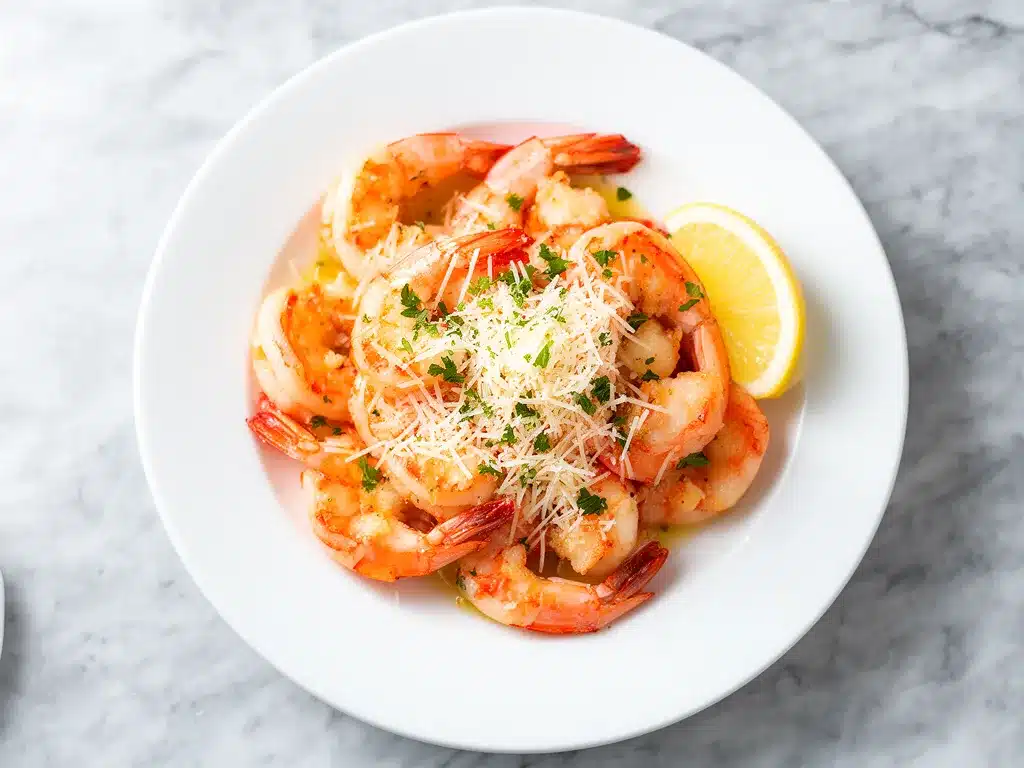
Alright, let’s make this! I’m walking you through exactly how I do it, including the little tricks I’ve picked up over the years.
Step 1: Prep Your Shrimp (3 minutes)
If you’re using frozen shrimp, thaw them under cold running water for about 5 minutes. Don’t use hot water—it starts cooking them prematurely. Once thawed, pat them completely dry with paper towels. This is crucial. Wet shrimp won’t stick to the coating, and they’ll steam instead of bake. I know it seems like a small step, but drying them makes all the difference.
If you’re using fresh shrimp, just peel and devein them. Most grocery stores sell them already peeled and deveined, which saves so much time. Look for shrimp that are pinkish-gray and smell fresh, not fishy. If they smell strong, they’re not fresh. Send them back.
Step 2: Make the Coating (2 minutes)
In a small mixing bowl, combine the melted butter, minced garlic, grated parmesan, panko breadcrumbs, Italian seasoning, and red pepper flakes. Stir everything together with a fork until it forms a thick, crumbly mixture. The butter should coat all the crumbs and cheese. If it looks too dry, add another tablespoon of melted butter. If it’s too wet, add a little more panko. You want a texture like wet sand.
Here’s a pro tip: taste the mixture before you add the shrimp. It should be flavorful on its own. If it tastes bland, add a pinch more salt or garlic. The coating is what gives the shrimp its flavor, so get it right.
Step 3: Coat the Shrimp (3 minutes)
Add the dried shrimp to the bowl with the coating. Use your hands or tongs to toss the shrimp until they’re evenly coated. You want every shrimp to be covered in the mixture. Don’t worry if some of the coating falls off; it’ll stick to the baking sheet and still be delicious.
I like to do this in batches if I’m making a large amount. It’s easier to get even coverage when you’re not overcrowding the bowl. But for this recipe, one bowl is usually fine.
Step 4: Arrange on Baking Sheet (1 minute)
Line a baking sheet with parchment paper or foil. Arrange the coated shrimp in a single layer on the sheet. Don’t overcrowd them. If they’re touching, they’ll steam instead of bake, and you won’t get that crispy texture. I usually need two baking sheets if I’m making this for a crowd, but one sheet works for this amount.
Leave a little space between each shrimp. I know it’s tempting to pack them in, but resist the urge. Your future self will thank you for the crispiness.
Step 5: Bake (8-10 minutes)
Preheat your oven to 400°F (200°C). Place the baking sheet in the center of the oven and bake for 8-10 minutes. The shrimp are done when they’re pink, opaque, and the coating is golden brown and crispy. Keep an eye on them after 8 minutes because ovens vary. If the coating is browning too fast, you can tent it loosely with foil.
Don’t overcook them! Shrimp cook very quickly, and overcooked shrimp are tough and rubbery. They should be just barely cooked through. If you’re unsure, check one shrimp by cutting it open. It should be opaque all the way through, not translucent.
Step 6: Serve (1 minute)
Remove from the oven and immediately sprinkle with fresh parsley. Serve hot with lemon wedges on the side. I usually serve this straight from the baking sheet at the dinner table—it looks rustic and stays warm. But you can also transfer them to a serving platter if you prefer.
Total Time: About 15 minutes (5 minutes prep, 10 minutes cooking)
Expert Tips & Tricks
Here’s everything I’ve learned from making this dozens of times. These tips will save you from my mistakes.
Pat the Shrimp Dry
This is the #1 tip. Wet shrimp = soggy coating. I’ve made this mistake more times than I can count. After thawing, I lay the shrimp on paper towels and press another towel on top to absorb excess moisture. It takes an extra minute, but it’s worth it.
Don’t Skip the Panko
I tried using regular breadcrumbs once, and the result was disappointing. They were dense and didn’t crisp up. Panko is lighter and airier, which creates that restaurant-quality crunch. It’s worth buying a box and keeping it in your pantry.
Use Fresh Parmesan
Pre-grated cheese doesn’t melt the same way. It has anti-caking agents that prevent it from becoming creamy and cohesive. Grate your own from a block. It takes two minutes, and the difference is night and day. My husband can taste the difference immediately.
Watch the Oven Like a Hawk
Shrimp cook incredibly fast. 8 minutes is usually enough, but 10 minutes might be too long in some ovens. Check at 8 minutes. If the coating is golden and the shrimp are pink, they’re done. If you leave them in for 12 minutes, they’ll be tough. I learned this the hard way with a batch of rubbery shrimp that my dog wouldn’t even touch.
Add Garlic to the Butter First
Garlic burns easily in the oven. By mixing it with the butter before adding the crumbs, the butter helps protect the garlic from burning. This ensures you get that fragrant garlic flavor without the bitter burnt taste.
Serve Immediately
This dish is best served right out of the oven. The coating gets soggy if it sits for more than 10 minutes. If you’re serving a crowd, make two batches. It’s faster to make two quick batches than to serve lukewarm, soft shrimp.
Variations & Substitutions
Once you’ve nailed the basic version, here’s how you can mix it up. I’ve tried all of these.
Cajun Garlic Shrimp
Swap the Italian seasoning for Cajun seasoning. Add ½ teaspoon smoked paprika and ¼ teaspoon cayenne pepper. This gives it a spicy, Southern vibe. My friend Sarah loves this version for game day parties.
Lemon Herb Shrimp
Add the zest of one lemon to the coating and use fresh dill instead of parsley. This version is lighter and brighter. Great for spring and summer.
Spicy Sriracha Shrimp
Mix 1 tablespoon sriracha into the melted butter before adding the other ingredients. Add a drizzle of honey for balance. This is my go-to when I want something with a kick.
Herb Butter Variation
Instead of plain butter, use herb butter (butter mixed with fresh herbs). Or buy pre-made herb butter from the store. It adds extra flavor without extra effort.
Dietary Modifications:
- Gluten-Free — Use gluten-free panko or crushed gluten-free crackers. Everything else is naturally gluten-free.
- Dairy-Free — Replace butter with olive oil and parmesan with nutritional yeast. It’s not the same, but it works in a pinch. My lactose-intolerant friend uses this version.
- Lower Carb — Skip the panko and just use extra parmesan and almond flour. It’s still crispy but lower in carbs.
Different Proteins:
- Scallops — Same method, cook for 6-8 minutes. Delicious but more expensive.
- Chicken Tenders — Use the same coating for baked chicken. Cook for 15-18 minutes.
- Tofu — Press firm tofu, cut into cubes, and use the same coating. Bake for 15 minutes. Great vegan option.
Serving & Storage
How to Serve:
I usually serve this straight from the baking sheet at the dinner table—it looks rustic and stays warm. But here are other ways I’ve enjoyed it:
- Over Pasta — Toss with linguine and a little pasta water for a quick garlic shrimp pasta.
- With Rice — Serve over jasmine or basmati rice with steamed broccoli.
- On a Salad — Put them on top of a Caesar salad or mixed greens with vinaigrette.
- As an Appetizer — Serve with cocktail sauce or tartar sauce for dipping.
Side Dishes:
- Roasted asparagus
- Garlic bread (obviously)
- Simple green salad
- Steamed green beans
Storage Instructions:
Refrigerator: Store leftovers in an airtight container for up to 2 days. The coating will soften, but the flavor is still good.
Reheating: Reheat in a 400°F oven for 5 minutes to crisp up the coating. Don’t microwave it—it’ll get soggy. If you must microwave, do it for 30 seconds and then finish in a toaster oven or skillet.
Freezing: I don’t recommend freezing this. The coating gets mushy when thawed, and the shrimp can become rubbery. It’s best made fresh.
Nutrition Information
I’m not a nutritionist, but here’s the breakdown if you’re tracking.
Per Serving (based on 4 servings):
- Calories: 280
- Protein: 28g
- Carbs: 12g
- Fiber: 1g
- Sugar: 1g
- Fat: 14g
- Saturated Fat: 7g
- Cholesterol: 180mg
- Sodium: 450mg
What’s Good:
- High in protein from the shrimp
- Low in carbs (if you skip panko)
- Good source of calcium from the parmesan
What to Know:
- Higher in sodium due to parmesan and butter
- Contains dairy and gluten
- Calories come mainly from the butter and coating
My Take:
Look, this is a rich, flavorful dish. It’s not a diet food. But it’s way better than takeout, costs less, and I know exactly what’s in it. When I want to make it lighter, I use less butter and skip the panko. But usually? I just enjoy a reasonable portion and don’t overthink it.
Final Thoughts
So that’s my go-to garlic parmesan baked shrimp! I’ve probably talked your ear off at this point, but when you make a recipe this often, you have a lot to say about it.
This has saved weeknight dinners more times than I can count. It’s my answer to “what’s for dinner” when I’m tired, don’t want takeout, and still want something that tastes really good. My kids are happy, my husband’s happy, and I’m happy because I’m not stressed about cooking.
Make it yours! Try different add-ins, swap in your favorite herbs, adjust the garlic (though more is always better in my opinion). The best recipes are the ones you adapt to your family’s tastes.
If you make this, drop a comment and let me know what you think! I love hearing how recipes turn out in your kitchen. And if something doesn’t work, tell me that too—I’m here to help troubleshoot.
Happy cooking! And I hope your kitchen smells half as good as mine does right now.
Frequently Asked Questions
Can I use frozen shrimp?
Yes! In fact, frozen shrimp is often fresher than “fresh” shrimp that’s been sitting in a display case. Just thaw them under cold water for 5 minutes, then pat them completely dry. The drying step is crucial for getting a crispy coating.
Why did my shrimp turn out rubbery?
Overcooking is the most common cause. Shrimp cook very quickly—usually 8-10 minutes at 400°F. If you leave them in longer, they become tough. Check them at 8 minutes. They’re done when they’re pink and opaque.
Can I make this ahead of time?
You can prep the coating and coat the shrimp up to 2 hours ahead, then store them in the fridge covered. But don’t bake them until you’re ready to serve. The coating will get soggy if it sits too long.
Can I use regular breadcrumbs instead of panko?
You can, but the texture won’t be as crispy. Panko is lighter and airier, which creates that restaurant-quality crunch. If you must use regular breadcrumbs, pulse them in a food processor to break them up first.
How do I reheat leftovers?
Reheat in a 400°F oven for 5 minutes to crisp up the coating. Don’t microwave it—it’ll get soggy. If you must microwave, do it for 30 seconds and then finish in a toaster oven or skillet.
Can I double this recipe?
Absolutely! Just use two baking sheets and make sure you don’t overcrowd the shrimp. You may need to bake them in two batches if your oven doesn’t fit two sheets.
What sauce goes best with this?
Classic options include cocktail sauce, tartar sauce, or aioli. I also love a simple lemon butter sauce or a spicy sriracha mayo. The garlic parmesan flavor pairs well with almost anything tangy or creamy.
Pin This Recipe!
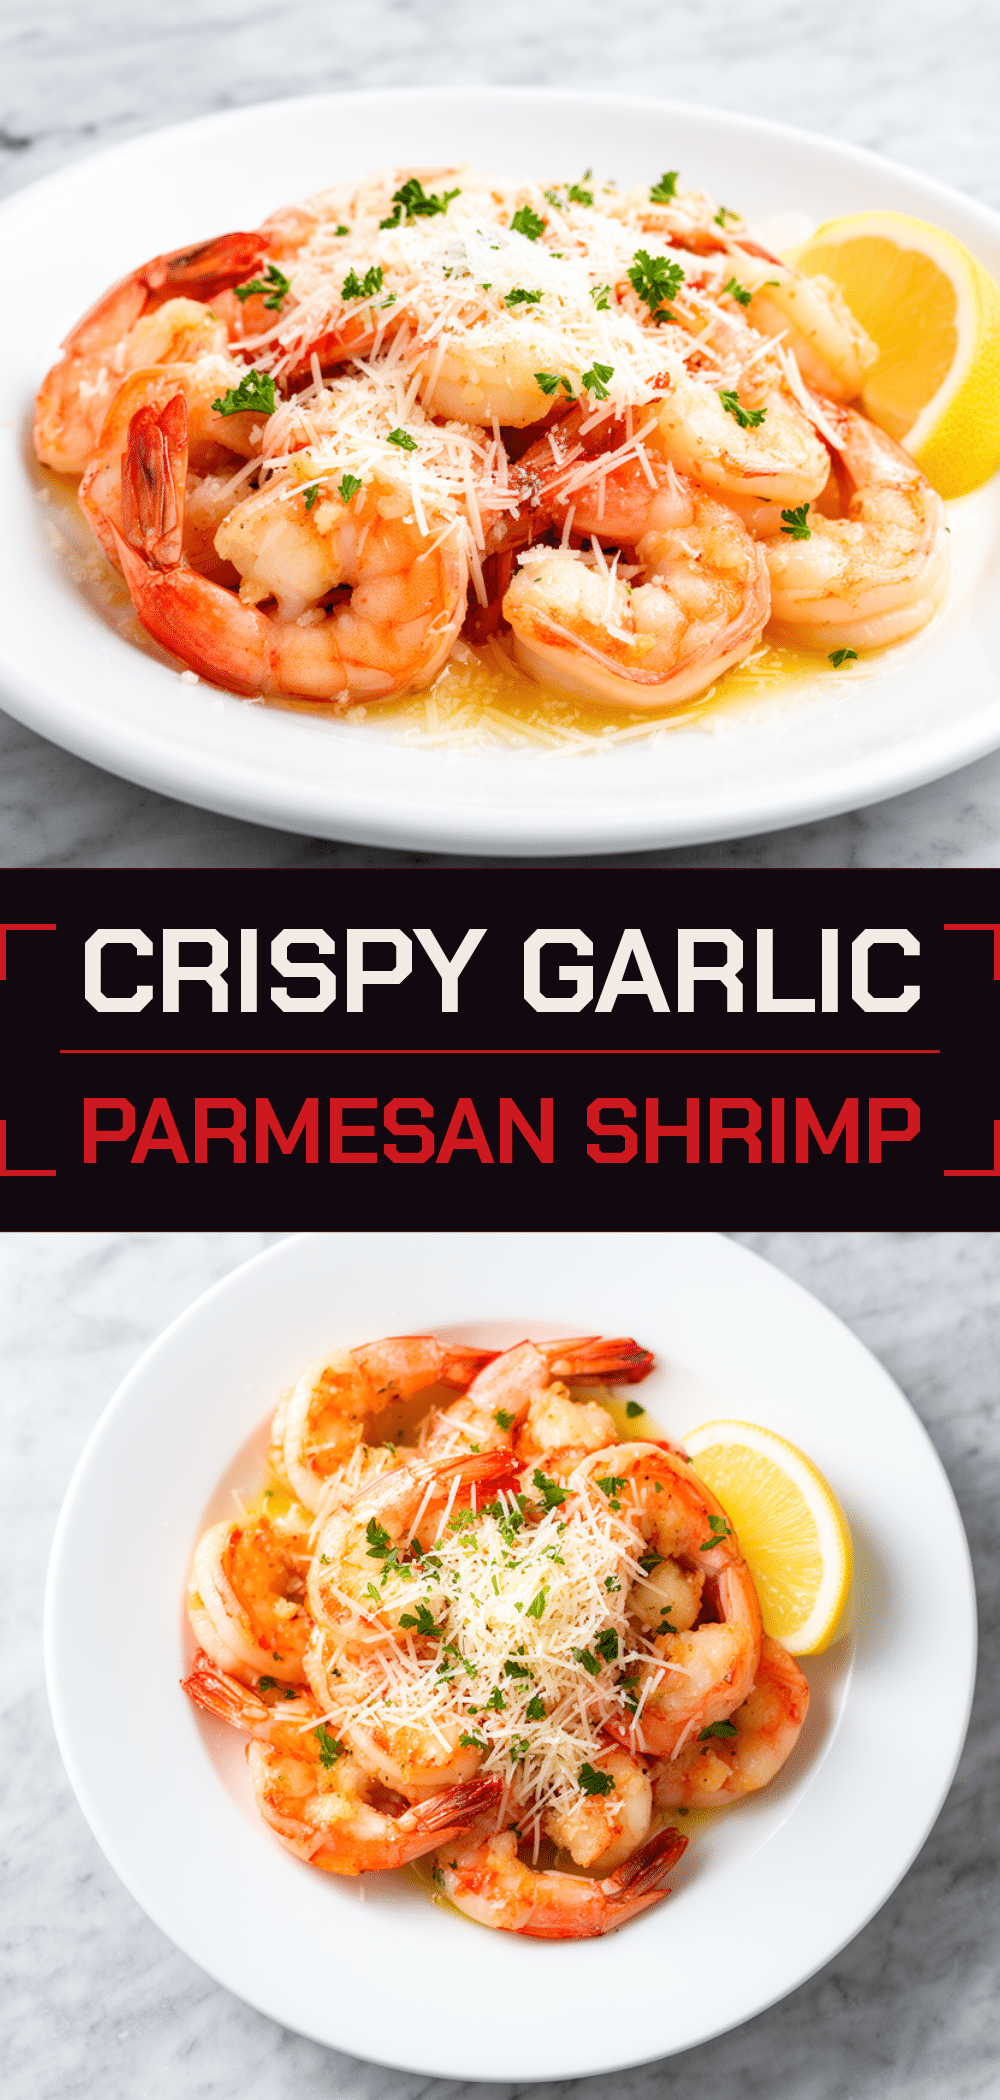
Garlic Parmesan Baked Shrimp: Easy 15-Min Dinner
- Total Time: 15 minutes
- Yield: 4 servings 1x
Description
A quick and easy weeknight dinner featuring crispy, golden-baked shrimp coated in a rich mixture of butter, garlic, parmesan cheese, and panko breadcrumbs. Ready in just 15 minutes with minimal cleanup.
Ingredients
- 1.5 pounds (680g) raw shrimp, peeled and deveined
- 4 tablespoons (60g) unsalted butter, melted
- 4–5 cloves garlic, minced
- 1 cup (100g) freshly grated Parmesan cheese
- 1/2 cup (50g) panko breadcrumbs
- 1 teaspoon Italian seasoning
- 1/4 teaspoon red pepper flakes (optional)
- 1 lemon, cut into wedges
- 2 tablespoons fresh parsley, chopped
- Salt and black pepper to taste
- Cooking spray or extra butter for greasing
Instructions
- Preheat oven to 400°F (200°C). Line a baking sheet with parchment paper or foil.
- If using frozen shrimp, thaw under cold water for 5 minutes and pat completely dry with paper towels. If using fresh, ensure they are peeled and deveined.
- In a small mixing bowl, combine melted butter, minced garlic, grated parmesan, panko breadcrumbs, Italian seasoning, and red pepper flakes. Stir until the mixture resembles wet sand.
- Add the dried shrimp to the bowl and toss until evenly coated in the mixture.
- Arrange the coated shrimp in a single layer on the prepared baking sheet, ensuring they are not touching.
- Bake for 8-10 minutes, or until the shrimp are pink, opaque, and the coating is golden brown and crispy.
- Remove from oven and immediately sprinkle with fresh parsley.
- Serve hot with lemon wedges on the side.
Notes
Patting the shrimp dry is crucial for a crispy coating. Do not overcrowd the baking sheet to ensure even baking. Serve immediately as the coating can become soggy if left to sit. For a gluten-free version, use gluten-free panko. For a dairy-free version, substitute butter with olive oil and parmesan with nutritional yeast.
- Prep Time: 5 minutes
- Cook Time: 10 minutes
- Category: Main Course
- Cuisine: American
Nutrition
- Serving Size: Approximately 4-6 sh
- Calories: 280
- Sugar: 1
- Sodium: 450
- Fat: 14
- Saturated Fat: 7
- Carbohydrates: 12
- Fiber: 1
- Protein: 28
Keywords: garlic parmesan shrimp, baked shrimp, quick dinner, weeknight meals, seafood recipe, easy shrimp, panko shrimp



