
There is a specific kind of panic that hits around 5 PM on the Tuesday before Halloween. You realize you promised your kid’s class party you’d bring something “spooky but edible,” and you’re staring at a fridge that contains nothing but half a lemon, some sad spinach, and a jar of pickles. That was me last year. I had zero time, zero fancy ingredients, and zero patience for a complicated craft project. So, I did what any sleep-deprived parent does: I raided the freezer and the pantry and threw together something that looked like it took hours but actually took ten minutes.
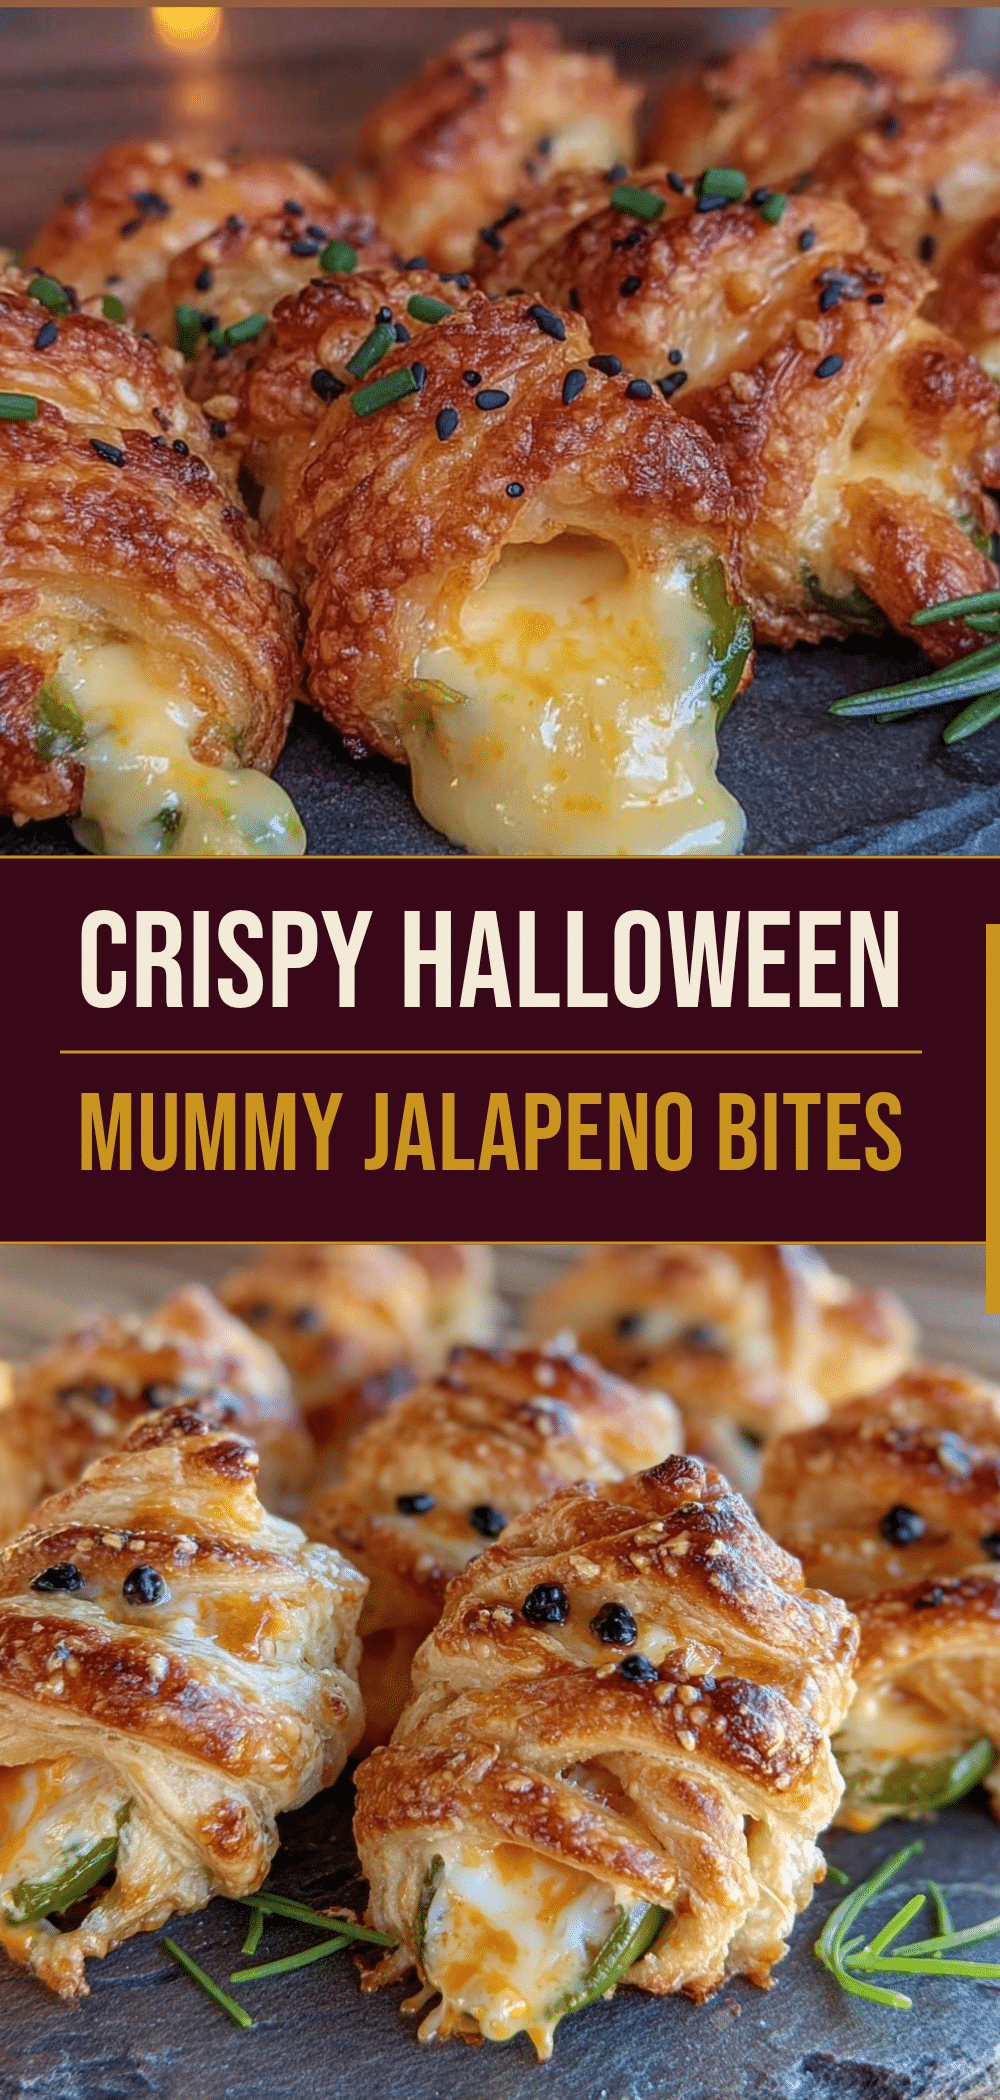
Enter the Halloween Mummy Jalapeno Popper Bites. They are cheesy, they are spicy, they look like little edible ghosts wrapped in pastry, and they vanish from the plate faster than you can say “trick or treat.” I’ve made these for Halloween parties, game day spreads, and random Tuesday snacks when I need something to actually fuel me without making me feel sluggish. They are the perfect balance of savory, crunchy, and a little bit naughty. Plus, they are surprisingly protein-packed thanks to the cream cheese and cheddar, keeping you satisfied long after the sugar rush of Halloween candy wears off.
People always ask for this recipe. Not just because it’s festive, but because it’s good. Real good. Like, “please give me the rest of the tray” good. It’s one of those recipes that feels like a cheat code for entertaining. You get all the credit for the spooky presentation, but the flavor is just pure, comforting jalapeno popper goodness. Let me show you how to make them.
Why You’ll Love This Recipe
I’ve tried my fair share of party appetizers over the years. Some are too fancy, some are too messy, and most are just sad bags of chips with a dip. These mummy bites are different. Here’s why they’ve earned a permanent spot in my rotation:
Stupid Fast — Seriously, if you have a tube of crescent roll dough and a block of cream cheese, you’re halfway there. The actual assembly takes about 10 minutes. The baking time is another 12-15 minutes. That’s it. I’ve made these while my kids were doing homework in the other room. No stress.
Protein-Packed Snack — Most party food is just empty carbs. These bites have cream cheese, sharp cheddar, and jalapenos. The protein from the dairy helps keep you full and steady, so you aren’t crashing an hour later. It’s fuel that looks like fun.
Customizable Heat — Hate spice? Use mild jalapenos or skip them entirely. Love heat? Add some cayenne to the filling or use hotter peppers. These are your bites, and you control the burn. I usually go for a medium kick because it wakes up my taste buds.
Looks Harder Than It Is — The “mummy” look is just strips of dough wrapped around the filling. It’s a simple visual trick that makes you look like a genius baker. Your friends will think you spent hours in the kitchen. (Spoiler: You didn’t.)
Make-Ahead Friendly — You can assemble these up to 24 hours in advance and keep them in the fridge. When guests arrive, just pop them in the oven. This is huge for hosting. You can actually enjoy your own party instead of being stuck by the stove.
This is my go-to when I need a snack that’s exciting, filling, and doesn’t require a degree in culinary arts. It’s comfort food with a spooky twist.
Ingredients You’ll Need
Here’s the best part: you probably have most of this already. It’s a pantry-friendly recipe that relies on a few key items to pull off that creamy, spicy, cheesy magic.
Crescent Roll Dough (1 tube, 8 oz) — This is your “mummy wrap.” I use the standard refrigerated tubes. You can use biscuit dough if you prefer, but crescent dough creates those perfect flaky strips. Thaw it slightly if it’s too stiff to cut.
Cream Cheese (8 oz, softened) — This is the binder. Make sure it’s softened to room temperature so it mixes smoothly with the cheddar. If it’s cold, you’ll get lumpy pockets in your filling.
Sharp Cheddar Cheese (1 cup, shredded) — Use block cheddar and grate it yourself. Pre-shredded cheese has anti-caking agents that prevent it from melting smoothly. I use a medium-sharp cheddar for the best balance of flavor and melt.
Jalapenos (2-3 medium) — Fresh is best. Slice them into thin rounds. If you’re worried about seeds, remove them with a knife. But honestly? A few seeds add nice heat. I keep some in for myself.
Garlic (1 clove, minced) — Just a touch. Fresh garlic adds depth that powder can’t quite match. Don’t skip it.
Green Onions (2 stalks, finely chopped) — Adds a fresh, oniony bite that cuts through the richness of the cheese. It’s a nice texture contrast.
Egg (1 large) — This is for the egg wash. It helps the dough turn golden brown and shiny. You can skip it if you’re out, but it makes them look pro.
Everything Bagel Seasoning (optional) — I sprinkle this on top before baking for extra crunch and flavor. It’s a game-changer. If you don’t have it, sesame seeds or just a pinch of salt works too.
Butter (2 tablespoons, melted) — Sometimes I brush the dough strips with melted butter before adding the cheese. It helps them crisp up faster.
Equipment Needed
You don’t need fancy equipment for this. Here’s what I actually use:
Baking Sheet — I use a standard 13×18 inch sheet. Line it with parchment paper. Trust me on the parchment. Cleaning cheese-splattered pans is a nightmare.
Small Bowl — For mixing the cream cheese, cheddar, jalapenos, and garlic.
Pastry Brush — For the egg wash. A silicone one is easy to clean.
Sharp Knife — For slicing jalapenos and chopping green onions. Be careful with the seeds!
Pizza Cutter or Sharp Knife — To cut the crescent dough into strips. A pizza cutter is faster and less likely to squish the dough.
Measuring Spoons — Standard stuff. Dollar store versions work fine.
Mixing Spoon — For combining the filling. A rubber spatula works too.
Optional: Mini Muffin Tin — If you want them to hold their shape perfectly, you can bake them in a mini muffin tin. But they’re cute enough on a flat sheet.
How to Make It: Step-by-Step

Alright, let’s make these! I’m walking you through exactly how I do it, including the little tricks I’ve picked up.
Step 1: Prep Your Oven and Pan (2 minutes)
Preheat your oven to 375°F (190°C). Line a large baking sheet with parchment paper. This is non-negotiable for easy cleanup. Set out your ingredients and let the cream cheese sit out while you prep the rest.
Step 2: Make the Filling (5 minutes)
In a small bowl, combine the softened cream cheese, shredded cheddar, minced garlic, and chopped green onions. Mix until smooth. Fold in the sliced jalapenos. If you want a milder version, use only half the jalapenos. Taste it—if you want more kick, add a pinch of cayenne. Set aside.
Step 3: Prep the Dough (3 minutes)
Unroll the crescent dough. It should be one large rectangle with perforated seams. Use a knife or pizza cutter to cut the dough into 1-inch wide strips. You should get about 16-20 strips depending on how you cut them. Don’t worry about perfection; rustic looks more like mummy wrappings anyway.
Step 4: Assemble the Mummies (10 minutes)
Take a strip of dough and lay it flat. Place a generous spoonful (about 1 tablespoon) of the cheese filling at one end. Roll the dough up tightly around the filling, leaving the top exposed to look like the mummy’s head. Then, take another strip and wrap it around the middle, like a bandage. Repeat until you’ve used all the dough. You might have some extra dough or filling—just use what you need. The key is to keep the filling enclosed so it doesn’t leak.
Step 5: Egg Wash and Season (2 minutes)
Whisk the egg with a splash of water. Brush the tops of the mummies lightly. Sprinkle with everything bagel seasoning if using. This adds that savory crunch and makes them look finished.
Step 6: Bake (12-15 minutes)
Bake in the preheated oven for 12-15 minutes, or until the dough is golden brown and puffy. Keep an eye on them around the 10-minute mark. If the tops are browning too fast, cover them loosely with foil. They’re done when the dough is cooked through and the cheese is bubbling inside.
Step 7: Cool and Serve
Let them cool for 5 minutes on the pan. The cheese will be lava-hot. Serve warm. They’re best eaten fresh, but leftovers are great too.
Expert Tips & Tricks
Here’s everything I’ve learned from making these dozens of times. These tips will save you from my mistakes.
Don’t Overfill — I used to stuff them like burritos. The dough bursts open in the oven, and you end up with a cheesy mess on the pan. Keep the filling to about 1 tablespoon per mummy. Less is more.
Keep the Heads Open — When rolling, leave the very top of the filling exposed. This creates the “mummy face” look. If you seal it completely, it just looks like a rolled-up cookie. The exposed cheese adds visual interest.
Thaw the Dough Properly — If your crescent dough is rock hard, it’s hard to cut into strips. Let it sit on the counter for 10-15 minutes before cutting. It should be pliable but not sticky.
Freeze Before Baking — You can assemble these and freeze them on the baking sheet for an hour, then transfer to a bag. Bake from frozen, adding 2-3 minutes to the bake time. Great for meal prep.
Use a Scale — If you want uniform mummies, weigh your filling. 15 grams per mummy is perfect. Consistency helps them bake evenly.
Variations & Substitutions
Once you’ve nailed the basic version, here’s how you can mix it up. I’ve tried all of these.
Bacon Wrapped — Add a small piece of cooked bacon to the filling before wrapping. The smokiness pairs perfectly with the jalapenos. This is my husband’s favorite version.
Spinach Artichoke — Swap the jalapenos for chopped spinach and artichoke hearts. Add a little garlic powder. It’s like a mini spinach artichoke dip in a mummy shell.
Buffalo Chicken — Mix shredded cooked chicken with buffalo sauce and blue cheese crumbles in the filling. Serve with ranch dipping sauce. Perfect for game day.
Vegan Version — Use vegan cream cheese, vegan cheddar, and vegan crescent dough (though this is harder to find). The filling stays the same, just swap the dairy. It’s not quite as gooey, but still tasty.
Gluten-Free — Use gluten-free crescent dough or make a simple almond flour dough. The filling is naturally gluten-free.
Serving & Storage
How to Serve: I usually serve these straight from the pan with a side of ranch or sour cream for dipping. They’re great for Halloween parties, tailgates, or just a late-night snack. Pair them with a cold drink to cool the heat.
Refrigerator: Store leftovers in an airtight container for up to 3 days. The dough will soften, but they’re still good.
Reheating: Reheat in the oven at 350°F for 5-7 minutes to crisp up the dough. Microwave makes them soggy. Avoid the microwave unless you’re in a huge rush.
Freezing: Yes, you can freeze baked mummies. Let them cool completely, then freeze in a single layer. Reheat in the oven. They won’t be as flaky, but still delicious.
Nutrition Information
I’m not a nutritionist, but here’s the breakdown if you’re tracking. These are relatively balanced for a party snack, thanks to the protein in the cheese.
Per Serving (based on 16 mummies):
- Calories: 120
- Protein: 4g
- Carbs: 12g
- Fiber: 0.5g
- Sugar: 1g
- Fat: 7g
What’s Good: Decent protein from the cream cheese and cheddar. Low sugar. The jalapenos add a metabolism-boosting kick.
What to Know: Higher in sodium from the dough and cheese. Contains dairy and gluten. Moderate calories, so enjoy in moderation if you’re watching intake. But really, these are fuel for fun.
Final Thoughts
So that’s my go-to Halloween Mummy Jalapeno Popper Bites! I’ve probably talked your ear off at this point, but when you make a recipe this often, you have a lot to say about it. These have saved me from party panic more times than I can count. They’re my answer to “what’s for the kids’ party” when I’m tired, don’t want takeout, and still want something that tastes really good. My kids are happy, my friends are happy, and I’m happy because I’m not stressed about cooking.
Make it yours! Try different cheeses, swap in your favorite peppers, adjust the garlic. The best recipes are the ones you adapt to your family’s tastes. If you make this, drop a comment and let me know what you think! I love hearing how recipes turn out in your kitchen. And if something doesn’t work, tell me that too—I’m here to help troubleshoot.
Happy cooking! And I hope your kitchen smells half as good as mine does right now.
Frequently Asked Questions
Can I use canned jalapenos instead of fresh?
You can, but they’re wetter. If you use canned, drain them really well and pat them dry with a paper towel. Excess water can make the dough soggy. Fresh jalapenos have a brighter, crisper flavor that I prefer, but canned works in a pinch.
Why did my dough burn?
Oven temperatures vary. If your dough is browning too fast, cover it loosely with foil after 10 minutes. Also, make sure you’re not placing the baking sheet too close to the heating element. Middle rack is usually best.
Can I make these ahead of time?
Yes! Assemble them and keep them in the fridge for up to 24 hours. Bake them right before you need them. This is perfect for party prep. Just take them out of the fridge 15 minutes before baking to take the chill off.
How do I stop them from leaking cheese?
Don’t overfill! Use about 1 tablespoon of filling per mummy. Also, make sure you’re sealing the dough well around the edges. If you see cheese bubbling out, that’s okay—it adds flavor, just wipe the pan after baking.
Can I freeze the raw mummies?
Yes. Assemble them, place them on a baking sheet, and freeze for 1-2 hours until solid. Then transfer to a freezer bag. Bake from frozen, adding 2-3 minutes to the bake time. They might spread a little more, so leave space between them.
What’s the best way to reheat leftovers?
Oven or air fryer. Reheat at 350°F for 5-7 minutes. This restores the crispiness of the dough. Microwave makes them chewy and soggy. If you must microwave, do it in 15-second bursts and let them rest.
Can I make these mild?
Absolutely. Use mild jalapenos, remove all the seeds and membranes, and reduce the amount. You can also add a little more cream cheese to mellow out the heat. The cheese flavor will still shine through.
Pin This Recipe!

Halloween Mummy Jalapeno Popper Bites
- Total Time: 25 minutes
- Yield: 16 servings 1x
Description
These spooky yet delicious jalapeno popper bites are wrapped in crescent dough to look like mummies. They are protein-packed, customizable in heat, and ready in just 10 minutes of prep time.
Ingredients
- 1 tube (8 oz) crescent roll dough
- 8 oz cream cheese, softened
- 1 cup sharp cheddar cheese, shredded
- 2–3 medium jalapenos, sliced into thin rounds
- 1 clove garlic, minced
- 2 stalks green onions, finely chopped
- 1 large egg (for egg wash)
- Everything bagel seasoning (optional)
- 2 tablespoons butter, melted (optional)
Instructions
- Preheat oven to 375°F (190°C) and line a large baking sheet with parchment paper.
- In a small bowl, combine softened cream cheese, shredded cheddar, minced garlic, and chopped green onions until smooth.
- Fold in the sliced jalapenos into the cheese mixture.
- Unroll the crescent dough and cut it into 1-inch wide strips.
- Place a generous spoonful (about 1 tablespoon) of the cheese filling at one end of a dough strip.
- Roll the dough tightly around the filling, leaving the top exposed to create the ‘mummy head’ look.
- Wrap another strip of dough around the middle like a bandage. Repeat with remaining dough and filling.
- Whisk the egg with a splash of water and brush the tops of the mummies lightly.
- Sprinkle with everything bagel seasoning if using.
- Bake for 12-15 minutes until the dough is golden brown and puffy.
- Let cool for 5 minutes before serving warm.
Notes
Do not overfill the mummies to prevent bursting. If using canned jalapenos, drain and pat them dry to avoid soggy dough. These can be assembled up to 24 hours in advance and refrigerated, or frozen raw before baking.
- Prep Time: 10 minutes
- Cook Time: 15 minutes
- Category: Appetizer
- Cuisine: American
Nutrition
- Serving Size: 1 mummy bite
- Calories: 120
- Sugar: 1
- Sodium: 250
- Fat: 7
- Saturated Fat: 3
- Carbohydrates: 12
- Fiber: 0.5
- Protein: 4
Keywords: Halloween recipes, jalapeno poppers, party appetizers, quick snacks, mummy bites, crescent roll recipes, spicy snacks



