I have a confession to make. I used to think “keto snacks” tasted like chalk, regret, and loneliness. You know the ones—dry protein balls that crumble everywhere, or those weird gelatinous cubes that taste like they were made in a chemistry lab. I avoided them like the plague for years.
Then, last month, I was staring into the freezer at 2 PM on a Tuesday, feeling that specific kind of low-blood-sugar fog that hits right before dinner. I didn’t have energy to cook. I didn’t want to order delivery (because, hello, budget). I just wanted something sweet, rich, and satisfying that wouldn’t kick me out of ketosis.
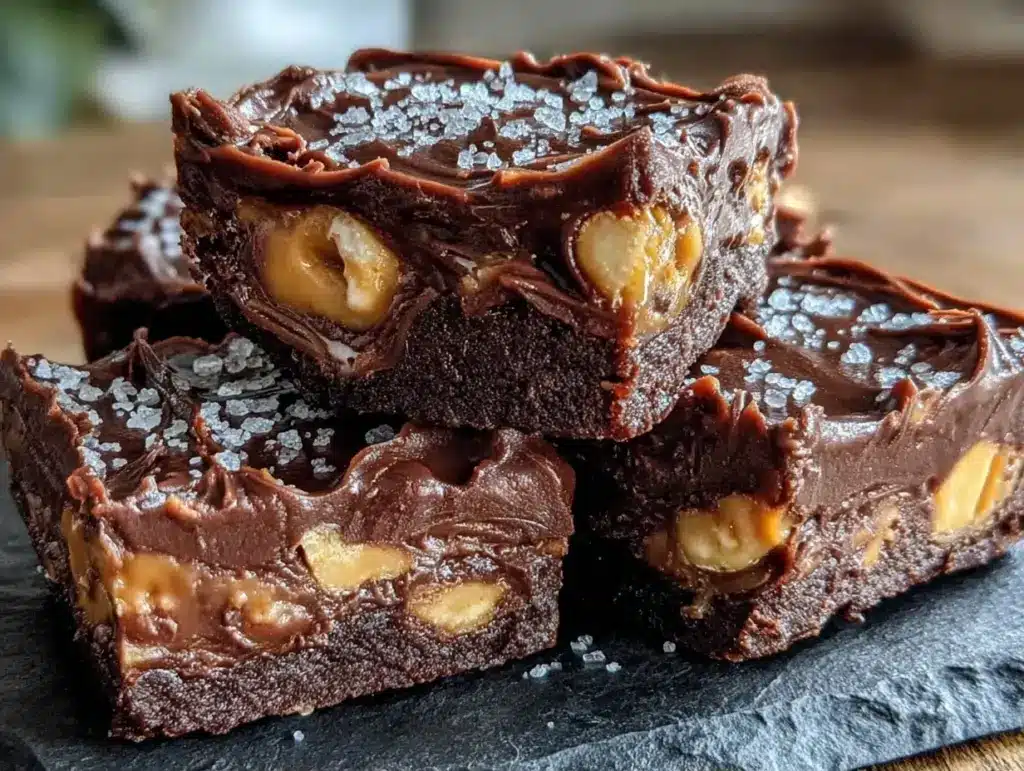
I grabbed two ingredients I always have: peanut butter and chocolate chips. I threw them together, froze them, and took a bite. And honestly? I stopped breathing for a second. It wasn’t just “good for keto.” It was just… good. It tasted like a Reese’s Cup had a baby with a high-end truffle, but with zero sugar and barely any effort.
That was three months ago. I’ve made these keto chocolate peanut butter fat bombs at least a dozen times since. My husband thinks I’m hiding them from him (I’m not, but I do eat them all). My kids love them. My picky friends who say they “don’t like keto food” steal bites when I bring them to work.
This isn’t a complicated recipe. It’s four ingredients. It takes five minutes of actual work. And the result is a creamy, chocolatey, peanut-buttery treat that tastes like you spent hours in the kitchen. If you’re looking for a way to satisfy your sweet tooth without the sugar crash, this is it. Seriously. You really can’t mess this up.
Why You’ll Love This Recipe
There are a hundred “healthy” snack recipes out there, but most of them require a food processor, a stand mixer, and a degree in culinary arts. This keto chocolate peanut butter fat bombs recipe is different. It’s the culinary equivalent of a safety net.
Here’s why this has earned a permanent spot in my freezer:
- Four Ingredients. That’s It. I’m not being dramatic. Four. If you have peanut butter, chocolate, butter, and maybe a little sweetener, you’re already halfway done. No obscure powders, no weird gums, no hunting for specialty health food stores.
- Zero Cooking Required. You don’t turn on the oven. You don’t stand over a stove stirring anything. You melt, mix, pour, and freeze. It’s the easiest dessert you will ever make. I’ve made these while watching TV. I’ve made these while on the phone. You literally cannot fail.
- Texture Perfection. Most keto treats are either too hard (like rocks) or too soft (like mush). These hit that sweet spot—firm enough to handle without melting in your hands, but soft enough to bite into with a satisfying snap. The peanut butter center stays creamy even after freezing.
- Actually Filling. These aren’t just empty calories. The healthy fats from the peanut butter and coconut oil keep you satiated. I had one of these last week during a 3 PM slump, and I didn’t feel hungry again until dinner. No snack attack, no cravings.
- Beginner-Proof. If you can microwave a cup of water, you can make this. I have zero culinary skills, and I’ve never once had a batch come out wrong. The margins for error are huge. Too runny? Freeze it longer. Too thick? Add a teaspoon of coconut oil. It’s forgiving as hell.
This is the kind of recipe that builds your confidence. You make it once, and suddenly you’re thinking, “Wait, I can make keto desserts?” And the answer is yes. You absolutely can.
Ingredients You’ll Need
Here’s the beauty of this keto chocolate peanut butter fat bombs recipe: you probably have everything in your pantry or fridge right now. I’m not asking you to buy a $10 bag of erythritol if you don’t already have it. But let’s get specific about what works best.
For the Peanut Butter Center
Creamy Peanut Butter (1 cup / 250g) — This is the star. Use natural peanut butter if you want, but make sure it’s well-stirred. If the oil has separated, stir it until it’s smooth and uniform. I prefer a standard brand like Jif or Skippy because they hold their shape better in the freezer, but if you’re using all-natural, just make sure there’s no separation. Avoid “no-stir” varieties with hydrogenated oils if you can help it—they can get waxy when cold.
Butter (2 tablespoons / 30g) — Unsalted is best so you can control the saltiness. This adds richness and helps the peanut butter center set up properly. It also helps prevent the peanut butter from tasting too “flat” on its own.
Vanilla Extract (½ teaspoon) — Just a splash. It rounds out the flavor and makes it taste more like a dessert than a snack. Don’t skip it.
Salt (A pinch) — Salt is flavor enhancer #1. It makes the peanut butter taste nuttier and the chocolate taste richer. I always add a tiny pinch.
For the Chocolate Coating
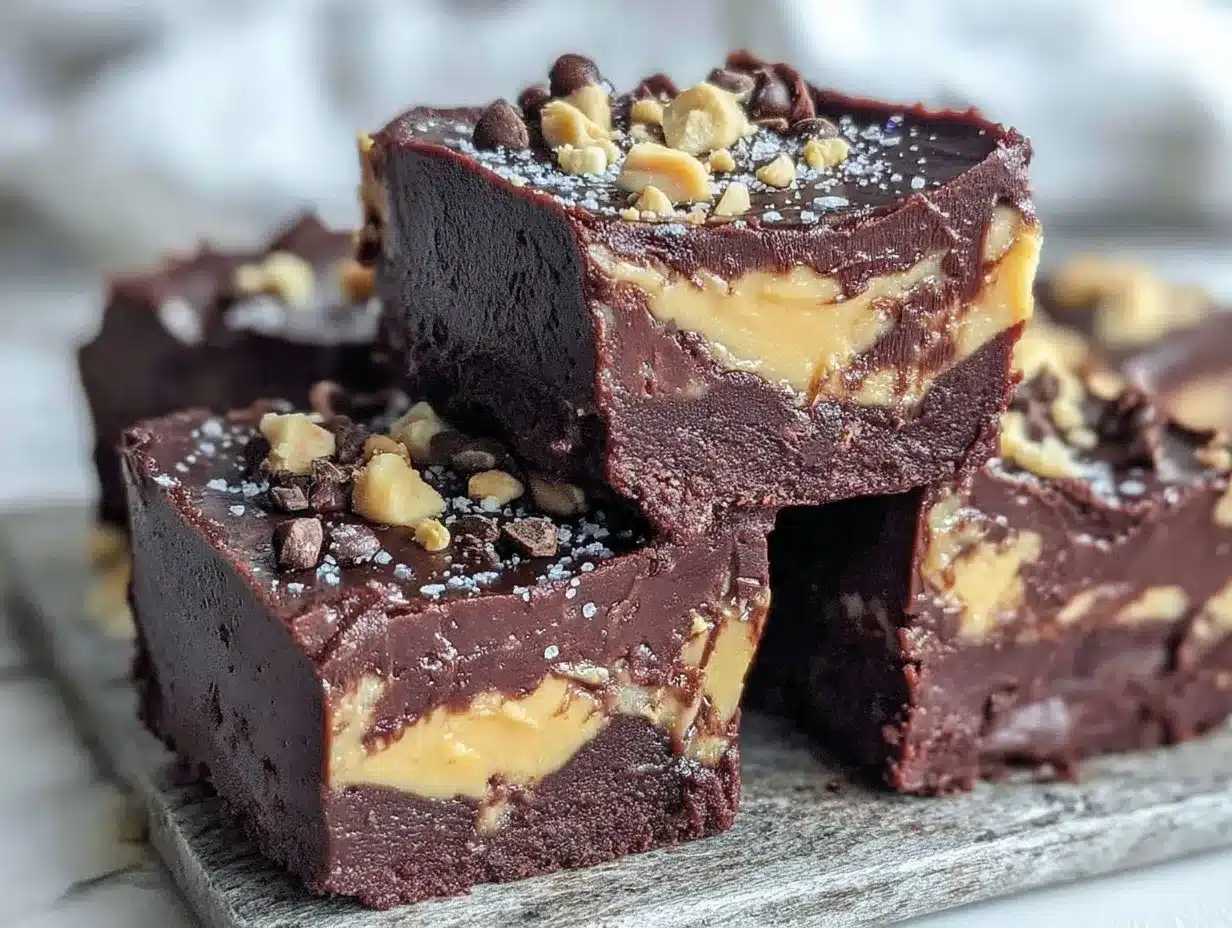
Semi-Sweet Chocolate Chips (1 cup / 170g) — This is your base. Look for chips labeled “keto-friendly” or “sugar-free” that use erythritol or allulose. I love Lindt 90% Dark Chocolate chips because they melt beautifully and have a deep, rich cocoa flavor. If you can’t find those, any sugar-free chocolate chip brand works. Just check the label to make sure it’s low-carb.
Coconut Oil (1 tablespoon / 15ml) — This is the secret weapon. Chocolate alone can be brittle and hard to bite into when frozen. Coconut oil keeps the coating soft and smooth, so it melts on your tongue instead of cracking your teeth. Use refined coconut oil if you don’t want a coconut flavor, or unrefined if you’re a fan of that tropical note (it pairs surprisingly well with peanut butter).
Optional: Liquid Sweetener — If your chocolate chips aren’t sweet enough for you, you can add a few drops of liquid stevia or monk fruit. But honestly? If you pick good quality sugar-free chips, you usually don’t need it. I taste-test mine before adding extra sweetener.
Substitutions & Swaps
Almond Butter: You can swap the peanut butter for almond butter. It’s slightly sweeter and nuttier. I’ve tried it, and it’s delicious, but peanut butter is cheaper and has that classic Reese’s vibe.
Coconut Butter: If you’re peanut-free, you can use coconut butter (cocoa butter) in the center, but it’s much harder to work with because it’s solid at room temperature. Stick to nut butters if you can.
White Chocolate: You can use sugar-free white chocolate chips for the coating if you want a “Reese’s Pieces” look. It’s sweeter and milder, which some people prefer.
Equipment Needed
You don’t need any fancy gadgets for this. Here’s what you actually need:
Microwave-Safe Bowl — I use a large glass measuring cup with a spout. It makes pouring the chocolate way easier and less messy. A regular bowl works fine, just be careful when pouring.
Silicone Molds — This is the only “special” tool you need. I use a standard silicone candy mold or even a mini muffin tin. Silicone is great because the fat bombs pop out easily. If you don’t have molds, you can use parchment paper squares and shape them by hand, but molds save time and give you that uniform look.
Small Spoon or Dropper — For putting the peanut butter into the molds. A teaspoon works perfectly.
Freezer — Obviously. But make sure you have space. These need about 1-2 hours to set properly.
Optional: Kitchen Scale — If you’re tracking macros strictly, a scale is helpful. But if you’re just eyeballing it, don’t stress. These recipes are forgiving.
How to Make It: Step-by-Step
Alright, let’s make these keto chocolate peanut butter fat bombs. I’m going to walk you through it slowly, but trust me—it’s incredibly fast. I’ll share the little tricks that keep them from cracking or getting grainy.
Step 1: Prep Your Molds
Take your silicone molds and lay them out on a flat surface. If you’re using a muffin tin, line each cup with a small piece of parchment paper. This isn’t strictly necessary if you use silicone, but it makes cleanup easier and helps with removal. Set these aside in the freezer for 5 minutes. Chilling the molds helps the chocolate set faster when you pour it.
Step 2: Make the Peanut Butter Center
In a small microwave-safe bowl, combine the creamy peanut butter, softened butter, vanilla extract, and a pinch of salt. Microwave on high for 30 seconds. Stir well. If it’s still too thick or the butter isn’t fully melted, microwave for another 15 seconds and stir again. You want a smooth, pourable (or at least spoonable) consistency. It shouldn’t be hot, just warm and mixed. Taste it! Adjust salt or vanilla if needed. This is your center, so make it good.
Step 3: Add the Peanut Butter to Molds
Using a teaspoon, drop a small amount of the peanut butter mixture into the bottom of each mold cavity. You don’t need a huge amount—about ½ to 1 teaspoon per mold. You want a small pool of peanut butter, not a giant ball. If you make them too big, they’ll be hard to bite through. Smooth the top slightly with the back of the spoon. Pop the molds back in the freezer for 10 minutes. This firms up the peanut butter so it doesn’t mix with the chocolate later.
Step 4: Melt the Chocolate
This is the part where most people get nervous, but it’s easy. Take your chocolate chips and coconut oil and put them in a microwave-safe bowl. Microwave in 30-second bursts. After the first 30 seconds, take them out and stir vigorously. The residual heat will finish melting them. If there are still chunks, do another 15-second burst and stir. Keep stirring until the mixture is completely smooth, glossy, and liquid. If it’s too thick, add another half-teaspoon of coconut oil. If it’s too thin, add a few more chips. You want a consistency like heavy cream.
Step 5: Pour the Chocolate
Remove the molds from the freezer. The peanut butter centers should be firm now. Carefully pour or spoon the melted chocolate over the peanut butter centers. Fill each mold to the top. Use a toothpick or the tip of a knife to gently swirl the chocolate and ensure there are no air bubbles. If you see a little peanut butter peeking out, just cover it with a tiny bit more chocolate.
Step 6: Freeze Until Set
Place the molds in the freezer for at least 1 hour, or until completely solid. If you’re in a rush, 45 minutes might work, but 1 hour guarantees they pop out cleanly. Don’t try to remove them while they’re still soft—they’ll stick and look messy. Be patient. The wait is worth it.
Step 7: Store and Enjoy
Once they’re solid, pop them out of the molds. If they stick, just run the mold under warm water for a few seconds and try again. Place them in an airtight container in the freezer. They’re ready to eat whenever you want. I keep them in a ziplock bag in the freezer, and I just grab one when I need a sweet fix.
Total Time: About 10 minutes active, plus 1 hour freezing.
Expert Tips & Tricks
Here’s everything I’ve learned from making these dozens of times. These tips will save you from my mistakes.
Don’t Overheat the Chocolate
The #1 mistake people make is burning the chocolate. Chocolate scorches easily in the microwave. Always use short bursts (15-30 seconds) and stir between each one. If the chocolate gets too hot, it can seize up and become grainy. Low and slow is the way to go. If you’re using a double boiler on the stove, keep the heat low and stir constantly.
Use Refined Coconut Oil for Neutral Flavor
Unrefined coconut oil has a distinct coconut taste. While some people love it, it can clash with the peanut butter if you’re going for that classic Reese’s flavor. Refined coconut oil has no coconut taste, so it just acts as a texture enhancer. If you do use unrefined, it’s still delicious, just different. I usually buy refined because I want the chocolate to shine.
Chill Your Spoons
If you’re using a spoon to drop the peanut butter into the molds, chill the spoon in the freezer for 5 minutes first. The cold spoon helps the peanut butter hold its shape and prevents it from sticking to the spoon as much. It’s a tiny trick, but it makes the process smoother.
Don’t Skip the Salt
I know it’s a sweet recipe, but the salt is crucial. It balances the sweetness of the chocolate and enhances the nutty flavor of the peanut butter. Without it, the fat bombs taste one-dimensional. I always add a pinch to the peanut butter mix, and sometimes I sprinkle a tiny flake of sea salt on top of the chocolate before it sets. It looks fancy and tastes amazing.
Keep Them in the Freezer
These are best eaten frozen. If you leave them at room temperature for too long, the coconut oil will melt, and they’ll become soft and gooey. That’s not necessarily bad, but it changes the texture. I keep them in the freezer and only take them out 5 minutes before eating. They stay firm in the fridge, but the freezer gives you that ice-cream-like texture.
Variations & Substitutions
Once you’ve mastered the basic version, here’s how you can mix it up. I’ve tried all of these, and they’re all winners.
Dark Chocolate & Sea Salt
Use 100% dark chocolate chips (sugar-free) for the coating. The bitterness of the dark chocolate pairs perfectly with the sweet peanut butter. Sprinkle flaky sea salt on top before the chocolate sets. This is my personal favorite because it tastes sophisticated and rich.
White Chocolate & Raspberry
Use sugar-free white chocolate chips for the coating. Add a tiny freeze-dried raspberry piece on top of the peanut butter before pouring the chocolate. The tartness of the raspberry cuts through the richness. It’s like a white chocolate raspberry truffle.
Mint Chocolate Chip
Add ¼ teaspoon of peppermint extract to the chocolate mixture. It tastes like an After Eight mint. If you want chips, sprinkle a few sugar-free chocolate chips on top before it sets. Refreshing and perfect for holidays.
Cookie Dough Center
Instead of peanut butter, use a keto cookie dough recipe for the center. Mix almond flour, butter, sweetener, and chocolate chips. Drop a ball of cookie dough into the mold, then cover with chocolate. It’s like a miniature cookie dough cup.
Caramel Swirl
Make a quick keto caramel sauce (butter, cream, sweetener) and swirl a teaspoon into the peanut butter center before covering with chocolate. It’s decadent and feels like a treat from a candy shop.
Dietary Modifications
Nut-Free: Use sunflower seed butter (SunButter) instead of peanut butter. It has a similar texture and works perfectly. The flavor is slightly different but still delicious.
Dairy-Free: Use coconut oil instead of butter in the center, and use dairy-free chocolate chips. Most sugar-free chocolate chips are naturally dairy-free, but check the label.
Lower Fat: Reduce the coconut oil in the chocolate coating to ½ tablespoon. The fat bombs will be slightly harder but still tasty.
Serving & Storage
These are meant to be eaten as a snack or dessert, so portion control is key. They’re small but potent.
How to Serve
I usually serve them straight from the freezer. Let them sit on the counter for 2-3 minutes to soften slightly. They’re best enjoyed with a cup of black coffee or unsweetened tea. The bitterness of the coffee balances the sweetness perfectly. I also like to serve them at parties because they look like little chocolates, and people are surprised when I tell them they’re keto-friendly.
Storage Instructions
Freezer: Store in an airtight container or ziplock bag in the freezer for up to 3 months. They actually get better after a few days as the flavors meld together. I usually make a big batch and just keep them stocked.
Fridge: You can store them in the fridge, but they’ll be harder to bite into. The freezer is definitely preferred for the best texture.
Room Temperature: Not recommended. The coconut oil will melt, and they’ll stick together. If you’re traveling, keep them in a cooler bag.
Reheating
You don’t need to reheat these. They’re best eaten cold. If they stick to the mold, run the mold under warm water for a few seconds to loosen them.
Nutrition Information
I’m not a nutritionist, but here’s the breakdown if you’re tracking. Please note that nutrition can vary based on the brands you use, especially for chocolate chips and peanut butter.
Per Fat Bomb (makes about 12-15 bombs):
- Calories: ~110
- Total Fat: 9g
- Net Carbs: 2g
- Protein: 3g
- Fiber: 1g
- Sugar: 0g (or <1g depending on sweetener)
What’s Good:
- Very low carb, perfect for keto.
- Good source of healthy fats from peanut butter and coconut oil.
- Provides satiety, helping to curb cravings.
What to Know:
- Calorie-dense, so stick to 1-2 at a time.
- Check labels for hidden carbs in chocolate chips.
- Contains nuts (unless using sunflower seed butter).
My Take:
Look, this is a treat. It’s not a vegetable. But it’s a smart treat. It satisfies the chocolate craving without derailing your diet. When I want to make it lighter, I use dark chocolate and less butter. But usually? I just enjoy one and feel good about it.
Final Thoughts
So that’s my go-to keto chocolate peanut butter fat bombs recipe! I’ve probably talked your ear off at this point, but when you find a recipe that works this well, you want to share it.
This has saved me from so many afternoon slumps and sugar cravings. It’s my answer to “I need something sweet” when I’m trying to stick to my macros. My family loves them, my friends ask for the recipe, and I’m constantly making more because they disappear so fast.
Make it yours! Try different chocolates, add some sea salt, or swap the peanut butter for almond butter. The best recipes are the ones you adapt to your taste. The beauty of this one is that it’s so forgiving, you can’t go wrong.
If you make this, drop a comment and let me know what you think! I love hearing how recipes turn out in your kitchen. And if something doesn’t work, tell me that too—I’m here to help troubleshoot.
Happy snacking! And I hope your freezer is always stocked with these.
Frequently Asked Questions
Can I use crunchy peanut butter?
Yes, you can! Crunchy peanut butter adds a nice texture contrast to the smooth chocolate. Just make sure it’s well-mixed so the chunks are evenly distributed. I actually prefer crunchy for this recipe because it feels more like a real candy bar.
Why did my chocolate coating crack?
Cracking usually happens if the chocolate was too thick or if the molds were too cold. If the chocolate is too thick, it shrinks as it cools and cracks. Make sure you add enough coconut oil to keep it fluid. Also, don’t freeze the molds for too long before pouring the chocolate—they just need to be cool, not frozen solid.
Can I make these ahead of time?
Absolutely. These are perfect for meal prep. Make a big batch on Sunday and store them in the freezer. They’ll last for up to 3 months. I usually make 30 at a time so I always have some on hand.
What if I don’t have silicone molds?
You can use a mini muffin tin lined with parchment paper cups. Or, you can just drop spoonfuls of peanut butter onto a parchment-lined baking sheet, freeze them, then dip them in melted chocolate. They’ll be irregularly shaped, but they’ll taste the same.
Are these safe for diabetics?
These are low-carb and sugar-free, which makes them suitable for many diabetics. However, everyone’s body reacts differently to sugar alcohols (like erythritol). It’s always best to check with your doctor or dietitian, especially if you’re sensitive to sugar alcohols.
Can I use honey or maple syrup?
No, those are high in sugar and will kick you out of ketosis. Stick to keto-friendly sweeteners like erythritol, monk fruit, or stevia. If you’re not doing keto, you can use honey, but then they’re not really “keto fat bombs” anymore!
How do I stop them from sticking to the mold?
Make sure they’re completely frozen before trying to remove them. If they stick, run the outside of the silicone mold under warm water for 10-15 seconds. The heat will loosen the chocolate, and they should pop right out.
Pin This Recipe!
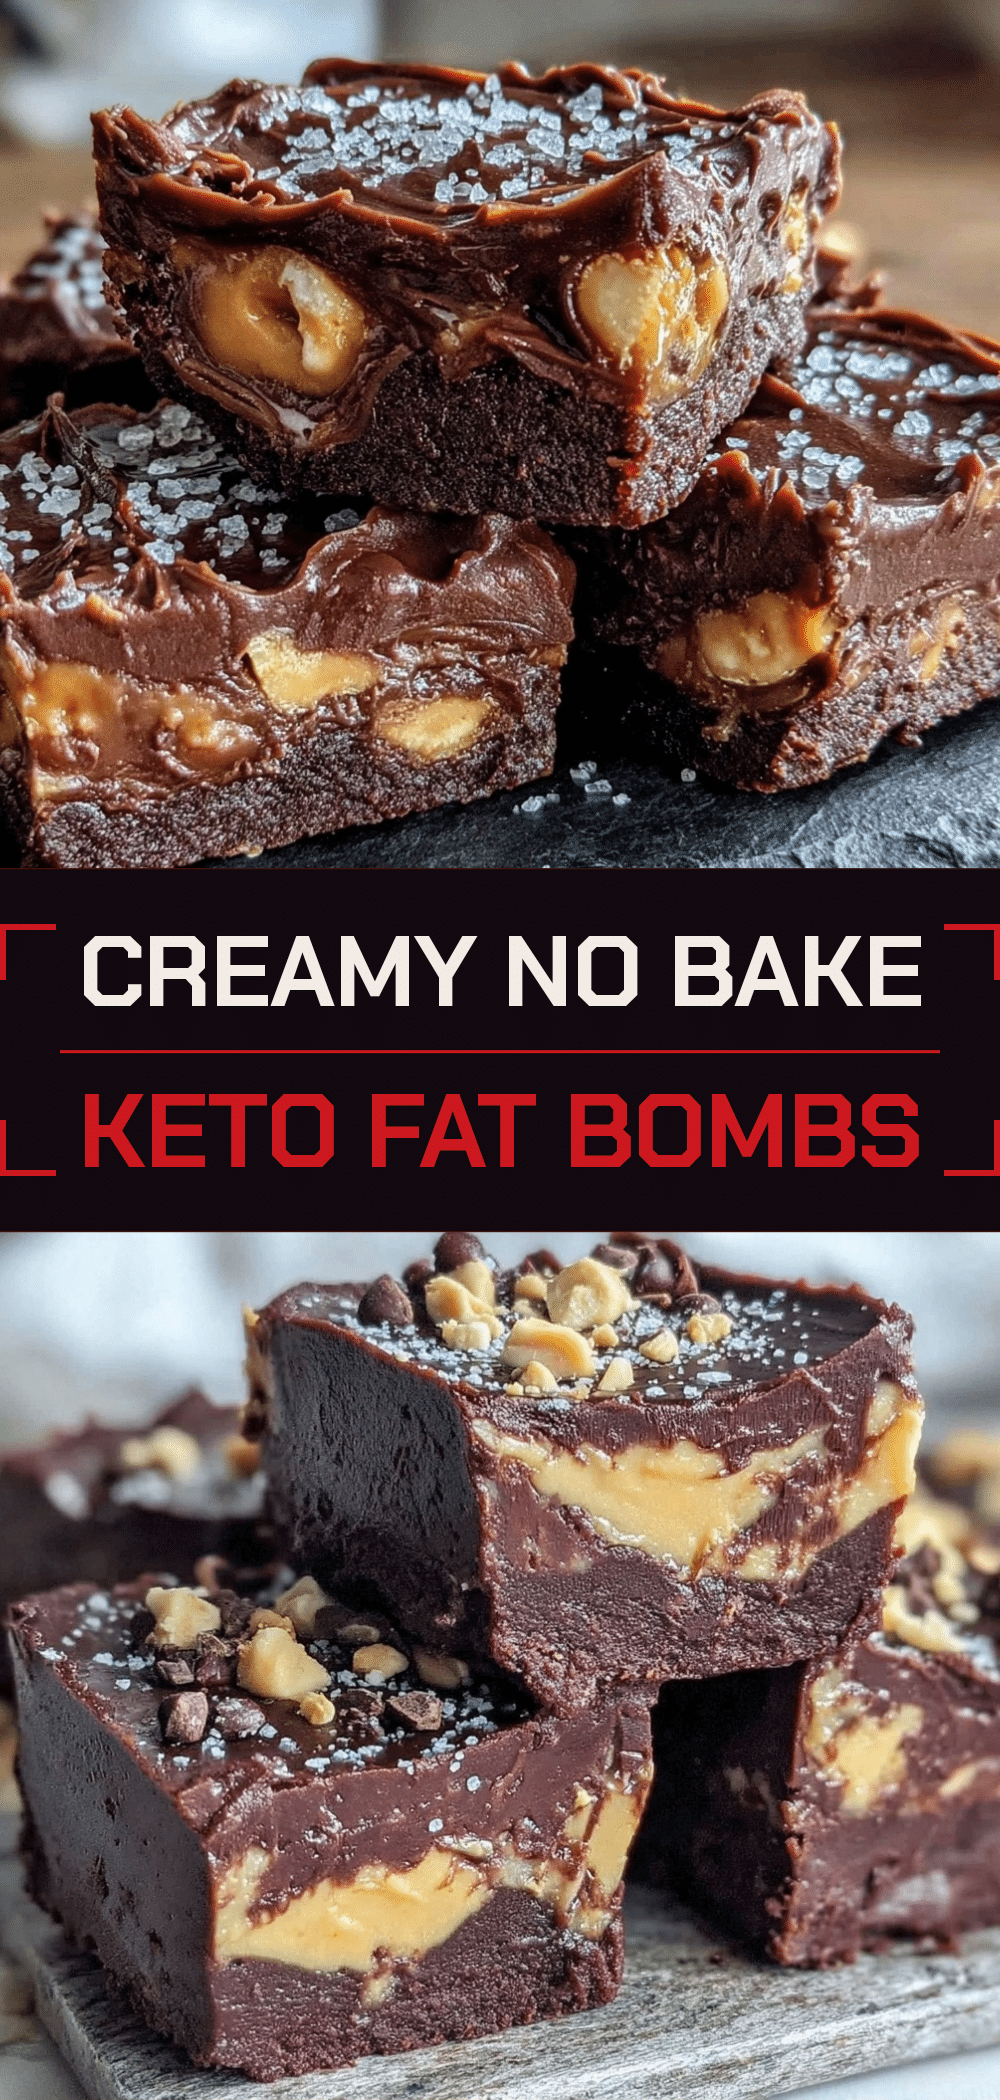
Keto Chocolate Peanut Butter Fat Bombs: 4-Ingredient No-Fuss Snack
- Total Time: 1 hour 10 minutes
- Yield: 12-15 servings 1x
Description
A simple, no-cook keto snack made with just four ingredients. These creamy, chocolatey fat bombs satisfy sweet cravings without sugar or complex preparation.
Ingredients
- 1 cup (250g) creamy peanut butter
- 2 tablespoons (30g) unsalted butter, softened
- 1/2 teaspoon vanilla extract
- A pinch of salt
- 1 cup (170g) semi-sweet sugar-free chocolate chips
- 1 tablespoon (15ml) coconut oil
- Optional: Liquid sweetener (stevia or monk fruit) to taste
Instructions
- Line silicone molds or a mini muffin tin with parchment paper and place in the freezer for 5 minutes to chill.
- In a microwave-safe bowl, combine peanut butter, butter, vanilla extract, and salt. Microwave on high for 30 seconds, stir, and microwave for another 15 seconds if needed until smooth and warm.
- Drop about 1/2 to 1 teaspoon of the peanut butter mixture into the bottom of each chilled mold cavity. Smooth the top and return to the freezer for 10 minutes to firm up.
- In a separate microwave-safe bowl, combine chocolate chips and coconut oil. Microwave in 30-second bursts, stirring vigorously between each burst, until the mixture is completely smooth and glossy.
- Remove molds from the freezer. Pour or spoon the melted chocolate over the peanut butter centers, filling each mold to the top.
- Use a toothpick to swirl the chocolate and remove any air bubbles. Ensure the peanut butter is fully covered.
- Place molds in the freezer for at least 1 hour, or until completely solid.
- Pop the fat bombs out of the molds. If they stick, run the mold under warm water for a few seconds. Store in an airtight container in the freezer.
Notes
Use refined coconut oil for a neutral flavor, or unrefined if you prefer a coconut taste. Do not overheat the chocolate to prevent seizing. These are best eaten frozen; if left at room temperature, the coconut oil will melt. For a nut-free version, substitute sunflower seed butter for peanut butter. For a dairy-free version, use coconut oil instead of butter and dairy-free chocolate chips.
- Prep Time: 10 minutes
- Cook Time: 0 minutes
- Category: Dessert
- Cuisine: American
Nutrition
- Serving Size: 1 fat bomb
- Calories: 110
- Sodium: 15
- Fat: 9
- Saturated Fat: 4
- Carbohydrates: 3
- Fiber: 1
- Protein: 3
Keywords: keto, low carb, sugar-free, fat bombs, peanut butter, chocolate, no-bake, snack, dessert, gluten-free



