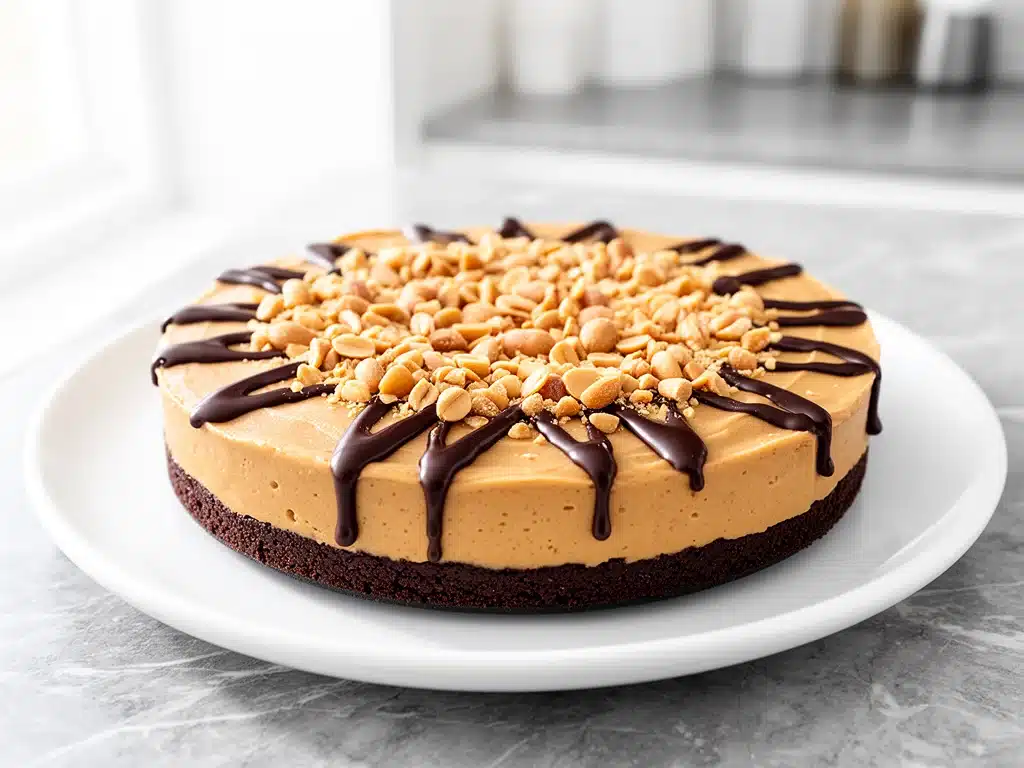
I still remember the exact moment I realized I had found the holy grail of dessert shortcuts. It was three weeks before my daughter’s birthday party, and I was spiraling. I had promised her a “fun” treat, but my schedule was a disaster zone of school plays, work deadlines, and a leaky faucet I was trying to fix myself. The idea of baking a cake? Impossible. The thought of standing over a hot oven while managing three other crises? Forget it. I needed something that looked impressive, tasted indulgent, and required zero actual baking skill.
That’s when I stumbled upon the concept of a no-bake peanut butter cup pie. I was skeptical, honestly. I’ve tried my fair share of “easy” desserts that turned out to be sweet, crunchy messes with no cohesion. But this one? This one changed everything. I made my first batch in a rush, using ingredients I already had in the pantry, and the result was nothing short of magic. It was creamy, chocolatey, and had that perfect snap of a Reese’s cup without the hassle.
Since that chaotic afternoon, this no-bake peanut butter cup pie has become my secret weapon. I’ve made it for potlucks, for last-minute guests, and just because I had a chocolate craving at 10 PM. It’s become my go-to when I need a dessert that feels fancy but takes less effort than making a sandwich. The best part? You don’t need any special equipment or hard-to-find ingredients. If you can mix things in a bowl, you can make this pie. It’s the ultimate comfort dessert for anyone who loves chocolate and peanut butter but hates the cleanup.
Why You’ll Love This Recipe
There are about ten reasons I keep making this pie, but here are the big ones that keep it in my regular rotation. This isn’t just another cookie recipe; it’s a complete dessert experience that delivers on flavor without the drama.
- Stupid Simple — Seriously, if you can mix yogurt and peanut butter, you can make this. I’ve walked my teenage son through it over FaceTime, and he didn’t burn the kitchen down. There’s no baking, no tempering chocolate, no complex techniques.
- Lightning Fast Prep — The actual hands-on time is about 15 minutes. The rest is just waiting for the fridge to do its job. I make this on weeknights when I get home at 7 PM and still want something sweet.
- Pantry-Friendly — You probably have 80% of these ingredients already. I keep peanut butter, Greek yogurt, and chocolate chips stocked just so I can throw this together on a whim.
- Crowd-Pleaser — I’ve served this to my picky eater nephew, my health-conscious sister, and my chocolate-obsessed husband. Everyone loved it. It tastes rich and decadent, even though it’s lighter than traditional cream cheese pies.
- Makes Amazing Leftovers — Actually tastes better the next day. The flavors meld together overnight. I deliberately make extra for lunch throughout the week because it’s like eating a candy bar for breakfast.
- Budget-Smart — Feeds 6-8 people for under $10. That’s less than one delivery order from a fancy dessert shop.
This is my go-to when I need dinner to just work. No complicated techniques, no weird ingredients, just reliable, delicious food that makes everyone happy. It’s the kind of dessert that makes people ask for the recipe immediately, only to realize it’s shockingly simple.
Ingredients You’ll Need
Here’s the best part: you probably have most of this already in your kitchen. I’m particular about three ingredients here, and I’ll tell you exactly why they matter for getting that perfect texture.
For the Crust
Crushed cookies (1 ½ cups / about 150g) — I use chocolate sandwich cookies (like Oreos) for that classic peanut butter cup vibe. If you want a lighter option, graham crackers work too, but the chocolate cookies give it that authentic candy bar taste. You need them finely crushed, almost like sand.
Unsalted butter (4 tablespoons / 57g) — Melted. This is the glue that holds the crust together. Don’t skip it, or you’ll have a crumbly mess. Salted butter works, but reduce any added salt elsewhere.
Granulated sugar (1 tablespoon / 12g) — Optional, depending on how sweet your cookies are. If you’re using very sweet cookies, you might not need this. I usually skip it for the crust.
For the Filling
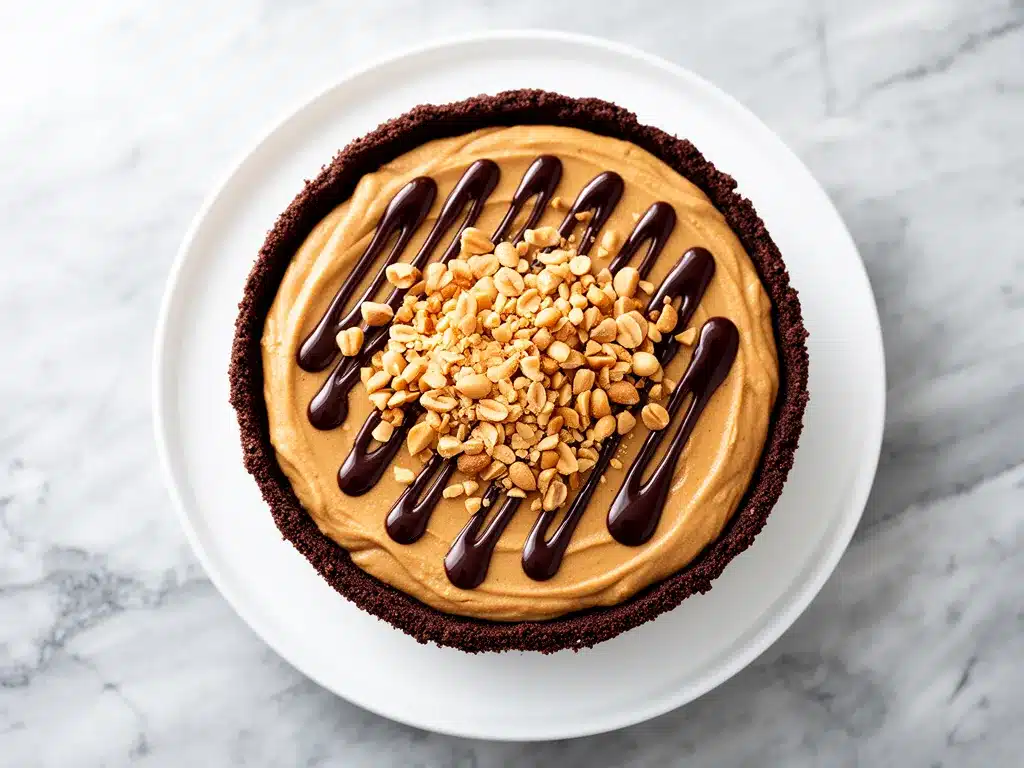
Smooth peanut butter (1 cup / 250g) — This is non-negotiable. Do not use natural peanut butter where the oil separates, unless you’re willing to stir it for five minutes. Standard brands like Jif or Skippy work best because they have that consistent, creamy texture. Chunky peanut butter will make the filling gritty.
Greek yogurt (1 cup / 240g) — Full-fat plain Greek yogurt is key here. It provides the tang and the creamy texture without the heaviness of whipped cream. Low-fat yogurt can be watery and affect the set. Plain is essential; vanilla adds too much sweetness.
Vanilla extract (1 teaspoon / 5ml) — Just a splash to round out the flavors. Pure vanilla is best.
Powdered sugar (½ cup / 60g) — This sweetens the filling and helps it thicken slightly. You can adjust this based on how sweet your peanut butter is.
For the Topping
Milk chocolate chips (1 cup / 170g) — For melting. Semi-sweet works too if you prefer less sweet, but milk chocolate mimics the classic Reese’s cup flavor better.
Coconut oil (1 tablespoon / 15ml) — This helps the chocolate snap and stay firm in the fridge. Without it, the chocolate topping might stay soft or tacky.
Equipment Needed
You don’t need fancy equipment for this. Here’s what I actually use.
8-inch pie dish — Any standard pie dish works. Glass or ceramic is fine. I use a glass one because I can see the crust forming.
Food processor or zip-top bag — For crushing the cookies. A food processor is faster, but a rolling pin and a heavy bag works just as well if you don’t want to wash another dish.
Mixing bowls — Two medium bowls. One for the crust, one for the filling.
Whisk or spatula — For mixing the filling until smooth. A silicone spatula is great for scraping the sides.
Microplane or grater — Optional, but nice for shaving chocolate on top if you want to look fancy.
Small saucepan or microwave-safe bowl — For melting the chocolate chips. I prefer the microwave in 30-second intervals.
Measuring cups and spoons — Standard stuff. Dollar store versions work fine.
How to Make It: Step-by-Step
Alright, let’s make this! I’m walking you through exactly how I do it, including the little tricks I’ve picked up over the years.
Step 1: Prep the Crust (5 minutes)
First, crush your cookies. If you’re using a food processor, pulse until you have fine crumbs. If you’re using the bag method, seal the cookies in a heavy-duty zip-top bag, press out the air, and roll a rolling pin over them until they’re sandy. Transfer the crumbs to a medium bowl.
Add the melted butter (and sugar, if using) to the crumbs. Stir until the mixture looks like wet sand. It should hold together when you pinch it. If it’s too dry, add a teaspoon more melted butter. Press this mixture firmly into the bottom and slightly up the sides of your pie dish. Use the bottom of a glass to pack it down tight. This is crucial—a loose crust leads to a messy slice. Set aside while you make the filling.
Step 2: Make the Filling (10 minutes)
In a large mixing bowl, combine the smooth peanut butter, Greek yogurt, powdered sugar, and vanilla extract. Whisk them together vigorously. At first, it might look a bit curdled or separated. Don’t panic! Keep whisking. The goal is to emulsify the fats and liquids until the mixture is completely smooth, creamy, and uniform in color. This takes about 2-3 minutes of elbow grease.
Once smooth, pour the filling over the prepared crust. Use a spatula to spread it evenly, smoothing the top. Tap the pie dish gently on the counter to release any air bubbles. Place the pie in the refrigerator for at least 30 minutes. This step is important—it firms up the filling so the chocolate topping doesn’t sink in.
Step 3: Melt the Chocolate (5 minutes)
While the filling sets, melt the chocolate chips. Place them in a microwave-safe bowl with the coconut oil. Microwave in 30-second intervals, stirring well between each interval. Stop when there are just a few small chips left and stir them out with the residual heat. Overheating chocolate makes it seize up and become grainy, so be gentle. Let it cool for a minute until it’s still liquid but not hot.
Step 4: Top and Chill (30+ minutes)
Pour the melted chocolate over the chilled pie. Use a spatula to spread it evenly to the edges. If you want a decorative touch, you can drizzle a little extra peanut butter on top and swirl it with a toothpick before the chocolate sets. Place the pie back in the refrigerator for at least 1 hour, or until the chocolate is completely firm. This usually takes about an hour, but overnight is even better.
Step 5: Serve
Slice with a sharp knife. For clean cuts, dip the knife in hot water and wipe it dry between each slice. Serve chilled. Garnish with crushed peanuts or a drizzle of peanut butter if you’re feeling extra fancy.
Total Time: About 15 minutes active, plus 1 hour chilling.
Expert Tips & Tricks
Here’s everything I’ve learned from making this dozens of times. These tips will save you from my mistakes.
Choose the Right Peanut Butter
This is the most critical ingredient. Natural peanut butter with separated oil will make your filling runny and greasy. Standard commercial peanut butter is stabilized with hydrogenated oils, which gives it the perfect structure for no-bake pies. If you must use natural, make sure it’s thoroughly mixed and very thick.
Don’t Skip the Greek Yogurt
I know some people are hesitant to put yogurt in dessert, but trust me. The tang cuts through the richness of the peanut butter and chocolate, making it taste less heavy. It also adds protein, which makes this feel like a more substantial treat. Full-fat is non-negotiable for creaminess.
Chill the Pie Dish
If you’re in a rush, put your pie dish in the freezer for 10 minutes before pressing the crust. A cold crust helps it set faster and holds its shape better when you add the filling.
Melt Chocolate Carefully
Chocolate is temperamental. If you overheat it, it becomes dull and grainy. Always use low power in the microwave and stir frequently. If the chocolate looks too thick, add a tiny bit more coconut oil. If it looks too thin, add a few more chocolate chips.
Clean Slicing Trick
Wiping your knife with a damp paper towel between cuts keeps the layers distinct. A dirty knife smears the chocolate and peanut butter layers together, making it look messy.
Variations & Substitutions
Once you’ve nailed the basic version, here’s how you can mix it up. I’ve tried all of these.
Dark Chocolate Version
Swap milk chocolate chips for dark chocolate chips (60-70% cocoa). This reduces the sweetness and adds a richer, more sophisticated flavor. Great for those who prefer less sweet desserts.
Almond Butter Swap
Replace peanut butter with almond butter. It creates a slightly different, more nutty flavor profile. Use the same measurements. This pairs beautifully with the chocolate.
Chocolate Chip Cookie Crust
Instead of Oreos, use crushed chocolate chip cookies for the crust. It adds extra chocolate chunks and a buttery texture. This is my personal favorite variation.
Gluten-Free
Use gluten-free chocolate sandwich cookies or gluten-free graham crackers. Ensure your peanut butter and chocolate chips are certified gluten-free. Everything else is naturally gluten-free.
Dairy-Free
Use dairy-free Greek yogurt (coconut or almond-based) and dairy-free chocolate chips. The texture might be slightly different, but it’s still delicious. Coconut yogurt adds a nice tropical note.
Protein-Packed
Add a scoop of vanilla protein powder to the filling. It might make the filling thicker, so add a splash of milk if needed. This turns the dessert into a post-workout treat.
Serving & Storage
How to Serve:
I usually serve this straight from the fridge. It’s best when it’s cold and firm. Pair it with a hot coffee or tea to balance the sweetness. It’s also great for picnics or potlucks because it travels well in the fridge.
Side Dishes:
This pie is rich, so it pairs well with lighter sides if you’re serving a full meal. A simple green salad or some fresh berries work well. It’s also a perfect standalone dessert.
Storage Instructions:
Refrigerator: Store in an airtight container or cover tightly with plastic wrap for up to 5 days. The flavors actually improve after day one.
Freezing: Yes, you can freeze this! Wrap the whole pie (or individual slices) in plastic wrap and then foil. It will keep for up to 2 months. Thaw in the fridge overnight before serving. The texture remains creamy.
Reheating: Do not reheat. This pie is meant to be eaten cold. Heating it will melt the chocolate and soften the filling too much.
Pro tip: If you’re bringing this to a party, transport it in the pie dish with the lid on, or wrap the whole dish in towels to prevent jostling. It’s sturdy, but a little care goes a long way.
Nutrition Information
I’m not a nutritionist, but here’s the breakdown if you’re tracking. Keep in mind that nutritional values can vary based on the specific brands of ingredients you use.
Per Serving (based on 8 slices):
- Calories: 280
- Protein: 8g
- Carbs: 28g
- Fiber: 2g
- Sugar: 22g
- Fat: 16g
- Saturated Fat: 6g
What’s Good:
- Decent protein from the Greek yogurt and peanut butter.
- Calcium from the yogurt.
- No baked goods, so no refined flour in the traditional sense (though cookies do contain flour).
What to Know:
- Higher in sugar due to the cookies and chocolate chips.
- Contains dairy and gluten.
- Calorie-dense, so portion control is key.
My Take:
Look, this is a treat. It’s not a health food. But it’s way better than a boxed mix, costs less, and I know exactly what’s in it. When I want to make it lighter, I use less chocolate topping and more fruit garnish. But usually? I just enjoy a slice and feel good about the fact that I didn’t spend hours in the kitchen.
Final Thoughts
So that’s my go-to no-bake peanut butter cup pie! I’ve probably talked your ear off at this point, but when you make a recipe this often, you have a lot to say about it. This has saved dessert nights more times than I can count. It’s my answer to “what’s for dessert” when I’m tired, don’t want takeout, and still want something that tastes really good. My kids are happy, my husband’s happy, and I’m happy because I’m not stressed about cooking.
Make it yours! Try different cookie crusts, swap the chocolate type, or add extra toppings. The best recipes are the ones you adapt to your family’s tastes. If you make this, drop a comment and let me know what you think! I love hearing how recipes turn out in your kitchen. And if something doesn’t work, tell me that too—I’m here to help troubleshoot.
Happy cooking! And I hope your kitchen smells half as good as mine does right now.
Frequently Asked Questions
Can I use chunky peanut butter?
I don’t recommend it for the filling. Chunky peanut butter will create a gritty texture that doesn’t feel smooth and creamy. It’s better to use smooth peanut butter for the filling and add crushed peanuts on top for crunch. If you really want chunky, you can fold in some chopped peanuts after mixing the filling.
Why did my chocolate topping crack?
This usually happens if the chocolate was too thick when you poured it, or if the pie was too cold. Make sure the chocolate is fluid and warm (not hot) before pouring. Also, ensure the filling is chilled but not frozen solid. A gentle pour and a quick swirl with a spatula can help it self-level.
Can I make this ahead of time?
Absolutely! This pie actually tastes better the next day. You can make it up to 3 days in advance. Just keep it covered in the fridge. If you’re making it for a party, make it the night before to save stress.
What if I don’t have Greek yogurt?
You can use sour cream, but the flavor will be tangier. You can also use whipped cream cheese, but it will be sweeter and heavier. Greek yogurt is the best balance of tang and creaminess without baking.
How do I store leftovers?
Store in an airtight container in the refrigerator for up to 5 days. You can also freeze individual slices for up to 2 months. Thaw in the fridge overnight.
Can I use a different type of cookie for the crust?
Yes! Graham crackers, vanilla wafers, or even shortbread cookies work well. Chocolate sandwich cookies give the most authentic peanut butter cup flavor, but other cookies will still taste great.
Pin This Recipe!
No-Bake Peanut Butter Cup Pie: 4-Ingredient Easy Dessert
- Total Time: 1 hour 15 minutes
- Yield: 8 servings 1x
Description
A creamy, chocolatey no-bake pie that tastes like a Reese’s cup but is lighter and easier to make. This pantry-friendly dessert requires just a few ingredients and minimal active time.
Ingredients
- 1 ½ cups crushed chocolate sandwich cookies (like Oreos)
- 4 tablespoons unsalted butter, melted
- 1 tablespoon granulated sugar (optional)
- 1 cup smooth peanut butter
- 1 cup full-fat plain Greek yogurt
- ½ cup powdered sugar
- 1 teaspoon vanilla extract
- 1 cup milk chocolate chips
- 1 tablespoon coconut oil
Instructions
- Crush the cookies into fine crumbs using a food processor or a zip-top bag with a rolling pin.
- In a medium bowl, mix the cookie crumbs with melted butter (and sugar if using) until it resembles wet sand.
- Press the crust mixture firmly into the bottom and slightly up the sides of an 8-inch pie dish. Set aside.
- In a large mixing bowl, whisk together smooth peanut butter, Greek yogurt, powdered sugar, and vanilla extract until completely smooth and emulsified.
- Pour the filling over the prepared crust and spread evenly. Tap the dish to release air bubbles.
- Refrigerate the pie for at least 30 minutes to firm up the filling.
- While the filling sets, melt chocolate chips and coconut oil in a microwave-safe bowl in 30-second intervals, stirring between each, until smooth.
- Pour the melted chocolate over the chilled pie and spread evenly to the edges.
- Refrigerate for at least 1 hour, or until the chocolate topping is completely firm.
- Slice with a sharp knife dipped in hot water for clean cuts. Serve chilled.
Notes
Use smooth commercial peanut butter, not natural peanut butter with separated oil, to ensure the filling sets properly. Full-fat Greek yogurt is essential for texture. The pie tastes better the next day as flavors meld. Do not reheat; serve cold.
- Prep Time: 15 minutes
- Cook Time: 0 minutes
- Category: Dessert
- Cuisine: American
Nutrition
- Serving Size: 1 slice
- Calories: 280
- Sugar: 22
- Fat: 16
- Saturated Fat: 6
- Carbohydrates: 28
- Fiber: 2
- Protein: 8
Keywords: no-bake, peanut butter, chocolate pie, easy dessert, 4-ingredient, gluten-free option, dairy-free option, party dessert



