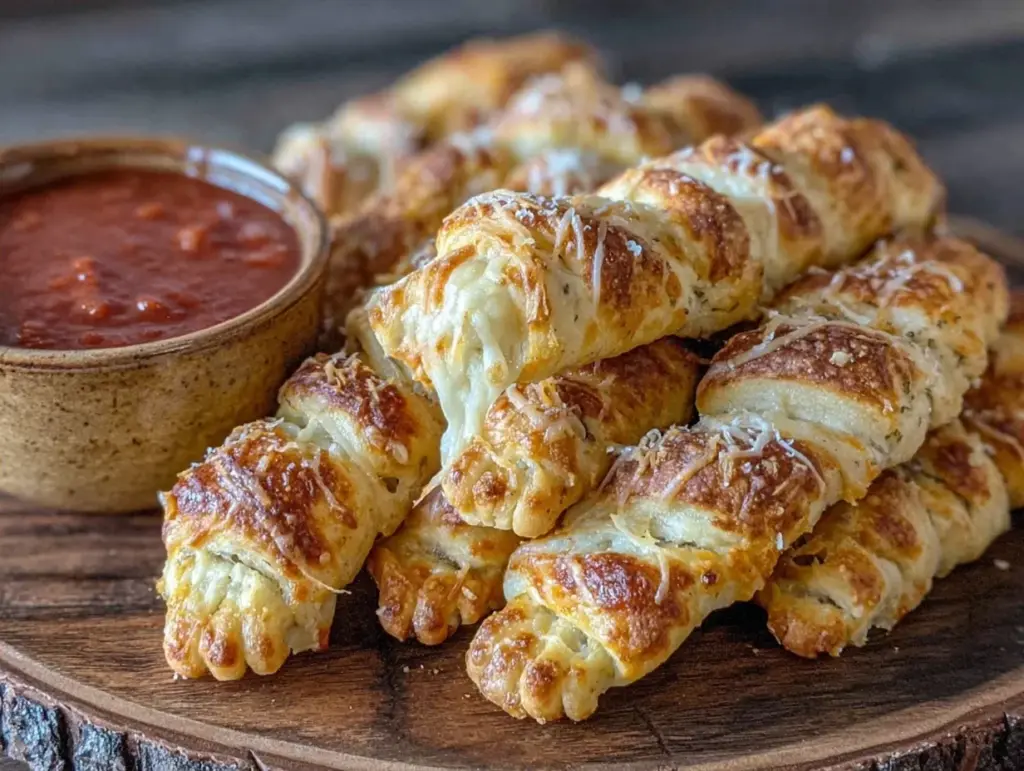
Let’s be real for a second. Halloween is the one time of year when buying pre-packaged, neon-orange candy feels like a waste of good money. I did the math last year while standing in the checkout line, staring at a $12 bag of generic gummy worms, and I nearly walked out. Twelve dollars for sugar and plastic packaging? No thanks. I needed something spooky, something that looked like it came from a coven’s kitchen, but cost less than a single movie ticket.
That’s when I decided to make witch finger breadsticks. Seriously. What started as a desperate attempt to save cash turned into the most talked-about item at my small, budget-conscious Halloween gathering. People thought I’d ordered them from some artisanal bakery. They didn’t know I made them with canned biscuit dough, a dollar bag of chocolate chips, and almonds from the bulk bin. The best part? They cost me about 15 cents per “finger.” That’s right. For the price of one candy bar, I made twenty spooky treats.
I’ve tested this witch finger breadsticks recipe three times now, tweaking the ratios until they were perfectly crispy on the outside and soft on the inside. It’s the kind of recipe that proves you don’t need fancy ingredients to create something memorable. In fact, the cheaper the base, the more you can spend on the fun details. If you’re looking for other ways to stretch your grocery budget without sacrificing taste, check out my homemade cinnamon sugar elephant ears—another dollar-friendly party treat that beats the mall food court every time.
Why You’ll Love This Budget-Friendly Spooky Snack
There are a lot of reasons to make these witch finger breadsticks, but if you’re anything like me, the main reason is that they respect your wallet. Here’s why this recipe has earned a permanent spot in my October rotation:
- Stupidly Cheap — The base ingredient is canned biscuit dough, which usually runs $1.50 to $2.00 for a can. That’s enough for the entire batch. Compare that to buying pre-made breadsticks at the store, which can easily run $5 or more for half the amount.
- Five-Minute Prep — I’m not exaggerating. You open the can, roll the dough, add the “nails,” and bake. I made these while helping my neighbor’s kid with homework. No stress, no mess, just spooky fun.
- Looks Expensive — The egg wash gives them that bakery-shine, and the almond nails look surprisingly realistic. Guests will ask where you got them, and you can just smile and say, “You won’t believe how cheap this was.”
- Perfect for One — Most Halloween recipes call for ingredients you’ll only use once (like purple food coloring or specialized molds). This recipe uses pantry staples. You’ll have leftover chocolate and almonds for later, so nothing goes to waste.
- Kid-Approved — My nephew, who usually only eats chicken nuggets, asked for three of these. If a picky eater loves it, you know it’s good. Plus, it’s a great way to get kids into the kitchen without breaking the bank on supplies.
This is my go-to when I need a festive treat that looks impressive but costs pennies. It’s practical, it’s fun, and it keeps your grocery receipt looking healthy.
Ingredients You’ll Need (And Why They’re Budget-Friendly)
Here’s the best part: you probably have most of these items already. I’m particular about quality, but for this recipe, we’re keeping it simple and cheap. This ingredient list won’t wreck your grocery budget, and that’s the whole point.
For the Breadsticks:
Canned biscuit dough (1 can, 16 oz / 450g) — This is your base. I usually grab the flaky variety, but the regular ones work too. Look for sales. I’ve seen cans go as low as $1.00 at my local discount store. Don’t buy the “premium” brand if you’re on a tight budget; the difference is negligible for this application.
Egg wash (1 large egg + 1 tablespoon water) — This gives the breadsticks that golden, shiny finish. If you’re worried about waste, use the yolk for another recipe (like my keto cinnamon roll cheesecake bars) and save the white for the wash. But honestly, one egg is so cheap it’s hardly worth the hassle.
Melted butter (2 tablespoons) — Optional, but highly recommended. Brushing them with melted butter after baking adds flavor and keeps them soft. I use whatever butter I have in the fridge, even if it’s been sitting there for a week. It’s fine.
For the “Fingers” and Nails:

Almonds (20-30 slivered or blanched almonds) — These are the fingernails. Slivered almonds are cheaper than whole ones and easier to fit. If you can’t find slivered, just chop whole almonds roughly. They don’t need to be perfect. Just make sure they’re clean!
Dark chocolate chips (1/2 cup / 85g) — For the “blood.” Dark chocolate is often cheaper than milk chocolate and looks more ominous. If you’re on a super tight budget, you can use any chocolate chips you have lying around. The color difference doesn’t matter as much as the contrast against the golden dough.
Red food coloring (1-2 drops) — Just a tiny bit. You don’t need a whole bottle. If you don’t have food coloring, you can skip it, but the “blood” won’t look as realistic. I keep a small bottle of red gel coloring in my pantry year-round. It lasts forever.
Flour (1-2 tablespoons) — Just a dusting to help the chocolate stick. You definitely have this.
Optional: Powdered sugar — For a “dusty” grave effect. Sprinkle lightly before serving. It adds a nice visual touch and costs almost nothing.
Equipment Needed
You don’t need fancy equipment for this. Here’s what I actually use:
Baking sheet — Any standard 13×18 inch sheet works. I use a dark metal pan because it helps the bottoms get crispier. If you’re using a light pan, watch them closely so they don’t burn.
Parchment paper — Liner your baking sheet. It makes cleanup instant. I hate washing baking sheets, so this is non-negotiable for me. It also costs pennies per sheet.
Small bowl — For the egg wash and the melted chocolate.
Paring knife — To trim the almond nails if they’re too big. A small, sharp knife is better for precision, but any knife works.
Silicone brush — For the egg wash and butter. If you don’t have one, a paper towel works in a pinch.
Ziplock bag — To store leftover chocolate chips. Keeps them fresh and prevents ants.
How to Make It: Step-by-Step
Alright, let’s make these witch finger breadsticks! I’m walking you through exactly how I do it, including the little tricks I’ve picked up to keep them looking creepy and tasting amazing.
Step 1: Prep Your Oven and Pan (2 minutes)
Preheat your oven to 350°F (175°C). Line your baking sheet with parchment paper. This is crucial. Without it, the butter will stick, and you’ll be scrubbing for ages. I’ve learned this the hard way. Set out your almond nails. Sort through them and pick the ones that look most like fingernails—slightly curved, not too big.
Step 2: Shape the Fingers (5 minutes)
Open the can of biscuit dough. You’ll get 8 biscuits. Separate them gently. Take each biscuit and roll it between your palms to form a long, tapered cylinder. Think of it like a snake, but fatter at one end and pointy at the other. The wide end is the knuckle, the pointy end is the tip. If the dough is sticky, dust your hands with a little flour. Don’t overwork it, or they’ll get tough. You want them soft and fluffy inside.
Step 3: Add the Nails (3 minutes)
Take your slivered almonds and press one into the side of each breadstick, about halfway down the “finger.” It should look like it’s growing out of the skin. Press it in gently but firmly so it doesn’t fall off in the oven. If an almond breaks, just use a smaller piece. Imperfection adds to the creepy vibe.
Step 4: Egg Wash and Bake (12-15 minutes)
Whisk the egg with the tablespoon of water. Brush the breadsticks lightly with the egg wash. This helps them brown evenly. Place them on the baking sheet, leaving a little space between them. Bake for 12-15 minutes, or until they are golden brown. Keep an eye on them after 10 minutes. Oven temperatures vary, and you want them golden, not burnt. The almond nails might start to brown too—don’t worry, that’s fine.
Step 5: Make the “Blood” Chocolate (2 minutes)
While the breadsticks bake, melt the chocolate chips in a microwave-safe bowl. Heat in 30-second intervals, stirring in between, until smooth. Stir in 1-2 drops of red food coloring. If the chocolate is too thick, add a tiny bit more melted butter (1/2 teaspoon) to thin it out. You want it to drizzle, not sit in globs.
Step 6: Add the Blood (5 minutes)
Once the breadsticks are out of the oven, let them cool for just 2-3 minutes. They’ll be hot! Dust them lightly with flour. This helps the chocolate stick. Now, take a spoon or a piping bag (or just snip the corner of a ziplock bag) and drizzle the red chocolate over the breadsticks. Let it drip down like blood. Don’t go overboard. Less is more. If you mess up a spot, just dab it with a paper towel.
Step 7: Serve or Store
Let them cool completely so the chocolate sets. Serve immediately for maximum spookiness, or store in an airtight container. They stay fresh for 2-3 days. If they get soft, pop them in the oven for 2 minutes to crisp them back up.
Total Time: About 25 minutes (5 minutes prep, 15 minutes bake, 5 minutes finish).
Expert Tips & Tricks
Here’s everything I’ve learned from making these dozens of times. These tips will save you from my mistakes.
Don’t Overroll the Dough
If you roll the dough too much, it becomes tough. You want those breadsticks to be fluffy. Handle them gently. If the dough tears, just pinch it back together. No one will notice.
Almond Placement Matters
Place the almond nail slightly angled, not straight out. It looks more natural. Also, make sure the almond is pointing towards the tip of the finger, not away from it. It’s a small detail, but it sells the illusion.
Chocolate Consistency is Key
If your chocolate is too thick, it won’t drip nicely. If it’s too thin, it’ll run off the breadstick and make a mess. Aim for a consistency like heavy cream. If you’re using dark chocolate, it might be thicker than milk chocolate, so add that extra bit of butter.
Flour Dusting Trick
The flour dusting before adding chocolate isn’t just for looks. It creates a rough surface for the chocolate to grip. Without it, the chocolate might slide off as it cools. It’s a small step that makes a big difference.
Batch Cooking
If you’re making these for a party, you can bake them in batches. Keep the first batch warm in a low oven (200°F) while you bake the second. Don’t stack them while warm, or they’ll steam and get soggy. Let them cool on a rack.
Variations & Substitutions
Once you’ve nailed the basic version, here’s how you can mix it up. I’ve tried all of these.
Cream Cheese Filling
Before rolling the dough, flatten it out and spread a thin layer of cream cheese mixed with a little sugar. Then roll it up. It adds a nice tangy surprise inside. Use up that cream cheese before it goes bad.
White Chocolate “Bones”
Instead of dark chocolate, use white chocolate mixed with black food coloring. It looks like actual bone marrow. It’s a bit more expensive, but if you have white chocolate on hand, it’s a cool twist.
Gluten-Free
Use gluten-free canned biscuits. They’re getting better every year. I’ve used Pillsbury’s gluten-free line, and they work surprisingly well for this recipe. Just watch the baking time, as GF dough can brown faster.
Vegan
Use vegan biscuit dough (like Adams or certain store brands) and an egg substitute (like flax egg) for the wash. Use dark chocolate chips that are vegan-certified. It’s easier than you think.
Savory Version
Skip the chocolate entirely. Sprinkle with garlic powder and parsley after baking. Add a dash of paprika for color. These make a great appetizer for non-halloween parties too.
Serving & Storage
How to Serve:
I usually serve these on a black platter with some fake cobwebs or dried leaves. It’s a cheap way to make the presentation look high-end. Pair them with a spooky drink, like my fall cranberry apple cider sangria, for a complete budget-friendly party vibe.
Storage Instructions:
Store in an airtight container at room temperature for up to 3 days. If your kitchen is humid, they might get soft. Reheat in the oven for 3-4 minutes to crisp them back up. Don’t freeze them—the texture of the biscuit dough changes when thawed.
Pro Tip:
If you’re making these ahead, bake them fully, let them cool, and store them in a container. Add the chocolate blood right before serving. This prevents the chocolate from melting or smudging during transport.
Nutrition Information
I’m not a nutritionist, but here’s the breakdown if you’re tracking. Keep in mind, these are indulgent treats, so enjoy in moderation.
Per Serving (based on 8 servings, 1 breadstick each):
– Calories: 180
– Protein: 3g
– Carbs: 22g
– Fiber: 1g
– Sugar: 8g
– Fat: 9g
– Saturated Fat: 3g
– Cholesterol: 15mg
– Sodium: 280mg
What’s Good:
– Relatively low in protein, but that’s expected for a breadstick.
– The almonds add a bit of healthy fat and crunch.
What to Know:
– Higher in sugar and carbs due to the dough and chocolate.
– Sodium content is moderate, mostly from the canned dough.
My Take:
“This is a fun, festive treat. It’s not health food, but it’s way better than store-bought Halloween candy because you control the ingredients. And at 15 cents a piece, you can afford to indulge a little more.”
Final Thoughts
So that’s my go-to witch finger breadsticks! I’ve probably talked your ear off at this point, but when you make a recipe this often, you have a lot to say about it. This has saved my Halloween budget more times than I can count. It’s my answer to “what’s a cheap, fun snack?” when I don’t want to spend a fortune on decorations or candy.
My friends are happy, my wallet is happy, and I’m happy because I’m not stressed about cooking. Make it yours! Try different fillings, swap in your favorite chocolate, or adjust the “blood” intensity. The best recipes are the ones you adapt to your budget and your tastes.
If you make this, drop a comment and let me know what you think! I love hearing how recipes turn out in your kitchen. And if something doesn’t work, tell me that too—I’m here to help troubleshoot. Happy cooking! And I hope your kitchen smells half as good as mine does right now.
Frequently Asked Questions
Can I make these ahead of time?
Yes! Bake the breadsticks up to 2 days ahead. Store them in an airtight container. Add the chocolate blood right before serving. This prevents the chocolate from melting or smudging. I do this all the time when I have guests coming over.
Why did my chocolate slide off?
This usually happens if the breadsticks weren’t dusted with flour. The flour creates a rough surface for the chocolate to grip. Also, make sure the breadsticks are slightly warm when you add the chocolate, but not hot. If they’re too cold, the chocolate might not stick well.
Can I use whole almonds instead of slivered?
You can, but you’ll need to chop them into smaller pieces. Slivered almonds are cheaper and easier to fit into the dough. If you use whole almonds, just break them in half. It doesn’t need to be perfect.
Is there a cheaper alternative to canned biscuit dough?
You could make your own dough, but that’s more work and often costs more unless you buy flour in bulk. For this recipe, canned dough is the most budget-friendly option. If you’re really on a tight budget, look for store-brand biscuits, which are often $1.00 or less.
Can I freeze these?
I wouldn’t recommend freezing them. The texture of the biscuit dough changes when thawed, and it can become soggy or tough. It’s best to make them fresh or store them at room temperature for a few days.
What if I don’t have red food coloring?
You can skip it! The chocolate will still look good, just not as “bloody.” Or, if you have strawberry jam, you can mix a tiny bit into the chocolate for a natural red tint. It won’t be as vibrant, but it works.
Pin This Recipe!
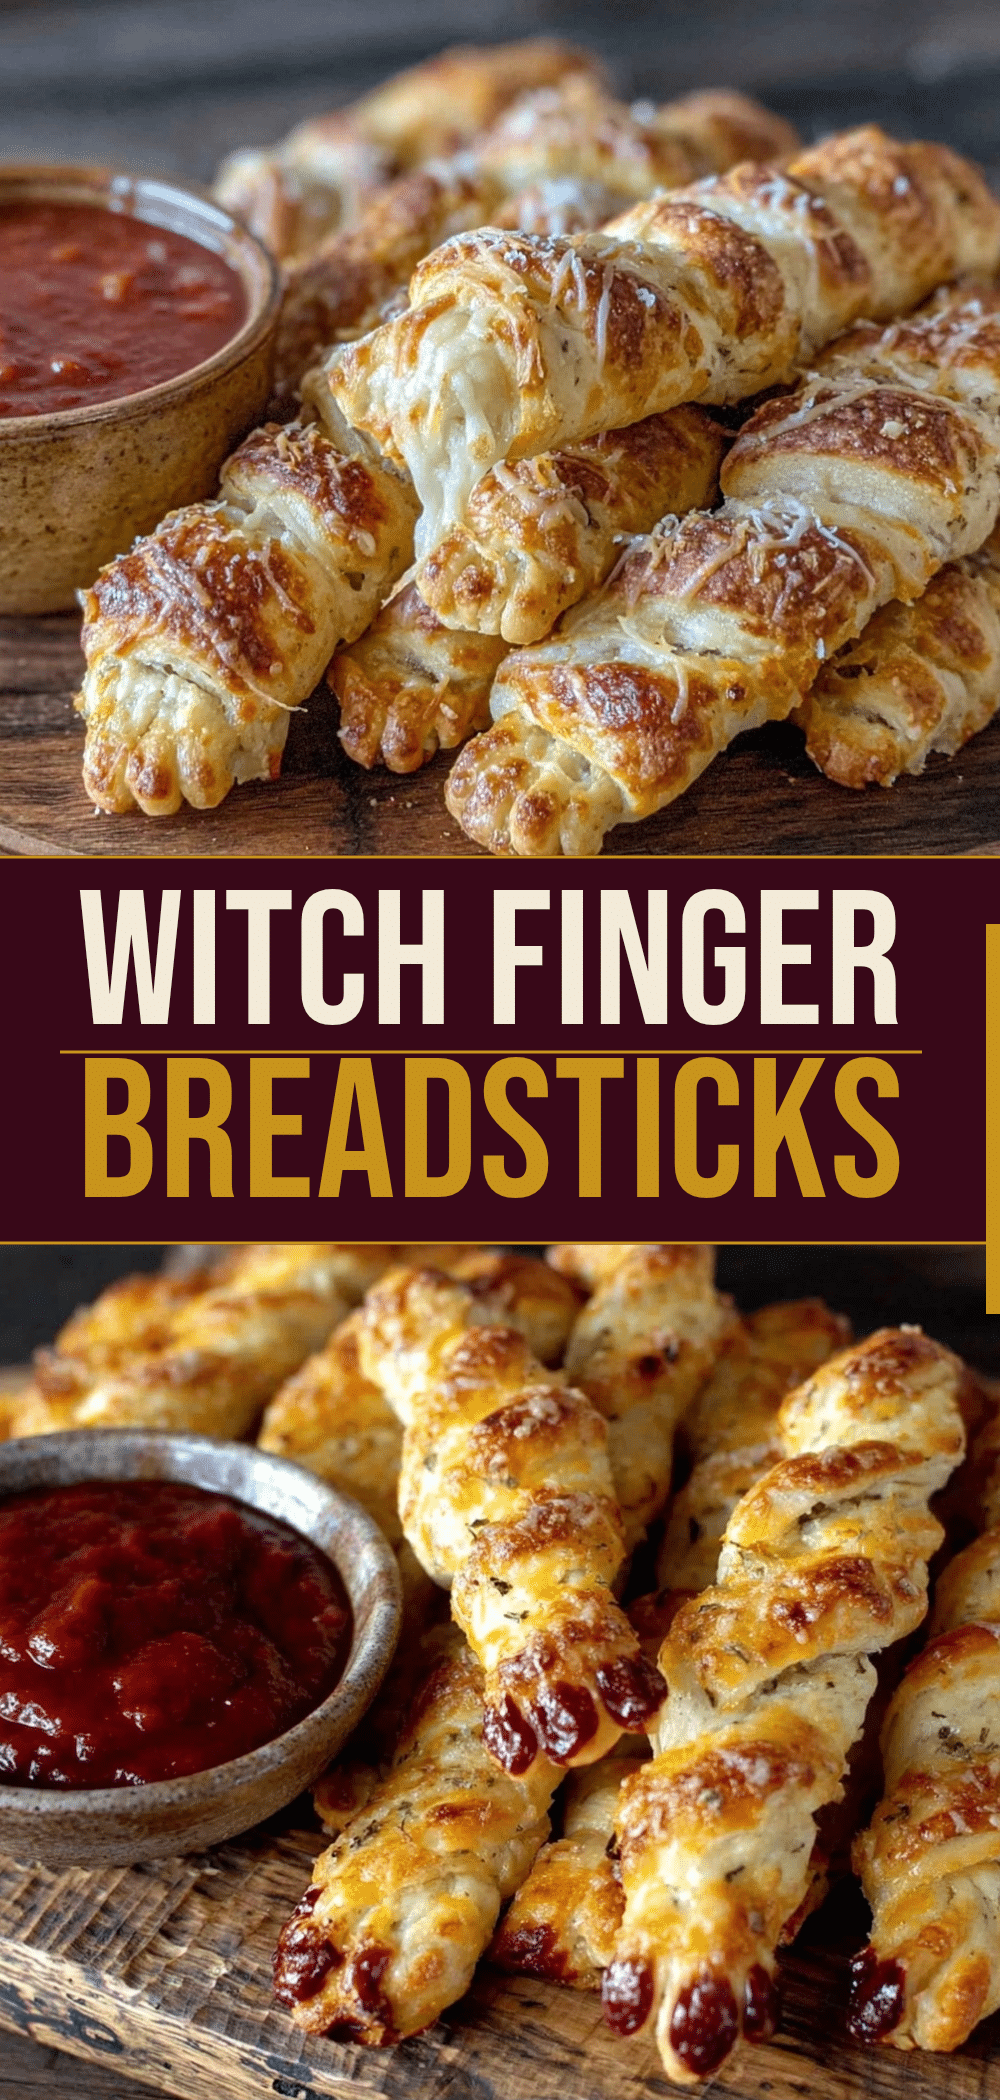

Witch Finger Breadsticks: 1-Person Halloween Budget
- Total Time: 25 minutes
- Yield: 8 servings 1x
Description
A budget-friendly, spooky Halloween snack made from canned biscuit dough, almonds, and chocolate ‘blood’. These witch finger breadsticks are cheap, easy to make, and look impressively creepy.
Ingredients
- 1 can (16 oz / 450g) canned biscuit dough
- 1 large egg
- 1 tablespoon water
- 2 tablespoons melted butter (optional, for brushing)
- 20–30 slivered or blanched almonds
- 1/2 cup (85g) dark chocolate chips
- 1–2 drops red food coloring
- 1–2 tablespoons flour (for dusting)
- Powdered sugar (optional, for serving)
Instructions
- Preheat oven to 350°F (175°C). Line a baking sheet with parchment paper.
- Open the can of biscuit dough and separate the 8 biscuits.
- Roll each biscuit between your palms to form a long, tapered cylinder (wide at one end, pointy at the other). Dust hands with flour if sticky.
- Press one slivered almond into the side of each breadstick, about halfway down, to resemble a fingernail.
- Whisk the egg with water to create an egg wash. Brush the breadsticks lightly with the wash.
- Bake for 12-15 minutes until golden brown. Keep an eye on them after 10 minutes.
- While baking, melt chocolate chips in 30-second intervals. Stir in red food coloring and a tiny bit of melted butter if needed to achieve a drizzling consistency.
- Let baked breadsticks cool for 2-3 minutes. Dust lightly with flour to help the chocolate stick.
- Drizzle the red chocolate over the breadsticks to resemble blood. Let cool completely so the chocolate sets.
- Serve immediately or store in an airtight container.
Notes
Do not overroll the dough to keep them fluffy. Place almonds slightly angled for a natural look. Dusting with flour helps the chocolate adhere. Do not freeze as the texture changes upon thawing. Can be made ahead by baking first and adding chocolate right before serving.
- Prep Time: 5 minutes
- Cook Time: 15 minutes
- Category: Snack
- Cuisine: American
Nutrition
- Serving Size: 1 breadstick
- Calories: 180
- Sugar: 8
- Sodium: 280
- Fat: 9
- Saturated Fat: 3
- Carbohydrates: 22
- Fiber: 1
- Protein: 3
Keywords: Halloween, budget recipe, witch fingers, biscuit dough, spooky snacks, easy treats, kid-friendly



